Page is loading ...

Please read this manual before installation, please keep it for reference.
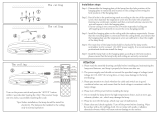
Product installation instructions
1h 2h 4h
Lighting key
Low wind key
Natural wind
Timing button
Fan switch key
Strong wind key
Stroke button
Wind wheel
Expanded rubber stopper
Hanging board
Hanging board
Hanging plate screw
Lamp body assembly
Connect AC220V power supply
Wind deflector
Self-tapping screws
Terminal block
[ ]
Figure 1
[ ]
Figure 3
[ ]
Figure 2
[ ]
Figure 4
1. When installing this product, first cut off the power supply and determine the installation
plan and the weight of the ceiling.
2. Drill the mounting holes into the ceiling according to the mounting holes of the hanging
plate, insert the expansion rubber plug, and fix the hanging plate to the wall with self-tapping
screws. Ensure that the external power cord passes through the lamp body entry hole and
that the installation is secure. (Figure 1)
3. Connect 220V mains to one end of the terminal block, connect the fire wire to L, and connect
the neutral wire to N. Pay attention to the wire contact when wiring, and the copper wire at the
end is not exposed. (Figure 2)
4. Fix the hanging plate to the ceiling, move the lamp body to the ceiling, align with the hole of the
hanging plate, and screw it into the screw. (Figure 3)
5. After confirming that the installation is correct, the power can be turned on for normal use. (Figure 4)
LED maintenance instructions: 1. When replacing the light source, please be sure to turn off the
power to avoid electric shock or impact damage to LEDs and electrical appliances.
2. Please make replacements according to the model on the LED light source board. When wiring,
distinguish the positive and negative polarity, and check if the fixing screws are missing and the
gasket is short-circuited.
3. The light source in this luminaire is replaced by the manufacturer or its service agent or a person
of similar qualification.
Remote control activation instructions: If the remote control cannot control the luminaire,
you need to activate the remote control. Activation method: Turn on the luminaire power switch and press
the fan switch key and strong wind button within 5 seconds. After you hear the drip, release it.
Note: The product graphics in this manual are for reference only, subject to the actual product.
/

