18
42936-01 10/17/2007
Hunter Fan Company
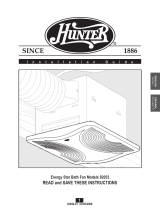
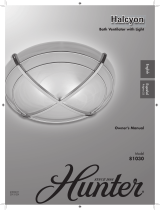
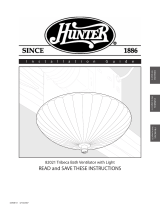
Bath Fan
LIMITED WARRANTY
Hunter Fan Company makes the following limited warranty to the original user or consumer purchaser of this Hunter Bath
Fan:
If any part of your Hunter Bath Fan fails at any time within one year after the date of sale to you due to a defect in material
or workmanship, we will repair or, at our option, replace the defective part free of charge for parts and labor performed at
our Service Department in Memphis, Tennessee. After this one-year period, you will be responsible for all parts and labor
costs for repairs on the Bath Fan except for motor repairs as provided below.
If your Hunter Bath Fan motor fails at any time within ve years after the date of sale to you due to a defect in material or
workmanship, labor and materials to repair the defect will be provided free of charge at our Service Department in Mem-
phis, Tennessee. If no replacement part can be provided, we will, at our option, either refund the actual purchase price of
your Bath Fan or provide a replacement free of charge. After this ve-year period, you will be responsible for all parts and
labor costs for repairs on all parts of the bath exhaust fan.
IF THE ORIGINAL USER OR CONSUMER PURCHASER CEASES TO OWN THE FAN, THIS WARRANTY AND ANY IMPLIED WAR-
RANTY WHICH THEN REMAINS IN EFFECT, INCLUDING BUT NOT LIMITED TO ANY IMPLIED WARRANTY OF MERCHANTABILITY
OR FITNESS FOR A PARTICULAR PURPOSE, ARE VOIDED. NO WARRANTY, EXPRESS OR IMPLIED, INCLUDING ANY WARRANTY
OF MERCHANTABILITY OR FITNESS FOR A PARTICULAR PURPOSE, IS MADE IN RESPECT OF GLASS FIXTURES OR LIGHT BULBS
OR THE FINISH ON ANY METAL PORTION OF THE BATH EXHAUST FAN.
THIS WARRANTY IS IN LIEU OF ALL OTHER EXPRESS WARRANTIES. THE DURATION OF ANY IMPLIED WARRANTY, INCLUDING,
BUT NOT LIMITED TO, ANY IMPLIED WARRANTY OF MERCHANTABILITY OR FITNESS FOR A PARTICULAR PURPOSE, IN RE-
SPECT TO ANY HUNTER FAN BATH FAN MOTOR OR OTHER FAN PART, IS EXPRESSLY LIMITED TO THE PERIOD OF THE EXPRESS
WARRANTY SET FORTH ABOVE FOR SUCH MOTORS OR OTHER PARTS.
This warranty is voided if your Hunter Bath Fan is not purchased and installed in the U.S.A. This warranty excludes and does
not cover defects, malfunctions or failures of any Hunter Bath Fan which were caused by repairs by persons not authorized
by us, use of parts or accessories not authorized by us, mishandling, improper installation, modications or damage to
the Hunter Bath Fan while in your possession, or unreasonable use, including failure to provide reasonable and necessary
maintenance.
To obtain servicing, contact Hunter Fan Company Technical Support at 1-888-830-1326. Please contact us before shipping
your Bath Fan to us. If we authorize you to ship it to us, you will be responsible for all insurance and freight or other trans-
portation charges to our factory or Service Department. We will return your Hunter Bath Fan freight prepaid. Your Hunter
Bath Fan should be properly packed to avoid damage in transit since we will not be responsible for any such damage. Proof
of purchase is required when requesting warranty service. The purchaser must present the sales receipt or other document
that establishes proof of purchase.
IN NO EVENT SHALL HUNTER FAN COMPANY BE LIABLE FOR CONSEQUENTIAL OR INCIDENTAL DAMAGES.
SOME STATES DO NOT ALLOW LIMITATIONS ON HOW LONG AN IMPLIED WARRANTY LASTS OR THE EXCLUSION OR LIMITA-
TION OF INCIDENTAL OR CONSEQUENTIAL DAMAGES SO THE ABOVE LIMITATION OR EXCLUSIONS MAY NOT APPLY TO YOU.
THE WARRANTY GIVES YOU SPECIFIC LEGAL RIGHTS AND YOU MAY ALSO HAVE OTHER RIGHTS WHICH VARY FROM STATE TO
STATE
.
Hunter Fan Company
2500 Frisco Avenue
Memphis, Tennessee 38114
Warranty
Printed in China
If you need parts or service assistance, please call 888-830-1326 or visit us at our website at http://www.
hunterfan.com.
Trouble Shooting (cont.)