Page is loading ...

The Trusted Source
®
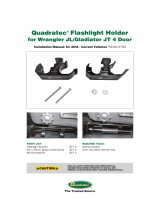
Quadratec®QR3
Tubular Rear Bumper
Installation Manual for ’55-’06 CJ-5, CJ-7 & Wrangler Vehicles
#12063.02XX
TO REDUCE RISK OF SERIOUS INJURY OR PROPERTY DAMAGE:
READ ALL SAFETY MESSAGES AND UNDERSTAND ALL INSTRUC-
TIONS AND PROCEDURE NOTICES BEFORE ATTEMPTING TO
INSTALL OR USE THIS PRODUCT. FOLLOW ALL INSTRUCTIONS
AND WARNINGS WITH PRODUCT & VEHICLE OWNERS MANUAL.
REGARDING RECEIVERS: SEE PAGE 5 FOR URGENT RECEIVER
CAPACITY WARNINGS. DO NOT ALLOW RECEIVER MOUNTED
ACCESSORIES (BIKES, ETC.) TO BLOCK VEHICLE MIRRORS OR
LIGHTS. READ AND UNDERSTAND ALL CAPACITY WARNINGS.
RISK OF EYE INJURY! SAFETY GLASSES MUST BE WORN AT ALL
TIMES WHILE INSTALLING OR MAINTAINING THIS PRODUCT.
TORQUE AND RECHECK FASTENERS AFTER 250 MILES AND
FREQUENTLY THEREAFTER. INSPECT BUMPER, WINCH AND
MOUNT BEFORE USE. DO NOT USE IF DAMAGED.
CHECK STATE AND LOCAL HIGHWAY SAFETY LAWS REGARDING
PERMITTED BUMPER TYPES AND HEIGHTS.
QR3_Tube_Rr_12063-02XX_LTR.qxp_Layout 1 5/16/16 3:32 PM Page 1
05162016153422

The Trusted Source
®
2
Before You Begin Installation:
Congratulations on your purchase of the
Quadratec QR3 Tubular Rear Bumper
for your Jeep®CJ or Wrangler.
When unpacking, check to make sure all
parts are included and not damaged due
to shipping. If any part is missing or
broken, please call Customer Service
at 800-745-6037 as soon as possible.
As bumpers tend to be heavy, we
strongly suggest you get the help of a
friend for steps that involve lifting, lo-
cating or holding the bumper during
installation.
Thank you again for your purchase
and let’s start the installation process.
As you unpack your rear bumper, be careful not to scratch the finish
with a knife or razor. We suggest placing the unpacked bumper back
into the original box so it does not get scratched before the installa-
tion begins. It is highly recommended that a second person assist with
the installation of this bumper.
a hazardous situation which, if not avoided, could result in death or
serious injury. You CAN be KILLED or SERIOUSLY HURT if you don’t
follow instructions.
a hazardous situation which, if not avoided, could result in minor or
moderate injury. You CAN be moderately HURT and also may suffer
property damage if you don’t follow instructions.
Careful attention is required to this instruction or operation but does
generally not relate to personal injury. Damage to your Quadratec®
product or other property may result if you don’t follow instructions.
This custom fit bumper has been
designed for long life and great looks.
With proper care, it is designed to
provide years of use.
Though constructed of only the finest
materials, this bumper must be main-
tained to keep its look while performing
under the toughest conditions.
Please see page 10 in this instruction
booklet for all suggested care for your
Quadratec QR3 Rear Bumper.
Bumper Care and Maintenance:
A Few Words About Product Safety:
Your Rear Bumper is intended to
enhance the utility and enjoyment of
your off road capable vehicle. Before
installation, please take a moment to
review the following safety information
and installation instructions. Important
safety information is generally preceded
by one of three signal words indicating
the relative risk of injury.
The signal words mean:
QR3_Tube_Rr_12063-02XX_LTR.qxp_Layout 1 5/16/16 3:32 PM Page 2
05162016153437

The Trusted Source
®
3
Required Tools Note: Depending on what bumper
you currently have on your Jeep®(factory or after-
market) will determine exactly what wrench or
socket you will need to remove and install your
new Quadratec bumper.
The socket heads listed above are to remove and
re-install factory bolts on a 97-06 Wrangler. Some
Aftermarket bumpers use an oversized Phillips
Head or other sized Hex head bolts.
Installation Hardware:
AB CG
F
DEH
PARTS LIST:
QR3 Rear Tube Bumper - QTY 1
REAR MOUNTING BRACKETS - QTY 2
HARDWARE
A) 10mm Lock Washers - QTY 8
B) 12mm Lock Washers - QTY 4
C) 10mm Flat Washers - QTY 16
D) 12mm Flat Washers - QTY 8
E) 10mm Nuts - QTY 8
F) 12mm Nuts - QTY 8
G) 10mm Bolts - QTY 8
H) 12mm Bolts - QTY 4
REQUIRED TOOLS:
Safety Glasses
18mm Socket and Driver
T30 Torx Bit (97-06 models only)
16mm Socket
5/8” Socket
16mm Box End Wrench
18mm Box End Wrench
Power Drill (97-06 models only)
3/16” Drill bit (97-06 models only)
1/2” Drill bit (97-06 models only)
Pencil (97-06 models only)
Torque Wrench
This instruction sheet and the parts list listed above include informa-
tion on installing your rear tube bumper (only) or a rear tube bumper
with the corresponding Quadratec frame mounted hitch. If you are
installing your tube bumper WITH a hitch, the mounting brackets
included with the tube bumper will not be used.
QR3_Tube_Rr_12063-02XX_LTR.qxp_Layout 1 5/16/16 3:32 PM Page 3
05162016153438

The Trusted Source
®
4
Next, use the 5/8” socket to remove the
rear body mount (FIG 3). Finally, use a
18mm socket to remove the nuts
holding the bumper to your Jeep’s
frame (FIG 4). Repeat these steps for
both sides of your Wrangler vehicle.
Removing Existing ’97-’06 Rear Bumper
Before you start, put on safety glasses.
Locate and remove the five T30 Torx
Bolts (2 on top, 3 on under side) holding
your plastic end caps to the existing
rear bumper (FIG 1). Locate the bolts
holding the body mount and bumper
bracket to the frame (FIG 2).
Installation Step One: Remove Stock Bumper
Figure 1 Figure 2
Figure 3
Figure 4
QR3_Tube_Rr_12063-02XX_LTR.qxp_Layout 1 5/16/16 3:32 PM Page 4
05162016153439

The Trusted Source
®
5
Once existing rear bumper is removed,
the next steps will be determined by
what model year Jeep®you own and
whether you are installing the optional
frame mounted Receiver hitch. If you are
not installing the optional receiver hitch,
you will be installing the included
bumper mounting brackets.
NOTE: If you are installing the optional
hitch, the mounting brackets for the
Rear tube Bumper are a part of the re-
ceiver hitch assembly and the mounting
brackets included with your Rear Tube
Bumper kit will not be used.
Please observe all warnings below:
Installation Step One (continued):
Remove ’87-’95 Rear Bumperettes
Put on safety glasses. Locate and re-
move the four bolts and nuts holding
the bumperettes to your Jeeps frame
(FIG 5). Our bolts were a 16mm head
and nuts were 18mm. Removal Tip,
we inserted the box end wrench into the
frame rail as shown for easy removal of
the nuts (FIG 6).
Figure 5 Figure 6
Step Two: Install QR3 Rear Bumper
THIS CLASS I RECEIVER:
MAXIMUM TOW WEIGHT 2000 LBS.
MAXIMUM TONGUE WT. 200 LBS.
TO REDUCE RISK OF SERIOUS INJURY OR PROPERTY DAMAGE:
INSTALL ACCORDING TO INSTRUCTIONS. TORQUE AND RECHECK
FASTENERS AFTER 250 MILES AND FREQUENTLY THEREAFTER.
INSPECT AND DO NOT USE RECEIVER/BUMPER IF DAMAGED.
CONSULT & NEVER EXCEED LESSER OF VEHICLE, RECEIVER
OR TRAILER MAXIMUM TOW OR WEIGHT RATINGS.
CONSULT AND FOLLOW ALL LIMITATIONS & WARNINGS IN YOUR
VEHICLE OWNERS MANUAL AND SAFE TOWING SUPPLEMENT.
CHECK STATE AND LOCAL HIGHWAY SAFETY LAWS REGARDING
PERMITTED BUMPER TYPES AND HEIGHTS.
QR3_Tube_Rr_12063-02XX_LTR.qxp_Layout 1 5/16/16 3:32 PM Page 5
05162016153440

Attach Mounting Brackets For ’55-’95
Attach each bracket to the rear frame
using (4) 10mm bolts, (8) 10mm Flat
Washers, (4) 10mm Lock Washers (Fig 7
& 8) and (4) 10mm nuts per side. Proper
bolt, washer and nut position called out
in (Fig 9). Do not tighten at this time.
With the mounting brackets loosely in-
stalled and centered on vehicle, line up
the two tabs on each side of the Tube
Bumper to the mounting holes on the
mounting brackets (Fig 10). Tighten the
bumper mounting brackets to the vehi-
cle to 45 ft/lbs using a torque wrench.
Attaching Receiver Hitch
Attach the receiver hitch to the rear
frame using (4) 10mm bolts, (8) 10mm
Flat Washers, (4) 10mm Lock Washers
and (4) 10mm nuts per side (Fig 11).
Proper bolt, washer and nut position
called out in (Fig 9). Tighten these
bolts/nuts to 45 ft/lbs using a Torque
Wrench. Proceed to Step 3. See page 9.
For ’55-’95 CJ & Wrangler
The pre-drilled holes in your bumper
will line up with mounting bracket/re-
ceiver hitch holes. The brackets and or
hitch should be centered on the holes
with the vertical mounting tab facing
outwards and the supports holding the
vertical mounting tab facing inwards
towards the center of the Jeep®(Fig 7).
The Trusted Source
®
6
Figure 7 Figure 8
Installation Step Two (continued):
Figure 9
Fig 10
Figure 11
QR3_Tube_Rr_12063-02XX_LTR.qxp_Layout 1 5/16/16 3:32 PM Page 6
05162016153440

With the outside holes of the mounting
bracket/hitch centered on the outside
holes, mark the center of the inside holes
making sure the mounting bracket/hitch
is level (Fig 13). Repeat for both sides.
Using a 3/16” drill bit, drill a pilot hole
being EXTREMELY careful not to drill
too deep as the fuel Tank is directly be-
hind bumper (Fig 14). Repeat this proce-
dure for all four marked holes. Then
replace the 3/16” drill bit with the ½”
drill bit and drill out pilot holes using
EXTREME Care not to drill too deep
(Fig 15). Consider using drill stop.
The Trusted Source
®
7
USE EXTREME CARE WHEN DRILLING INTO THE REAR FRAME OF
YOUR VEHICLE. THE GAS TANK IS DIRECTLY BEHIND THE CROSS
MEMBER AND CAN BE PUNCTURED IF DRILLING IS TOO DEEP.
THERE IS A POTENTIAL FIRE AND SAFETY HAZARD IF FUEL TANK
IS PUNCTURED.
For ’97-’06 Wrangler TJ Vehicles
The outside pre-drilled holes in your
bumper will line up with the outside
mounting bracket/receiver hitch holes
on your Wrangler. You will need to drill
two holes per side for the inside
bracket/hitch mount. With the help of
another person, the mounting brackets
and or hitch should be centered on the
outside holes with the vertical mounting
tab facing outwards and the supports
holding the vertical mounting tab facing
inwards towards the center of the
Jeep® (Fig 12 & 13).
Figure 12 Figure 13
Installation Step Two (continued):
Figure 14 Figure 15
QR3_Tube_Rr_12063-02XX_LTR.qxp_Layout 1 5/16/16 3:32 PM Page 7
05162016153441

Attaching Mounting Brackets
With the four ½’ Holes drilled, the
brackets/Hitch should be centered on
the holes with the vertical mounting tab
facing outwards and the supports hold-
ing the vertical mounting tab facing in-
wards (Fig 16).
Attaching Mounting Brackets
Attach each bracket to the rear frame
using (4) 10mm bolts, (8) 10mm Flat
Washers, (4) 10mm Lock Washers (Fig
17) and (4) 10mm nuts per side. Proper
bolt, washer and nut position called out
in (Fig 18). Do not tighten at this time.
With the mounting brackets loosely in-
stalled and centered on the vehicle, line
up the two tabs on each side of the
Tube Bumper to the mounting holes on
the mounting brackets (Fig 19). Line up
both brackets so the width of the
bumper brackets lines up with the out-
side of the mounting brackets (Fig 20).
Tighten the bumper mounting brackets
to the vehicle to 45 ft/lbs using a torque
wrench. Attach the receiver hitch to the
rear frame using (4) 10mm bolts, (8)
10mm Flat Washers, (4) 10mm Lock
Washers (Fig 21) and (4) 10mm nuts per
side. Proper bolt, washer and nut posi-
tion called out in (Fig 18). Tighten these
bolts/nuts to 45 ft/lbs using a Torque
Wrench. Proceed to Step 3.
The Trusted Source
®
8
Installation Step Two (continued):
Figure 17
Figure 16
Figure 18
Fig 19
Figure 20
QR3_Tube_Rr_12063-02XX_LTR.qxp_Layout 1 5/16/16 3:32 PM Page 8
05162016153441

The Trusted Source
®
9
Installation Step Three:
Figure 24
Mounting The Bumper
to Brackets or Receiver Hitch
Now that your Mounting Brackets/Re-
ceiver Hitch have been installed and
torqued to 45 Lbs., you now can attach
the rear tube bumper to the mounting
brackets/Hitch. Line up the rear tube
bumper mounting tabs with the top and
bottom holes in the mounting plates/Re-
ceiver Hitch and attach the bumper
using (4) 12mm bolts, (8 ) 12mm Flat
washers, (4)12mm Lock Washers and
(4) 12mm nuts (Fig 22, 23 & 24).
Tighten the bumper mounting brackets
to the Rear Tube Bumper to 45 ft/lbs
using a torque wrench.
Torque Specifications: All New Installed Bolts = 45 ft-Lbs
Figure 22 Figure 23
QR3_Tube_Rr_12063-02XX_LTR.qxp_Layout 1 5/16/16 3:32 PM Page 9
05162016153442

The Trusted Source
®
10
Your Bumper has been designed and
manufactured to provide years of use.
However, like any product, general
maintenance is required to keep it
looking new.
Because the bumper is located on the
rear of the vehicle, it is subject to poten-
tial rock chips and other debris poten-
tially causing portions of the paint to
chip off. We recommend using a tex-
tured or gloss black spray paint sprayed
on a piece of cardboard and Q-Tip to
gently fill in these chips. This will
prevent any rust from forming.
On all bumpers there is a chance of
some surface rust showing over time
due to metal particles being embedded
in the paint. This surface rust is easily
removed by a non-abrasive cleaner/pol-
ish and a soft brush (not a metal brush!)
To further protect your bumper we
recommend using a non-abrasive car
wax on the part on a regular basis.
This will protect the finish and keep
your bumper looking like new. For gloss
black and stainless finishes, micro
scratches can occur from daily use of the
bumper. To remove these scratches we
recommend a mild aluminum polish.
However, before using any polish, try a
test area on the back side of the bumper
before using it on the front, exposed
surface to test abrasive level of the
polish. If it causes more scratches,
STOP and use a milder polish.
Bumper Care and Maintenance:
QR3_Tube_Rr_12063-02XX_LTR.qxp_Layout 1 5/16/16 3:32 PM Page 10
05162016153442

The Trusted Source
®
11
Q
uadraTopTM Replacement Soft Tops
Affordable quality and durability with no compromises! Our top kits are designed to work with factory hard-
ware and feature finer quality materials and workmanship along with the latest in manufacturing technolo-
gies for unprecedented value. Our new product team with decades of soft top knowledge and experience
delivers you all the great features you want in a replacement top with unsurpassed customer service and sup-
port. Our QuadraTop is the best value in replacement soft tops compared to other tops costing hundreds more.
If for any reason, you are not completely satisfied with your soft top purchase or have an installation question,
please contact our professional customer support staff for a solution. All QuadraTops feature a limited Three
year warranty against defects. The incredible fit & detailed instructions make installation as easy as...
One, Two, Three!
Applications for YJ and TJ Wrangler Vehicles:
For ’88-’95 Wrangler w/Upper Doors & Clear Windows #11000.00XX
For ’88-’95 Wrangler w/Upper Doors & Tinted Windows #11000.01XX
AColors: 09 .15 .17
For ’97-’02 Wrangler w/Clear Windows #11000.02XX
For ’97-’02 Wrangler w/Tinted Windows #11000.03XX
For ’97-’02 Wrangler w/Upper Doors & Clear Windows #11000.04XX
For ’97-’02 Wrangler w/Upper Doors & Tinted Windows #11000.05XX
AColors: 15 .17.33
For ’03-’06 Wrangler w/Clear Windows #11000.0635
For ’03-’06 Wrangler w/Tinted Windows #11000.0735
For ’03-’06 Wrangler w/Upper Doors & Clear Windows #11000.0645
For ’03-’06 Wrangler w/Upper Doors & Tinted Windows #11000.0745
AColors: 35
QUADRATOPS
Start At
$299.99!
Go online or call for latest price...
09-Grey
Denim
Fabric
15-Black
Denim
Fabric
17-Spice
Denim
Fabric
33-Dark
Tan Denim
Fabric
35-Black
Diamond
Fabric
09-Grey
Denim
Fabric
15-Black
Denim
Fabric
17-Spice
Denim
Fabric
33-Dark
Tan Denim
Fabric
35-Black
Diamond
Fabric
*Order an In Stock New QuadraTop Soft Top for Delivery in the Lower 48 States Before 4pm Eastern Standard Time, and It’ll Ship UPS Ground the Same Day.
Ground Shipments take between 1-7 Business Days to Deliver. Need Your Top Faster? Expedited Shipping Options are Available with a UPS Air Freight Surcharge.
Due to the limitations of
printing, all color samples
shown in this catalog are
close approximations only.
31% Tint Windows
31% Tint Windows
Clear Windows
QuadraTop
SAME DAY SHIPPING!*
Factory Trained Soft Top
Advisors Always on Call!
to the RESCUE!
to the RESCUE!
QR3_Tube_Rr_12063-02XX_LTR.qxp_Layout 1 5/16/16 3:33 PM Page 11
05162016153458

The Trusted Source
®
Quadratec® Exclusive
Three Year Limited Warranty
Your Quadratec®branded accessories are
covered by the following Limited Warranty
provided exclusively by Quadratec, Inc., 1028
Saunders Lane, West Chester PA 19380.
This Limited Warranty is the only warranty
made in connection with your purchase.
Quadratec neither assumes nor authorizes any
vendor, retailer or other person or entity to as-
sume for it any other obligation or liability in
connection with this product or Limited War-
ranty. This Limited Warranty does not apply
and is not cumulative to any accessory or part
distributed by Quadratec for which the Manu-
facturer provides a separate written warranty.
What is Covered: Subject to the terms, exclu-
sions and limitations herein and with respect
only to Quadratec branded accessories first sold
in the United States, Quadratec warrants to the
initial retail purchaser only that your
Quadratec accessory shall be free of defects in
material and workmanship: for a period of
three (3) years from date of retail purchase.
This Limited Warranty is not assignable and
shall terminate upon sale of the vehicle upon
which the Quadratec accessory is installed or
other transfer third persons.
All other warranties are hereby disclaimed, ex-
cept to the extent prohibited by applicable law
in which case any implied warranty of mer-
chantability or fitness for a particular purpose
on this product is limited to 3 year from date of
initial retail sale. Quadratec reserves the rights
to: (a.) require invoice or other proof your ac-
cessory is within the terms of this Limited
Warranty as a condition of warranty service
and, (b.) make future revisions to this product
and Limited Warranty without prior notice or
obligation to upgrade your product.
What is Not Covered:
Your Quadratec Limited Warranty does not
cover products or parts Quadratec determines
to have been damaged by or subjected to:
(a.) installation damage, alteration, modifica-
tion, combination with other parts, failure to
maintain or improper repair or service, (b.) nor-
mal wear & tear, cosmetic damage or damage
from moisture or water immersion, (c.) Acts of
God, accidents, misuse, negligence, inadequate
mounting or impact with vehicle(s), obstacles
or other aspects of the environment, (d.) theft,
vandalism or other intentional damage.
Remedy Limited to Repair/Replacement:
The exclusive remedy provided hereunder shall,
upon Quadratec inspection and at Quadratec’s
option, be either repair or replacement of prod-
uct or parts (new or refurbished) covered under
this Limited Warranty. Customers requesting
warranty consideration should first contact
Quadratec to obtain a RGA number
(610-701-3336). All labor, removal, shipping
and installation costs are customer’s
responsibility.
Other Limitations - Exclusion of Damages -
Your Rights Under State Law:
In consideration of the purchase price paid, nei-
ther Quadratec nor any independent Quadratec
distributor/licensee are responsible for any time
loss, rental costs, or for any incidental, conse-
quential, punitive or other damages you may
have or incur in connection with any part or
product purchased. Your exclusive remedy
hereunder for covered parts is repair/replace-
ment as described above.
This Limited Warranty gives you specific rights.
You may also have other rights that vary from
state to state. For example, some states do not
allow limitations of how long an implied war-
ranty lasts and /or do not allow the exclusion
or limitation of incidental or consequential
damages, so the limitations and exclusions
herein may not apply to you.
©Quadratec, Inc. 2013. All Rights Reserved.
3.25.13 LTR Version
Part #12999.3004
12
QR3_Tube_Rr_12063-02XX_LTR.qxp_Layout 1 5/16/16 3:33 PM Page 12
05162016153458
/