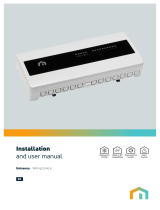
KL06

Salus KL06, KL06 Wiring Centre (6 zones) 230 V User guide

  • Hello! I've reviewed the user manual for the SALUS Controls KL06 wiring center and its PL06 and PL07 modules. This document covers installation, safety and technical details, and how to connect thermostats, actuators and control modules. I'm ready to answer any questions you have about these devices.
  • What type of actuators are compatible with the KL06 wiring center?
    What is the purpose of the NSB function?
    What is the use of the PL06 and PL07 modules?
    How many actuators can be connected to a single zone?
Wiring centre (6 zones) 230 V
Model: KL06
Manual
T: +44 (0) 1226 323961
Head Office:
SALUS Controls plc
SALUS House
Dodworth Business Park South,
Whinby Road, Dodworth,
Barnsley S75 3SP, UK.
www.salus-controls.com
SALUS Controls is a member of the Computime Group.
Maintaining a policy of continuous product development SALUS Controls plc reserve the right to
change specification, design and materials of products listed in this brochure without prior notice.
VII 2018
Introduction
Technical Information
Product Compliance
Safety information
This product complies with the essential requirements and other relevant provisions of the following
EU Directives: EMC 2014/30/EU, Low Voltage Directive LVD 2014/35/EU, RoHS directive 2011/65/EU.
The full text of the EU Declaration of Conformity is available at the following internet address:
www.saluslegal.com.
Use in accordance to national and EU regulations. Use the device as intended, keeping it in dry
condition. Product for indoor use only. Installation must be carried out by a qualied person in
accordance to national and EU regulations.
Before any of operation releated to power supply (connecting wires, installing the device, etc.),
make sure that KL06 is not connected to any power source. Installation must be carried out
by a qualied person. Incorrect connection of the wires may cause damage to the wiring centre.
The KL06 can not be used in conditions of water vapor condensation neither exposed to water.
Power Supply 230 V AC 50 Hz
Max load 2 (1) A
Outputs Terminals for actuators (230 V)
Dimmensions [mm] 300 x 86 x 63
Wired KL06 230V wiring centre allows easy and quick connection of thermostats and actuators.
It has a serial connector for additional modules (sold separately):
• PL06 Pump or boiler control module
• PL07 Pump and boiler control module
The KL06 230V wiring centre is adapted to work with NC type actuators (normally closed)
and maximum 6 thermostats.
2. Power Supply
3. LED diodes
Features:
• two-wire installation,
• made in accordance with applicable regulations.
230 V AC
- green LED diode indicates power supply connection (230 V AC)
Power supply for wiring centre is 230 V ~ 50Hz.
- orange LED diode indicates NSB function being activated
ON OFF
34
DelayOverrun
ON OFF
12
123456
fuse (T2A)
LN
LN LN LN LN LN
LN
CON1
1. Fuse
Main fuse is located under the housing cover next to power supply terminals and secures the wiring
centre and the devices connected to it. Use cartridge fuses (5x20 mm) with nominal max current 2 A.
To replace fuse remove the fuse holder with a at screwdriver and pull out the fuse.
Note: Replace the fuse only when the wiring centre is disconnected from power supply
(230 V ~).
L
N
NSB function is activated in non-programmable Salus thermostats of the Expert NSB, HTR, BTR series
via external signal. NSB 230 V signal (night-time temperature reduction) is sent via an external
timer or programmable thermostat connected to the KL06 wiring centre. Non-programmable
thermostats are receiving NSB signal and reducing setpoint temperature (by switching to eco mode).
All thermostats have to be connected using a 4-wire cable (min. 4 x 0,75 mm2, max. 4 x 1,5 mm2 ).
4. NSB (Night Set Back reduction) function
ON OFF
34
DelayOverrun
ON OFF
12
123456
fuse
(T2A)
LN LN LN LN LN LN
LN
CON1
ON OFF
34
DelayOverrun
ON OFF
12
123456
fuse
(T2A)
LN LN LN LN LN LN
LN
CON1
5
1
0
1
5
2
0
2
5
3
0
3
5
5. Thermostats connection
Connecting a 230 V thermostat to the KL08NSB wiring centre (e.g. RT200)
Connecting EXPERT NSB, HTR or BTR series thermostats with NSB function
RT200 THERMOSTAT VS30 THERMOSTAT
L N SL NSB
230 V AC
L N SL
L
N
230 V AC
L
N
ON OFF
34
DelayOverrun
ON OFF
12
123456
fuse
(T2A)
LN LN LN LN LN LN
LN
CON1
Connecting ON/OFF battery-powered thermostat with voltage-free COM / NO output contacts
(e.g. 091FL, RT310, RT510)
COM NO
ON OFF
34
DelayOverrun
ON OFF
12
123456
fuse
(T2A)
LN LN LN LN LN LN
LN
CON1
6. Actuators connection
The actuator wires should be secured with the self locking connectors in the appropriate zone. Up to
6 actuators with a load of up to 2 Watts each can be connected to a single zone. Should more than
6 actuators be required in a zone use an additional relay to relieve the output.
Note: 230 V AC voltage when actuators
are live.
Example based on T30NC 230 V actuators
Note: In NSB, HTR, ERT, BTR product series follow interchangeable signifying:
= SL
= NSB
230 V AC
L
N
RT310 THERMOSTAT
Wiring centre description
ON OFF
34
DelayOverrun
ON OFF
12
123456
fuse
(T2A)
LN LN LN LN LN LN
LN
CON1
ON OFF
34
DelayOverrun
ON OFF
12
123456
fuse
(T2A)
LN LN LN LN LN LN
LN
CON1
ON OFF
34
DelayOverrun
ON OFF
12
123456
fuse
(T2A)
LN LN LN LN LN LN
LN
CON1
12
3
4
OR
58
7 A
7 B
6
1. Cartridge fuse 5 x 20 mm 2 A
2. Power Supply
3. Diodes
4. NSB (Night Set Back reduction) function
5. Thermostats connection
6. Actuators connection
7A. PL06 - pump (or boiler) control module
7B. PL07 - pump and boiler control module
8. Serial connector for PL06 and PL07 modules
L, N 1 2 3 4 5 6
7 A. PL06 – pump (or boiler) control module
PUMP CONTROL
BOILER CONTROL
ON OFF
34
DelayOverrun
ON OFF
12
123456
fuse
(T2A)
LN LN LN LN LN LN
LN
CON1
ON OFF
34
DelayOverrun
ON OFF
12
123456
fuse
(T2A)
LN LN LN LN LN LN
LN
CON1
ON OFF
34
DelayOverrun
ON OFF
12
123456
fuse
(T2A)
LN LN LN LN LN LN
LN
CON1
PL06 module is used to control the pump (or boiler) using volt-free NC/COM/NO contacts. When any
of thermostats connected to the KL06 230 V reports heat demand, COM/NO contacts are closing.
COM/NO contacts are opening, when thermostats connected to the wiring centre will stop sending
signal for heating.
0-15 values specify the time in minutes. E.g. when jumper is set to value
0”,
COM/NO output will turn o as soon as the thermostats stop calling for heat.
If jumper will be set to the value „10”, the module will turn o 10 min after the
thermostats stop calling for heat.
P - all zones start the module
1, 2, 3, 4, 5, 6 – select the specic zone which turns on the module.
Jumpers 0-15
These are used to set in minutes the delay time (overrun time). Default setting is „0”.
Jumpers P,1,2,3,4,5,6
They are used to select the zone which turns on the module. Default setting is „P”.
ON OFF
34
DelayOverrun
ON OFF
12
123456
fuse (T2A)
LN LN LN LN LN LN
LN
CON1
ON OFF
34
DelayOverrun
ON OFF
12
123456
fuse (T2A)
LN LN LN LN LN LN
LN
CON1
ON OFF
34
DelayOverrun
ON OFF
12
123456
fuse (T2A)
LN LN LN LN LN LN
LN
CON1
ON OFF
34
DelayOverrun
ON OFF
12
123456
fuse (T2A)
LN LN LN LN LN LN
LN
CON1
ON OFF
34
DelayOverrun
ON OFF
12
123456
fuse (T2A)
LN LN LN LN LN LN
LN
CON1
Power Supply from the KL06 wiring centre
Max load 5 (2) A
Outputs NO/COM/NC relay
Dimensions [mm] 60 x 80 x 20
ON OFF
34
DelayOverrun
ON OFF
12
123456
fuse (T2A)
LN LN LN LN LN LN
LN
CON1
Boiler ON/OFF contacts
(according to the boiler’s
manual)
230 V AC
L
L
N
NPE
max 5 (2) A
7 B. PL07 – pump and boiler control module
PUMP AND BOILER CONTROL
230 V AC
ON OFF
34
DelayOverrun
ON OFF
12
123456
fuse
(T2A)
LN LN LN LN LN LN
LN
CON1
ON OFF
34
DelayOverrun
ON OFF
12
123456
fuse
(T2A)
LN LN LN LN LN LN
LN
CON1
ON OFF
34
DelayOverrun
ON OFF
12
123456
fuse
(T2A)
LN LN LN LN LN LN
LN
CON1
ON OFF
34
DelayOverrun
ON OFF
12
123456
fuse
(T2A)
LN LN LN LN LN LN
LN
CON1
ON OFF
34
DelayOverrun
ON OFF
12
123456
fuse
(T2A)
LN LN LN LN LN LN
LN
CON1
PL07 module is used to control the pump and the boiler using volt-free COM/NO contacts. When
any of thermostats connected to the KL06 230V reports heat demand, COM/NO contacts are closing.
COM/NO contacts are opening, when thermostats connected to the wiring centre will stop sending
signal for heating.
„ON” position activates the pump and boiler outputs with a delay of 3 minutes
after the heating signal is supplied from any of the thermostats connected
to the wiring centre.
„OFF” position causes immediate activation of the pump and boiler outputs.
Is used to activate the delay output for the pump and boiler. Default is „ON”.
Is used to activate the delay output for the pump when heating is satised. Default is „ON”.
„ON” position turns OFF the pump output with a delay of 3 minutes when all
thermostats stop calling for heat.
„OFF” position immediately turns OFF the pump output when all thermostats
stop calling for heat.
ON-OFF Delay jumper
ON-OFF Overrun jumper
Power Supply from the KL06 wiring centre
Max load 5 (2) A
Outputs 2 x NO/COM relay
Dimensions [mm] 70 x 80 x 20
L
L
N
N
Boiler ON/OFF contacts
(according to the boiler’s
manual)
PE
max 5 (2) A
8. Serial connector for PL06 and PL07 modules.
It provides communication between the KL06 wiring centre and the PL06/PL07 modules. KL06
wiring centre + PL06/PL07 module increases functionality and additionally makes possible
to control pump and/or boiler. PL06/PL07 module is powered from the wiring centre.
INSTALLATION
INSTALLATION OF THE ADDITIONAL MODULE PL06 OR PL07 ON THE EXAMPLE OF PL06 MODULE
Remove the top cover of the wiring centre.
Adjust the wires and screw the main housing of the wiring
centre to the rear housing.
Remove the top cover of the wiring centre.
Unscrew the main housing (see picture).
Thread the wires under the mounting belt in the back part
of the wiring centre.
Remove the appropriate pices of insulation from the wires.
Connect the thermoelectric actuators wires.
Connect the PL06 or PL07 module to the serial connector.
Mount the back side of the housing to the wall.
When mounting on a DIN rail, open the hooks
on the back of the housing.
Thread the wires through the slots in the top part of the wiring
centre and connect it to the terminals.
Make sure that all the wires are properly connected, mount top
cover and power up the wiring centre -
the green “Power” indicator LED will illuminate.
Make sure that all the wires are properly connected, mount top
cover and power up the wiring centre -
the green „Power” indicator LED will illuminate.
50 mm
110 mm
12 mm
12 mm
Set includes supplementary accessories (to support
installation proces).
Note: Before connecting PL06/PL07 module, disconnect
the main power from the KL06 wiring centre.
12
5
3
46
7
1
8
2
9
3
Wiring centre
power supply
(min. 2 x 1,0 mm
2
230 V
max. 2 x 1,5 mm
2
230 V)
Thermostats wires
(min. 4 x 0,75 mm
2
230 V
max. 4 x 1,5 mm
2
230 V)
Wires for the pump
and boiler control
(min. 2 x 0,75 mm
2
230 V
max. 2 x 1,5 mm
2
230 V)
/