Page is loading ...

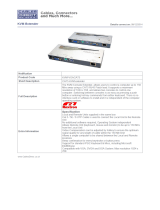
USB KVM Console Extender
User Manual (GCE700)


Thank you for purchasing the IOGEAR USB KVM Console Extender that allows you to access you com-
puter or KVM switch from up to 500 ft away, via a CAT5e cable. This unit is perfect for moving the console
away from the computer or the KVM switch. Your console can be moved across the room or hall, out of the
server room, or anywhere that is most convenient. It is also useful for security and monitoring purposes,
where you can have the system unit in a secure area at the same time that you put the console in the most
convenient location for user access and monitoring. A USB KVM Console Extender is a cost effective
solution because it uses inexpensive UTP (CAT5e) cabling to extend the distance, versus expensive and
bulky coaxial cabling. It is easy to install and operate because of the Auto Signal Compensation (ASC)
technology, which senses the distance and adjusts the signal levels accordingly so there is no need to do
any dip switch setting.
We hope that you will enjoy using your USB KVM Console Extender and find it to be a useful solution.
© 2003 IOGEAR. All Rights Reserved. PKG-M0070
IOGEAR, the IOGEAR logo, MiniView, MiniView II, MiniView SE, MasterView, and VSE are trademarks or registered trademarks of IOGEAR Inc.
Microsoft and Windows are registered trademarks of Microsoft Corporation. IBM is a registered trademark of International Business Machines, Inc.
Macintosh, G3/G4 and iMac are registered trademarks of Apple Computer, Inc. IOGEAR makes no warranty of any kind with regards to the
information presented in this document. All information furnished here is for informational purposes only and is subject to change without notice.
IOGEAR technology assumes no responsibility for any inaccuracies or errors that may appear in this document.
Welcome

Table of Contents:
Table of Contents
Package Contents
Features
System Requirements
Introduction
Installation
Operation
Troubleshooting
Twisted Pair Wiring Diagram
Twisted Pair Pin Assignment
Specification
Technical Support
Radio & TV Interference Statement
Limited Warranty
02
03
04
05
08
11
13
14
15
16
17
18
19

2
Package Contents
This package contains:
1 USB KVM Console Extender Local Unit
1 USB KVM Console Extender Remote Unit
1 Custom KVM Cable
2 Power Adapters
1 User Manual
1 Warranty Registration Card
If any items are missing or damaged please contact your dealer.

3
Features
Features
- Allows remote access up to 500 away via CAT5e cables
- Auto Signal Compensation (ASC) helps make installation easy, with no need to configure DIP switches
- Dual console operation - control your system from both local and remote USB keyboards, USB mice, and
monitors
- USB over-current detection and prevention
- Easy to operate - push button selection between local and remote console
- High video resolution - up to 1280 x 1024
- Supports VGA, SVGA, and Multisync monitors
- Local monitor supports DDC; DDC2; DDC2B
- Hot pluggable
- Plug-n-Play – no need for any software driver installation

4
Requirements
Requirements
Consoles:
- VGA, SVGA, or Multisync monitor capable of the highest resolution that you will be using on any computer
in the installation
- USB keyboard
- USB mouse
Computers:
- VGA, SVGA or Multisync card
- Available USB port
Cables:
- Category 5e rated UTP (Unshielded Twisted Pairs) cable with solid conductors is the minimum requirement
to connect the GCE700 local unit to the GCE700 remote unit. Cable of a lesser standard will result in
degrading of the video signal. For best performance, we strongly recommend Category 5e or Category 6
cables

1
5
5
2
4
3
6
GCE700 Local Unite Front View
1. Operating Mode Selection Switch
Pressing this button toggles between the choices of operating modes:
• Local - only the local console can control the system(s);
• Auto - both consoles can control the system(s).
2. LEDs
The Local Unit has two LEDs to indicate the operating status of the
Local and Remote units.
3. USB Keyboard and Mouse Ports
The local USB Keyboard and local USB mouse plug into these ports.
4. Monitor Port
The local monitor plugs into this port.
5. Remote I/O
The Category 5e cable that connects to the Remote Unit plugs into this port.
6. Power Jack
The cable from the AC Power Adapter plugs into this jack.
Introduction

6
1
2
GCE700 Local Unit Rear View
1. USB Port
Plug the USB Type B connector of the USB KVM Cable supplied
with this package in here.
2. Monitor Port
The HDB-15 VGA Connector of the USB KVM Custom Cable
supplied with this package plugs in here.
Introduction

7
1
2
3
4
5
GCE700 Remote Unit Front View
1. LEDs
The Remote Unit has two LEDs (Status and On Line) to
indicate the operating status of the Local and Remote units.
2. USB Keyboard and Mouse Port
The remote USB keyboard and USB mouse plug into these
ports.
3. Monitor Port
The remote monitor plugs into this port.
4. Remote I/O
The Category 5e cable that connects back to the Local Unit
plugs into this port.
5. Power Jack
The cable from the AC Power Adapter plugs into this jack.
Introduction

8
Installation
Setting up the USB KVM Console Extender System is simply a matter of plugging
in the cables:
GCE700 Local Unit Front View
GCE700 Local Unit Rear View
GCE700 Remote Unit

9
Installation
Installation
1. Make sure that all the equipment to be connected up is powered off.
2. Plug the cables from the local console devices (mouse, keyboard, monitor), into their ports on the Console
side of the Local Unit
3. Plug the appropriate connectors on the USB KVM extension cable supplied with this unit into the CPU side
of the Local Unit. Each connector is marked with an appropriate icon to indicate what it is.
4. Plug the connectors on the other end of the cable into the appropriate ports on the computer system (or
Console section of the USB KVM switch). Each connector is marked with an appropriate icon to indicate
what it is.
5. Plug either end of the Category 5e cable into the Remote I/O port of the Local Unit.
6. Plug one of the power adapters (supplied with this package) into an AC source; plug the adapter’s power
cable into the Power Jack of the Local Unit.
7. Plug the other end of the Category 5e cable into the I/O port of the Remote Unit.

10
Installation
8. Plug the cables from the remote console devices (USB mouse, USB keyboard, monitor), into their ports on
the Console side of the Remote Unit.
9. Plug the second power adapter (supplied with this package) into an AC source; plug the adapter’s power
cable into the Power Jack of the Remote Unit.

11
Operation
Operation:
Once the installation is completed, you can access your computer and KVM switch from either local or
remote console.
You can select either local or auto by pushing the SELECT button. The auto mode allows either console to
take over, and allow the other console to view.
The Local and Remote Units each have two LEDs to indicate their operating status, as shown in the tables
below:

12
edoMgnitarepO
sDEL
lacoL etomeR
evitcAelosnoClacoLHSALFFFO
evitcAelosnoCetomeR FFO HSALF
tcennocsiD/rorrENOFFO
ydaeRtoN
FFO FFO
evitcAelosnoCrehtieNNONO
edoMgnitarepO
sDEL
sutatS enilnO
evitcAelosnoClacoLFFONO
evitcAelosnoCetomeR HSALF NO
tcennocsiD/rorrEFFOHSALF
ydaeRtoN
FFO FFO
evitcAelosnoCrehtieNNONO
Operation
Local Unit:
Remote Unit:

13
smotpmyS noitcA
oediVoN
stekcosriehtotnideggulpyleruceseraselbacllatahterusekaM
ehtgnihcaertoN
deificepsecnatsid
diloshtiwelbac6yrogetaCroe5yrogetaCesuuoytahterusekaM
.ecnatsidehttceffalliwselbachctapdednartsgnisU.srotcudnoc
Troubleshooting
Troubleshooting

T568B
AT&T 568A
14
Twisted Pair Wiring Diagram
Twisted Pair Wiring Diagram

15
Twisted Pair Pin Assignments
Twisted Pair Pin Assignments
niP tnemngissA
1 BTUOV/
2
BTUOV
3
GTUOV/
4
RTUOV/
5
RTUOV
6
GTUOV
7
OD/
8
OD

noitcnuF tinUlacoL007ECG tinUetomeR007ECG
srotcennoCelosnoC
draobyeK
AepyTBSU
esuoM
AepyTBSU
rotinoM
elameFBDHnip51x1elameFBDHnip51x1
tinUoTtinU
kcaJC8P8
srotcennoCUPC
esuoM/draobyeK
BepyTBSUA/N
oediV
elaMBDHnip51x1 A/N
sDEL
lacoL1
etomeR1
sutatS1
eniLnO1
syeKnoitcnuF
nottuBtceleSotuA/lacoL A/N
htgneLelbaC
mumixam).tf005(.m051
noituloseRoediV
*B2CDD;2CDD;CDD;4201x0821
noitpmusnoCrewoP
W8.6,V9CAW4.7,V9CA
gnisuoH
citsalP
thgieW
sbl54.sbl54.
)HxWxL(snoisnemiD
"52.4x"5x"572.1
16
Specifications
Specifications

17
Technical Support
Please check out our IOGEAR Tech Info Library (T.I.L.) at www.iogear.com/support for the latest tips, tricks,
and troubleshooting. The IOGEAR T.I.L. was designed to provide you with the latest technical information
about our products. Most of the answers to your questions can be found here, so please try it out before
contacting technical support. Service Support can be reached at IOGEAR® from 8am to 5pm Pacific
Standard Time, Monday through Friday or at the following address:
23 Hubble Drive
Irvine, CA 92618
You may also reach us online at www.iogear.com/support 24 hours a day. Please be ready to give a brief
description of the problem, and what you were doing when the problem occurred, before calling Service
Support. The Service Support representative will be able to serve you much quicker if you are prepared to
answer the following questions listed below.
1) What version of OS are you using?
2) What type of computer are you using?
3) Can the problem be reproduced? If so, what are the steps necessary to reproduce the problem
4) When does the problem occur?
5) What have you already tried to get the problem resolved?
6) What is the purchase date and serial number of the product?
7) Are you on a network? If so, what type of network is it?
8) Where any messages displayed on the screen when the error occurred? If so, what was the exact
wording of the message?
/