2
En
English
CAUTION
TO PREVENT THE RISK OF ELECTRIC SHOCK, DO NOT
REMOVE COVER (OR BACK). NO USER-SERVICEABLE
PARTS INSIDE. REFER SERVICING TO QUALIFIED
SERVICE PERSONNEL.
D3-4-2-1-1_B1_En
WARNING
This equipment is not waterproof. To prevent a fire or
shock hazard, do not place any container filled with
liquid near this equipment (such as a vase or flower
pot) or expose it to dripping, splashing, rain or
moisture.
D3-4-2-1-3_A1_En
WARNING
To prevent a fire hazard, do not place any naked flame
sources (such as a lighted candle) on the equipment.
D3-4-2-1-7a_A1_En
VENTILATION CAUTION
When installing this unit, make sure to leave space
around the unit for ventilation to improve heat radiation
(at least 10 cm at top, 10 cm at rear, and 10 cm at each
side).
WARNING
Slots and openings in the cabinet are provided for
ventilation to ensure reliable operation of the product,
and to protect it from overheating. To prevent fire
hazard, the openings should never be blocked or
covered with items (such as newspapers, table-cloths,
curtains) or by operating the equipment on thick carpet
or a bed.
D3-4-2-1-7b*_A1_En
Operating Environment
Operating environment temperature and humidity:
+5 °C to +35 °C (+41 °F to +95 °F); less than 85 %RH
(cooling vents not blocked)
Do not install this unit in a poorly ventilated area, or in
locations exposed to high humidity or direct sunlight (or
strong artificial light).
D3-4-2-1-7c*_A2_En
CAUTION
The
STANDBY/ON switch on this unit will not
completely shut off all power from the AC outlet.
Since the power cord serves as the main disconnect
device for the unit, you will need to unplug it from the
AC outlet to shut down all power. Therefore, make
sure the unit has been installed so that the power
cord can be easily unplugged from the AC outlet in
case of an accident. To avoid fire hazard, the power
cord should also be unplugged from the AC outlet
when left unused for a long period of time (for
example, when on vacation).
D3-4-2-2-2a*_A1_En
D3-11-15-5-2_A1_En
For Norway customers
Utstyr som er koplet til beskyttelsesjord via nettplugg
og/eller via annet jordtilkoplet utstyr – og er tilkoplet
et kabel-TV nett, kan forårsake brannfare. For å unngå
dette skal det ved tilkopling av utstyret til kabel-TV
nettet installeres en galvanisk isolator mellom
utstyret og kabel-TV nettet.
For Sweden customers
Utrustning som är kopplad till skyddsjord via jordat
vägguttag och/eller via annan utrustning och
samtidigt är kopplad till kabel-TV nät kan i vissa fall
medföra risk för brand.
För att undvika detta skall vid anslutning av utrustnin-
gen till kabel-TV nät galvanisk isolator finnas mellan
utrustningen och kabel-TV nätet.
Information for users on collection and disposal of old equipment and used batteries
These symbols on the products, packaging, and/or accompanying documents mean
that used electrical and electronic products and batteries should not be mixed with
general household waste.
For proper treatment, recovery and recycling of old products and used batteries,
please take them to applicable collection points in accordance with your national
legislation.
By disposing of these products and batteries correctly, you will help to save valuable
resources and prevent any potential negative effects on human health and the
environment which could otherwise arise from inappropriate waste handling.
For more information about collection and recycling of old products and batteries,
please contact your local municipality, your waste disposal service or the point of sale
where you purchased the items.
These symbols are only valid in the European Union.
For countries outside the European Union:
If you wish to discard these items, please contact your local authorities or dealer and
ask for the correct method of disposal.
K058a_A1_En
Symbol examples
for batteries
Symbol for
equipment
Pb
WARNING
Store small parts out of the reach of children and
infants. If accidentally swallowed, contact a doctor
immediately.
D41-6-4_A1_En
This product is for general household purposes. Any
failure due to use for other than household purposes
(such as long-term use for business purposes in a
restaurant or use in a car or ship) and which requires
repair will be charged for even during the warranty
period.
K041_A1_En
POWER-CORD CAUTION
Handle the power cord by the plug. Do not pull out the
plug by tugging the cord and never touch the power
cord when your hands are wet as this could cause a
short circuit or electric shock. Do not place the unit, a
piece of furniture, etc., on the power cord, or pinch the
cord. Never make a knot in the cord or tie it with other
cords. The power cords should be routed such that they
are not likely to be stepped on. A damaged power cord
can cause a fire or give you an electrical shock. Check
he power cord once in a while. When you find it
damaged, ask your nearest PIONEER authorized
service center or your dealer for a replacement.
S002*_A1_En
CAUTION
This product is a class 1 laser product classified
under the Safety of laser products, IEC 60825-1:2007.
CLASS 1 LASER PRODUCT
D58-5-2-2a_A1_En
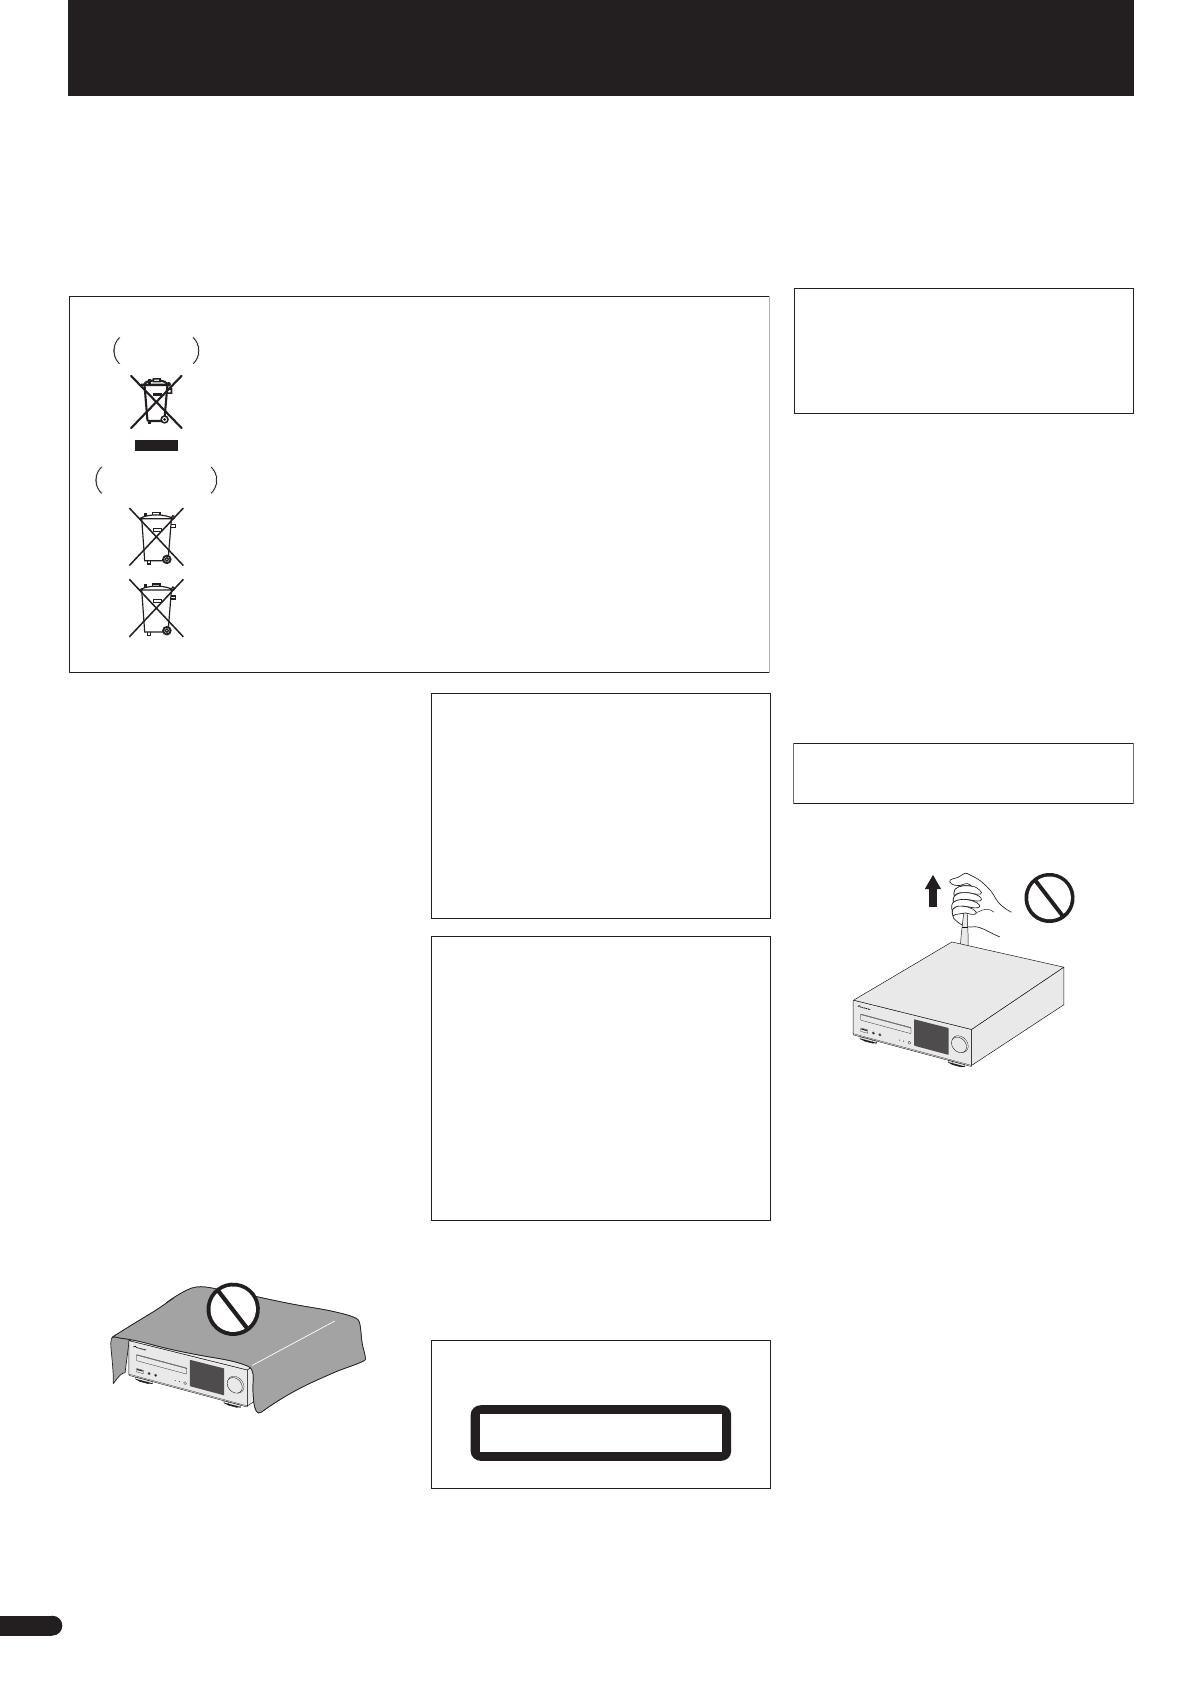
Radio wave caution
This unit uses a 2.4 GHz radio wave frequency, which is
a band used by other wireless systems (Microwave
ovens and Cordless phones, etc.). In this event noise
appears in your television image, there is the possibility
this unit (including products supported by this unit) is
causing signal interference with the antenna input
connector of your television, video, satellite tuner, etc. In
this event, increase the distance between the antenna
input connector and this unit (including products
supported by this unit).
• Pioneer is not responsible for any malfunction of the
compatible Pioneer product due to communication
error/malfunctions associated with your network
connection and/or your connected equipment. Please
contact your Internet service provider or network
device manufacturer.
• A separate contract with/payment to an Internet
service provider is required to use the Internet.
Do not lift this device by holding the wireless LAN
antenna, since damage or personal injury may result.
For detailed descriptions of the receiver, see the “Operating Instructions” provided on the included CD-ROM. The operating instructions can also be downloaded from the Pioneer website (http:// www.
pioneer.eu). See below for instructions on handling the CD-ROM.
Operating Environment — In regard to viewing the user’s manual PDF included on the CD-ROM, operation has been confi rmed on the following operating environments. Microsoft® Windows® XP /Win-
dows Vista® / Windows® 7 / Windows® 8 and Apple Mac OS X 10.7 or later, Adobe Reader (Version 10, 11).
Precautions For Use — This CD-ROM is for use with a computer. It cannot be used with a
DVD player or music CD player. Attempting to play this CD-ROM with a DVD player or music CD player can damage speakers or cause impaired hearing due to the large volume.
License — Please agree
to the “Terms of Use” indicated below before using this CD-ROM. Do not use if you are unwilling to consent to the terms of its use.
Terms of Use — Copyright to data provided on this CD-ROM belongs to
PIONEER HOME ELECTRONICS CORPORATION. Unauthorized transfer, duplication, broadcast, public transmission, translation, sales, lending or other such matters that go beyond the scope of “personal
use” or “citation” as defi ned by Copyright Law may be subject to punitive actions. Permission to use this CD-ROM is granted under license by PIONEER HOME ELECTRONICS CORPORATION.
Gen-
eral Disclaimer — PIONEER HOME ELECTRONICS CORPORATION does not guarantee the operation of this CD-ROM with respect to computers using any of the applicable OS. In addition, PIONEER
HOME ELECTRONICS CORPORATION is not liable for any damages incurred as a result of use of this CD-ROM and is not responsible for any compensation. The names of private corporations, products
and other entities described herein are the registered trademarks or trademarks of their respective fi rms.
* When Using a Mac OS: Place the CD-ROM in the CD drive, click the CD drive from Finder, and double click the Index.html (table of contents) for operation instructions.
Do not attach these speakers to the wall or ceiling, as
they may cause injury in the event of a fall.
SGK007_A1_En
X-HM82, X-HM82D, X-HM72 and
X-HM72D only


