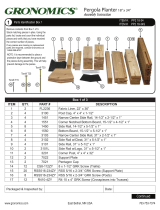
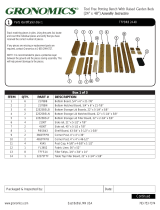
Page is loading ...

WWW.gronomics.com East Bethel, MN USA
763-753-7374
Gronomics Signature Bench 6 FT.
Assembly Instruction
Continued
Parts List
ITEM QTY. PART # DESCRIPTION
1 6 GSB7200 Surface Panel Boards - Prefinished 72”
2 1 GSBLHL LH Leg Assembly
3 1 GSBRHL RH Leg Assembly
4 2 GSBF-Spacer Spacer (Seat)
5 2 GSBB-Spacer Spacer (Backrest)
6 28 RSS14-212ZY Screw 1/4” x 2-1/2”
7 8 RSS516-312ZY Screw 5/16” x 3-1/2”
Stack matching pieces in piles. Using the parts list,
locate and count the individual pieces and verify that
you have received the correct number of pieces.
If any pieces are missing or replacement parts are
required, contact Gronomics at 1-855-299-6727.
NOTE: It is recommended to place a protective layer
between the ground and the pieces during assembly.
This will help prevent damage to the pieces.
Parts Identification
Item #: GSB-6FT
1
1
2
3
4
5
Torx® T30
Torx® T25
6
7
Packaged & Inspected by: Date:

WWW.gronomics.com East Bethel, MN USA 763-753-7374
Continued
Place three surface panel boards (Item 1) onto
a table or work bench.
Place the RH leg assembly (Item 3) as shown.
Repeat procedure at opposite end for the LH
leg assembly.
Seat / Leg Assembly
2
9”
9”
3
1
3
NOTE: Make sure the inner surface panel
board (Item 1) is tight against the leg
assemblies (Items 2 & 3) back rest supports.
NOTE: Screws will only be installed to the
inner surface panel board in this step.
Install two 1/4” x 2-1/2” screws (Item 6) into the
pre-drilled holes of the leg assemblies at each
end and tighten.
Seat / Leg Assembly Continued
3
Inner surface panel
board tight against
backrest supports.
6
1
3 2

WWW.gronomics.com East Bethel, MN USA 763-753-7374
Continued
Place the seat spacers (Item 4) between the
inner surface panel board and center surface
panel board as shown. This will allow a 1/2” gap
between the boards.
NOTE: Make sure the center surface panel
board is snug to the seat spacers and that the
boards are flush at each end.
Install two 1/4” x 2-1/2” screws (Item 6) into the
pre-drilled holes of the leg assemblies at each
end and tighten.
Remove the seat spacers.
Seat / Leg Assembly Continued
4
4
4
6
Inner Board
Center Board
Place the seat spacers (Item 4) between the outer
surface panel board and center surface panel board.
NOTE: Make sure the outer surface panel board is
snug to the seat spacers and that the boards are
flush at each end.
Install two 1/4” x 2-1/2” screws (Item 6) into the pre-
drilled holes of the leg assemblies at each end and
tighten.
Remove the seat spacers.
Seat / Leg Assembly Continued
5
4
4
6
Outer Board

WWW.gronomics.com East Bethel, MN USA
763-753-7374
Continued
Install six 1/4” x 2-1/2” screws (Item 6) into the pre-
drilled holes of the leg assembly.
Repeat procedure for the leg assembly at opposite
end.
Seat / Leg Assembly Continued
6
6
6
Remove the bench from the work table and place
the bench on the ground as shown.
Place the backrest spacers (Item 5) and backrest
surface panel board (Item 1) as shown. This will
allow a 1-3/8” gap between the backrest surface
panel boards.
NOTE: Make sure the backrest surface panel board
ends are flush with the ends of the seat surface
panel boards.
Install four 5/16” x 3-1/2” screws (Item 7) into the
pre-drilled holes and tighten.
Remove the backrest spacers.
Backrest Assembly
7
1
7
5
5

WWW.gronomics.com East Bethel, MN USA 763-753-7374
Continued
Place the backrest spacers (Item 5) at the top of
the lower backrest board. Place the upper
backrest board (Item 1) onto the spacers.
NOTE: Make sure the top backrest surface panel
board ends are flush with the bottom backrest
surface panel board ends.
Install four 5/16” x 3-1/2” screws (Item 7) into the
pre-drilled holes and tighten.
Remove the backrest spacers.
Backrest Assembly Continued
8
1
7
5
5
Place the backrest top rail surface panel board (Item
1) as shown.
NOTE: Make sure the backrest top rail surface panel
board ends are flush with the backrest surface panel
board ends.
Install two 1/4” x 2-1/2” screws (Item 6) into the pre-
drilled holes and tighten.
Repeat procedure at the opposite end.
Backrest Top Rail Assembly
9
1
6

WWW.gronomics.com East Bethel, MN USA 763-753-7374
Gronomics Signature Bench completed assembly.
Completed Assembly
10
/


