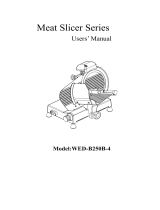
Catler FS 9010 User manual

Category
Small kitchen appliances
Type
User manual

This manual is also suitable for

FOOD SLICER
FS 9010
FS 9020
Instruction Manual
FOOD SLICER
FOOD SLICER
1
CONTENTS
CONTENTS
3 CATLER RECOMMENDS SAFETY FIRST
9 KNOW YOUR FOOD SLICER FS 9010 / FS 9020
11 OPERATING YOUR FOOD SLICER FS 9010 / FS 9020
11 Before rst use
11 Assembling your appliance
11 Levelling your appliance
11 Checking before use
12 Operating the appliance
13 CARE AND CLEANING
13 Cleaning the removable hub
13 Greasing the pressure plate
13 Grinding the slicing disc
14 Replacing the slicing disc
14 Storage
Congratulations
for purchasing your new FS 9010 / FS 9020 food slicer.
2
CONGRATULATIONS
3
CATLER RECOMMENDS SAFETY FIRST
We understand the importance of safety and thatswhy we put your safety  rst from the
initial design concept to the production itself. Nevertheless, please be careful and follow the
instructions below when using this appliance.
This appliance is not to be used by children.
Keep this appliance and its power cord out of
children.
The appliances may be used by persons
with physical or mental impairments or by
inexperienced persons only if they are properly
supervised or have been informed about how
to use of the product in asafe manner and
understand possible.
Children must not play with the appliance.
Cleaning and maintenance must not be
performed by children.
If the power cord is damaged, ask the
authorised service for areplacement in order
to prevent hazards. It is forbidden to use the
appliance with the power cord damaged.
WARNING!
Incorrect use may lead to serious injuries.
When handling and/or cleaning the slicing
disc manually, take extreme care to avoid
being injured by the edge.
4
CATLER RECOMMENDS SAFETY FIRST
Do not expose the appliance to dripping or
splashing water or other  uid. During cleaning,
do not expose the appliance to splashing water.
Keep the appliance in aclean condition. When
cleaning, please follow the instructions in the
Care and Cleaning chapter. For cleaning,
please use only soft sponge slightly moistened
in warm water and dry cloth.
Always disconnect the appliance from the power
socket if you are leaving it unattended as well as
before assembly, disassembly or cleaning.
Before assembling, disassembling, cleaning
and moving the appliance or if it’sto be left
unattended, always turn the cut thickness
control to 0.
Grinding the slicing disc may only be
performed by aprofessionally trained sta
member of an authorized service centre. Under
no circumstances should the slicing disc be
ground by auser.
Use only accessories supplied with the
appliance. Itsforbidden to use other than
supplied or recommended accessories.
Otherwise, risk of  re, electric shock or serious
injury could occur.
5
CATLER RECOMMENDS SAFETY FIRST
This appliance must be used with the sliding
pressure plate and the food holder in place
unless unfeasible due to size or shape of the
food.
Before replacing the accessories or accessible
movable parts, please turn the appliance o
and disconnect it from the power supply.
Before connecting this appliance to apower
socket, make sure the voltage stated on the
product'srating label matches the voltage in
your power socket.
Do not disconnect the appliance from the
power socket by pulling the power cord. This
could damage the power cord or the power
socket. Disconnect the cord from the power
socket by gently pulling the plug of the power
cord.
Before plugging the power cord in the mains
socket and turning the appliance on, make sure
that the appliance is correctly assembled, the
sliding pressure plate is in place and the rotary
cut thickness control is set to 0.
Do not place the appliance on window sills or
on unstable surfaces. Only place the appliance
on an even, dry and stable surface.
6
CATLER RECOMMENDS SAFETY FIRST
Do not place the appliance in the vicinity of
open  re or any heat source.
Avoid contact with moving parts, in particular
the slicing disc. Even though the appliance is
equipped with safety devices, do not put your
hands near the slicing disc or other moving
parts.
Never use your hands to press food against the
slicing disc. Always place food on the sliding
pressure plate and secure with the holder.
Do not use the appliance if your hands are wet
or if you are barefoot.
The appliance is designed to slice food. Do
not use the appliance to slice hard pastry,
vegetables, frozen food, food in plastic or
aluminium foils, meat with bones, fruit with
hard pits etc.
This appliance is designed for household use
only. Do not use the appliance in an industrial
environment or outdoors.
Clean the slicing disc hub regularly, following
the instructions in the Care and Cleaning
chapter. However, still take great care to avoid
injury on the slicing disc edge.
7
CATLER RECOMMENDS SAFETY FIRST
Do not put your  ngers or other objects such as
knife, fork etc. in space between the movable
supporting plate and the slicing disc.
Before removing the food, make sure that the
slicing disk has come to afull standstill.
IMPORTANT SAFETY INSTRUCTIONS FOR
USING ELECTRICAL EQUIPMENT
Fully unwind the power cord before use.
Do not leave the power cord hanging over the
edge of atable or countertop or allow it to
touch ahot surface or to become tangled up.
Do not put heavy objects on the power cord.
For safety reasons, we recommend to connect
the appliance in an independent electrical
circuit separated from other appliances. Do
not use adapter plugs or extension cords to
connect the appliance to apower outlet.
To prevent electric shock, do not submerge this
appliance, its base or power cord in water or
any other liquid.
We recommend that you inspect the appliance
regularly. Do not use the appliance if it is
damaged in any way or if the power cord or
plug is defective. All repairs or adjustments
8
CATLER RECOMMENDS SAFETY FIRST
must be performed at the nearest Catler
authorised service centre.
Any maintenance other than standard cleaning
must be performed at authorised Catler service
centre.
We recommend to install aresidual current
device (standard safety switches in your power
outlet) to provide ahigher level of protection
when using the appliance. We recommend to
install aresidual current device (with anominal
residual operating current of no more than
30mA) in the electric circuit in which your
appliance is to be connected. For further expert
advise, please contact your electrician.
9
KNOW YOUR FOOD SLICER FS 9010 / FS 9020
0
1
2
3
3 41 2 5 6
7
8
9
10
11
15
14
13
12
1. Pressure plate protective cover
2. Movable supporting plate
3. Food holder with spikes for better stability of inserted food
4. Handle protective cover
5. Handle
6. Slicing disc protective cover
7. Attachment to grind the slicing disc
8. Cutting disc
9. Removable slicing disc hub
10. Stainless steel base
11. Antiskid feet
12. Rotary cut thickness control
13. Cut thickness indicator
14. Controls
15. Sliding pressure plate
10
KNOW YOUR FOOD SLICER FS 9010 / FS 9020
(REAR VIEW)
16
17
18
19
20
16. Grinding attachment holder
17. Grinding attachment  xing screw
18. Slicing disc hub  xing screw
19. Power cable
20. Stacking area
CONTROLS
21 22 23
21. Power o button O
22. Indicator light
23. Power on button I
11
OPERATING YOUR FOOD SLICER FS 9010 / FS 9020
BEFORE FIRST USE
Before rst use, remove all packaging
and advertising labels / stickers from the
appliance. Check the appliance for damage.
Make sure that the rotary cut thickness
control is set to 0. Wipe the appliance with
asoft sponge slightly moistened in warm
water. Wipe dry using aclean wiping cloth.
WARNING!
Avoid contact with
slicing disc edge.
ASSEMBLING YOUR APPLIANCE
Place the appliance on adry,  at and stable
surface, such as acountertop.
Provide su cient free space around the
appliance, at least 15cm on each side.
Insert the grinding attachment in the holder
and secure with screw. Attach the protective
cover to the sliding pressure plate using the
supplied screws. Depending on the model,
attach the handle.
WARNING!
Do not use the
appliance if the
sliding pressure
platescover is not
installed.
Make sure that the slicing disc hub is
correctly attached and the slicing disc hub
xing screw is properly tightened.
The slicing disc hub  xing screw is equipped
with amicroswitch to turn the appliance o
automatically if released.
LEVELLING YOUR APPLIANCE
To ensure correct functioning of the
appliance, it’simportant for you to check if
it’slevelled before each use.
1. Turn the cut thickness control to 0.
2. Check if the sliding pressure plate is
aligned with the slicing dics.
3. Level the appliance by screwing out/in
the antiskid feet.
4. As soon as the appliance is levelled,
it’sready for use.
WARNING!
Never use the
appliance if it’snot
levelled.
CHECKING BEFORE USE
Check if the rotary cut thickness control is
set to 0.
Fully unwind the power cord and connect
the power cord plug in the mains socket.
Press Ito turn the appliance on. The red
indicator will light and the slicing disk will
start turning. Please check if the slicing disk
is turning regularly and the motor is running
smoothly. Press the Obutton to turn the
appliance o and wait until the slicing disk
has come to astop.
If no malfunction is noticed, the appliance is
ready for use.
12
OPERATING YOUR FOOD SLICER FS 9010 / FS 9020
NOTE
We recommend that this check be
made before each use.
OPERATING THE APPLIANCE
Make sure that the appliance is levelled
and the power cord is plugged in the mains
socket.
Place the food you want to slice on the
sliding pressure plate and secure with the
holder. The holder is equipped with spikes to
provide better slicing stability.
Move the sliding pressure plate to the far left
side.
Adjust the required thickness of the resulting
slice with the slice thickness control.
Place tray, plate or food foil on the laydown
area on which the food slices are to be
dropped.
Press Ito turn the appliance on. The indicator
will light. Wait for the slicing disc to start
turning.
Hold the appliance by the handle and slowly
move the sliding pressure plate with inserted
food against the turning slicing disc. The
food slice will fall on the tray or the food foil
on the laydown area.
Move the sliding pressure plate right or
left to slice the inserted food. Exert slight
pressure on the holder while slicing to ensure
equal thickness of food slices.
When done with slicing, press the Obutton
to turn the appliance o and wait until the
slicing disk has come to afull standstill. Only
then you can release the uncut food from
the holder and remove them from the sliding
pressure plate.
Turn the cut thickness control to 0.
If the appliance is not to be used any longer,
please clean it following the instruction in
the “Care and Cleaning chapter.
WARNING!
Before removing
the food, always
wait until the slicing
disc has come to
afull standstill.
If apiece of food gets jammed during slicing,
press the Obutton to turn the appliance o
and unplug the power cord from the mains.
Wait for the slicing disc to come to afull
standstill. Remove the food from the slicing
disc carefully. Take great care to avoid being
injured by the slicing disc edge.
13
CARE AND CLEANING
CARE AND CLEANING
Before cleaning the appliance, always
disconnect the plug of the power cord from
the mains socket and wait for the slicing disc
to come to afull standstill.
Turn the cut thickness control to 0.
Clean the appliance after each use to avoid
the build-up of deposits.
For cleaning, please use only soft sponge
slightly moistened in warm water. We
recommend the use protective gloves
resistant against being cut through.
Wipe the appliance with asoft sponge
slightly moistened in warm water, then wipe
with asoft sponge.
WARNING!
DO NOT WASH THE
APPLIANCE, MAINS
CORD AND PLUG
UNDER RUNNING
WATER AND DO
NOT IMMERSE IT
IN WATER OR ANY
OTHER LIQUID.
ATTENTION:
Do not use sharp objects, chemicals,
thinners, petrol or other similar
substances. Under no circumstances
should the appliance be cleaned with
asteam cleaner.
CLEANING THE REMOVABLE HUB
If the slicing disc hub is excessively dirty, you
can remove and clean it.
Carefully loosen the slicing disc hub  xing
screw. Hold the slicing disc hub with your
other hand and once the screw is loosened,
remove it from the appliance.
Wash the hub in warm water with asmall
amount of kitchen washing-up liquid,
rinse and wipe dry. Before assembling your
appliance, make sure that the slicing disc hub
is completely dry.
Wipe the slicing disc with asoft sponge, then
wipe dry with aclean cloth.
Insert the hub onto the slicing disc and
secure with the  xing screw. Tighten
thoroughly.
GREASING THE PRESSURE PLATE
If the pressure plate stops moving, it may be
necessary to grease the rail at the appliance
bottom along which the plate moves.
1. Before greasing, make sure that rotary
cut thickness control is set to 0, the
appliance is turned o and the power
cord is unplugged from the mains socket.
2. Tilt the appliance carefully, leaning it
against the slicing disc hub  xing screw.
We recommend to insert acloth under
the  xing screw to avoid damaging or
scratching the countertop.
3. Wipe the rail attached to the pressure
plate.
4. Use acommon lubricant or oil suitable
for this type of appliance.
GRINDING THE SLICING DISC
If the slicing outcome is not satisfactory,
the slicing knife may be blunt. Use only the
supplied slicing disc grinding attachment for
grinding.
14
CARE AND CLEANING
WARNING!
Grinding the slicing
disc may only be
performed by
aprofessionally
trained staff
member of an
authorized service
centre. Under no
circumstances
should the slicing
disc be ground by
auser.
NOTE
The slicing disc is made of ahighly
durable material. The grinding may
only be performed when the slicing
outcome is really poor, the cut is
irregular, the slice gets torn apart and
agreat force must be applied to press
the food against the slicing disc.
Before starting the grinding process, make
sure that:
- the rotary cut thickness control is set to 0,
- the plug is inserted in your mains socket,
- the appliance has been cleaned following
the above instructions.
GRINDING PROCEDURE
1. Loosen the grinding attachment screw.
2. Lift the attachment and turn it 180 ° to
position the slicing disc between the two
grinding wheels.
3. Tighten the grinding attachment  xing
screw.
4. Insert the mains cord plug into apower
socket.
5. Press Ito turn the appliance on. The
indicator will light. Wait for the slicing
disc to start turning.
6. Press and hold down the grinding wheel
button located above the grinding
attachment  xing screw.
7. Leave the appliance in operation for
about 1 minute. When the grinding
wheel has stopped, check if edge has
been formed on the cutting disc rim.
8. If edge has been formed, press and hold
down the grinding wheel’sbutton now
located above the slicing disc hub. Leave
the appliance powered on for about
3 seconds. Then release both buttons.
Press the Obutton to turn the appliance
o and unplug the power cord from the
mains. Wait for the slicing disc to come to
afull standstill.
9. When done with the grinding, loosen
the grinding attachment screw, turn the
attachment back to its original position
and secure with the  xing screw.
10. Wipe the grinding wheels and the slicing
disc with clean alcohol.
REPLACING THE SLICING DISC
The slicing disc may only be replaced if it
cannot be ground any more or if the distance
between the disc edge and the upper
protective cover is greater than 6 mm.
Please have the slicing disc replaced in an
authorized service centre.
STORAGE
Before storing, make sure that the appliance
is clean and dry. Store it in awell-ventilated
dry place out of reach of children and
animals.
15
INSTRUCTIONS AND INFORMATION REGARDING THE DISPOSAL OF USED PACKAGING
MATERIALS
Dispose of packaging material at a public waste disposal site.
DISPOSAL OF USED ELECTRICAL AND ELECTRONIC APPLIANCES
The meaning of the symbol on the product, its accessory or packaging indicates that this product shall not
be treated as household waste. Please, dispose of this product at your applicable collection point for the
recycling of electrical & electronic equipment waste. Alternatively in some states of the European Union or
other European states you may return your products to your local retailer when buying an equivalent new
product. The correct disposal of this product will help save valuable natural resources and help in preventing
the potential negative impact on the environment and human health, which could be caused as a result of
improper liquidation of waste. Please ask your local authorities or the nearest waste collection centre for
further details. The improper disposal of this type of waste may fall subject to national regulations for  nes.
For business entities in the European Union
If you wish to dispose of an electrical or electronic device, request the necessary information from your seller
or supplier.
Disposal in other countries outside the European Union
If you wish to dispose of this product, request the necessary information about the correct disposal method
from local government departments or from your seller.
This product meets all the basic EU regulation requirements that relate to it.
Changes to the text, design and technical speci cations may occur without prior notice and we reserve the right to make
these changes.
The original version is in the Czech language.
Address of the manufacturer: FAST ČR, a.s., Černokostelecká 1621, ŘíčanyCZ-251 01
WWW.CATLER.EU
FOOD SLICER
Because of continuous impro-
vement of design and other pr-
operties, your product may sli-
ghtly di er from the one shown
on the pictures in this manual.
Zdůvodu neustálého zdokona-
lování designu a dalších vlast-
ností se může vámi zakoupený
výrobek mírně lišit od výrobku
uvedeného na obrázcích vtom-
to návodu.
Z dôvodu neustáleho zdo-
konaľovania dizajnu a ďal-
ších vlastností sa môže vami
kúpený výrobok mierne líšiť
od výrobku uvedeného na
obrázkoch vtomto návode.
A kivitel és más jellemzők
állandó fejlesztése miatt
a megvásárolt termék enyhén
eltérhet az ezen útmutatóban
található képeken mutatott
terméktől.
Ze względu na ciągłe udoskona-
lanie designu iinnych właściwo-
ści, zakupiony produkt może się
nieznacznie różnić od produktu
przedstawionego na rysunkach
wniniejszej instrukcji.
Из-за постоянного улучшения
дизайна и других свойств
ваш продукт может
немного отличаться от
представленного на рисунках
вданном руководстве.
CUSTOMER SERVICE • ZÁKAZNICKÝ SERVIS • ZÁKAZNICKÝ SERVIS • ÜGYFÉLSZOLGÁLAT • SERWIS KLIENTA • ОБСЛУЖИВАНИЕ КЛИЕНТОВ
INFO@CATLER.EU
  • Page 1 1
  • Page 2 2
  • Page 3 3
  • Page 4 4
  • Page 5 5
  • Page 6 6
  • Page 7 7
  • Page 8 8
  • Page 9 9
  • Page 10 10
  • Page 11 11
  • Page 12 12
  • Page 13 13
  • Page 14 14
  • Page 15 15
  • Page 16 16
  • Page 17 17
  • Page 18 18

Catler FS 9010 User manual

Category
Small kitchen appliances
Type
User manual
This manual is also suitable for

Ask a question and I''ll find the answer in the document

Finding information in a document is now easier with AI