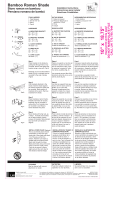
PREPARING FOR INSTALLATION
□ Place bracket on the shade by
putting bolt through slot on top
of shade. Secure and tighten the
bracket using a wing nut. (Fig.A)
□ Brackets can be mounted behind
shade (Fig.A) or brackets can be
mounted to the side of shade (Fig.B)
2 POSITION SHADE
□ With brackets attached to the
shade, hold the shade against
the window where the shade will
be mounted. Mark position of
brackets with a pencil. Remove
brackets from shade.
3 INSTALL BRACKETS
□ Place brackets at pencil marks.
Predrill small holes for screws.
Brackets may be mounted to
ceiling (Fig.C) or to wall (Fig.D).
Screw brackets into place.
Installation
Use and Care Guide
Natural Roman Shade
Fig. C
Fig. D
Fig. B
Fig. A
3/4”
1,905 cm
1/2”
1,27cm
A
B
C
D
E
Fig. A
3/4”
1,905 cm
1/2”
1,27cm
A
B
C
D
E
Fig. B
Fig. A
3/4”
1,905 cm
1/2”
1,27cm
A
B
C
D
E
TOOLS REQUIRED
Tape Measure Drill & 1/16" bit Pencil
PACKAGE CONTENTS
3/4”
1,905 cm
1/2”
1,27cm
A
B
C
D
E
THIS IS NOT RECOMMENDED FOR USE AROUND CHILDREN!
CLEANING
May be cleaned with vaccum attachement or duster.
Please contact 1-877-527-0313 for further assistance.HOMEDEPOT.COM
Part Description Quantity
A
MOUNTING BRACKET 2 (23"-48") / 3 (52"-72")
B
BRACKET SCREWS 8 (23"-48") / 12 (52"-72")
C
CLEAT SCREWS 2
D
WING NUTS 2 (23"-48") / 3 (52"-72")
E
CORD CLEAT 1


