Page is loading ...

710286-100 Rev. A
1
Product names listed herein are trademarks of AS America Inc.
© AS America Inc. 2013
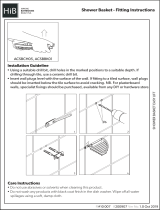
Thank you for selecting American Standard – the benchmark of fine quality for over 100 years. To ensure this product is installed
properly, please read these instructions carefully before you begin. (Certain installations may require professional help.) Also be sure
your installation conforms to local codes.
INSTALLATION INSTRUCTIONS
SAVER
™
BATH DOOR
MODEL: AM00495.400 SERIES
REQUIRED TOOLS AND MATERIALS
GENERAL INFORMATION
Please inspect the product immediately upon receipt for transit damage, missing packs/parts or manufacturing
fault. Damage reported later cannot be accepted. Please handle the product with care avoiding knocks and
shocks loading to all sides and edges of the glass.
NOTE: TEMPERED GLASS CANNOT BE DRILLED, CUT OR MODIFIED.
READ THE INSTRUCTIONS CAREFULLY
Familiarize yourself with all the parts as shown in the assembly drawing. The assembly drawing will also
provide a helpful reference when relating the location of the various parts and how they are mounted.
Special care should be taken when drilling walls to avoid hidden pipes or electrical cables.
Note: This product is heavy and may require two people to install.
AFTERCARE INSTRUCTIONS
After use, your shower should be cleaned with soap and water. This is particularly important in hard water
districts where insoluble lime salts may be deposited and allowed to build up. Cleaners of a gritty or abrasive
nature should not be used. Care should be taken to avoid contact with strong chemicals such as organic
solvents and strippers.
Glass cleaners can be used but with caution, if in doubt contact the manufacturer of the cleaner in question.
Please keep these instructions for aftercare and customer service details.
For problems please contact American Standard. Do not return to store.
Regular ScrewdriverPhillips Screwdriver
10'
Caulking Gun & Caulking
Drill 1/4" & 1/8" Drill Bits
#2 Square Drive Bit
Level
Tape Measure
Hammer Pencil
SAVE FOR FUTURE USE

2
710286-100 Rev. A
BOX CONTENTS
2x Horizontal Rails
1x Lube
1x Installation Instructions
1x Handle Set
2x Retaining Blocks
2x Screws M4x12
2x Screw Cover Caps
6x Profile Covers
6x Wall Plugs
12x Screws M4x35
2x Screws, Flat Head, M4x35
6x Screw Cover Caps
6x Cupped Washers
2x Wall Posts
6x Screws M4x10
6x Screw Cover Caps
6x Cupped Washers
2x Door Posts
1x Magnetic Seal
1x Fixed Glass Door Panel
710286-100 Rev. A
Product names listed herein are trademarks of AS America Inc.
© AS America Inc. 2013
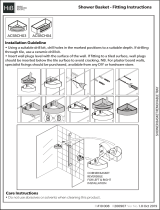
Thank you for selecting American Standard – the benchmark of fine quality for over 100 years. To ensure this product is installed
properly, please read these instructions carefully before you begin. (Certain installations may require professional help.) Also be sure
your installation conforms to local codes.
INSTALLATION INSTRUCTIONS
SAVER™ BATH DOOR
MODEL: AM00495.400 SERIES
REQUIRED TOOLS AND MATERIALS
GENERAL INFORMATION
Please inspect the product immediately upon receipt for transit damage, missing packs/parts or manufacturing
fault. Damage reported later cannot be accepted. Please handle the product with care avoiding knocks and
shocks loading
to all sides and edges of the glass.
NOTES: SAFETY GLASS CANNOT BE DRILLED, CUT OR MODIFIED.
READ THE INSTRUCTIONS CAREFULLY
Familiarize yourself with all the parts as shown in the assembly drawing. The assembly drawing will also
provide a helpful reference when relating the location of the various parts and how they are mounted.
Special care should be taken when drilling walls to avoid hidden pipes or electrical cables.
Note: This product is heavy and may require two people to install.
AFTERCARE INSTRUCTIONS
After use, your shower should be cleaned with soap and water. This is particularly important in hard water
districts where insoluble lime salts may be deposited and allowed to build up. Cleaners of a gritty or abrasive
nature should not be used. Care should be taken to avoid contact with strong chemicals such as organic
solvents and strippers.
Glass cleaners can be used but with caution, if in doubt contact the manufacturer of the cleaner in question.
Please keep these instructions for aftercare and customer service details.
For problems please contact American Standard. Do not return to store.
Regular ScrewdriverPhillips Screwdriver
10'
Caulking Gun & Caulking
Drill 1/4" & 1/8" Drill Bits
Level
Tape Measure
Hammer Pencil
SAVE FOR FUTURE USE
5x Water Defelectors
1x Sliding Glass Door Panel

710286-100 Rev. A
3
[1]
[2]
[4]
[6]
[7]
[8]
[9]
[23]
[11]
[12]
[5]
[13]
[14]
[15]
[17]
[19]
[20]
[22]
[21]
[22]
[16]
[3]
[10]
[18]
ASSEMBLY DRAWING
[1] 6x Wall Plugs
[2] 12x Screws M4x35
[3] 24x Screw Cover Caps
[4] 6x Screws M4x10
[5] 1x Handle Set
[6] 2x Wall Posts
[7] 1x Door Post
[8] 1x Magnetic Seal
[9] 1x Bottom Horizontal Rail
[10] 2x Bottom Rollers
[11] 2x Screws M4x12
[12] 2x Retaining Blocks
[13] 1x Sliding Door Panel
[14] 1x Fixed Door Panel
[16] 2x Top Rollers
[17] 1x Top Horizontal Rail
[18] 2x Screw Cover Caps
[21] 1x Door Post
[22] 2x Flat Head Screws M4x35
[24] 12x Cupped Washers
Fixed Right-hand Panel shown - See page 8 for Fixed Left-hand Panel
[24]

4
710286-100 Rev. A
2A
2B
INSTALLATION NOTES
1
(6) Wall Post
(7 & 21) Door Post
VIEW FROM LEFT SIDE - INSIDE
This unit is best installed by two people.
Cover drain with tape prior to installation to prevent the loss of small parts.
Unpack your unit carefully and inspect for freight damage. Lay out and identify all parts using instruction sheet as a
reference. Before discarding the carton check to see that no small hardware parts have fallen to the bottom of the box. If
any parts are damaged or missing refer to the description noted in the instructions when inquiring about replacements.
Handle the glass panels carefully and protect the edges. Although tempered glass is very resistant to breakage the glass
can still break if unequal pressure is applied during installation and the sharp corners of the panel can damage tile and
ooring surface.
Be sure to wear safety glasses whenever drilling or cutting. When drilling holes in ceramic tile or marble use a center
punch and hammer to carefully break the glazed surface. This will prevent skidding when drilling.
NOTE: TEMPERED GLASS CANNOT BE DRILLED, CUT OR MODIFIED.
1A
ASSEMBLE FRAME - REFER TO ASSEMBLY DRAWING
Slide Horizontal Rails (9 & 17) onto Door Posts (7 & 21)
and screw together. Refer to Assembly Drawing to determine
correct location of Fixed Glass Panel.
Slide Wall Posts (6) on each end. The Wall Posts fit inside
posts of the frame.
1A - 1B
2A - 2B
1B
VIEW FROM RIGHT SIDE - INSIDE
7
9
21
17
Screw M4x35
VIEW FROM INSIDE
Screw M4x35
Flat Head
Screw
M4x35

710286-100 Rev. A
5
3
2
FITTING FRAME ASSEMBLY INTO OPENING
2 PEOPLE REQUIRED
1
2
3
1
2 3
A
57-1/2" x 58-1/4"
(1460 x 1480mm)
ANCHOR INSTALL
Mark holes
DO NOT install screws
Use 1/4" drill bit
for anchor holes
DRILL FOR ANCHOR
IF NEEDED
INSTALL ANCHOR
IF NEEDED
Place completed frame onto the tube located edge
at the edge of the at surface of the deck. Push
wall posts against wall and position the posts with
a level and mark the mounting holes on the wall.
Remove the frame; drill 1/8” holes at marked
locations.
Use the anchors if NOT securing to studs (use 1/4”
drill bit).
Remove frame and proceed to STEP 3.
A
FITTING FIXED GLASS PANEL INTO FRAME ASSEMBLY
VIEW FROM INSIDE
View from inside
RIGHT-HAND FIXED PANEL SHOWN. SEE PAGE 8 FOR
LEFT-HAND VERSION.
1. Place Retaining Blocks (12) on glass at top and bottom (see Fig. A) and
use them as guides to install the top and bottom Water Deflectors (15).
Once the Water Deflectors are in place, remove the Retaining Blocks for later
installation.
12
3
12
10
12
19
10
1
2
4
2. Slide Fixed Glass Panel (14) in place, engaging Top and Bottom Rails and
Door Posts.
3. Install top & bottom Retaining Blocks with screws (11) to hold Fixed Glass
Panel in place.
4. Install Water Deflector (19) by pressing into place.
(NOTE: The Water Deflector may need to be trimmed if it extends beyond
the Top (17) or Bottom (9) Horizontal Rails.)
11
FIG. A
19
Fix e d Pa n e l

6
710286-100 Rev. A
4
OUTSIDE VIEW
2B1B
INSTALLING FRAME
2 PEOPLE REQUIRED
VIEW FROM INSIDE
1B and 2B Secure assembly to wall using previously drilled holes.
Fix e d Pa n e l
Ensure door assembly is centered in opening. Push down to
top of tub before anchoring screws to wall posts.
1A & 2A — Drill Pilot Holes
1B & 2B — Cupped Plastic Washer hold Cap in place
1C & 2C — Snap Cap in place
5
FIXING ASSEMBLY TO WALL POSTS
1 2
(NOTE: The Cupped Washers (23) hold Screw Cover Caps in place.)
1B
Screw M4x35
VIEW FROM INSIDE
Ø1/8" BIT
Ø3.2mm
SCREW M4X10
CAP
2A
2B
2C
1A
1B
1C
2B
Snap Screw Cover Caps (3) over screws and Cupped Washers.

710286-100 Rev. A
7
Hang door in track as shown in (1). Depress lower Rollers
and seat as shown in (2).
6
INSTALLING SLIDING DOORS
2
1
1
2
Door Panel
( If Top & Bottom Rollers need to be reversed, see page 8.)
1
2
ADD DOOR HANDLES AND WATER DEFLECTORS
Screw Handle (5) in place as shown in 1.
7
Install Water Deflectors (15) as shown in 2A & 2B.
Install Magnetic Seal (8) on Sliding Glass Door (13).
Sliding
Door Panel —
Longer Water
Fixed Panel —
Shorter Water
2A 2B
1

8
710286-100 Rev. A
11
2 2
APPLY SILICONE CAULKING & PROFILE COVERS
8
FIG. 1
Top Roller
Top Roller
Bottom Roller
Bottom Roller
FIXED GLASS PANEL - CHANGING SIDES
RIGHT HAND
FIG. 2
LEFT HAND
FIG. 4
FIG. 3
RIGHT HAND - FIXED GLASS PANEL
LEFT HAND - FIXED GLASS PANEL
Fix e d Pa n e l
Fix e d Pa n e l
SLIDING DOOR
RIGHT-HAND FIXED GLASS PANEL
SLIDING DOOR
LEFT-HAND FIXED GLASS PANEL
Handle
Hole
Snap Profile Covers (20) in place as shown in 1.
FIXED GLASS PANEL FIXED GLASS PANEL
To convert to Left-Hand Fixed Glass
Panel, invert the Sliding Glass Panel
so the Handel Hole is as shown above.
Disassemble Top & Bottom Rollers &
re-install appropriate Rollers to top &
bottom of Sliding Glass Panel.
VIEW FROM INSIDE
1

710286-100 Rev. A
9
AS AMERICA, INC. LIMITED LIFETIME WARRANTY FOR SHOWER DOORS
AS America, Inc. (“American Standard”) warrants to the original consumer purchaser that it will, at its sole option, repair or replace this product or
any part of this product, if it confirms that the product is defective in materials or workmanship under normal use and maintenance for the lifetime
of this product.
This warranty does not apply to commercial installations. Commercial installations shall have a limited warranty of 3 year(s).
This limited warranty DOES NOT COVER the following:
1. Defects or damage arising from shipping, installation, alterations, accidents, abuse, misuse, lack of proper maintenance and use of other than
genuine American Standard replacement parts, in all cases whether caused by a plumbing contractor, service company, the owner or any
other person.
2. Deterioration through normal wear and tear.
3. HARD WATER DAMAGE, OR DAMAGES RESULTING FROM ABUSE OR MISUSE OR FROM FAILURE TO INSTALL OR MAINTAIN THIS
PLUMBING PRODUCT IN ACCORDANCE WITH THE WRITTEN INSTRUCTIONS FURNISHED BY AS AMERICA, INC.
4. USE OF CLEANING PRODUCTS CONTAINING CALCIUM HYPO CHLORITE (CHLORINE), SCOURING POWDERS OR PADS SHALL
NOT BE COVERED.
5. THE USE OF SCENTED CANDLES IN CLOSE PROXIMITY WITH THIS PRODUCT CAN RESULT IN PERMANENT STAINING OF THE FINISH.
6. Expense of normal maintenance.
7. A ll costs of removal, transportation, labor, reinstallation or other costs including postage and/or shipping costs to obtain warranty service shall
be paid by the consumer.
8. ANY LIABILITY FOR CONSEQUENTIAL OR INCIDENTAL DAMAGES, ALL OF WHICH ARE HEREBY EXPRESSLY DISCLAIMED. ANY
IMPLIED WARRANTIES, INCLUDING THOSE OF MERCHANTABILITY OR FITNESS FOR PURPOSE INTENDED ARE SPECIFICALLY
EXCLUDED. (Some jurisdictions do not allow limitations on how long an implied warranty lasts, or the exclusion or limitation of incidental or
consequential damages, so these limitations and exclusions may not apply to you.)
9. Responsibility for compliance with local code requirements ARE EXCLUDED FROM THIS WARRANTY. (Since local code requirements vary
greatly distributors, dealers, installation contractors and users of plumbing products should determine whether there are any code restrictions
on the installation or use of a specific product.)
This limited warranty gives you specific legal rights. You may have other statutory rights that vary from state to state or from province to province,
in which case this limited warranty does not affect such statutory rights.
For service under this warranty, it is suggested that a claim be made through the contractor or dealer from or through whom the product was
purchased, or that a service request (including a description of the product model and of the defect) be sent to the following with proof of
purchase or original receipt:
In the United States:
American Standard Brands
P.O. Box 6820
Piscataway, New Jersey 08855
Attention: Director of Consumer Affairs
For residents of the United States, warranty
information may also be obtained by calling
the following toll free number: (800) 442-1902
www.americanstandard.com
In Canada:
AS Canada ULC
5900 Avebury Rd.
Mississauga, Ontario
Canada L5R 3M3
Toll Free: (800) 387-0369
www.americanstandard.ca
In Mexico:
American Standard B&K Mexico
S. de R.L. de C.V.
Via Morelos #330
Col. Santa Clara
Ecatepec 55540 Edo. Mexico
Toll Free: 01-800-839-1200
www.americanstandard.com.mx
MAINTENANCE:
Two primary materials are used to manufacture your new American Standard shower enclosure: tempered glass and
anodized aluminum. To assure a long lasting nish on the enclosure, wipe it down with a towel after each use.
For occasional, more concentrated cleaning efforts Lysol Non-Abrasive Bathroom Cleaner works extremely well.
Be sure that any over spray falling on the aluminum frame is rinsed thoroughly and dried. Many over-the-counter
cleaners, if applied to the aluminum and left on, will harm the metal nish and cause permanent damage even
though their directions indicate safe use on shower doors. Never use a scouring agent to clean the aluminum.
/