Page is loading ...

MADI-192 MADI Option Card Installation Guide 1
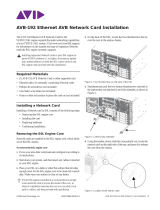
MADI-192 MADI Option Card Installation Guide
The MADI-192 MADI Option Card is a high-channel-count
MADI audio interface card for Avid
®
VENUE | S6L systems.
MADI-192 MADI Option cards are installed in E6L engines.
• Up to four MADI Option cards can be installed in an
E6L-192 or E6L-144 engine.
• Up to two MADI Option cards can be installed in an
E6L-112 engine.
For information on supported Option cards, visit:
https://www.avid.com/products/venue-s6l-system
This guide shows how to install a MADI-192 MADI Option Card
into an E6L.
Required Materials
• MADI-192 MADI Option Card
• Phillips #1 screwdriver (not included)
• Anti-Static wrist strap (not included)
• Foam or other padded surface to place the card on (not in-
cluded)
Installing a MADI-192 MADI Card
Installing a MADI-192 MADI Option card in E6L consists of the
following steps:
• Removing the E6L engine core
• Installing the card
• Replacing hardware
• Confirming Installation
Removing the E6L Engine Core
E6L Option cards are installed in the E6L engine core, which
slides out of the E6L chassis.
To remove the E6L engine core:
1 Put on your anti-static wrist band and configure according to
its instructions.
2 Shut down your system, and disconnect any cables connected
to your E6L engine.
3 Place your E6L on a table or other flat surface that provides
enough room for the E6L engine core to be removed comfort-
ably. Make sure your surface is clear of any debris.
4 On the back of the E6L, loosen the four thumbscrews that se-
cure the core to the engine chassis.
5 Simultaneously pull the two bottom thumbscrews outward so
the latches they are attached to are fully extended, as shown in
Figure 2.
6 Using the handle, slowly slide the core partially out, locate the
interior catch on the right side of the tray, and press it to release
the core from the chassis.
Figure 1. Four thumbscrews on the back of the E6L
Figure 2. Latches fully extended
Figure 3. Location of the interior catch
© 2018 Avid Technology, Inc 9320-70100-00 REV B

MADI-192 MADI Option Card Installation Guide 2
7 Slowly slide the core out of the E6L chassis completely and
place it on your work surface.
Installing the Card
The E6L engine core has eight half-length PCIe slots for Option
cards.
E6L-192/144
Install MADI-192 cards into Option slots 1–4 only.
E6L-112
Install one MADI-192 card in Option slot 1. If using two
MADI-192 cards, the second must be installed in AVB Network
slot 3 which requires replacing the faceplate on the second
MADI-192 card as explained later in this guide.
When standing at the back of the E6L engine, Option slots 1–5
are at the lower right and slots 6–8 are in the middle (below the
AVB Network slots) as shown in Figure 4.
Always install new MADI-192 cards in the lowest numbered
available slot. For example, if one MADI-192 card is already in-
stalled in Option slot 1, install the next MADI-192 card in slot 2
(E6L-192/144), or into AVB Network slot 3 (E6L-112 only).
The following instructions show a MADI-192 card being in-
stalled into Option slot 1 (all E6L engines), as well as how to in-
stall a second MADI-192 card into AVB Network slot 3
(E6L-112 only).
Before installing cards in slots 1–4 you must first remove the card
retaining bracket.
To remove the card retaining bracket and install the card:
1 Looking inside the core from the right side, locate the E6L
card retaining bracket.
2 Locate the thumbscrew that secures the bracket to the bottom
of the unit and loosen it completely.
3 Locate the two Phillips head screws on the top of the bracket,
remove them, carefully remove the bracket, and set them all
aside.
4 Locate the next available Option Card slot below any currently
installed Option card(s), and remove the blank faceplate. The
faceplate can be recycled or discarded.
The core will not slide out of the E6L chassis until the
latches are fully extended and the catch has been released.
If you experience any resistance, make sure the latches are
fully extended before pulling.
Figure 4. E6L Option card slots 1–4 (lower right) and AVB Network
slot 3 (top)
IN
OUT
NETWORK
MASTER 1
WORD CLOCK
UTIL
EXPANSION
2
3
6
7
8
1
2
3
4
5
AVB-192
ACT SIG ACT SIG
ACT SIG ACT SIG
A
B
1-4
AVB Network slot 3
Figure 5. E6L card bracket thumbscrew
Figure 6. Removing one of two card bracket screws
Figure 7. Open Option card slot (right) and blank faceplate removed
(left)

MADI-192 MADI Option Card Installation Guide 3
5 Remove the MADI-192 card from its packaging and place it
on your padded surface. Be careful to handle the card by its
edges only.
6 Optional: Disconnect the power cables connected to HDX
cards installed above the Option card slots and tuck them out
of the way. It is possible to install MADI-192 cards without
disconnecting these cables, as long as you are careful to not
stretch the cables or damage their connectors while installing
the cards.
7 Remove the Option card guide bracket by doing the following:
• Fully loosen its single thumbscrew (shown below).
• Slide the bracket to the right, towards the front of the E6L,
until it clears the two bracket alignment posts.
• Carefully lift the guide bracket out of the core and set it
aside.
8 Align the MADI-192 card’s PCIe connectors with the corre-
sponding PCIe expansion slot, and firmly press the card into
the PCIe slot.
Make sure the card is fully seated in the PCIe slot and that the
white retaining clip clicks into position.
9 Carefully place the card guide bracket back in the core and do
the following:
• Being careful to align the guide bracket with the its align-
ment posts, align its card retaining slots with all Option
cards.
• Slide the bracket to the left (towards the back of the E6L),
making sure all cards are correctly secured within the slots
on the guide bracket.
10 Secure the guide bracket to the core by tightening its thumb-
screw.
11 From the back of the core, make sure the faceplate of the Op-
tion card is correctly aligned with the open slot and then secure
the card to the core by tightening the captive thumbscrew.
Figure 8. Disconnecting the power cable of an HDX card
Figure 9. Card guide bracket and its thumbscrew
Figure 10. Card retaining clip correctly locked
Figure 11. Option card correctly positioned in slot of guide bracket

MADI-192 MADI Option Card Installation Guide4
Installing a Second MADI-192 Card into an
E6L-112
If installing a second MADI-192 card into an E6L-112, the sec-
ond MADI-192 card must be installed in AVB Network slot 3.
The correct faceplate (included with the MADI-192 card) must be
installed on the card before installing it in AVB Network slot 3.
To install the faceplate for E6L-112 AVB Network slot 3:
1 Place the MADI-192 card on your padded work-surface
face-down, so you can access the two screws that secure the
existing faceplate to the tabs on the card.
2 Using a #2 Phillips screwdriver, remove the two screws that
secure the faceplate to the card. Keep the screws nearby to use
to secure the new faceplate.
3 Remove the 3 screws that secure the faceplate to the front (be-
tween the MADI BNC ports). Keep the screws nearby.
4 Remove the faceplate and set it aside.
5 Turn the MADI-192 card over so it is face-up.
6 Take the new E6L-112-compatible faceplate and slide it over
the MADI BNC ports.
• Make sure that the card mounting tabs sit below the card.
7 Secure the faceplate to the front of the card using the 3 screws
you removed earlier.
8 Secure the faceplate to the card from the top using only one of
the screws you removed earlier as shown in image, below.
• The clear lightpipe tube blocks access to the 2nd screw
hole; do not attempt to install the 2nd screw into the hole
below the lightpipe as it risks damaging the lightpipe/con-
nector).
Keep the 2nd screw with the original faceplate in case you ever
need to move the card to another Engine or to Option slot 1.
Figure 12. E6L AVB Network slot 3 (top)
Figure 13. MADI-192 with AVB Network slot faceplate (shown at left)
and Option slot faceplate (shown at right)
Figure 14. Underside of MADI-192 card showing fasteners to remove
Figure 15. Screws (3x) to remove from faceplate
NETWORK
MASTER 1
2
3
AVB-192
ACT SIG ACT SIG
ACT SIG ACT SIG
A
B
AVB Network slot 3
Keep the faceplate in case you want to move this card into
an Option card slot in the future.
This is different from how the Option slot faceplate is at-
tached to the card; tabs on the AVB Network slot faceplate sit
below the card and are secured from above, while those on
the Option slot faceplate sit above the MADI-192 card and
are secured from below as shown in the following diagram.
Figure 16. Orientation of faceplate, card, and fasteners for AVB
Network slot 3 (shown at left) and Option card slots (at right)
Figure 17. Screws (3x) to secure faceplate
Figure 18. Top view showing the single fastener to re-install (at right)
AVB/Network
Slot Faceplate
Option Slot
Faceplate
Card
Card
tab
tab

MADI-192 MADI Option Card Installation Guide 5
To install the MADI-192 card into AVB Network slot 3:
1 Hold the card it by its edges.
2 Inside the unit, place the face of the card into position in the
slot, with the back of the card tilting upwards.
3 Using two hands, hold the front of the card in place in the slot
with one hand, and slowly move the back of the card down-
wards along the sheet metal until the card is horizontal.
4 Once the card is horizontal, make sure the tab on the right side
of the faceplate of the card is positioned on the outside of the
E6L chassis slot.
5 Align the PCIe connector on the card with the corresponding
PCIe port, and align the flange on the card with the retaining
clip on the PC board.
6 Lift the tab on the retaining clip, and then press the card firmly
into the PCIe port and clip.
The card should look similar to the following:
7 Tighten the exterior captive thumbscrew to secure the face-
plate of the MADI-192 card to the E6L.
8 Proceed to “Replacing E6L Hardware” on page 5.
Additional Information
You can install either a second MADI-192 card or a WSG-HD
Waves SoundGrid Option card in AVB Network slot 3 of an
E6L-112 engine. You cannot have both a WSG-HD card and a
second MADI-192 card installed in an E6L-112 simultaneously.
If you ever want to remove the second MADI-192 card from the
E6L-112 and install it into a standard E6L Option card slot (1–4),
be sure to re-install the original Option slot faceplate.
Replacing E6L Hardware
After installing the cards, replace the retaining bracket and put the
core back into the E6L chassis.
To replace E6L hardware:
1 If you disconnected any power cables to DSP cards, reconnect
them now. Similarly, if you disconnected cables to any AVB
cards, reconnect them now (make sure to reconnect them to
their original ports).
2 Carefully place the card retaining bracket back into position,
making sure to not disturb the surface of the DSP cards in the
process or pinch any cables.
3 Tighten the captive thumbscrew securing the bracket to the
bottom of the E6L engine core.
4 Replace the two screws at the top of the retaining bracket.
5 Slide the core back into the E6L chassis, making sure the con-
nectors face outward.
When the core is fully seated into the chassis, the two latches
at the bottom of the chassis should fully collapse.
6 Tighten the four thumbscrews to secure the core to the chassis.
Figure 19. Lifting the tab on the retaining clip
Figure 20. MADI-192 card properly seated in the PCIe slot
Make sure the bottom edge of the retaining bracket is
aligned evenly with the bottom of the core. If the bracket is
misaligned it can prevent the core from sliding easily back
into the E6L.

MADI-192 MADI Option Card Installation Guide6
Removing an Option Card
If you ever need to remove a MADI-192 card from an Option
card slot, do the following:
• Remove the E6L Engine core.
• Remove the card retaining bracket.
• Remove the card guide bracket.
• Completely loosen the captive thumbscrew that secures the
faceplate of the card to the back panel of the E6L core.
• To remove an Option card, release its retaining clip using a
long, flat head screwdriver (not included) as shown below,
pull the card out of its PCIe slot and then carefully lift the
card out of the core.
If you ever need to remove a second MADI-192 card from AVB
Network slot 3 in an E6L-112 (in order to install a WSG-HD card,
for example), do the following:
• Remove the E6L Engine core.
• Completely loosen the captive thumbscrew that secures the
faceplate of the card to the E6L chassis.
• Release the MADI-192 card from its PCIe slots by using
one hand to lift the tab on the retaining clip to release the
card from its clip, then using your other hand to pull the
card out of its PCIe port.
Confirming Installation
After installing MADI-192 cards, confirm that you successfully
installed them.
To confirm installation:
1 Connect power to the E6L, and connect an audio network ca-
ble from your S6L control surface to E6L.
2 Power on your S6L and E6L.
3 On the external VENUE software screen, go to the Options >
Devices
page.
4 In the EXPANSION CARDS section, the newly installed
card(s) should appear in their corresponding slot(s).
5 If prompted to update firmware, let the update process com-
plete and then power cycle the entire system.
Figure 21. Releasing a card retaining clip
Your S6L system may initiate a firmware update of your
newly-installed card. If so, follow the on-screen prompts to
ensure a successful installation.
In E6L-112 engines, a second MADI-192 physically installed
in AVB Network slot 3 is listed in slot 2 under EXPANSION
CARDS.
/