Page is loading ...

118580
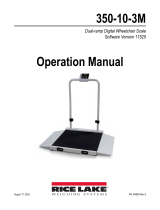
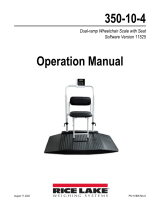
Rice Lake Digital Wheelchair Scale
340-10 Series
Software Revision 11387
Technical and Operating
Instructions
To be the best by every measure


Contents
1.0 Introduction.................................................................................................................................. 1
2.0 Scale Assembly ........................................................................................................................... 2
2.1 Unpacking Your Scale . . . . . . . . . . . . . . . . . . . . . . . . . . . . . . . . . . . . . . . . . . . . . . . . . . . . . . . . . . . . 2
2.2 Repacking . . . . . . . . . . . . . . . . . . . . . . . . . . . . . . . . . . . . . . . . . . . . . . . . . . . . . . . . . . . . . . . . . . . . . 2
2.3 Setting Up Your Scale . . . . . . . . . . . . . . . . . . . . . . . . . . . . . . . . . . . . . . . . . . . . . . . . . . . . . . . . . . . . 3
2.4 Attaching the Feet to the Scale. . . . . . . . . . . . . . . . . . . . . . . . . . . . . . . . . . . . . . . . . . . . . . . . . . . . . . 4
2.5 Hooking up the AC Power Connections . . . . . . . . . . . . . . . . . . . . . . . . . . . . . . . . . . . . . . . . . . . . . . . 6
2.6 Getting Ready to Weigh a Patient. . . . . . . . . . . . . . . . . . . . . . . . . . . . . . . . . . . . . . . . . . . . . . . . . . . . 6
3.0 Scale Operation ........................................................................................................................... 7
3.1 Weighing a Patient . . . . . . . . . . . . . . . . . . . . . . . . . . . . . . . . . . . . . . . . . . . . . . . . . . . . . . . . . . . . . . . 7
3.2 Using the Body Mass Index (BMI) Function. . . . . . . . . . . . . . . . . . . . . . . . . . . . . . . . . . . . . . . . . . . . . 8
3.3 Using the Tare Function . . . . . . . . . . . . . . . . . . . . . . . . . . . . . . . . . . . . . . . . . . . . . . . . . . . . . . . . . . . 9
4.0 Scale Configuration ................................................................................................................... 10
4.1 Enabling Configuration or Calibration Modes . . . . . . . . . . . . . . . . . . . . . . . . . . . . . . . . . . . . . . . . . . 10
4.2 Configuration Mode . . . . . . . . . . . . . . . . . . . . . . . . . . . . . . . . . . . . . . . . . . . . . . . . . . . . . . . . . . . . . 10
4.3 Numeric Data Entry . . . . . . . . . . . . . . . . . . . . . . . . . . . . . . . . . . . . . . . . . . . . . . . . . . . . . . . . . . . . . 11
4.4 Reset To Factory Defaults . . . . . . . . . . . . . . . . . . . . . . . . . . . . . . . . . . . . . . . . . . . . . . . . . . . . . . . . 15
5.0 Scale Calibration ....................................................................................................................... 16
6.0 RS-232 Communication............................................................................................................. 17
6.1 Pushbutton Keypad Print . . . . . . . . . . . . . . . . . . . . . . . . . . . . . . . . . . . . . . . . . . . . . . . . . . . . . . . . . 17
6.2 Standard Remote Protocol (configuration option #9 set to 1) . . . . . . . . . . . . . . . . . . . . . . . . . . . . . . 17
6.3 ESC Protocol (configuration option #9 set to 0) . . . . . . . . . . . . . . . . . . . . . . . . . . . . . . . . . . . . . . . . 18
6.4 Sample and Explanation of ESC Protocol . . . . . . . . . . . . . . . . . . . . . . . . . . . . . . . . . . . . . . . . . . . . . 21
7.0 Troubleshooting and Testing ..................................................................................................... 23
7.1 Test Mode . . . . . . . . . . . . . . . . . . . . . . . . . . . . . . . . . . . . . . . . . . . . . . . . . . . . . . . . . . . . . . . . . . . . 24
8.0 Maintenance .............................................................................................................................. 26
8.1 Basic Maintenance . . . . . . . . . . . . . . . . . . . . . . . . . . . . . . . . . . . . . . . . . . . . . . . . . . . . . . . . . . . . . . 26
8.2 Cleaning . . . . . . . . . . . . . . . . . . . . . . . . . . . . . . . . . . . . . . . . . . . . . . . . . . . . . . . . . . . . . . . . . . . . . . 26
8.3 Trimming Procedure . . . . . . . . . . . . . . . . . . . . . . . . . . . . . . . . . . . . . . . . . . . . . . . . . . . . . . . . . . . . . 27
9.0 Wheelchair Scale Specifications.............................................................................................. 29
For More Information ............................................................................................................................. 30
Digital Wheelchair Scale Limited Warranty.......................................................................................... 31
Technical training seminars are available through Rice Lake Weighing Systems.
Course descriptions and dates can be viewed at www.ricelake.com or obtained
by calling 715-234-9171 and asking for the training department
© 2012 Rice Lake Weighing Systems. All rights reserved. Specifications subject to change without notice.
Series 340-10, Software revision 11387
January 2012

ii Wheelchair Scale Technical and Operating Instructions
Rice Lake continually offers web-based video training on a growing selection
of product-related topics at no cost. Visit www.ricelake.com/webinars.

1
1.0 Introduction
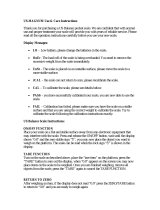
The Rice Lake Digital Wheelchair Scale from Rice Lake is a user-friendly, quality scale, designed for safe
weighing of the handicapped and mobility challenged individuals. Movement compensation technology ensures
sound, accurate weighments. The scale has roll on ramp access and comes in four different configurations:
• Single ramp wheelchair scale
• Single ramp platform wheelchair scale • Dual ramp wheelchair scale
• Dual ramp platform wheelchair scale
The scale has a non-skid rigid platform and two rear heavy duty wheels for easy maneuverability.
Figure 1-1. Digital Wheelchair Scale (single ramp and dual ramp models shown)
The scale is set up to use motion sensing technology, to determine actual weight of a moving patient. The weight
can be displayed in either pounds or kilograms and you can enter a tare weight. The scale operation section on
page 8 of this manual explains the scale operation and how to obtain a tare weight.
The wheelchair scale has a unique folding feature that enables easy transportation and simplifies assembly,
avoiding the need for field wiring and recalibration. All that is required is to open the packaging and unfold the
scale.
Place a known weight on each corner of the scale. The display should illuminate that known weight. If it does
not, trimming will be required. See “Trimming Procedure” on page 28.
This manual can be viewed and downloaded from the Rice Lake Weighing Systems
web site at www.ricelake.com/health. Technical information on these products and
other medical products are available on the Rice Lake Weighing Systems web site.
Rice Lake Weighing Systems is an ISO 9001 registered company.
Model 340-10-2
Model 340-10-7
Model 340-10-3
Model 340-10-8
Internet

2 Wheelchair Scale Technical and Operating Instructions
2.0 Scale Assembly
2.1 Unpacking Your Scale
Place the unopened box in an open area that has ample room for unpacking the scale.
Recommended tools needed to set up your scale include:
• Scissors or a box cutter
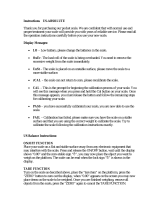
Using scissors or a box cutter, cut the strapping bands that secure the box together. Immediately after opening the
box, visually inspect your scale to ensure all parts are included and undamaged.
Parts contained in the shipping box include:
• The scale
• This manual
• Small box containing AC adaptor, RS-232 cable, and scale feet
Figure 2-1. Box Contents Including the Scale Surrounded by Styrofoam Packing Material
2.2 Repacking
If the Digital Wheelchair Scale must be returned for modification, calibration or repair, it must be properly
packed with sufficient packing materials. Whenever possible, use the original carton when shipping the scale
back.
Damage caused by improper packaging is not covered by the warranty.
Note

Wheelchair Scale Technical and Operating Instructions - Scale Assembly 3
2.3 Setting Up Your Scale
Use the following steps to set up the Digital Wheelchair Scale.
1. Locate the users manual from inside the box and set aside as it will provide instructions on the proper
scale removal and set up.
2. Using two people, remove the scale out of the packaging material that it came in by lifting the scale out
of the box by the scale base as shown in Figure 2-2.
DO NOT lift the scale out of the box by its handle as this can cause the hinges to break or affect the scale
operation.
.
Figure 2-2. Lift the Scale From the Box
3. Move the scale into the area where the weighing process will occur. It’s recommended to place the scale
on a hard, level surface for the most accurate weighments. Thin carpeting is fine but not recommended.
4. Stand the scale on its side as shown in Figure 2-3, so that the plastic packaging material can be removed.
Figure 2-3. Remove Plastic Covering Material
Note

4 Wheelchair Scale Technical and Operating Instructions
2.4 Attaching the Feet to the Scale
The Digital Wheelchair Scale comes with four feet that must be attached to the scale base for proper operation.
The four feet are located in the parts box in the original shipping box. Use the following steps to attach the feet to
the scale.
1. Screw the four round feet clockwise into the scale base as shown in Figure 2-4.
Figure 2-4. Screw Feet Into the Scale Platform
2. There must be adequate clearance between the scale base and the floor so screw each foot out
counterclockwise two full turns. This will ensure that there is enough clearance between the scale base
and the floor.
3. Gently set the scale base down to the floor. There should be minimal clearance between the scale base
and the floor without having the scale base actually touching the floor. Figure 2-5 shows the width of a
finger being slid under the scale base and the floor.
By not having clearance around the scale base will create inaccurate weighments
Figure 2-5. Have a Minimal Amount of Clearance Between the Scale Base and the Floor
4. It’s also important to make sure that the scale is completely level. Gently press down on all corners of the
scale base to ensure that there are no high spots or rocking of the scale base.
An un-level base will produce inaccurate weight readings.
Note
Note

Wheelchair Scale Technical and Operating Instructions - Scale Assembly 5
5. Loosen the handles (shown in Figure 2-6) and set upright as shown in Figure 2-7.
Figure 2-6. Loosen the Durable Hinges to Set Handles Upright
Figure 2-7. Set Scale Handles Upright
6. Tighten the two hinges on the Digital Wheelchair Scale by rotating the two handles. This will secure the
handrail mounted indicator.

6 Wheelchair Scale Technical and Operating Instructions
2.5 Hooking up the AC Power Connections
The Digital Wheelchair Scale has a 120 VAC adaptor or 230 VAC adaptor to use when power is readily available.
The AC power adaptor plugs into the back of the indicator as shown in Figure 2-8.
.
Figure 2-8. LED Light Location
The AC adaptor, when not in use, plugs into the back housing of the indicator for storage. Figure 2-8 shows that
location.
The Digital Wheelchair Scale is capable of running its internal sealed lead-acid rechargeable battery if no
additional power source is available. Battery life is approximately 75 hours. If the LO Bat indicator is showing on
the display, recharge the battery or connect the scale to an AC power source as soon as possible for accurate
weighing.
Battery Charging
When the AC adaptor is connected to a power source, the rechargeable battery goes into recharge mode.
To maintain battery longevity we recommend you charge it on a regular basis rather than waiting until it is
fully discharged.
The LED indicator light on the back of the scale housing will illuminate red during the charging period, and
change over to green when the battery becomes fully charged.
Connect the AC power
source here
LED indicator light
illuminates from red to
green when charged
Store the 120 VAC
adaptor here when
not in use
RS-232 port
connection
Store the 230 VAC
adaptor here when
not in use
Back cover to
indicator
Note

Wheelchair Scale Technical and Operating Instructions - Scale Assembly 7
2.6 Getting Ready to Weigh a Patient
Once the scale is properly unpacked and set up, and prior to weighing a patient, step on the scale to check the
scale that all functions are working correctly. The scale is calibrated from the factory so simply turn on the scale
and step on the scale to get a weight reading. Press the REWEIGH key again to verify that weight.
Figure 2-9. Press The Reweigh Key to Verify Weight

8 Wheelchair Scale Technical and Operating Instructions
3.0 Scale Operation
The display has various front panel keys. They are shown below and their function is described in 3-1.
Figure 3-1. Front Panel Display Keys
The keys on the front panel display are very sensitive so only a gentle pushing motion is required to
obtain results.
The scale has the capability of performing different operations beyond just calculating weight. The various
operating instructions are described below.
3.1 Weighing a Patient
Use the following steps to weigh a person.
1. Press the On-Off/Zero key to turn on the scale and 0.0 will appear on the display.
2. Wheel the patient onto the scale. The display shows WEIGH, then the patient’s weight, and beeps to
indicate the end of the weighing process.
3. To ensure an accurate weighing, press the REWEIGH key.
4. To change the display from Kg to Lb and vice-versa, press the Kg-Lb key.
5. The scale is set to lock in the weight when the weighing process is complete. The weight will remain on
the display even after the patient exits off the scale. To clear the weight, press the On-Off/Zero key.
6. To turn off the scale, press and hold the On-Off/Zero key until OFF appears on the display.
Key Name Function
ON-OFF/ZERO ON-OFF - Switches the scale on or off.
ZERO - Clears weight off the scale and returns it back to zero.
BMI/TARE BMI - Enables the user to access the BMI (Body Max Index) function.
TARE - Used to subtract a weight off the scale ie: wheelchair.
REWEIGH Allows you to reweigh a patient without having them leave the scale.
Kg-Lb/PRINT Allows the user to toggle between kilograms and pounds.
Press this key to print a weight if connected to a printer.
Table 3-1. Key Functions
Caution

Wheelchair Scale Technical and Operating Instructions - Scale Operation 9
3.2 Using the Body Mass Index (BMI) Function
Body mass index (BMI) is the relationship between weight and height associated with body fat and health risk. It
is a reliable indicator of body fatness for people and even though BMI does not measure body fat directly,
research has shown the BMI correlates to direct measures of body fat. BMI is an inexpensive and
easy-to-perform method of screening for weight categories that may lead to health problems for adults.
Calculating BMI is one of the best methods for population assessment of overweight and obesity. Because
calculation requires only height and weight, it is inexpensive and easy to use for clinicians and for the general
public. The calculation is based on the following formulas:
Calculate BMI by dividing weight in pounds (lbs) by height in inches (in) squared and multiplying by a
conversion factor of 703.
Example: weight = 150 lbs, height = 5’5 (65")
Calculation: [150 ÷ (65)2] x 703 = 24.96
The standard weight status categories associated with BMI ranges for adults are shown in the following table.
The following examples show weight ranges, the corresponding BMI ranges and the weight status categories for
a sample height.
Use the following steps in determining the BMI.
1. To use the BMI function, weigh the patient as described under Weighing and then press the BMI key. If
weighing in Lbs, the default height of (5 feet) appears on the display. Use the up or down arrows to
increase the feet height by one foot increments). Press the BMI key again to display inches (default is 7.0
inches) Again, use the up or down arrows to increase or decrease the inches height by 0.5" increments.
Press the BMI key again to accept the inches value. The final height value will be displayed ie: 5-07.5 =
5’ 7.5".
2. If you are weighing in Kgs, the default will be 170.0 cm. Use the up or down arrows to increase or
decrease by 0.5 cm increments.
3. To see the patient’s calculated BMI, press the BMI key again. The BMI appears.
4. To cancel the BMI display, press the BMI key.
BMI Weight Status
Below 18.5 Underweight
18.5 - 24.9 Normal
25.0 - 29.9 Overweight
30.0 and Above Obese
Table 3-2. Standard Weight Status
Height Weight Range BMI Weight Status
5’9” 124 lbs or less Below 18.5 Underweight
125 lbs to 168 lbs 18.5 to 24.9 Normal
169 lbs to 202 lbs 25.0 to 29.9 Overweight
203 lbs or more 30 or higher Obese
Table 3-3. BMI Ranges and Weight Status Example

10 Wheelchair Scale Technical and Operating Instructions
3.3 Using the Tare Function
You can use the tare function for deducting an extra weight (such as a wheelchair, or medical equipment attached
to the patient) in a weighing operation.
To get the most accurate reading, always use the same equipment for pre-weighing (getting the tare
weight) which includes things like the wheelchair footrests, blankets, etc.
Determining a Tare
Use the following steps to use the tare function.
1. With the scale set to 0.0, place the extra load (wheelchair) on the scale. The display shows WEIGH and
then the weight of the wheelchair.
2. Press and hold the TARE key until TARE appears on the display. The display returns to 0.0 and TARE
appears on the left side of the display.
3. Remove the wheelchair from the scale. The weight of the wheelchair appears with a negative symbol to
the left of it.
4. Wheel the patient onto the scale. The display then shows the patient’s weight without the weight of the
wheelchair.
5. The weight of the wheelchair remains stored in memory, so you can continue to weigh patients who are
carrying the same tare weight. For example, when using the same wheelchair for weighing more than
one patient.
6. To cancel the tare weight, press and hold the TARE key until TARE disappears from the display and the
display returns back to 0.0. The tare weight is also cancelled when the scale is turned off.
Entering a Known Tare Manually
Use the following steps to enter a tare without placing that item on the scale. An example of this would be if
you’ve got a patient in a wheelchair and the wheelchair has a known weight (has been tagged) you can enter that
weight manually.
1. With the scale set to 0.0 Lbs (there must be no weight on the scale), press the TARE key. The display will
alternate between a value and the word TARE.
2. To change the value, press and hold the Kg/Lb key until the right most digit is equal to the first digit of the
value you want. Example: If you want 103.5, hold the key until the display is 0.1.
3. To advance to the next digit, press the Kg/Lb key twice quickly. The digit you changed will move left and
the right most digit will again be 0. Again, hold the Kg/Lb key until the right most digit is equal to the
next digit in the numbers you want.
4. Continue as in Step 3 until you are displaying the value you want, then press the TARE key.
5. You can now accurately weigh the patient.
6. To cancel the tare weight, press and hold the TARE key until TARE disappears from the display and the
display returns back to 0.0. The tare weight is also cancelled when the scale is turned off.
Note

Wheelchair Scale Technical and Operating Instructions - Scale Configuration 11
4.0 Scale Configuration
Options and parameter setup are done through the scale configuration section and is used for setting values and
various parameters and options that are essential for the functioning of the system. Entry into this mode is
possible only when the scale is turned off.
4.1 Enabling Configuration or Calibration Modes
Before the scale will enter either the Configuration or Calibration mode, the configuration enable jumper must be
removed.
Access to that jumper is gained by removing the back cover of the indicator. Remove the four back cover
retaining screws as shown on the left side of Figure 4-1. With the cover removed, the jumper can be seen sticking
through the hole in the rear housing (shown in Figure 4-1 - right side). Remove that jumper to gain access to the
configuration and calibration modes.
Figure 4-1. Gain Access to the Configuration/Calibration Enable Jumper on the Back of the Indicator
After configuration or calibration is done, the jumper must be replaced for normal scale operation.
A display of Con En indicates that the jumper is not in place. Put jumper on both pins to return the scale
to normal weigh mode.
4.2 Configuration Mode
To get into the configuration mode, turn the scale off and remove the configuration jumper as shown in
Figure 4-1. Turn the scale on. While Start is displayed, press and hold the Kg-Lb key until IDENT appears on the
display.
To change from one parameter to the next, press the REWEIGH key once.
To change the value of the parameter, use the Kg-Lb key.
From the SAVE phase: to save the configuration data, press the REWEIGH key. DONE appears for one or two
seconds followed by Start and the display enter into weighing mode and is ready to start the weighing process. To
exit with saving changes, press the Lb/Kg key.
Remove retaining screws x 4 (only 2 shown) Remove jumper to gain access to
configuration and calibration modes
Note

12 Wheelchair Scale Technical and Operating Instructions
Various parameters can be set up while in programming mode.
Figure 4-2. Programming Mode Menu Structure
4.3 Numeric Data Entry
Use the Kg-Lb key to change the numeric data entry while setting up the various configuration parameters and
while in calibration mode.
Use the following steps:
1. Press and hold the Kg-Lb key, the rightmost digit on the display will begin to increment.
2. Release the Kg-Lb key to stop the increments.
3. A double click on the Kg-Lb key will cause the right hand digit to move one place to the left.
4. Repeat steps 1-3 until the desired number is reached.
Power Off
Power On-Off
START Kg-Lb Key
0.000
Software Version
Round xx
Full xxx
At
Press and
hold
OP1=X
SAVE
T-OFFX
DONE
OP2=X
OP4=X
OP3=X
OP5=X
OP7=X
OP6=X
OP8=X
Press and
hold the
Kg-Lb key
to advance
to option
2 through
option 8.
= DEF =
A TOLXX
A LEN X
MESS
A TImE XX
BAUD XX
Drange
Software ID SET=X
OP9=X
OP10=X
Limit 0.0

Wheelchair Scale Technical and Operating Instructions - Scale Configuration 13
The following table lists the various display messages and sequence when setting up the scale.
<-> means that you can toggle between two values.
Step Function Display Available Parameters
1*With the scale turned off, remove the
confiiguration jumper as shown in
Figure 4-1.
Allows the scale to enter into either
configuration or calibration mode.
2Enters into programming mode
*With the scale turned off,
simultaneously press the On-Off/Zero
and Kg-Lb key.
StArt Scale automatically advances to Step 3.
3Indentifies the software ID IdEnt<->11007 Press the REWEIGH key to advance to the
next step.
4Identifies software version Id<->11387 Press the REWEIGH key to advance to the
next step.
5Allows selection of decimal point
setting
dOt<->000.0
Default = 0.0
To change the position of the decimal point,
press the Kg-Lb key to toggle through the
various options. To advance to the next step,
press the REWEIGH key.
6This indicates the maximum allowed
weight. Any weight above this value will
cause StOP to appear on the display
while in the weighing mode.
FULL<->XX.XXX
Default= 600 Lb
This value is
dependent on the
model you have.
Refer to the serial number
label on your scale and set
appropriately.
Use the numeric data entry (See “Numeric
Data Entry” on page 12.) to change the
value. To advance to the next step, press the
REWEIGH key.
7This limit defines the start of the
weighing threshold to compensate for
a key press during the Tare function.
Limit<->0.0 Use the numeric data entry (See “Numeric
Data Entry” on page 12.) to see the
optimum weight value of 5 lbs.
To advance to the next step, press the
REWEIGH key.
8Display divisions rOUnd<->XXXX
Default = 0.2 Lb
To change the display divisions, press the
Kg-Lb key to toggle through the various
options.
0.2, 0.5, 1.0, 2.0, 5.0, 10.0, 20.0.
To advance to the next step, press the
REWEIGH key.
9Double ranges limit drAnGe <-> 0 This parameter is preset from the factory. To
advance to the next step, press the
REWEIGH key.
10 Weight algorithm initial tolerance A tOL <-> 10 This parameter is preset from the factory. To
advance to the next step, press the
REWEIGH key.
11 Weight algorithm initial exponent A LEn <-> 8 This parameter is preset from the factory. To
advance to the next step, press the
REWEIGH key.
12 Weight algorithm maximal exponent A t INE <-> 10 This parameter is preset from the factory. To
advance to the next step, press the
REWEIGH key.
Table 4-1. Configuration Mode Menu
Note
Note

14 Wheelchair Scale Technical and Operating Instructions
13 Message style on weight algorithm MESS <-> WEIGH This displays the message that will show on
the indicator display. To change the
message, press the Kg-Lb key.
WEIGH,
LIVE,
- - - - - -
To advance to the next step, press the
REWEIGH key.
14 This allows for setting the baud rate of
the RS-232 connection
BAUd <->
Default - 9600
To change the baud rate, use the numeric
data entry (See “Numeric Data Entry” on
page 12.)
To advance to the next step, press the
REWEIGH key.
15 Optional features
Option 1 allows the selection of unit of
measure (UOM) in calibration and
programming.
OP1 = 1Hold the Kg-Lb key for browsing through
the options. Double click on the Kg-Lb key
to change the options value or
to advance to the next step, press the
REWEIGH key.
OP1 = Unit of measure (UOM) in calibration
and programming.
0=Kg
1=Lb
Option 2 allows the scale to work only
in Kg.
OP2 = 0Hold the Kg-Lb key for browsing through
the options. Double click on the Kg-Lb key
to change the options value or
to advance to the next step, press the
REWEIGH key.
0=Disable
1= Enable
This option works only if Option 3 is disabled
Option 3 allows the scale to work only
in Lb.
OP3 = 0Hold the Kg-Lb key for browsing through
the options. Double click on the Kg-Lb key
to change the options value or
to advance to the next step, press the
REWEIGH key.
0=Disable
1=Enable
Option 4, the scale must be stable to
show a Kg or Lb weight reading. You
can enable or disable this.
OP4 = 0Hold the Kg-Lb key for browsing through
the options. Double click on the Kg-Lb key
to change the options value or
to advance to the next step, press the
REWEIGH key.
0=Disable
1=Enable
Won’t show lb or kg until the
scale is at a standstill.
Option 5 allows for live or dynamic
weighing
OP5 = 0Hold the Kg-Lb key for browsing through
the options. Double click on the Kg-Lb key
to change the options value or
to advance to the next step, press the
REWEIGH key.
0=Disable
1=Enable
Step Function Display Available Parameters
Table 4-1. Configuration Mode Menu
Note

Wheelchair Scale Technical and Operating Instructions - Scale Configuration 15
Option 6 allows you to either enable or
disable the hold function on the scale
OP6 = 1Hold the Kg-Lb key for browsing through
the options. Double click on the Kg-Lb key
to change the options value or
to advance to the next step, press the
REWEIGH key.
0=Disable
1=Enable
Option 7 allows you to either enable or
disable the baby scale function.
OP7=0Hold the Kg-Lb key for browsing through
the options. Double click on the Kg-Lb key
to change the options value or
to advance to the next step, press the
REWEIGH key.
0=Disable
1=Enable
Leave set to 0
Option 8 allows you to choose
between 9 volts and 6 volts
OP8 = 1Hold the Kg-Lb key for browsing through
the options. Double click on the Kg-Lb key
to change the options value or
to advance to the next step, press the
REWEIGH key.
0=9 volts
1=6 volts
Leave set to 1
Option 9 allows you to select the
communications protocol.
OP9 = 1Hold the Kg-Lb key for browsing through
the options. Double click on the Kg-Lb key
to change the options value or
to advance to the next step, press the
REWEIGH key.
0= escape
1= standard protocol
Option 10 allows you to enable the
user menu.
OP10 = 1Hold the Kg-Lb key for browsing through
the options. Double click on the Kg-Lb key
to change the options value or
to advance to the next step, press the
REWEIGH key.
0= enable
1= disable
16 Set Option defaults Set < - > 1To change, press the Kg-Lb key.
0 - default
Options = (OPx)
1 = US default (US defaults are OP1-1,
OP2-0, OP3-0, OP4-0, OP5-0, OP6-1,
OP-7-0, OP8-1, OP9-1, OP10-1).
2 = European 1 default
3 = European 2 default
9 = Used if OP1 through OP10 have been
changed to something other than the factory
default settings.
Always set to 1 or 9 for US
indicators. To advance to the
next step, press the REWEIGH
key.
Step Function Display Available Parameters
Table 4-1. Configuration Mode Menu
Note
Note
Note

16 Wheelchair Scale Technical and Operating Instructions
4.4 Reset To Factory Defaults
The configuration parameters may be reset to factory defaults while in the configuration mode. To do so, enter
the configuration mode. Press the REWEIGH key once to advance to displaying the software version (ID <->
11305). Press and hold the BMI key until =DEF= is displayed. At this point, if you wish to perform the default
function, press the REWEIGH key and the scale will show DONE, then it will restart. If you do not want to perform
the default function, press the ON/OFF key.
After performing the default function, the scale will require re-calibration. In addition, the scale will be set
up to a capacity of 600 lbs. The capacity varies by model - refer to the serial label on your scale and
reconfigure the capacity (FULL) and display divisions (rOUnd) as necessary in the configuration menu.
17 Determines the automatic shut off time
when the scale is not in use. Options
are between one and 20 minutes.
This is used when the unit is battery
operated.
t-OFF <-> 5Press and hold the Kg-Lb key to scroll
through the furthest right hand digit on the
display (0-9). If you want a value from 10 to
19, with the display sitting at 1, double press
the Kg-Lb key and 10 appears. Press and
hold the Kg-Lb key to begin scrolling 10-19.
If you want a value of 20, with the display
sitting at 2, double press the Kg-Lb key and
20 will appear.
To advance to the next step, press the
REWEIGH key.
18 StArt or SAvE If no changes were made in the parameters
the display will automatically show StArt and
then returns to normal weighing mode.
If a parameter was changed, the display will
show SAvE. To save changes made, press
the REWEIGH key. To return to weigh mode
without saving changes, press the Kg-Lb
key.
19 Con En Replace the configuration jumper.
* Indicates procedure to perform.
Step Function Display Available Parameters
Table 4-1. Configuration Mode Menu
/