Page is loading ...

EINLEGEN DER BATTERIEN UND ANWEISUNGEN
1. Drei AAA-Batterien sind erforderlich, nicht enthalten.
2. Die Polarität beim Einlegen der Batterien beachten.
3. Alte und neue Batterien nicht zusammen verwenden.
4. Nicht wiederaufl adbare Batterien nicht aufl aden.
5. Keine wiederaufl adbaren Batterien verwenden.
6. Verschiedene Batterien nicht zusammen verwenden: Alkali-,
Standard- (Zink-Kohle) oder wiederaufl adbare Batterien.
7. Nur Batterien derselben oder ähnlichen Art verwenden
8. Leere Batterien aus dem Gerät entfernen.
9. Die Anschlussklemmen nicht
kurzschließen.
10. Zur Verhinderung von Korrosion und
möglichen Schäden des Produkts,
Batterien aus dem Gerät entnehmen,
wenn es länger als zwei Wochen nicht
benutzt wird.
11. Reinigungsanleitung: Reinigen Sie das
Produkt mit einem trockenen oder
feuchten Tuch, tauchen Sie das Gerät
nicht in bzw. besprühen Sie es nicht mit
Wasser oder anderen Flüssigkeiten
3. Zeigen Sie dem Kind die drei Positionen des Schalters am
Elektrowerkzeug, Rechtslauf, Aus und Linkslauf.
4. Stecken Sie eine Schraube in ein Loch des Spielfelds und lassen Sie
das Kind die Schraube mit dem Rechtslauf festdrehen. Zeigen Sie
ihm, wie man die Schraube mit dem Linkslauf wieder lockert.
MUSTER
Ermutigen Sie das Kind, mit das Elektrowerkzeug und den Schrauben zu
spielen, bevor Sie ihm die Muster zeigen. Dadurch kann das Kind nach
Lust und Laune Schrauben festdrehen oder einfach Muster und Bilder
erstellen. Wenn Sie das Gefühl haben, dass das Kind nach Mustern
arbeiten kann, wählen Sie eines der leichten Muster aus und legen
Sie es neben das Spielfeld, um die Zuordnungsfähigkeit des Kindes
zu unterstützen. Ermutigen Sie das Kind dazu, die richtige Position der
Schrauben zu ermitteln, indem es die Anzahl der leeren Löcher zählt.
ContEntS
EI-4112
Ages 3+
Grades Pre-K+
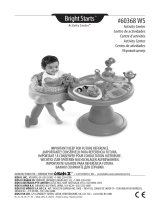
With the Design & Drill Activity Center, children
design their own learning fun! The sturdy board,
big bolts, colorful activity cards, and realistic tools
encourage young learners to develop a variety of
important skills, from color recognition and counting
to fi ne-motor skills and following directions.
Power drill
Activity board
Wrench
Screwdriver handle
2 drill bits (fl at tip,
Phillips)
120 bolts (in 5 colors)
Developed in Southern California by Educational Insights.
© Educational Insights, Gardena, CA (U.S.A.). All rights reserved.
Learning Resources Ltd., Bergen Way, King’s Lynn, Norfolk,
PE30 2JG, UK. Please retain this package. Made in China.
www.educationalinsights.com

GETTING STARTED
1. Insert three AA batteries into the drill’s battery compartment
following the directions on the back cover of this guide.
2. Show the child the three different drill bits (flat tip, Phillips, and
socket) and encourage him or her to experiment with how each
one fits into or over the head of one of the bolts.
USING THE DESIGN & DRILL
ACTIVITY CENTER
3. Help the child snap one of the bits into the drill.
4. Point out the three positions of the power switch—forward, off, and
reverse. Let the child experiment with the different positions.
5. Place one of the bolts into a hole in the activity board and have the
child use the forward position of the drill to screw it in.
6. Demonstrate to the child how to use the drill’s reverse position to
remove the bolt.
7. Let the child practice using the drill, bolts, and activity board—
changing the drill bit as he or she wishes.
8. For some kid-powered fun, show the child how to snap one of
the drill bits into the screwdriver. Encourage the child to use the
screwdriver and wrench to screw in and remove the bolts.
Flat tip bit Phillips bit Socket bit
ACTIVITY CARDS
Before presenting the activity cards, encourage the child to play
freely with the board, bolts, and different tools—screwing the bolts in
randomly, or creating simple patterns and pictures.
When you feel the child is ready to work with the
activity cards, choose one of the simple pattern
cards. Place it next to the activity board to develop
matching skills. Help the child to develop a
strategy for working with the card. For example,
on some cards it is helpful to begin at the top of
the card, or at the right-hand side, and work to
the opposite end of each row. Encourage the child to pay close
attention to the relative positions of the bolts by counting the number
of blank holes. You can help by asking questions such as, “What is
next to the yellow bolt?” “What is under the red bolt?” “What is above
the green bolt?” “How many blue bolts are there in that row?”
As children gain more experience with making
the patterns on the cards, introduce the cards with
more complex designs and the picture cards.
You can also use the picture cards to encourage
language development by discussing the details
in each picture, or having a child tell you a story
about the design he or she is working on.
MAKE-YOUR-OWN CARDS
Reproduce the blank pattern card to create your
own patterns for children to follow. Children’s
coloring books are a good source of simple, fun
picture ideas. You can also give children copies of
the pattern card to plan their own patterns, such
as a favorite animal or toy. If you wish, laminate
the cards and add them to your collection of pattern cards for other
children to use.
©2003 Educational Insights, Inc. Card 20 grid
©2003 Educational Insights, Inc. Card 18 butterfly
©2003 Educational Insights, Inc. Card 4
Tip: Some children find it helpful to say the pictured pattern
aloud as they work, for example, “Green, green, yellow.”

INTRODUCCI N
1. Coloque las baterías dentro del compartimento de baterías de la
Herramienta Eléctrica (ver Instalación de Baterías e Instrucciones).
2. Muestre al niño las tres brocas distintas (punta plana, Phillips y de
boquilla). Inserte una broca dentro del Destornillador Eléctrico.
CENTRO DE ACTIVIDADES
TALADRE Y CREE’’
BATTERY INSTALLATION anD INSTRUCTIONS
1. Requires three AA batteries, not included.
2. Batteries must be inserted with the correct polarity.
3. Do not mix old and new batteries.
4. Non-rechargeable batteries are not to be recharged.
5. Do not use rechargeable batteries.
6. Do not mix different types of batteries: alkaline, standard
(carbon zinc), or rechargeable batteries.
7. Only batteries of the same or
equivalent type are to be used.
8. Remove exhausted batteries
from the unit.
9. The supply terminals are not to
be short-circuited.
10. To prevent corrosion and
possible damage to the product,
it is recommended to remove
the batteries from the unit if it
will not be used for more than
two weeks.
11. Cleaning instructions: Clean
product with a damp or dry
cloth—do not immerse or spray
any liquid or water on product.
Broca de punta plana Broca de boquillaBroca Phillips
INSTALACI N DE BATER AS E INSTRUCCIONES
1. Requiere tres baterías AA (no incluidas).
2. Las baterías se deben colocar con la polaridad correcta.
3. No mezcle las baterías usadas con las nuevas.
4. Las baterías recargables no se recargarán.
5. No use baterías recargables.
6. No mezcle los diferentes tipos de baterías: alcalinas, regulares
(carbono-cinc), o baterías recargables.
7. Solo utilice baterías del mismo
tipo o equivalentes.
8. Retire las baterías usadas de la
unidad.
9. Los terminales de energía no
sufrirán cortos circuitos.
10. Para evitar la corrosión y
posible daño del producto, se
recomienda retirar las baterías
de la unidad cuando no la utilice
por más de dos semanas.
11. Instrucciones de limpieza:
Limpie el producto con un paño
húmedo o seco. No rocíe líquido
o agua sobre el producto.
3. Señale las tres posiciones del interruptor de encendido de la
Herramienta Eléctrica (avance, apagado y reversa).
4. Coloque uno de los tornillos dentro de un agujero del tablero de
actividades y permita que el niño utilice la posición “avanzar” de
la Herramienta Eléctrica para entornillarlo. Demuestre el modo de
utilizar la posición “reversa” para retirar el tornillo.
PATRONES
Antes de presentar los patrones, anime al niño a jugar libremente
con el Destornillador Eléctrico y tornillos, entornillando los tornillos
aleatoriamente o creando patrones y fi guras sencillas.
Cuando considere que el niño está listo para trabajar con patrones,
seleccione uno de los patrones simples y colóquelo al lado del tablero
para desarrollar habilidades de correspondencia. Motive al niño a
que preste mucha atención a las posiciones relativas de los tornillos
contando los agujeros vacíos.
/