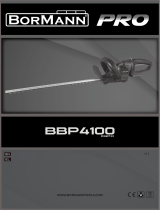
Black & Decker BDHT185ST1 Owner's manual

Category
Power tools
Type
Owner's manual

This manual is also suitable for

www.blackanddecker.eu
GTC18452PC
GTC18502PC
GTC18504PC
BDHT185ST1
GTC18502PST
www.blackanddecker.eu
GTC18452PC
GTC18502PC
GTC18504PC
1
3
2
6
5
7
4
2
3
DC
8 9
9
A B
E
F
2
3
J
K L
0-15
I
G
H
4
ENGLISH
(Original instructions)
Intended use
Your BLACK+DECKER
TM
GTC18452PC, GTC18502PC,
GTC18504PC, BDHT185ST1 & GTC18502PST hedge trim-
mer have been designed for trimming hedges, shrubs and
brambles. This tool is intended for consumer use only.
Safety instructions
General power tool safety warnings
@
Warning! Read all safety warnings and all
instructions. Failure to follow the warnings and
instructions listed below may result in electric
shock, re and/or serious injury.
Save all warnings and instructions for future reference.
The term "power tool" in the warnings refers to your mains
operated (corded) power tool or battery operated (cordless)
power tool.
1. Work area safety
a. Keep work area clean and well lit. Cluttered or dark
areas invite accidents.
b. Do not operate power tools in explosive atmospheres,
such as in the presence of ammable liquids, gases
or dust. Power tools create sparks which may ignite the
dust or fumes.
c. Keep children and bystanders away while operating a
power tool. Distractions can cause you to lose control.
2. Electrical safety
a. Power tool plugs must match the outlet. Never modify
the plug in any way. Do not use any adapter plugs
with earthed (grounded) power tools. Unmodied plugs
and matching outlets will reduce risk of electric shock.
b. Avoid body contact with earthed or grounded
surfaces such as pipes, radiators, ranges and
refrigerators. There is an increased risk of electric shock
if your body is earthed or grounded.
c. Do not expose power tools to rain or wet conditions.
Water entering a power tool will increase the risk of
electric shock.
d. Do not abuse the cord. Never use the cord for
carrying, pulling or unplugging the power tool. Keep
cord away from heat, oil, sharp edges or moving
parts. Damaged or entangled cords increase the risk of
electric shock.
e. When operating a power tool outdoors, use an
extension cord suitable for outdoor use. Use of a cord
suitable for outdoor use reduces the risk of electric shock.
f. If operating a power tool in a damp location is
unavoidable, use a residual current device (RCD)
protected supply.
Use of an RCD reduces the risk of electric shock.
3. Personal safety
a. Stay alert, watch what you are doing and use common
sense when operating a power tool. Do not use a
power tool while you are tired or under the inuence
of drugs, alcohol or medication. A moment of inattention
while operating power tools may result in serious personal
injury.
b. Use personal protective equipment. Always wear eye
protection. Protective equipment such as dust mask,
non-skid safety shoes, hard hat, or hearing protection
used for appropriate conditions will reduce personal
injuries.
c. Prevent unintentional starting. Ensure the switch is in
the off-position before connecting to power source
and/or battery pack, picking up or carrying the tool.
Carrying power tools with your nger on the switch or
energising power tools that have the switch on invites
accidents.
d. Remove any adjusting key or wrench before turning
the power tool on. A wrench or a key left attached to a
rotating part of the power tool may result in personal injury.
e. Do not overreach. Keep proper footing and balance at
all times. This enables better control of the power tool in
unexpected situations.
f. Dress properly. Do not wear loose clothing or
jewellery. Keep your hair, clothing and gloves away
from moving parts. Loose clothes, jewellery or long hair
can be caught in moving parts.
g. If devices are provided for the connection of dust
extraction and collection facilities, ensure these are
connected and properly used. Use of dust collection can
reduce dust-related hazards.
4. Power tool use and care
a. Do not force the power tool. Use the correct power
tool for your application. The correct power tool will do
the job better and safer at the rate for which it was
designed.
b. Do not use the power tool if the switch does not turn it
on and off. Any power tool that cannot be controlled with
the switch is dangerous and must be repaired.
c. Disconnect the plug from the power source and/or the
battery pack from the power tool before making any
adjustments, changing accessories, or storing power
tools. Such preventive safety measures reduce the risk of
starting the power tool accidentally.
5
ENGLISH
(Original instructions)
d. Store idle power tools out of the reach of children and
do not allow persons unfamiliar with the power tool or
these instructions to operate the power tool. Power
tools are dangerous in the hands of untrained users.
e. Maintain power tools. Check for misalignment or
binding of moving parts, breakage of parts and any
other condition that may affect the power tools
operation. If damaged, have the power tool repaired
before use. Many accidents are caused by poorly
maintained power tools.
f. Keep cutting tools sharp and clean. Properly
maintained cutting tools with sharp cutting edges are less
likely to bind and are easier to control.
g. Use the power tool, accessories and tool bits etc. In
accordance with these instructions, taking into
account the working conditions and the work to be
performed. Use of the power tool for operations different
from those intended could result in a hazardous situation.
5. Battery tool use and care
a. Recharge only with the charger specied by the
manufacturer. A charger that is suitable for one type of
battery pack may create a risk of re when used with
another battery pack.
b. Use power tools only with specically designated
battery packs. Use of any other battery packs may create
a risk of injury and re.
c. When battery pack is not in use, keep it away from
other metal objects, like paper clips, coins, keys,
nails, screws, or other small metal objects, that can
make a connection from one terminal to another.
Shorting the battery terminals together may cause burns
or a re.
d. Under abusive conditions, liquid may be ejected from
the battery; avoid contact. If contact accidentally
occurs, ush with water. If liquid contacts eyes,
additionally seek medical help. Liquid ejected from the
battery may cause irritation or burns.
6. Service
a. Have your power tool serviced by a qualied repair
person using only identical replacement parts. This
will ensure that the safety of the power tool is maintained.
Additional power tool safety warnings
@
Warning! Additional safety warnings for hedge
trimmers
u Keep all parts of the body away from the cutter blade.
Do not remove cut material or hold material to be cut
when blades are moving. Make sure the switch is off
when clearing jammed material. A moment of inattention
while operating the tool can result in serious personal
injury.
u Carry the hedge trimmer by the handle with the cutter
blade stopped. When transporting or storing the
hedge trimmer always t the cutting device cover.
Proper handling of the hedge trimmer will reduce possible
personal injury from the cutter blades.
u Hold the power tool by insulated gripping surfaces
only, because the cutter blade may contact hidden
wiring. Cutter blades contacting a "live" wire may make
exposed metal parts of the power tool "live" and could give
the operator an electric shock.
u The intended use is described in this instruction manual.
The use of any accessory or attachment or performance
of any operation with this tool other than those recom-
mended in this instruction manual can present a risk of
personal injury and/or damage to property.
u Do not carry the tool with your hands on the front handle,
switch or the trigger switch unless the battery has been
removed.
u If you have not used a hedge trimmer before, preferably
seek practical instruction by an experienced user in addi-
tion to studying this manual.
u Never touch the blades while the tool is running.
u Never attempt to force the blades to come to a standstill.
u Do not put the tool down until the blades have come to a
complete standstill.
u Regularly check the blades for damage and wear. Do not
use the tool when the blades are damaged.
u Take care to avoid hard objects (e.g. metal wire, railings)
when trimming. Should you accidentally hit any such
object, immediately switch the tool off and check for any
damage.
u Should the tool start to vibrate abnormally, immediately
switch it off and remove the battery then check for any
damage.
u If the tool stalls, immediately switch it off. Remove the
battery before attempting to remove any obstructions.
u After use, place the blade sheath supplied over the
blades. Store the tool, making sure that the blade is not
exposed.
u Always ensure that all guards are tted when using the
tool. Never attempt to use an incomplete tool or a tool with
unauthorised modications.
u Never allow children to use the tool.
u Be aware of falling debris when cutting the higher sides of
a hedge.
u Always hold the tool with both hands and by the handles
provided.
6
ENGLISH
(Original instructions)
Safety of others
u This appliance can be used by children aged from 8 years
and above and persons with reduced physical, sensory or
mental capabilities or lack of experience and knowledge
if they have been given supervision or instruction concern-
ing use of the appliance in a safe way and understand the
hazards involved.
u Children shall not play with the appliance. Cleaning and
user maintenance shall not be made by children without
supervision.
Residual risks
Additional residual risks may arise when using the tool which
may not be included in the enclosed safety warnings. These
risks can arise from misuse, prolonged use etc.
Even with the application of the relevant safety regulations
and the implementation of safety devices, certain residual
risks can not be avoided. These include:
u Injuries caused by touching any rotating/moving parts.
u Injuries caused when changing any parts, blades or ac-
cessories.
u Injuries caused by prolonged use of a tool. When using
any tool for prolonged periods ensure you take regular
breaks.
u Impairment of hearing.
u Health hazards caused by breathing dust developed when
using your tool (example:- working with wood, especially
oak, beech and MDF.)
Vibration
The declared vibration emission values stated in the technical
data and the declaration of conformity have been measured
in accordance with a standard test method provided by
EN 60745 and may be used for comparing one tool with
another. The declared vibration emission value may also be
used in a preliminary assessment of exposure.
Warning! The vibration emission value during actual use of
the power tool can differ from the declared value depending
on the ways in which the tool is used. The vibration level may
increase above the level stated.
When assessing vibration exposure to determine safety
measures required by 2002/44/EC to protect persons regularly
using power tools in employment, an estimation of vibration
exposure should consider, the actual conditions of use and the
way the tool is used, including taking account of all parts of the
operating cycle such as the times when the tool is switched off
and when it is running idle in addition to the trigger time.
Labels on tool
The following pictograms are shown on the tool along with the
date code:
:
Warning! To reduce the risk of injury, the user
must read the instruction manual.
O
Wear safety glasses or goggles when operat-
ing this tool.
N
Wear ear protection when operating this tool.
R
Do not expose the tool to rain or high humidity.
Directive 2000/14/EC guaranteed sound
power.
Switch the tool off. Before performing any
maintenance on the tool, remove the battery
from the tool.
Electrical safety
Additional safety instructions for batteries and
chargers
Batteries
u Never attempt to open for any reason.
u Do not expose the battery to water.
u Do not store in locations where the temperature may
exceed 40 °C.
u Charge only at ambient temperatures between 10 °C and
40 °C.
u Charge only using the charger provided with the tool.
u When disposing of batteries, follow the instructions given
in the section "Protecting the environment".
p
Do not attempt to charge damaged batteries.
Chargers
u Use your BLACK+DECKER charger only to charge the
battery in the tool with which it was supplied. Other batter-
ies could burst, causing personal injury and damage.
u Never attempt to charge non-rechargeable batteries.
u Have defective cords replaced immediately.
u Do not expose the charger to water.
u Do not open the charger.
98
7
ENGLISH
(Original instructions)
u Do not probe the charger.
$
The charger is intended for indoor use only.
+
Read the instruction manual before use.
#
Your charger is double insulated; therefore no
earth wire is required. Always check that the
mains voltage corresponds to the voltage on the
rating plate. Never attempt to replace the charger
unit with a regular mains plug.
u If the supply cord is damaged, it must be replaced by the
manufacturer or an authorised BLACK+DECKER Service
Centre in order to avoid a hazard.
Features
This tool includes some or all of the following features.
1. Trigger switch
2. Lock off button
3. Switch handle
4. POWERCOMMAND button
5. Blade guard
6. Dual switch bail handle
7. Blade
8. Battery
9. Charger
Assembly
Warning! Before assembly, remove the battery from the tool
t the blade sheath over the blades.
Warning! Before assembly, make sure that the tool is
switched off and unplugged and that the blade sheath is tted
over the blades.
Warning! Never use the tool without the guard.
Charging procedure
Black+decker chargers are designed to charge Black+decker
battery packs.
u Plug the charger into an appropriate outlet before inserting
the battery pack.
u Insert the battery pack into the charger as shown in gure
A.
u The green LED will ash indicating that the battery is be-
ing charged.
u The completion of charge is indicated by the green LED
remaining on continuously. The pack is fully charged and
may be used at this time or left on the charger.
Note: Recharge discharged batteries as soon as possible
after use or battery life may be greatly diminished. For longest
battery life, do not discharge batteries fully. It is recommended
that the batteries be recharged after each use.
Leaving the battery in the charger
The charger and battery pack can be left connected with the
LED glowing indenitely. The charger will keep the battery
pack fresh and fully charged.
Important charging notes
u Longest life and best performance can be obtained if
the battery pack is charged when the air temperature is
between 65°F and 75°F (18°- 24°C). DO NOT charge the
battery pack in an air temperature below +40°F (+4.5°C),
or above +105°F (+40.5°C). This is important and will
prevent serious damage to the battery pack.
u The charger and battery pack may become warm to touch
while charging. This is a normal condition, and does not
indicate a problem. To facilitate the cooling of the battery
pack after use, avoid placing the charger or battery pack
in a warm environment such as in a metal shed, or an
uninsulated trailer.
u If the battery pack does not charge properly:
u Check current at receptacle by plugging in a lamp or
other appliance.
u Check to see if receptacle is connected to a light switch
which turns power off when you turn out the lights.
u Move charger and battery pack to a location where the
surrounding air temperature is approximately 65°F
- 75°F (18°- 24°C).
u If charging problems persist, take the tool, battery pack
and charger to your local service center.
u The battery pack should be recharged when it fails to
produce sufcient power on jobs which were easily done
previously. DO NOT CONTINUE to use under these
conditions. Follow the charging procedure. You may also
charge a partially used pack whenever you desire with no
adverse affect on the battery pack.
u Foreign materials of a conductive nature such as, but
not limited to, steel wool, aluminium foil, or any buildup
of metallic particles should be kept away from charger
cavities. Always unplug the charger from the power supply
when there is no battery pack in the cavity. Unplug charger
before attempting to clean.
u Do not freeze or immerse charger in water or any other
liquid.
Warning! Do not allow any liquid to get inside charger. Never
attempt to open the battery pack for any reason. If the plastic
housing of the battery pack breaks or cracks, return to a
service center for recycling.
Installing and removing the battery pack from the
tool
Warning! Make certain the lock-off button is engaged to
prevent switch actuation before removing or installing battery.
8
ENGLISH
(Original instructions)
To install battery pack
u Insert battery (8) into tool until an audible click is heard
(Figure. B)
u Ensure battery pack is fully seated and fully latched into
position.
To remove battery pack
u Depress the battery release button as shown in gure C
and pull battery pack out of tool.
Assembly instructions
Warning! Make certain the battery is removed before assem-
bly or disassembly of any parts.
Assembly tools required (not supplied):- phillips screw-
driver.
Attaching guard and bail handle to trimmer
Warning! Only use with handle and guard properly assembled
to hedge trimmer. The use of the hedge trimmer without
the proper guard or handle provided may result in serious
personal injury.
The trimmer is shipped with the guard and bail handle at-
tached with a plastic zip tie.
To assemble to trimmer:
u Cut the plastic zip tie.
u Remove the six screws that are partially run into the trim-
mer housing (Figure D).
u Slide the guard (5) onto the front of the trimmer housing
as shown in gure E
u Insert two of the six screws into the openings on the sides
of the guard and tighten securely.
u Slide the bail handle (6) onto the front of the trimmer hous-
ing behind the guard as shown in gure F.
u Insert the remaining four screws into the openings on the
sides of the bail handle and tighten securely.
Operation
u To turn the unit on, push the lock off button (2) down,
squeeze the trigger (1) and depress the dual switch bail
handle(6), as shown in gure G. Once the unit is running,
you may release the lock-off button. In order to keep the
unit running you must continue to squeeze the trigger.
Warning! Never attempt to lock a switch in the on position.
Trimming Instructions
u Maintain proper footing and balance and do not overreach.
Wear safety goggles, non-skid footwear when trimming.
Hold the unit rmly in both hands and turn the unit ON.
Always hold the trimmer, as shown in the illustrations in
this manual, with one hand on the switch handle and one
hand on the bail handle (gure H). Never hold the unit by
the blade guard.
Trimming new growth (Fig. I)
u A wide, sweeping motion, feeding the blade teeth through
the twigs is most effective. A slight downward tilt of the
blade, in the direction of motion gives the best cutting.
Warning! Do not cut stems greater than 19mm.
Use the trimmer only for cutting normal shrubbery around
houses and buildings.
Level hedges (Fig. J)
u To obtain exceptionally level hedges a piece of string can
be stretched along the length of the hedge as a guide.
Side trimming hedges (Fig. K)
u Hold the trimmer as shown and begin at the bottom and
sweep up.
POWERCOMMAND
If you encounter a jam, depress the POWERCOMMAND
button (4) shown in gure l. The blades will move back and
forth in a slower, more forceful rhythm to help cut through dif-
cult branches. Release the button to return to normal hedge
trimming usage.
Note: Once the button is released, the blades will immediately
return to full speed.
Note: The blades will stop when the button is held for 15 sec-
onds. To reengage the POWERCOMMAND feature, release
the button and depress it again. DO NOT continuously hold
the POWERCOMMAND button during normal hedge trimming.
Maintenance
Your BLACK+DECKER corded/cordless appliance/tool has
been designed to operate over a long period of time with a
minimum of maintenance. Continuous satisfactory operation
depends upon proper tool care and regular cleaning.
Warning! Before performing any maintenance on corded/
cordless power tools:
u Switch off and unplug the appliance/tool.
u Or switch off and remove the battery from the appliance/
tool if the appliance/tool has a separate battery pack.
u Or run the battery down completely if it is integral and then
switch off.
u Unplug the charger before cleaning it. Your charger does
not require any maintenance apart from regular cleaning.
u Regularly clean the ventilation slots in your appliance/tool/
charger using a soft brush or dry cloth.
u Regularly clean the motor housing using a damp cloth. Do
not use any abrasive or solvent-based cleaner.
u After use, carefully clean the blades. After cleaning, apply
a lm of light machine oil to prevent the blades from rust-
ing.
9
ENGLISH
(Original instructions)
The cutting blades are made from high quality, hardened steel
and with normal usage, they will not require resharpening.
However, if you accidentally hit a wire fence, stones, glass or
other hard objects, you may put a nick in the blade. There is
no need to remove this nick as long as it does not interfere
with the movement of the blade.
If it does interfere, remove the battery and use a ne toothed
le or sharpening stone to remove the nick. If you drop the
trimmer, carefully inspect it for damage. If the blade is bent,
housing cracked, or handles broken or if you see any other
condition that may affect the trimmer’s operation contact your
local BLACK+DECKER Service Center for repairs before
putting it back into use. Fertilizers and other garden chemicals
contain agents which greatly accelerate the corrosion of
metals. Do not store the unit on or adjacent to fertilizers or
chemicals. With the battery removed, use only mild soap and
a damp cloth to clean the unit. Never let any liquid get inside
the unit; never immerse any part of the unit into a liquid. Pre-
vent the blades from rusting by applying a lm of light machine
oil after cleaning.
Mains plug replacement (U.K. & Ireland only)
If a new mains plug needs to be tted:
u Safely dispose of the old plug.
u Connect the brown lead to the live terminal in the new
plug.
u Connect the blue lead to the neutral terminal.
Warning! No connection is to be made to the earth terminal.
Follow the tting instructions supplied with good quality plugs.
Recommended fuse: 5 A.
Troubleshooting
Problem Possible Cause Possible Solution
Slow running, noisy
or hot blades.
Dry, corroded blades. Lubricate blades.
Blade or blade support
bent.
Straighten blade or blade
support.
Bent or damaged teeth. Straighten teeth.
Loose blade bolts. Tighten blade bolts.
Unit will not start. Battery not installed
properly.
Check battery installation.
Battery not charged. Check battery charging
requirements.
Lock off not fully
operated.
Check lock off is fully
depressed prior to moving
main trigger.
Battery won't
charge
Battery not inserted into
charger.
Insert battery into charger
until green LED appears.
Charge up to 8 hours if
battery totally drained.
Charger not plugged in. Plug charger into a working
outlet. Refer to “Important
Charging Notes” for more
details. Check current at
receptacle by plugging in
a lamp or other appliance.
Check to see if receptacle
is connected to a light
switch which turns
power off when you turn out
the light.
Surrounding air
temperature too hot or
too cold.
Move charger and tool to a
surrounding air temperature
of above 40 degree F
(4.5°C) or below 105
degree F (+40.5°C).
Protecting the environment
Z
Separate collection. Products and batteries
marked with this symbol must not be disposed of
with normal household waste.
Products and batteries contain materials that can be
recovered or recycled reducing the demand for raw materials.
Please recycle electrical products and batteries accord-
ing to local provisions. Further information is available at
www.2helpU.com
10
ENGLISH
(Original instructions)
Technical data
GTC18452PC
H1
GTC18502PC
H1
GTC18504PC
H1
Voltage
V
DC
18 18 18
Blade strokes
(no load)
min
-1
2600 2600 2600
Blade length
cm 45 50 50
Blade gap
mm 18 18 18
Weight
kg 2.75 2.80 3.10
Battery BL2018 BL2018 BL4018
Voltage
V
DC
18 18 18
Capacity
Ah 2 2 4
Type
Li-Ion Li-Ion Li-Ion
Charger 905902**
(Type 1)
906068** 906068**
Input voltage
V
DC
100 - 240 230 230
Output voltage
Ah 8 - 20 18 18
Current
mA 400 2000 2000
BDHT185ST1
H1
GTC18502PST
H1
Voltage
V
DC
18 18
Blade strokes
(no load)
min
-1
2600 2600
Blade length
cm 50 50
Blade gap
mm 18 18
Weight
kg 2.8 2.8
Battery BL2018ST BL2018ST
Voltage
V
DC
18 18
Capacity
Ah 2 2
Type
Li-Ion Li-Ion
Charger 906349** 905902** (Type 1)
Input voltage
V
AC
200-240 100-240
Output voltage
V
DC
8-20 8-20
Current
mA 1000 400
Level of sound pressure according to EN 60745:
Sound pressure: (L
PA
)
78
dB(A) uncertainty (K) 3 dB(A)
Sound power: (L
WA
)
90.5
dB(A) uncertainty (K) 3 dB(A)
Vibration total values (triax vector sum) according to EN 60745:
Vibration emission value: (a
h, D
)
2.0
m/s
2
, uncertainty (K)
1.5
m/s
2
EC declaration of conformity
MACHINERY DIRECTIVE
OUTDOOR NOISE DIRECTIVE
%
GTC18452PC/GTC18502PC/GTC18504PC/
BDHT185ST1/GTC18502PST - Hedge Trimmer
Black & Decker declares that these products described under
"technical data" are in compliance with:
2006/42/EC, EN 60745-1:2009 + A11:2010, EN 60745-2-
15:2009 +A1:2010
2000/14/EC, Hedge trimmer 1300 min
-1
, Annex V
Measured sound power (L
wA
) 90,5 dB(A)
Uncertainty (K) 3 dB(A)
Guaranteed sound power (L
wA
) 98 dB
These products also comply with Directive 2014/30/EU and
2011/65/EU. For more information, please contact Black &
Decker at the following address or refer to the back of the
manual.
The undersigned is responsible for compilation of the technical
le and makes this declaration on behalf of Black & Decker.
Ray Laverick
Director of Engineering
Black & Decker Europe, 210 Bath Road, Slough,
Berkshire, SL1 3YD
United Kingdom
18/11/2016
Guarantee
Black & Decker is condent of the quality of its products
and offers consumers a 24 month guarantee from the date
of purchase. This guarantee is in addition to and in no way
prejudices your statutory rights. The guarantee is valid within
the territories of the Member States of the European Union
and the European Free Trade Area.
To claim on the guarantee, the claim must be in accordance
with Black&Decker Terms and Conditions and you will need to
submit proof of purchase to the seller or an authorised repair
agent. Terms and conditions of the Black&Decker 2 year
guarantee and the location of your nearest authorised repair
agent can be obtained on the Internet at www.2helpU.com, or
by contacting your local Black & Decker ofce at the address
indicated in this manual.
Please visit our website www.blackanddecker.co.uk to register
your new Black & Decker product and receive updates on new
products and special offers.
17
(Übersetzung der ursprünglichen Anweisungen)
DEUTSCH
Fehlerbehebung
Problem
Mögliche
Ursache
Mögliche Lösung
Klingen laufen
langsam, sind laut
oder werden heiß.
Klingen sind trocken,
rostig.
Klingen schmieren.
Klinge oder Klingenhal-
terung verbogen.
Klinge oder Klingenhalte-
rung begradigen.
Zähne verbogen oder
beschädigt.
Zähne begradigen.
Lockere Klingenschrau-
ben.
Ziehen Sie die Klingen-
schrauben an.
Gerät startet nicht. Akku wurde nicht
ordnungsgemäß
angebracht.
Prüfen Sie, ob der Akku
richtig angebracht wurde.
Der Akku ist nicht
geladen.
Prüfen Sie die erforderliche
Ladekapazität.
Einschaltsperre
funktioniert nicht.
Prüfen Sie, ob die Ein-
schaltsperre vollständig
hereingedrückt ist, bevor
Sie den Hauptauslöser
betätigen.
Der Akku lässt sich
nicht auaden.
Akku bendet sich nicht
im Ladegerät.
Akku so in das Ladegerät
einsetzen, dass die grüne
LED leuchtet. Bis zu 8 Stun-
den auaden, wenn der
Akku vollständig leer war.
Das Ladegerät ist nicht
mit dem Stromnetz
verbunden.
Stecken Sie den Stecker
des Ladegeräts in eine
aktive Steckdose. Weitere
Details nden Sie unter
„Wichtige Hinweise zum
Auaden“. Prüfen Sie, ob
die Steckdose unter Span-
nung steht, indem Sie eine
Lampe oder ein anderes
Gerät an die Steckdose
anschließen. Überprüfen
Sie, ob die Steckdose mit
einem Lichtschalter verbun-
den ist, der auch das Gerät
ausschaltet, wenn das Licht
ausgeschaltet wird.
Umgebungstemperatur
zu hoch oder zu niedrig.
Bringen Sie das Ladegerät
und das Werkzeug an
einen Ort, der eine Umge-
bungstemperatur von über
4,5ºC und unter +40,5ºC
aufweist.
Umweltschutz
Z
Getrennte Entsorgung. Produkte und Akkus mit
diesem Symbol dürfen nicht mit dem normalen
Hausmüll entsorgt werden.
Produkte und Akkus enthalten Materialien, die wiederverwertet
werden können, um den Bedarf an Rohstoffen zu verringern.
Bitte recyceln Sie elektrische Produkte und Akkus gemäß den
örtlichen Bestimmungen.
Technische Daten
GTC18452PC
H1
GTC18502PC
H1
GTC18504PC
H1
Spannung
V
DC
18 18 18
Klingenhübe
(lastfrei)
min
-1
2600 2600 2600
Messerlänge
cm 45 50 50
Messerabstand
mm 18 18 18
Gewicht
kg 2.75 2.80 3.10
Akku BL2018 BL2018 BL4018
Spannung
V
DC
18 18 18
Kapazität
Ah 2 2 4
Typ
Li-Ion Li-Ion Li-Ion
Ladegerät 905902**
(Typ 1)
906068** 906068**
Eingangsspann-
ung
V
AC
100 - 240 230 230
Ausgangsspan-
nung
V
DC
8 - 20 18 18
Stromstärke
mA 400 2000 2000
BDHT185ST1
H1
GTC18502PST
H1
Spannung
V
DC
18 18
Klingenhübe
(lastfrei)
min
-1
2600 2600
Messerlänge
cm 50 50
Messerabstand
mm 18 18
Gewicht
kg 2.8 2.8
Akku BL2018ST BL2018ST
Spannung
V
DC
18 18
Kapazität
Ah 2 2
Typ
Li-Ion Li-Ion
Ladegerät 906349** 905902** (Typ 1)
Eingangsspann-
ung
V
DC
200-240 100-240
Ausgangsspan-
nung
Ah 8-20 8-20
Stromstärke
mA 1000 400
Schalldruckpegel gemäß EN 60745:
Schalldruck: (L
PA
)
78
dB(A) Unsicherheitsfaktor (K) 3 dB(A)
Sound power: (L
WA
)
90.5
dB(A) Unsicherheitsfaktor (K) 3 dB(A)
Gesamtvibration (Triax-Vektorsumme) gemäß EN 60745:
Vibrationsemissionswert: (a
h, D
)
2.0
m/s
2
, Unsicherheitsfaktor (K)
1.5
m/s
2
25
(Traduction des instructions initiales)
FRANÇAIS
Dépannage
Problème Cause possible Solution possible
Le fonctionnement
est lent, bruyant
ou les lames
chauffent.
Les lames sont sèches,
corrodées.
Lubriez les lames.
La lame ou le support
de lame est tordu.
Rectiez la lame ou le
support de lame.
Les dents sont tordues
ou endommagées.
Rectiez les dents.
Les boulons de la lame
sont desserrés.
Resserrez les boulons de
la lame.
L’appareil ne
démarre pas.
Le bloc-batterie n’est
pas bien installé.
Vériez l’installation du
bloc-batterie.
La batterie n’est pas
chargée.
Vériez les caractéristiques
de charge du bloc-batterie.
Le déverrouillage n’est
pas bien enclenché.
Contrôlez que le déver-
rouillage est complètement
enfoncé avant de déplacer
la gâchette principale.
La batterie ne se
recharge pas
La batterie n’est pas
correctement insérée
dans le chargeur.
Insérez la batterie dans le
chargeur jusqu’à ce que
le voyant vert apparaisse.
Rechargez pendant 8
heures si la batterie est
complètement vide.
Le chargeur n’est pas
branché.
Branchez le chargeur
dans une prise murale
qui fonctionne. Consultez
la section «Remarques
importantes sur la charge»
pour avoir plus de détails.
Vériez le courant en
branchant une lampe ou un
autre appareil dans la prise
murale. Vériez que la prise
de courant n’est pas reliée
à un interrupteur coupant
l’alimentation lorsqu’on
éteint l’éclairage.
La température am-
biante est trop chaude
ou trop froide.
Déplacez le chargeur et
l’outil dans un endroit où la
température ambiante est
supérieure à 40°F (4,5°C)
ou inférieure à 105°F
(+40,5C)
Protection de l’environnement
Z
Tri sélectif. Les produits et batteries marqués de ce
symbole ne doivent pas être jetés avec les déchets
ménagers.
Les produits et batteries contiennent des matières qui peuvent
être récupérées et recyclées an de réduire la demande en
matières premières. Veuillez recycler les produits électriques
et les batteries conformément aux dispositions locales en
vigueur.
Données techniques
GTC18452PC
H1
GTC18502PC
H1
GTC18504PC
H1
Tension
V
DC
18 18 18
Course de la
lame
(à vide)
min
-1
2600 2600 2600
Longueur du
lame
cm 45 50 50
Jeu de lame
mm 18 18 18
Poids
kg 2.75 2.80 3.10
Batterie BL2018 BL2018 BL4018
Tension
V
DC
18 18 18
Capacité
Ah 2 2 4
Type
Li-Ion Li-Ion Li-Ion
Chargeur 905902**
(Type 1)
906068** 906068**
Tension
d’entrée
V
DC
100 - 240 230 230
Tension de
sortie
Ah 8 - 20 18 18
Courant
mA 400 2000 2000
BDHT185ST1
H1
GTC18502PST
H1
Tension
V
DC
18 18
Course de la
lame
(à vide)
min
-1
2600 2600
Longueur du
lame
cm 50 50
Jeu de lame
mm 18 18
Poids
kg 2.8 2.8
Batterie BL2018ST BL2018ST
Tension
V
DC
18 18
Capacité
Ah 2 2
Type
Li-Ion Li-Ion
Chargeur 906349** 905902** (Type 1)
Tension
d’entrée
V
AC
200-240 100-240
Tension de
sortie
V
DC
8-20 8-20
Courant
mA 1000 400
33
(Traduzione del testo originale)
ITALIANO
Ricerca guasti
Problema Causa possibile Soluzione possibile
Lame lente, rumo-
rose o bollenti.
Lame asciutte e
corrose.
Lubricare le lame.
Lama o supporto della
lama piegato.
Raddrizzare la lama o il
supporto della lama.
Denti piegati o
danneggiati.
Raddrizzare i denti.
Allentare i bulloni della
lama.
Serrare i bulloni della lama.
L’unità non parte. Batteria non installata
correttamente.
Controllare l’inserimento
della batteria.
Batteria scarica. Controllare i requisiti di
carica della batteria.
Blocco non completa-
mente azionato.
Vericare se il blocco è
completamente premuto
prima di muovere il grilletto
principale.
La batteria non si
carica.
La batteria non è inseri-
ta nell’alimentatore.
Inserire la batteria nell’a-
limentatore nché non
compare il LED verde.
Caricare no a 8 ore se la
batteria è completamente
scarica.
Alimentatore non
collegato a una presa di
corrente.
Collegare l’alimentatore a
una presa di corrente che
funzioni. Consultare “Note
importanti sul caricamento”
per ulteriori dettagli.
Controllare la presenza
di corrente nella presa
collegandovi una lampada
o apparecchio simile. Veri-
care se la presa è collegata
ad un interruttore della luce
che si spegne quando si
spengono le luci.
Temperatura dell’aria
circostante troppo calda
o troppo fredda.
Spostare il caricabatteria e
l’utensile ad una temperatu-
ra dell’aria circostante al di
sopra di 4,5 °C o al di sotto
di +40,5 ºC.
Protezione dell’ambiente
Z
Raccolta differenziata. I prodotti e le batterie
contrassegnati con questo simbolo devono essere
smaltiti con i riuti domestici normali.
I prodotti e le batterie contengono materiali che possono
essere recuperati o riciclati riducendo la richiesta di materie
prime. Riciclare i prodotti elettrici e le batterie secondo le
disposizioni locali.
Dati tecnici
GTC18452PC
H1
GTC18502PC
H1
GTC18504PC
H1
Tensione
V
DC
18 18 18
Corse della lama
(senza carico)
min
-1
2600 2600 2600
Lunghezza lama
cm 45 50 50
Distanza lama
mm 18 18 18
Peso
kg 2.75 2.80 3.10
Batteria BL2018 BL2018 BL4018
Tensione
V
DC
18 18 18
Capacità
Ah 2 2 4
Tipo
Li-Ion Li-Ion Li-Ion
Caricabatteria 905902**
(Tipo 1)
906068** 906068**
Tensione in
ingresso
V
DC
100 - 240 230 230
Tensione
erogata
Ah 8 - 20 18 18
Corrente
mA 400 2000 2000
BDHT185ST1
H1
GTC18502PST
H1
Tensione
V
DC
18 18
Corse della lama
(senza carico)
min
-1
2600 2600
Lunghezza lama
cm 50 50
Distanza lama
mm 18 18
Peso
kg 2.8 2.8
Batteria BL2018ST BL2018ST
Tensione
V
DC
18 18
Capacità
Ah 2 2
Tipo
Li-Ion Li-Ion
Caricabatteria 906349** 905902** (Type 1)
Tensione in
ingresso
V
AC
200-240 100-240
Tensione
erogata
V
DC
8-20 8-20
Corrente
mA 1000 400
Livello di pressione sonora misurato in base a EN 60745:
Pressione sonora: (L
PA
)
78
dB(A) Incertezza (K) 3 dB(A)
Potenza sonora: (L
WA
)
90.5
dB(A) Incertezza (K) 3 dB(A)
Valori totali vibrazioni (somma vettoriale triassiale) in base a EN 60745:
Valore emissioni di vibrazioni: (a
h, D
)
2.0
m/s
2
, Incertezza (K)
1.5
m/s
2
41
(Vertaling van de originele instructies)
NEDERLANDS
Problemen oplossen
Probleem Mogelijke oorzaak Mogelijke oplossing
Maaibladen die
langzaam lopen,
lawaai maken of
heet worden.
Droge, verroeste
maaibladen.
Smeer de bladen.
Maaiblad of steun
doorgebogen.
Maak maaiblad of steun
recht.
Verbogen of bescha-
digde tanden
Rechte tanden.
Losse bouten van het
zaagblad.
Zet de bouten van het
zaagblad vast.
Gereedschap
start niet.
De accu is niet goed
geplaatst.
Controleer de manier
waarop de accu is ge-
plaatst.
Accu is niet opgeladen. Controleer wat nodig is voor
het laden van de accu.
Vergrendeling Uit niet
goed bediend.
Controleer dat u de Ver-
grendeling Uit wel geheel
hebt ingedrukt voordat u
de Aan/Uit-schakelaar hebt
omgezet.
Accu laadt niet op. De accu is niet in de
lader geplaatst.
Plaats de accu in de lader
en wacht tot het groene
lampje gaat branden, Laad
de accu tot wel 8 uur op als
de accu geheel leeg is.
De lader is niet
aangesloten.
Sluit de lader aan op een
stopcontact. Raadpleeg
“Belangrijke opmerkingen
over laden” voor meer
informatie. Controleer de
spanning door een lamp
of ander apparaat op het
stopcontact aan te sluiten.
Controleer of het stopcon-
tact wordt onderbroken door
een schakelaar, die het licht
uitschakelt en het stopcon-
tact stroomloos maakt.
De luchttemperatuur
van de omgeving is te
hoog of te laag.
Verplaats de lader en het
gereedschap naar een
locatie waar de luchttempe-
ratuur hoger is dan 4,5 °C
en lager is dan +40,5 °C.
Het milieu beschermen
Z
Gescheiden afvalinzameling. Producten en accu’s
die zijn voorzien van dit symbool mogen niet bij het
normale huishoudafval worden weggegooid.
Producten en accu’s bevatten materialen die kunnen worden
teruggewonnen of gerecycled, wat de vraag naar grondstoffen
doet afnemen. Recycle elektrische producten en accu’s
volgens de ter plaatse geldende bepalingen.
Technische gegevens
GTC18452PC
H1
GTC18502PC
H1
GTC18504PC
H1
Spanning
V
DC
18 18 18
Maaibladslagen
(onbelast)
min
-1
2600 2600 2600
Bladlengte
cm 45 50 50
Bladholte
mm 18 18 18
Gewicht
kg 2.75 2.80 3.10
Accu BL2018 BL2018 BL4018
Spanning
V
DC
18 18 18
Capaciteit
Ah 2 2 4
Type
Li-Ion Li-Ion Li-Ion
Lader 905902**
(Type 1)
906068** 906068**
Ingangsspanning
V
DC
100 - 240 230 230
Uitgangsspan-
ning
Ah 8 - 20 18 18
Current
mA 400 2000 2000
BDHT185ST1
H1
GTC18502PST
H1
Spanning
V
DC
18 18
Maaibladslagen
(onbelast)
min
-1
2600 2600
Bladlengte
cm 50 50
Bladholte
mm 18 18
Gewicht
kg 2.8 2.8
Accu BL2018ST BL2018ST
Spanning
V
DC
18 18
Capaciteit
Ah 2 2
Type
Li-Ion Li-Ion
Charger 906349** 905902** (Type 1)
Input voltage
V
AC
200-240 100-240
Output voltage
V
DC
8-20 8-20
Current
mA 1000 400
Geluidsdrukniveau, volgens EN 60745:
Geluidsdruk: (L
PA
)
78
dB(A) Meetonzekerheid (K) 3 dB(A)
Geluidsvermogen: (L
WA
)
90.5
dB(A) Meetonzekerheid (K) 3 dB(A)
Totale trillingwaarden (som triaxvector) volgens EN 60745:
Waarde trillingsemissie: (a
h, D
)
2.0
m/s
2
, Meetonzekerheid (K)
1.5
m/s
2
49
(Traducción de las instrucciones originales)
ESPAÑOL
Resolución de problemas
Problema Causa posible Solución posible
Cuchillas lentas,
ruidosas o
calientes.
Cuchillas secas y
corroídas.
Engrase las cuchillas.
Cuchilla doblada o
soporte de cuchilla
doblado.
Enderece la cuchilla o el
soporte de cuchilla.
Dientes doblados o
dañados.
Enderece los dientes.
Pernos de la cuchilla
sueltos.
Apriete los pernos de la
cuchilla.
El aparato no se
pone en marcha.
La batería no se ha
instalado correcta-
mente.
Compruebe la instalación
de la batería.
La batería no está
cargada.
Compruebe los requisitos
de carga de la batería.
El desbloqueo no fun-
ciona completamente.
Compruebe que el
desbloqueo esté totalmente
presionado antes de mover
el gatillo principal.
La batería no se
carga.
No se ha insertado la
batería en el cargador.
Inserte la batería en el
cargador hasta que se
encienda el indicador LED
verde. Si la batería está
agotada, cargue durante 8
horas como máximo.
El cargador no está
enchufado.
Enchufe el cargador en
una toma de corriente que
funcione. Puede obtener
más información en “Notas
importantes para la carga”.
Encienda una lámpara u
otro aparato para compro-
bar la corriente de la toma.
Compruebe si la toma está
conectada a un interruptor
de luz que corta la energía
al apagar las luces.
La temperatura del
aire circundante es
demasiado caliente o
demasiado fría.
Desplace el cargador y la
batería a un lugar con tem-
peratura ambiente superior
a 40 ºF (4,5 ºC) o inferior a
105 ºF (+40,5 ºC)
Protección del medio ambiente
Z
Recogida selectiva. Los productos y las baterías
marcadas con este símbolo no se deben eliminar
con la basura doméstica normal.
Los productos y las baterías que contienen materiales que se
puedan recuperar o reciclar reducen la demanda de materias
primas. Recicle los productos eléctricos y las baterías de
conformidad con la normativa local.
Datos técnicos
GTC18452PC
H1
GTC18502PC
H1
GTC18504PC
H1
Tensión
V
DC
18 18 18
Recorrido de las
cuchillas
(sin carga)
min
-1
2600 2600 2600
Longitud de las
cuchillas
cm 45 50 50
Distancias de las
cuchillas
mm 18 18 18
Peso
kg 2.75 2.80 3.10
Batería BL2018 BL2018 BL4018
Tensión
V
DC
18 18 18
Capacidad
Ah 2 2 4
Tipo
Li-Ion Li-Ion Li-Ion
Cargador 905902**
(Tipo 1)
906068** 906068**
Voltaje de
entrada
V
DC
100 - 240 230 230
Voltaje de
salida
Ah 8 - 20 18 18
Corriente
mA 400 2000 2000
BDHT185ST1
H1
GTC18502PST
H1
Tensión
V
DC
18 18
Recorrido de las
cuchillas
(sin carga)
min
-1
2600 2600
Longitud de las
cuchillas
cm 50 50
Distancias de las
cuchillas
mm 18 18
Peso
kg 2.8 2.8
Batería BL2018ST BL2018ST
Tensión
V
DC
18 18
Capacidad
Ah 2 2
Tipo
Li-Ion Li-Ion
Cargador 906349** 905902** (Type 1)
Voltaje de
entrada
V
AC
200-240 100-240
Voltaje de
salida
V
DC
8-20 8-20
Corriente
mA 1000 400
57
(Tradução das instruções originais)
PORTUGUÊS
Resolução de problemas
Problema Causa possível Solução possível
Funcionamento
lento, com ruído ou
as lâminas estão
quentes.
Lâminas secas e
corroídas.
Lubrique as lâminas.
A lâmina ou o suporte
da lâmina dobrados.
Endireite a lâmina ou o
respectivo suporte.
Dentes dobrados ou
danicados.
Endireite os dentes.
Parafusos da lâmina
soltos.
Aperte os parafusos da
lâmina.
A unidade não é
iniciada.
A bateria não foi colo-
cada correctamente.
Verique a instalação da
bateria.
A bateria não está
carregada.
Verique os requisitos para
carregar a bateria.
O desbloqueio não está
totalmente funcional.
Verique se o desbloqueio
está totalmente premido
antes de deslocar o gatilho
principal.
A bateria não
carrega
Bateria não introduzida
no carregador.
Insira a bateria no
carregador até o LED
verde acender. Se a bateria
estiver totalmente descar-
regada, carregue-a durante
8 horas.
Carregador não ligado. Ligue o carregador à
tomada. Consulte “Notas
importantes sobre carre-
gamento” para obter mais
informações. Verique a
corrente no receptáculo,
ligando uma lâmpada ou
outro aparelho. Verique se
o receptáculo está ligado a
um comutador de ilumina-
ção que se desliga quando
desliga as luzes.
A temperatura de ar
circundante é demasia-
do quente ou fria.
O carregador e a ferra-
menta devem estar a uma
temperatura de ar circun-
dante superior a 45 ºC ou
inferior a 40,5 ºC.
Protecção do ambiente
Z
Faça uma recolha de lixo selectiva. Os produtos e
baterias assinalados com este símbolo não devem
ser eliminados em conjunto com resíduos domés-
ticos normais.
Os produtos e baterias contêm materiais que podem ser
recuperados ou reciclados, reduzindo a necessidade de
matérias-primas. Recicle os produtos eléctricos e as baterias
de acordo com as disposições locais.
Dados técnicos
GTC18452PC
H1
GTC18502PC
H1
GTC18504PC
H1
Tensão
V
DC
18 18 18
Cursos da lâmina
(sem carga)
min
-1
2600 2600 2600
Comprimento da
lâmina
cm 45 50 50
Intervalo entre as
lâminas
mm 18 18 18
Peso
kg 2.75 2.80 3.10
Bateria BL2018 BL2018 BL4018
Tensão
V
DC
18 18 18
Capacidade
Ah 2 2 4
Tipo
Li-Ion Li-Ion Li-Ion
Carregador 905902**
(Tipo 1)
906068** 906068**
Tensão de
entrada
V
DC
100 - 240 230 230
Voltagem
de saída
Ah 8 - 20 18 18
Corriente
mA 400 2000 2000
BDHT185ST1
H1
GTC18502PST
H1
Tensão
V
DC
18 18
Cursos da lâmina
(sem carga)
min
-1
2600 2600
Comprimento da
lâmina
cm 50 50
Intervalo entre as
lâminas
mm 18 18
Peso
kg 2.8 2.8
Bateria BL2018ST BL2018ST
Tensão
V
DC
18 18
Capacidade
Ah 2 2
Tipo
Li-Ion Li-Ion
Carregador 906349** 905902** (Tipo 1)
Tensão de
entrada
V
AC
200-240 100-240
Voltagem
de saída
V
DC
8-20 8-20
Corriente
mA 1000 400
65
(Översättning av originalanvisningarna)
SVENSKA
Tekniska data
GTC18452PC
H1
GTC18502PC
H1
GTC18504PC
H1
Spänning
V
DC
18 18 18
Slag per min
(obelastad)
min
-1
2600 2600 2600
Bladlängd
cm 45 50 50
Tandavstånd
mm 18 18 18
Vikt
kg 2.75 2.80 3.10
Batteri BL2018 BL2018 BL4018
Spänning
V
DC
18 18 18
Kapacitet
Ah 2 2 4
Typ
Li-Ion Li-Ion Li-Ion
Laddare 905902** (Typ
1)
906068** 906068**
Inspänning
V
DC
100 - 240 230 230
Utspänning
Ah 8 - 20 18 18
Strömstyrka
mA 400 2000 2000
BDHT185ST1
H1
GTC18502PST
H1
Spänning
V
DC
18 18
Slag per min
(obelastad)
min
-1
2600 2600
Bladlängd
cm 50 50
Tandavstånd
mm 18 18
Vikt
kg 2.8 2.8
Batteri BL2018ST BL2018ST
Spänning
V
DC
18 18
Kapacitet
Ah 2 2
Typ
Li-Ion Li-Ion
Laddare 906349** 905902** (Typ 1)
Inspänning
V
AC
200-240 100-240
Utspänning
V
DC
8-20 8-20
Strömstyrka
mA 1000 400
Ljudnivå enligt EN 60745:
Ljudtryck: (L
PA
)
78
dB(A) Osäkerhet (K) 3 dB(A)
Ljudeffekt:: (L
WA
)
90.5
dB(A) Osäkerhet (K) 3 dB(A)
Totala vibrationsvärden (vektorsumman av tre axlar) enligt EN 60745:
Vibrationsvärde: (a
h, D
)
2.0
m/s
2
, Osäkerhet (K)
1.5
m/s
2
EG Försäkran om överensstämmelse
MASKINDIREKTIV
BULLERFÖRESKRIFTER, UTOMHUS
%
GTC18452PC/GTC18502PC/GTC18504PC/
BDHT185ST1/GTC18502PST - Häcksax
Black & Decker deklarerar att dessa produkter, beskrivna
under ”tekniska data” uppfyller:
2006/42/EC, EN 60745-1:2009 + A11:2010, EN 60745-2-
15:2009 +A1:2010
2000/14/EG, häcksax 1300 min
-1
, Annex V
Uppmätt ljudeffekt (LwA) 90,5 dB(A)
Osäkerhet (K) 3 dB(A)
Garanterad ljudeffekt (LwA) 98 dB
De här produkterna överensstämmer även med direktiven
2014/30/EU och 2011/65/EU. För ytterligare information,
kontakta Black & Decker på följande adress eller se baksidan
av bruksanvisningen.
Undertecknad är ansvarig för sammanställningen av tekniska
data och gör denna försäkran för Black & Decker.
Ray Laverick
Director of Engineering
Black & Decker Europe, 210 Bath Road, Slough,
Berkshire, SL1 3YD
Storbritannien
18/11/2016
66
(Översättning av originalanvis-
ningarna)
SVENSKA
(Oversettelse av de opprinnelige
instruksjonene)
NORSK
Tiltenkt bruk
Your BLACK+DECKER
TM
GTC18452PC, GTC18502PC,
GTC18504PC, BDHT185ST1, GTC18502PST hekksakser
er designet for trimming av hekker, busker og kratt. Dette
verktøyet er bare tiltenkt bruk som et forbrukerverktøy.
Sikkerhetsinstruksjoner
Generelle sikkerhetsadvarsler for elektroverktøy
@
Advarsel! Les alle sikkerhetsadvarsler og alle
instruksjoner. Hvis advarslene og anvisningene
nedenfor ikke overholdes, kan det medføre elek-
trisk støt, brann og/eller alvorlige personskader.
Ta vare på alle advarsler og instruksjoner for fremtidig
bruk. Begrepet ”elektroverktøy” i advarslene gjelder nettdrevet
elektroverktøy (med ledning) eller batteridrevet elektroverktøy
(uten ledning).
1. Sikkerhet i arbeidsområdet
a. Hold arbeidsområdet rent og godt opplyst. Rotete eller
mørke områder er en invitasjon til ulykker.
b. Ikke arbeid med elektroverktøy i eksplosjonsfarlige
omgivelser, for eksempel der det benner seg
brennbare væsker, gass eller støv. Elektrisk verktøy
skaper gnister som kan antenne støv eller gasser.
c. Hold barn og andre personer unna når du bruker et
elektroverktøy. Distraksjoner kan føre til at du mister
kontrollen.
2. Elektrisk sikkerhet
a. Støpselet til verktøyet må passe til stikkontakten. Aldri
modiser støpselet på noen måte. Ikke bruk
adapterstøpsler til jordede elektriske verktøy.
Umodiserte støpsler og stikkontakter som passer vil
redusere risikoen for elektrisk sjokk.
b. Unngå kroppskontakt med jordede overater som rør,
radiatorer, komfyrer og kjøleskap. Det er økt risiko for
elektrisk støt dersom kroppen din er jordet.
c. Ikke utsett elektroverktøy for regn eller fuktighet.
Dersom det kommer vann inn i et elektrisk verktøy vil det
øke risikoen for elektrisk sjokk.
d. Unngå uforsvarlig behandling av ledningen. Aldri bruk
ledningen til å bære, trekke eller dra ut støpselet til
det elektriske verktøyet. Hold ledningen borte fra
varme, olje, skarpe kanter eller bevegelige deler.
Skadede eller innviklede ledninger øker risikoen for
elektrisk sjokk.
e. Når du bruker et elektroverktøy utendørs, må du bruke
en skjøteledning som er egnet til utendørs bruk. Bruk
av en skjøteledning beregnet for utendørs bruk reduserer
risikoen for elektrisk støt.
Garanti
Black & Decker är säker på kvaliteten hos denna produkt och
erbjuder kunder 24 månaders garanti från inköpsdatumet.
Garantin gäller utöver konsumentens rättigheter enligt lag och
påverkar inte dessa. Garantin är giltig i de territorier som tillhör
medlemsstaterna i Europeiska unionen och det europeiska
frihandelsområdet.
För yrkande under garantin måste yrkandet vara in enlighet
med Black&Deckers villkor och du kommer att behöva skicka
in bevis på köpet till försäljaren eller en auktoriserad reparatör.
Villkoren för Black&Deckers tvååriga garanti och var du
hittar din närmaste auktoriserade reparatör kan erhållas på
internet på www.2helpU.com, eller genom att kontakta ditt
lokal Black & Decker kontor på adressen som angetts i denna
bruksanvisning.
Besök vår webbplats www.blackanddecker.se för att registrera
din nya Black & Decker-produkt samt för att få information om
nya produkter och specialerbjudanden.
71
(Oversettelse av de opprinnelige instruksjonene)
NORSK
Klippeanvisninger
u Pass på at du alltid har sikkert fotfeste og god balanse,
og ikke strekk deg for langt. Bruk vernebriller og sklisikre
vernesko ved klipping. Hold enheten godt med begge
hendene, og slå på enheten. Hold alltid enheten som
vist i gurene i denne bruksanvisningen, med en hånd
på bryterhåndtaket og en hånd på sikkerhetshåndtaket
(Fig.H). Hold aldri enheten i bladbeskyttelsen.
Klippe ny vekst (Fig. I)
u Det er mest effektivt med en bred, sveipende bevegelse
for å mate bladets tenner gjennom kvistene.
Best resultat får du med en liten ned-vinkel på bladet i
bevegelsesretningen.
Advarsel! Ikke kutt kvister som er tykkere enn 19mm. Bruk
bare trimmeren for klipping av normale busker rundt hus og
andre bygninger.
Trimme hekker (Fig. J)
u For å svært jevne hekker kan du strekke en tråd langs
hele hekken som styring.
Trimme hekker på siden (Fig. K)
u Hold trimmeren som vist, start nederst og sveip oppover.
POWERCOMMAND
Dersom du kjører deg fast, trykk inn POWERCOMMAND
knappen (4) som vist i gur I. Bladene vil bevege seg frem og
tilbake i en langsommere og kraftigere rytme for å hjelpe deg
å klippe kraftigere kvister. Slipp knappen for å gå tilbake til
vanlig hekklipping.
Merk: Når du slipper knappen, vil bladene straks gå tilbake til
full hastighet.
Merk: Bladene vil stoppe når knappen holdes i 15 sekunder.
For å aktivere POWERCOMMAND funksjonen igjen, slipp
knappen og trykk den inn på nytt. IKKE hold POWERCOM-
MAND knappen kontinuerlig ved normal hekklipping.
Vedlikehold
BLACK+DECKER-apparatet/-verktøyet med ledning/bat-
teri er laget for å brukes over lang tid med et minimum av
vedlikehold. For at den skal fungere tilfredsstillende over tid,
er det viktig å sørge for riktig stell av verktøyet og regelmessig
renhold.
Advarsel! Før du utfører vedlikehold på elektriskdrevet/bat-
teridrevet elektroverktøy:
u Slå av apparatet/verktøyet og trekk ut støpselet.
u Eller slå av apparatet/verktøyet og fjern batteriet fra dette
hvis apparatet/verktøyet har separat batteripakke.
u Eller la batteriet gå helt tomt hvis det er innebygd, og slå
deretter av.
u Trekk ut laderen fra stikkontakten før du rengjør den.
Laderen krever ikke annet vedlikehold enn regelmessig
rengjøring.
u Rengjør ventilasjonsåpningene i apparatet/verktøyet/
laderen jevnlig med en myk børste eller tørr klut.
u Rengjør motorhuset regelmessig med en fuktig klut. Ikke
bruk slipende eller løsemiddelbaserte rengjøringsmidler.
u Rengjør bladene omhyggelig etter bruk. Etter rengjøring
påføres en lm av lett maskinolje for å hindre at bladene
ruster.
Klippebladene er laget av høykvalitets herdet stål, ved normal
bruk vil de ikke kreve sliping. Men dersom du ved et uhell
treffer et gjerde, steiner, glass eller andre harde objekter, kan
du få et hakk i bladet. Det er ikke nødvendig å fjerne dette
hakket dersom det ikke hindrer bevegelse av bladet. Dersom
hakket hindrer bevegelse av bladet, ta ut batteriet og bruk
en n l eller et bryne for å slipe ned hakket. Dersom du
mister ned trimmeren, inspiser den nøye for å se etter skader.
Dersom bladet er bøyd, kapslingen sprukket eller du ser noen
andre salder som kan påvirke trimmerens funksjon, kontakt
ditt lokale BLACK+DECKER servicesenter før du tar den i
bruk igjen. Kunstgjødsel og andre hagekjemikalier innehol-
der stoffer som fører til at metaller ruster fortere. Ikke lagre
enheten på eller i nærheten av kunstgjødsel eller kjemikalier.
Bare bruk mild såpe og en fuktig klut til å rengjøre enheten. La
det aldri komme væske inn i enheten, og senk aldri noen deler
av enheten ned i væske. Forhindre at bladene ruster ved å
smøre på et tynt lag rustbeskyttende olje etter rengjøring.
72
(Oversettelse av de opprinnelige instruksjonene)
NORSK
Feilsøking
Problem Mulig årsak Mulig løsning
Går langsomt,
støyende eller
varme blad.
Tørre, rustne blad. Smør bladene.
Blad eller bladstøtte
bøyd.
Rett ut bladet eller blad-
støtten.
Bøyde eller skadde
tenner.
Rett ut tennene.
Løsne bladboltene. Stram til bladboltene.
Enheten starter
ikke.
Batteriet er ikke satt
inn riktig.
Kontroller innsettingen av
batteriet.
Batteriet er ikke ladet. Kontroller kravene til
ladning av batteriet.
Låsen ikke helt i lås. Kontroller at låsen er
trykket helt inn før du bruker
hovedavtrekkeren.
Batteriet lader ikke Batteriet er ikke satt inn
i laderen.
Sett batteriet i laderen til
grønn LED lyser. Lad i opp
til 8 timer dersom batteriet
er helt utladet.
Laderen er ikke satt i
stikkontakten.
Sett laderen i en stikkontakt
som virker. Se ”Viktige
merknader om lading” for
mer informasjon. Kontroller
strømmen i kontakten ved
å sette inn en lampe eller
et annet apparat. Kontroller
at stikkontakten er koblet
til en lysbryter som slår
av strømmen når du slår
av lyset.
Omgivelsestempe-
raturen er for varm
eller kald.
Flytt laderen og batteriet til
et sted med lufttemperatur
over 40 grader F (4,5°C)
eller under 105 grader F
(+40,5°C).
Miljøvern
Z
Separat avfallshåndtering. Produkter og batterier
merket med dette symbolet skal ikke kastes i
vanlig husholdningsavfall.
Produkter og batterier inneholder materialer som kan
gjenbrukes eller gjenvinnes for å redusere behovet for nye
råmaterialer. Vennligst lever elektrisk utstyr og batterier til
gjenbruk i henhold til lokale regler.
Tekniske data
GTC18452PC
H1
GTC18502PC
H1
GTC18504PC
H1
Spenning
V
DC
18 18 18
Bladslag
(ubelastet)
min
-1
2600 2600 2600
Bladlengde
cm 45 50 50
Bladgap
mm 18 18 18
Vekt
kg 2.75 2.80 3.10
Batteri BL2018 BL2018 BL4018
Spenning
V
DC
18 18 18
Kapasitet
Ah 2 2 4
Type
Li-Ion Li-Ion Li-Ion
Lader 905902**
(Type 1)
906068** 906068**
Inngangsspen-
ning
V
DC
100 - 240 230 230
Utgangsspenning
Ah 8 - 20 18 18
Strøm
mA 400 2000 2000
BDHT185ST1
H1
GTC18502PST
H1
Spenning
V
DC
18 18
Bladslag
(ubelastet)
min
-1
2600 2600
Bladlengde
cm 50 50
Bladgap
mm 18 18
Vekt
kg 2.8 2.8
Batteri BL2018ST BL2018ST
Spenning
V
DC
18 18
Kapasitet
Ah 2 2
Type
Li-Ion Li-Ion
Lader 906349** 905902** (Type 1)
Inngangsspen-
ning
V
AC
200-240 100-240
Utgangsspenning
V
DC
8-20 8-20
Strøm
mA 1000 400
Level of sound pressure according to EN 60745:
Lydtrykk: (L
PA
)
78
dB(A) Usikkerhet (K) 3 dB(A)
Lydeffekt: (L
WA
)
90.5
dB(A) Usikkerhet (K) 3 dB(A)
Totale vibrasjonsverdier (triax vektorsum) bestemt i samsvar med EN 60745:
Vibrasjonsverdi: (a
h, D
)
2.0
m/s
2
, Usikkerhet (K)
1.5
m/s
2
  • Page 1 1
  • Page 2 2
  • Page 3 3
  • Page 4 4
  • Page 5 5
  • Page 6 6
  • Page 7 7
  • Page 8 8
  • Page 9 9
  • Page 10 10
  • Page 11 11
  • Page 12 12
  • Page 13 13
  • Page 14 14
  • Page 15 15
  • Page 16 16
  • Page 17 17
  • Page 18 18
  • Page 19 19
  • Page 20 20
  • Page 21 21
  • Page 22 22
  • Page 23 23
  • Page 24 24
  • Page 25 25
  • Page 26 26
  • Page 27 27
  • Page 28 28
  • Page 29 29
  • Page 30 30
  • Page 31 31
  • Page 32 32
  • Page 33 33
  • Page 34 34
  • Page 35 35
  • Page 36 36
  • Page 37 37
  • Page 38 38
  • Page 39 39
  • Page 40 40
  • Page 41 41
  • Page 42 42
  • Page 43 43
  • Page 44 44
  • Page 45 45
  • Page 46 46
  • Page 47 47
  • Page 48 48
  • Page 49 49
  • Page 50 50
  • Page 51 51
  • Page 52 52
  • Page 53 53
  • Page 54 54
  • Page 55 55
  • Page 56 56
  • Page 57 57
  • Page 58 58
  • Page 59 59
  • Page 60 60
  • Page 61 61
  • Page 62 62
  • Page 63 63
  • Page 64 64
  • Page 65 65
  • Page 66 66
  • Page 67 67
  • Page 68 68
  • Page 69 69
  • Page 70 70
  • Page 71 71
  • Page 72 72
  • Page 73 73
  • Page 74 74
  • Page 75 75
  • Page 76 76
  • Page 77 77
  • Page 78 78
  • Page 79 79
  • Page 80 80
  • Page 81 81
  • Page 82 82
  • Page 83 83
  • Page 84 84
  • Page 85 85
  • Page 86 86
  • Page 87 87
  • Page 88 88
  • Page 89 89
  • Page 90 90
  • Page 91 91
  • Page 92 92
  • Page 93 93
  • Page 94 94
  • Page 95 95
  • Page 96 96
  • Page 97 97
  • Page 98 98
  • Page 99 99
  • Page 100 100

Black & Decker BDHT185ST1 Owner's manual

Category
Power tools
Type
Owner's manual
This manual is also suitable for

Ask a question and I''ll find the answer in the document

Finding information in a document is now easier with AI