Page is loading ...

Owner
Manual
batribike.com
Hand Built in Europe
ELECTRIC BICYCLES

2
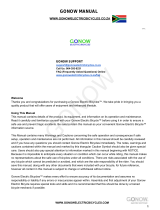
STANDARD
(11 Ah)
LONG RANGE
(15.6 Ah)
BATTERY:-
COLOUR:-
HUNTER
GREEN
EARTH
BROWN
WHITE
SHADOW
DISPLAY:-
LED
MINI LCD
CENTRE
LCD
EXT. DUTY
(16.8 Ah)
ECO
(8.8 Ah)
D
E
A
L
E
R
S
T
A
M
P
IMPORTANT PLEASE READ THIS MANUAL FULLY BEFORE USE
For your safety and to ensure a long and trouble free life of your Batribike
bicycle, check the operation of brakes, lights, bell and gears,
and check tyre pressures are correct.
Also check all fasteners, including quick release mechanisms,
before every ride.
Register your BATRIBIKE Warranty online at
batribike.com/warranty-registration
/
/
PURCHASE DATE:-
DAY MONTH YEAR
BATTERY SERIAL №:-
BICYCLE SERIAL №:-

3
Thank you for purchasing a BATRIBIKE Electric Bicycle
With care and correct usage your bicycle
will give many years of service.
Important
PLEASE CHARGE THE BATTERY
BEFORE FIRST USING THE BICYCLE
Even though the battery indicator may show charge this cannot be
relied upon until the battery has had the initial full charge.
1 ELECTRIC BICYCLE
1 BATTERY with Keys
1 BATTERY CHARGER with UK Mains Lead
1 MANUAL
Contents
Parts Identification ............................................ PAGE 4
Battery Care & Charging ...................................PAGE 6
Using the Power Assistance ............................. PAGE 8
Troubleshooting................................................. PAGE 14
Standard Bicycle Functions .............................. PAGE 16
Adjusting to Suit the Rider ............................... PAGE 17
Folding the Bicycle ........................................... PAGE 18
Maintenance Schedule ..................................... PAGE 20
Warranty ........................................................... PAGE 22
Specifications ................................................... PAGE 24
Certificate of Compliance ................................. PAGE 25
PACKAGE
CONTENTS

4
PARTS IDENTIFICATION
We continually strive to ensure that we provide you with the best possible products, therefore
SPECIFICATIONS ARE SUBJECT TO CHANGE WITHOUT NOTICE
1
2
LEFT SIDE
OF BATTERY
5
6
STANDARD BATTERY & CARRIER SHOWN
ALTERNATIVE BATTERIES and
XL CARRIER ALSO AVAILABLE
8
Display (LED shown)
1
2
Rear Brake Lever
3
Front Brake Lever
4
Motor Connector (On Left Fork)
5
Gear Selector (Twist)
6
Bell
7
Gear Indicator
8
9
10
11
Battery
12
Rear Carrier
13
Battery Lock & Key Switch
14
15
Controller Box
16
19
20
21
Lights ON/OFF Button
22
23
24
Bicycle Serial Number Label
Side Stand
Front Hub Motor
7 Speed Shimano Nexus Hub Gears
Rear Tyre 20 x 2.00 (Schwalbe)
25
Seat Adjust (Height) - Quick Release
26
27
28
29
30
31
Rear Vee Brake
32
Power UP Button
34
33
Charging Socket
Battery Charge Level Indication
Walk Assist (6 Km/h) Button
Seat Adjust (Position - Front/Back)
Handlebar Folding Mechanism
Front LED Light
Rear LED Light (Built into Battery)
Power ON/OFF & D OWN Button
4
Frame Folding Mechanism
Folding Pedals
Power Assistance Level Indication
Front Tyre 20 x 2.00 (Schwalbe)
Front Vee Brake
17
18
3
7

5
HANDLEBAR DISPLAY
OPTIONS
STANDARD FITMENT (LED)
SHOWN LEFT
Mini LCD and CENTRE LCD
(NOT SHOWN)
ALSO AVAILABLE AS
UPGRADES
9
10
11
12
27
26
17
ON INSIDE OF
FRAME (Chainstay)
24
18
23
25
OTHER
SIDE
20
OTHER
SIDE
19
21
22
14
15
16
28
30
31
29
34
32
33

6
First time use
Your battery will be supplied in a state of sleep from the factory. The first time you
use the battery it requires activation by being fully charged.
Storage
Batteries do not like to be stored in very hot or
very cold conditions or to be subject to conditions
of high moisture. They also do not like to be left in
a fully discharged state. If Lithium batteries are
left flat for an extended period they may no longer
be functional.
• Store your battery between 15º C and 25º C
in a dry area. (The conditions found in a
normal domestic house).
• If your Batribike is not in use for an extended
period it is imperative that you charge the
battery before storage and then charge the
battery once a month to prevent deterioration.
Charging
Lithium batteries do not like to be left discharged.
It is good practice to recharge as soon as is
reasonably possible after the battery goes flat.
We recommend charging after every ride, that
way your electric bike is always ready for your
next outing.
• Do not charge at temperatures below 0º C
• Switch off the battery before charging, using
key switch.
• Battery can be charged on or off the bike.
• Always make sure the battery and charger
are on a non-flammable, dry surface away
from sources of heat, humidity and
flammable materials.
• Do not cover the battery or charger whilst
charging.
• Only use the charger supplied.
• Even if not in use recharge your battery a
minimum of once a month.
For Your Safety
• Keep battery away
from children
• Do not dismantle
• Do not pierce or crush
• Do not immerse in liquid
• Do not expose to
temperatures over 60ºC
• Do not short circuit the
battery connections
• Do not leave unattended
whilst charging
• Do not sleep near a
battery that is charging
Failure to adhere to these
Battery Care instructions
can allow the battery to
deteriorate and may pose
a serious risk of Fire
BATTERY CARE & CHARGING
Your Batribike Electric Bicycle uses a Lithium battery for it's power and the
following points will directly affect battery life and performance.
Removing the Battery
To remove the battery, turn off
at the handlebar display, then
turn the key (located on the
side of the battery), anti-
clockwise to the off position.
Whilst pushing in the key, again
turn in an anti-clockwise
direction to unlock from the
carrier. Slide out the battery
from the rear of the carrier.

7
Using the Charger
Two types of battery charger are
used by BATRIBIKE. (Only one will
be supplied). Both have a charge
light which will display RED when
charging and change to GREEN
when the battery is charged.
The alternative type charger also has a second light
which shows RED when mains power is applied.
• Ensure the battery is switched off.
• Plug the charging lead into the batter y.
The charging lead plugs into the charging socket
located beneath the cover on the side of the battery
casing. It can only be inserted one way.
• Plug the charger into the mains socket and
switch on at the wall outlet.
• The lights on the charger will illuminate after a
few seconds.
When charging is complete the RED charge light will
change to GREEN. May take up to 6 hrs for flat battery.
• Once charged, switch off at the wall outlet and unplug.
• Disconnect the charging lead from the battery and
replace the cover over the charging socket.
The battery does not have to be completely discharged before it is recharged. The
Lithium battery has no "memory" and therefore can be charged at any time. It is
perfectly acceptable to recharge the battery after a short ride so that the battery is
fully charged before the next ride.
NOTE: If the battery is charged
and the charger left switched
on for an extended period the
alternative type charger will enter
a low power state, indicated by
both the RED and ORANGE/
GREEN LEDs flashing slowly.
Switch off and unplug as above.
IMPORTANT
Plug the charger into the battery
before switching on at the mains.
Similarly, switch off at the mains before
unplugging the charger from the battery.
DO NOT LEAVE PERMANENTLY
CONNECTED

8
Usage
Your BATRIBIKE electric bicycle has a choice of display options
available. For the SIGMA the LED type is fitted as standard to the
bike.
LED Display
See page 10 for operation
The operation of the LED system provides adjustable SPEED in five
selectable steps. Level 1 powers up to 6 mph, whilst level 5 powers
up to 15 mph. Each level operates at up to full power, and power
cuts out at the selected speed level.
This display may also
be supplied in an
alternative casing.
Operation is identical
whichever casing is
supplied.
Alernative Case Style

9
Mini LCD
See separate manual for this upgrade.
The operation of the Mini LCD system has four selectable POWER
levels. Level 1 gives 25% of the power, level 2 - 50% up to level 4,
100% power. Speed range is from 0 to 15 mph in all levels. This is
available as an easy to fit upgrade.
Centre LCD
See separate manual for this upgrade.
The Centre LCD system provides more power levels than the Mini
LCD and a larger display makes it easier to read. This is available
as an easy to fit upgrade.
Display Upgrades

10
LED Operation
To use under electric power, switch on at
the key switch on the side of the battery,
then press and hold the DOWN button on
the handlebar LED display until the blue
lights are seen.
Switching On
To turn off the LED and the power to the bike, press and hold the
DOWN button for 2 seconds.
If the power is left on for an extended
period and the bike is not used, then
the power will automatically be turned off.
To fully turn off the power, switch off at the key switch on the side
of the battery and remove the key for security.
Switching Off
Control Buttons
By means of the three buttons, UP, DOWN and
6 Km/h, on the handlebar mounted display unit,
the various functions of the power controller can
be utilised.
See the following sections for details.

11
Bicycle Lights
Your BATRIBIKE Electric Bicycle is supplied with powerful LED
lights on the front and rear. The rear light is switched on whenever
the battery is turned on via the key switch. The front light is
activated by pressing the LIGHT button on the handlebar display.
To turn the front light off, again press the LIGHT button.
The top row of LEDs show the charge
remaining in the battery. The indicators
will gradually go out as the battery
power is used up. Refer to the table
below for details.
Battery Meter
70 - 100%
SYMBOL
DISPLAYED
CHARGE
REMAINING
BATTERY METER DISPLAYS THE CHARGE REMAINING IN THE BATTERY
BATTERY IS
EXHAUSTED AND
SHOULD BE
RECHARGED AS
SOON AS POSSIBLE
50 - 70%
30 - 50%
15 - 30%
0 - 15%
EMPTY
OR
First Light Flashes 8 Times

12
There are 5 levels of pedal assistance available from the
motor. Using the UP and DOWN buttons you can select
from Level 1 (Lowest), to Level 5 (Highest). The motor will
then be activated upon pedalling.
Pedal Assistance
Please remember that the above values are provided as a guide.
Due to manufacturing tolerances the performance may vary.
PEDAL ASSISTANCE FROM THE MOTOR
LEVEL
RANGE / SPEED
Provides maximum power when
negotiating hills and head winds.
Great when needing to simply get from
A to B as fast as possible.
Great for commuting to work.
EXAMPLE OF USAGE
Normal Use Mode.
These are the levels to use for everyday
cycling. Gives good performance whilst
maximising usable range per charge.
Best for Leisure Use.
Use these lower power levels when
negotiating busy cycle paths and
crowded areas. Also use when setting
off and gradually increase through the
levels for a smoother performance.
Ideal for negotiating obstacles.
up to 22 miles / 15 mph
up to 26 miles / 12 mph
up to 40 miles / 8 mph
up to 50 miles / 6 mph
up to 32 miles / 10 mph
up to 36 km / 25 km/h
up to 42 km / 20 km/h
up to 52 km / 16 km/h
up to 64 km / 13 km/h
up to 80 km / 10 km/h
RANGE SHOWN WITH
STANDARD BATTERY

13
Weather and terrain will affect the performance. In hilly areas, or
when the bike is heavily loaded, there will be a significant increase
in the power used from
the battery and hence
the range will decrease
accordingly. A lightly
loaded bike will achieve
higher performance
levels. (These results
were obtained by test
riders in optimal
conditions - 75kg rider,
level ground, no wind).
Your BATRIBIKE bicycle has a Walk Assist
Mode. This is designed to propel the bike
under power at a low speed of 6 km/h (4
MPH) and is ideal to help you when pushing
the bike up steep hills. It is not designed for
prolonged use or whilst riding.
This feature only operates whilst the button is
pressed.
Assisted Walking Mode (6 km/h)
THEN HOLD
If the assistance level is set to ZERO, then the motor will not be
turned on. Your BATRIBIKE will now act and feel like a normal
bicycle. This is useful when you are feeling fit at the start of a
journey or using your bike for exercise purposes. Power is still only
a button press away.
No Assistance - Normal Pedal Bicycle

14
TROUBLESHOOTING
If an error occurs the LED display will show a code by flashing the
first battery light. Make a note of the number of flashes and turn off
the bicycle power at both the LCD and the battery switch. After 2
minutes turn on the power again. If the code re-occurs contact your
dealer for assistance.
Diagnostic Error Messages
First Light Flashes
Number of
Flashes
Error
Type
Action
Required
2
Motor Error
Check Motor Plug, if all OK
contact Dealer for Assistance
3
Controller Error
Contact Dealer for Assistance
4
Display Error
5
Brake Sensor Error
8
Low Battery Voltage
Charge the Battery
Contact Dealer for Assistance
Check brake lever returns
fully, if all OK contact Dealer
for Assistance

15
STANDARD BICYCLE FUNCTIONS
Gears
Your BATRIBIKE is provided with 7 speed Shimano Nexus hub
gears with RevoShift gear change. To change gear you use the
right handlebar twist selector.
Gear number 1 is low for hills and rough terrain and gear 7 is high
for normal road use. An indicator window shows the selected gear.
To increase the gear simply twist the half grip towards you with
your right hand. To decrease the gear twist the half grip away from
you.
You do not have to be pedalling as you change gears.
UP
DOWN
INDICATOR
WINDOW

16
Braking
To stop, cease pedalling and pull the brake levers.
Bell
A bell is attached to the handlebars.
Side Stand
To put the bicycle on its stand:-
1) While holding the bicycle upright, push the stand
downwards to its full extent.
2) Lean the bicycle over onto the stand.
Make sure bicycle is on solid ground.
Do not sit on the bicycle whilst the stand is down. It is
designed to take the weight of the bicycle and not the
additional weight of the rider.
Luggage Rack
The luggage rack provided is designed to carry a maximum
load of 25kg. Make sure that any items carried are securely
strapped and nothing is able to get caught in the rear wheel.
All other operations of your BATRIBIKE Electric Bicycle are as
per a normal pedal cycle.

17
Seat Height
The height of the saddle can be adjusted to suit the rider. If you do
not feel confident with making these adjustments then your
BATRIBIKE Dealer will be able to set up the bike initially.
The saddle can also be
adjusted frontwards or
backwards on its
mount. Take care with
all fasteners after
adjustment to ensure
that they are safely
tightened to avoid
movement and
potential injury whilst
riding.
The saddle height is adjusted
by loosening the Quick
Release seat post clamp and
moving the post up or down as
desired.
Take care not to exceed the
limit marked on the post.
If the clamp tension needs to be
adjusted, then with the lever in the
open position, tighten the Allen Bolt
(5 mm) until finger tight. The final
tightening is done by moving the
lever to the closed position. Only
small adjustments should be made
and the tension checked. Repeat as
necessary.

18
Folding the Bicycle
The SIGMA has a folding
frame. Follow the
diagrams below for the
procedure to use.
To unfold the bike, simply
reverse the above
procedure.
THE SIGMA FOLDS TO A
COMACT SIZE FOR
CONVENIENCE
OPEN SAFETY
LOCK
OPEN
CLAMP
MOVE CLAMP
FORWARD IN SLOT
FRAME CAN NOW
BE FOLDED
1
2
3
4
Folding the Frame
PUSH &
HOLD
OPEN
CLAMP
SLIDE
STEM
UPWARDS
FOLD
BARS
HANDLEBAR STEM CLAMP
SAFETY LOCK
HANDLEBAR STEM SLIDE
HANDLEBAR STEM RELEASED FROM
HEADSTOCK AND FOLDED DOWN
1
2
3
4
Folding the Handlebars

19
Take care to ensure all fixings are secure and
safety locks in place before riding the bike.
Folding the Pedals
The pedals can be folded by
squeezing in as per the photo,
and turning through 90 degrees.
FOLD DOWN
THROUGH 90º
SQUEEZE
TOGETHER
TO RELEASE
Turn the pedals to a suitable position so that they are not
trapped when folding the frame.

20
MAINTAINANCE SCHEDULE
Maintaining your bicycle ensures you’ll get the most out of every ride and out of
the entire life of your BATRIBIKE electric bike. How much of your bike’s
maintenance you can do yourself will depend on your knowledge, skill,
experience and whether you have the necessary tools for the job.
Beyond this manual, it is good to consult your BATRIBIKE dealer for advice if
you are at all unsure about any of the procedures described. Normal
maintenance is not covered under the warranty and this service may be
chargeable.
Before every ride
● Mechanical safety checks, (see notes on page 2). Use a fully
charged battery. Visual inspection for damage.
After every ride (or WEEKLY)
● Clean the bike, including chain rings and sprocket. Clean and
lightly oil the chain and gears.
● This must be carried out after every ride in dusty, marine or
winter conditions due to the salt laden atmosphere.
Every 20 - 30 hours of riding (or MONTHLY if sooner)
● Squeeze the brakes and rock the bike to check for any
looseness of the headset or brake mechanisms with each forward or
backward movement. If any are loose, have your dealer check it.
● Lift the front wheel and turn handlebars left and right to check for
tightness of steering. If tightness is detected it may be necessary to
lubricate bearings and/or adjust the headset.
● Check and adjust the brakes, replace if worn out.
● Squeeze spokes in adjoining pairs between your thumb and
index finger.
They all should have the same tension. Have your dealer re-spoke or
true the wheel if necessary.
● Check cables for rust, kinks and fraying, have your dealer
replace them if necessary.
● Check wheel bearings for play and adjust/lubricate if necessary
/