Page is loading ...

Model No. A117BB
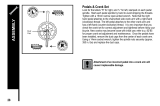
BODYWORX
BODYWORX
INDOOR CYCLE

Step 1
Visit our Website
Go to the GPI Sports website: www.gpisports.com.au/warranty
Warranty Registration Form
Step 2
Enter Purchase Information
Enter all purchase information including the serial number and proof
of purchase which can be uploaded from this page
Step 3
Call Our Toll Free Number
If a warranty service request is required on your product
please call the toll free number - 1800 005 770
Congratulations on purchasing your product, we at GPI believe that our product range is of the
highest quality and represents great value for money.
We back our product range up with our industry leading warranty.
Please see below for the step by step instructions on how to register your product warranty
online.
GPI Sports & Fitness

INDEX
* SAFETY & MAINTENANCE INSTRUCTIONS ----- PAGE 2
* FEATURES ---------------------------------------------PAGE 3-4
* ASSEMBLY INSTRUCTION
Parts List ---------------------------------------------------PAGE 5
Assembly Step A-------------------------------------------PAGE 6
Assembly Step B-------------------------------------------PAGE 6
Assembly Step C ------------------------------------------PAGE 7
Assembly Step D ------------------------------------------PAGE 7
Assembly Step E ------------------------------------------PAGE 8
Assembly Step F ------------------------------------------PAGE 8
* EXPLODED DRAWING --------------------------------PAGE 9
* BILL OF MATERIAL -----------------------------------PAGE 10
1

2
SAFETY & MAINTENANCE INSTRUCTIONS
1. Once fully assembled, please check that all hardware parts such as bolts,
nuts and washers are positioned and secured firmly.
2. Please check regularly that the safety chain guard that protects the moving
parts of the machine is secured and in good order.
3. Please always check the seat post, seat slider, pedals and handlebar are
secured firmly before getting on the bike.
4. To lubricate all moving parts monthly is recommended.
5. Do not wear loose clothing to avoid entangling in any moving parts.
6. Do not remove feet from the pedals while they are in motion.
7. Always wear shoes when using the machine.
8. Dry the bike after each use to remove sweat and moisture. Wipe the machine
with a damp cloth, water and mild soap. Do not use a petroleum-based
solvent to clean the machine in order not to damage the finish .
9. Please keep children away from the bike while it is in use. Do not allow
children to use the bike. This bike is designed for adults, not children.
10. Do not dismount the bike until the pedals have stopped completely.
11. Stop exercise immediately in case of nausea, shortness of breath, faint,
headache, pain, tightness in your chest or any discomfort.
12. Do not place fingers or any other objects into the moving parts of the bike.
13. Prior to any exercise, consult with your physician first to establish the
exercise frequency, time and intensity appropriate for your particular age
and condition.
14. After exercising, please turn the tension control knob clockwise (+) to
increase resistance so that the pedals will not rotate freely and possibly hurt
someone.
15.For daily maintenance, use a damp cloth to wipe your bike free on sweat to avoid
excess moisture , and apply supplied lubricant on flywheel’s CP rim to increase
its operation smoothness .
16.Before riding, check the emergency brake are functioning well and properly
17.For weekly maintenance, make sure the crank bolt and pedal bolt are well
tightened

F E A T U R E S
3
Belt Driven
Saddle
Transportation Wheel
Seat Slider
Seat Post
Heavy Flywheel
Tension Control
Adjustable Knob
Durable Crank
Emergency Brake

4
Adjustable Knob
Easy to adjust the height of both seat post & handlebar
Heavy Flywheel
High-inertia flywheel creates the high momentum
Transportation Wheel
Anyone can move this machine using the 2 wheels
Durable Crank
Ensure the best durability when in big force
Belt Driven
Most comfortable and less noisy
Seat Post
Up/down adjustment for any shapes of users
Seat Slider
Forward/backwards adjustment for any shapes of users
Saddle
Extra padding to provide comfortable sitting
Emergency Brake
Pushing down the leveler, user can stop the transmission
immediately without danger.
Tension Control
Micro torque adjustment with push-down emergency brake

5
PARTS LIST
ASSEMBLY INSTRUCTION
Front Stabilizer
with 2 wheels
Rear Stabilizer
without wheels
Carriage Bolt
M8*50
M8
Washer
φ16*φ8.5*1.6
Multi-Wrench
Pedal ( R )
Pedal ( L )
Handlebar
Saddle
Right Threaded
Left Threaded
Chrome & dipping
With 2 hex nuts
15
25
28
42R
DESCRIPTION
Q’TY
SPECIFICATION#
42L
51
52
54
56
57
1
1
1
4
1
1
4
4
1
1
Flange Nut

6
Assembly Step A
Attach the Rear stabilizer (#57) to the frame using two Carriage Bolts (#51)
and two Flange Nuts (#54) and two Washers(#52), and secure
firmly using the Multi-Wrench (#15).
Assembly Step B
Attach the Front stabilizer (#56) to the frame using two Carriage Bolts(#51)
and two Flange Nuts (#54) and two Washers(#52), and secure firmly using
the Multi-Wrench (#15).
52
54
51
15
57
54
52
51
15
56

7
Assembly Step C
Thread the right pedal (#42R) that has "R" on spindle to the right side arm
of the bike using the Multi-Wrench (#15) . Please note that the R pedal
is right-hand threaded which must be turned clockwise to tight.
Thread the left pedal (#42L) that has "L" on spindle of the left side arm
of the bike using the Multi-Wrench (1#5). Please note that the L pedal
is left-hand threaded which must be turned counterclockwise to tight.
Assembly Step D
Orient the Handlebar (#25) as shown.
Locate the Adjustable Knob on the front of the Frame. Loosen the knob
and pull it outward. Then, insert the Handlebar (#25) into the frame. Move
the Handlebar (#25) upward or downward to the desired position, and then
tighten the knob.
15
42L
42R
25

8
Assembly Step E
15
28
Attach the Seat ( #28 ) to the Seat slider with two M8 Hex Nuts, and secure
firmly using the Multi-Wrench (#15). Make sure that the nose of the Seat
is pointing straight ahead before you tighten the Hex Nuts.
Note: The M8 Hex Nuts may be pre-attached to the seat clamp.
Assembly Step F
Congratulations that you have assembled the bike successfully !

9
EXPLODED DRAWING
43
1
2
3
3
3
2
4
5
5
6
7
8
9
10
11
13
14
15
16
20
21
23
17
18
19
24
25
26
29
27
29
30
28
35
32
33
34
32-1
32-2
32-1
32-2
20
20
12
12
31
48
37
38
39
40
40-1
40-2
40-2
41L
41R
42R
42L
41-1
41-1
43
43
44
46
45
46
47
47
56
49
49
50
50
50
51 51
52
52
53
52
54
52
54
55
57
52
53
52
36
36
58
59
59
59
59
60
61
22
20
55
62
63
12
43
43
64
65
66
67
68

10
BILL OF MATERIAL
# DESCRIPTION Q'TY/BIKE # DESCRIPTION Q'TY/BIKE
1
Frame
1 37
Outer Chain Guard
1
2
Long Sleeve
2 38
Belt
1
3
Adjustable Knob
3 39
Big Pulley
1
4 Allen Bolt 2
40
5 Allen Nut 2
40-1
6
Tension Control
1 40-2
Crank Bolt
2
7 Square Washer 1
41R
Crank (R )
1
8
Helical Compression Spring
1 41L
Crank (L)
1
9 Square Nut 1
41-1
Crank Cap
2
10 Spacer 1 42L
Left Pedal
1
11 Cap Nut 1
42R
Right Pedal
1
12 Self-tapping Screw 3 43 Self-tapping Screw 8
13 Spacer 1
44 Allen Bolt 6
14 Flange Bolt Cap 1
45 Allen Bolt 2
15 Multi-Wrench 1
46 Spring Washer 6
16 Brake Pad Assembly
1
47 Locked Nut 6
17
Beam
1 48
Inner Chain Guard
1
18
Rubber Absorber
1 49
Transportation Wheel
1
19 Allen Bolt 2
50
Leveling Feet
4
20 Washer 6
51 Carriage Bolt
4
21 Locked Nut 2 52 Washer 8
22
Self-tapping Screw 2 53 Allen Bolt 2
23 Self-tapping Screw 2
54 Flange Nut
4
24 Brake Absorber 1
55 Locked Nut 2
25
Handlebar
1 56
Front Stabilizer
1
26
Seat Slider
1 57
Rear Stabilizer
1
27
Seat Post
1
58 Allen Bolt 1
28
Saddle
1
59 Self-tapping Screw 6
29
Short Sleeve
2
60 Self-tapping Screw 1
30 End Cap (for Seat Slider) 1 61 Water Bottle Cage 1
31 End Cap (for Seat Post) 1 62 Magnet 1
32
Hub
1 63 Sensor Clamp 1
32-1
Washer
2 64
Allen Bolt
1
32-2
Flange Nut
2 65 Emergency Leveler 1
33
Small Pulley
1 66
Self-tapping Screw
1
34
Locked Ring
1 67
Locked Nut
1
35
Flywheel
1 68 Front Chain Guard 1
36
Flywheel Cover
2
Bottom Bracket 1


BODYWORX
BODYWORX
Model No: # A117BB
To register your warranty, please go to
www.gpisports.com.au
/