Page is loading ...

Phaser
®
6200

ގ᠌ܚԤ © 2002, Xerox CorporationȄ߳Ιϸ᠌ցȄਲ਼ᐃछհ᠌ݲȂ߳ҐюގޟܚԤގ᠌ȄҐင Xerox
Corporation ӣཎȂҏюގࠢϞϱৠϚுоӈդПԒᙚӟȄ
ގ᠌߳៖ѓࢂҬࠉݲхܖѧݲᆓᗒϰ೨ȂܖήМϛܚᇯџϞӨގ᠌నᇄၥଉ Ȟฒጒ൜३ڙȟȂһѓࢂᒉᄍܚ
ᡗҰϞᡝแԒܚॊҡޟސӇȂٽԃኺԒȃጒҏȃყҰȃᒉᄍᡗҰȃѴᢎ้ҬȄ
XEROX
®
ȃThe Document Company
®
ȃthe stylized X, CentreWare
®
ȃDocuPrint
®
ȃMade For Each Other
®
ȃPhaser
®
ȃ
PhaserShare
®
ȃthe TekColor
®
icon ڷ WorkSet
®
࣏ Xerox Corporation. infoSMART™ȃPhaserPort™ȃPhaserPrint™,
PhaserSMART™ȃPhaserSym™ȃPhaserTools™ ޟຝы୦и TekColor™ Ӫᆎ࣏ Xerox Corporation ޟຝы୦Ȅ
Adobe
®
ȃAcrobat
®
ȃAcrobat
®
Reader
®
ȃIllustrator
®
ȃPageMaker
®
ȃPhotoshop
®
ȃPostScript
®
ȃATM
®
ȃAdobe
Garamond
®
ȃBirch
®
ȃCarta
®
ȃMythos
®
ȃQuake
®
ڷ Tekton
®
࣏ڏຝы୦ȂAdobe Jenson™ȃAdobe Brilliant Screens™
technology ڷ IntelliSelect™ ࣏ Adobe Systems Incorporated ܖڏӵ࢚ٲᆓᗒጒ൜ϱܚຝыޟυϴѧϞຝы୦Ȅ
Apple
®
ȃLaserWriter
®
ȃLocalTalk
®
ȃMacintosh
®
ȃMac
®
OSȃAppleTalk
®
ȃ TrueType2
®
ȃApple Chancery
®
ȃ
Chicago
®
ȃGeneva
®
ȃMonaco
®
ȂЅ New York
®
ࣱ࣏ຝы୦ȂQuickDraw™ ࠌ࣏ Apple Computer Incorporated Ϟຝы
୦Ȅ
Marigold™ Ѕ Oxford™ ࣏ AlphaOmega Typography Ϟຝы୦Ȅ
Avery™ ࣏ Avery Dennison Corporation Ϟຝы୦Ȅ
PCL
®
Ѕ HP-GL
®
࣏֯ Hewlett-Packard Corporation Ϟຝы୦Ȅ
Hoefler Text ࣏ Hoefler Type Foundry ܚ೩ॎȄ
ITC Avant Guard Gothic
®
ȃITC Bookman
®
ȃITC Lubalin Graph
®
ȃITC Mona Lisa
®
ȃITC Symbol
®
ȃITC Zapf Chancery
®
Ѕ ITC Zapf Dingbats
®
ࣱ࣏ International Typeface Corporation Ϟຝы୦Ȅ
Bernhard Modern™ȃClarendon™ȃCoronet™ȃHelvetica™ȃNew Century Schoolbook™ȃOptima™ȃPalatino™ȃ
Stempel Garamond™ȃTimes™ Ѕ Univers™ ࣏֯ Linotype-Hell AG ᇄ ( ܖ ) ڏܚ឴ϴѧϞຝы୦Ȅ
MS-DOS
®
Ѕ Windows
®
࣏ Microsoft Corporation Ϟຝы୦Ȅ
о TrueType
®
ਿԒޟ Wingdings™ ࣏ Microsoft Corporation ϞࠢȄWingDings ࣏ Microsoft Corporation Ϟຝы୦Ȃ
TrueType Apple Computer, Inc. Ϟຝы୦Ȅ
Albertus™ȃArial™ȃGill Sans™ȃJoanna™ Ѕ Times New Roman™ ࣏ Monotype Corporation Ϟຝы୦Ȅ
Antique Olive
®
࣏ M. Olive Ϟຝы୦Ȅ
Eurostile™ ࣏ Nebiolo Ϟຝы୦Ȅ
Novell
®
Ѕ NetWare
®
࣏ Novell, Incorporated Ϟຝы୦Ȅ
Sun
®
Ѕ Sun Microsystems
®
࣏ Sun Microsystems, Incorporated Ϟຝы୦ȄSPARC
®
࣏ SPARC International, Incorporated
Ϟຝы୦ȄSPARCstation™ ࣏ SPARC International, Incorporated Ϟ୦Ȃᐿড়௲᠌Ϡ Sun Microsystems, IncorporatedȄ
UNIX
®
࣏छЅڏтড়Ϟຝы୦Ȃҥ X/Open Company Limited ᐿড়௲᠌Ȅ
հ࣏ E
NERGY
S
TAR
®
ޟٱཾჱբȂXerox Corporation ϐؚۡᡱҏࠢಒӫ E
NERGY
S
TAR
ྛघौؑȄE
NERGY
S
TAR
ޟӪᆎЅ୦࣏छޟຝыȄ
ҏࠢٺҢ John Halleck ܚቸޟ SHA-1 แԒጆȂٮϐᕕுհޱӣཎٺҢȄ
ᕕுछடց 4,558,302 ௲᠌Ȃҏࠢ௴Ң LZWȄ
ڏт࣏ࣺ֯ᜰϴѧޟ୦ܖຝы୦Ȅ
ҥ Phaser 6200 ிՓӟߒᐠܚҡޟ PANTONE
®
Փி߽࣏ѲՓᇄ / ܖέՓӫ౩ޟᔣՓிȂџฒݲಒӫ
PANTONE ܚᇯӣޟᄂЖՓிྥȄٺҢҬࠉޟ PANTONE Color Reference Manuals ȲPANTONE ՓிՃЙыȳо
ࢥၚྥጂޟՓிȄ
୲ԤԊ၆ҥ PANTONE ௲᠌ޟྥଢ଼แԒȂϗٺԪࠢᕕு PANTONE ޟՓிᔣਝݎȄषौڥுҬࠉሴԤӫਿ
ஈྱޱӪȂࣁ Pantone, Inc.Ȅ

ގ᠌ܚԤ © 2002 Xerox CorporationȄ߳Ιϸ᠌ցȄ i
Ҭᓃ
ҬᓃҬᓃ
Ҭᓃ
Ԋ၆ᇄפഀՃЙы
Ԋ၆ᇄפഀՃЙыԊ၆ᇄפഀՃЙы
Ԋ၆ᇄפഀՃЙы
ଽৠ໔໌ાᏢ
ଽৠ໔໌ાᏢଽৠ໔໌ાᏢ
ଽৠ໔໌ાᏢ..................................................1
ᆅ
ᆅᆅ
ᆅ.........................................................2
Phaser 6200B Ѐڗ
ЀڗЀڗ
Ѐڗ Phaser 6200N ޟЀৈӇ
ޟЀৈӇޟЀৈӇ
ޟЀৈӇ ..................4
Phaser 6200N Ѐڗ
ЀڗЀڗ
Ѐڗ Phaser 6200DP ޟЀৈӇ
ޟЀৈӇޟЀৈӇ
ޟЀৈӇ .................6
ᏹᡝ
ᏹᡝᏹᡝ
ᏹᡝ .......................................................7
೩ۡ
೩ۡ೩ۡ
೩ۡ .....................................................8
ಋଢ଼
ಋଢ଼ಋଢ଼
ಋଢ଼.........................................................9
ૉ
ૉૉ
ૉ
ौᕕுΙӋԤᜰ Phaser® 6200 ிՓႪৢӟߒᐠޟૉڷߣӇޟׇᐌ఼ȂӖӟӵϣ
ϣϣ
ϣଢ଼Ԓ
ଢ଼Ԓଢ଼Ԓ
ଢ଼ԒМ
ММ
МӇ
ӇӇ
Ӈ
ӎᆅ
ӎᆅӎᆅ
ӎᆅΰޟЛධЙыȄ
ԃሯԃդڥюЅԊ၆ӟߒᐠޟࡾҰȂᎧӟߒᐠᓍߣޟ ȮԊ၆ᇄפഀ
ՃЙыȯȄௌџоӵϣଢ଼
ϣଢ଼ϣଢ଼
ϣଢ଼Ԓ
ԒԒ
ԒМӇ
МӇМӇ
МӇӎ
ӎӎ
ӎᆅ
ᆅᆅ
ᆅΰײڗ ȮԊ၆ᇄפഀՃЙыȯ
ޟ PDF ᔬਰȄ
6200-90
FPO
FPO

Phaser® 6200 ிՓႪৢӟߒᐠ
ގ᠌ܚԤ © 2002 Xerox CorporationȄ߳Ιϸ᠌ցȄ 1
ଽৠ໔໌ાᏢ
ଽৠ໔໌ાᏢଽৠ໔໌ાᏢ
ଽৠ໔໌ાᏢ
1.3
1.1
1.2
35 kg
77 lbs
4.1
4.2

Phaser® 6200 ிՓႪৢӟߒᐠ
ގ᠌ܚԤ © 2002 Xerox CorporationȄ߳Ιϸ᠌ցȄ 2
ᆅ
ᆅᆅ
ᆅ
1
2
3
4
5
6
4.1
4.2

ᆅ
Phaser® 6200 ிՓႪৢӟߒᐠ 3
6
9
8
7

Phaser 6200B Ѐڗ Phaser 6200N ޟЀৈӇ
Phaser® 6200 ிՓႪৢӟߒᐠ 4
Phaser 6200B Ѐڗ
ЀڗЀڗ
Ѐڗ Phaser
6200N ޟЀৈӇ
ޟЀৈӇޟЀৈӇ
ޟЀৈӇ
1
2
3
6
8
5
4

Phaser 6200B Ѐڗ Phaser 6200N ޟЀৈӇ
Phaser® 6200 ிՓႪৢӟߒᐠ 5
98
10
11

Phaser 6200N Ѐڗ Phaser 6200DP ޟЀৈӇ
Phaser® 6200 ிՓႪৢӟߒᐠ 6
Phaser 6200N Ѐڗ
ЀڗЀڗ
Ѐڗ Phaser
6200DP ޟЀৈӇ
ޟЀৈӇޟЀৈӇ
ޟЀৈӇ
1
7 8
4
5
6
2 3

Phaser® 6200 ிՓႪৢӟߒᐠ
ގ᠌ܚԤ © 2002 Xerox CorporationȄ߳Ιϸ᠌ցȄ 7
ᏹᡝ
ᏹᡝᏹᡝ
ᏹᡝ
1
2
3
4
7 86

Phaser® 6200 ிՓႪৢӟߒᐠ
ގ᠌ܚԤ © 2002 Xerox CorporationȄ߳Ιϸ᠌ցȄ 8
೩ۡ
೩ۡ೩ۡ
೩ۡ
ௌџоήӖӈΙᆍПԒӟߒᐠጣՍႫသȄ
■ ٮӖஃ
■
USB
■ ᆩၯ
ԤᜰՍᆩၯޟၥଉȂᔮຜ
೩
೩೩
೩ۡ
ۡۡ
ۡџӖӟॲ७ȂڏᇄڏтԤҢޟџӖӟॲ७ᓽԆӵΙ
ଔȄήӖॲ७ོᡗҰ
೩
೩೩
೩ۡ
ۡۡ
ۡџӖӟॲ७Ȅ
ܚԤџӖӟॲ७ٺҢএਿԒȂ։ӵڏॲ७ޟഥᆒЅۻഋԤிՓనȄӵӟߒᐠࠉ७ݖΰ
Ӗӟٲॲ७Ȅ
ԃሯᜰܻՍᆩၯޟ၏ಠၥଉȂᎧϣ
ϣϣ
ϣଢ଼
ଢ଼ଢ଼
ଢ଼ԒМ
ԒМԒМ
ԒМӇ
ӇӇ
Ӈӎᆅ
ӎᆅӎᆅ
ӎᆅΰޟ ȮᆩၯЙыȯȄ
ٺҢџӖӟॲ७
ٺҢџӖӟॲ७ٺҢџӖӟॲ७
ٺҢџӖӟॲ७
Ԇڥџ
џџ
џӖӟ
ӖӟӖӟ
Ӗӟॲ
ॲॲ
ॲ७ђ
७ђ७ђ
७ђ
ߒ
ߒߒ
ߒΰޟٲॲ७Ȉ
1.
ӵࠉ७ݖΰȂٺҢή
ήή
ήጐ
ጐጐ
ጐဴ
ဴဴ
ဴܖΰ
ΰΰ
ΰጐဴ
ጐဴጐဴ
ጐဴࡸᗤଢ଼ՍџӖ
џӖџӖ
џӖӟ
ӟӟ
ӟॲ७
ॲ७ॲ७
ॲ७ђ
ђђ
ђߒ
ߒߒ
ߒȂ
ȂȂ
Ȃณࡣࡸጂۡ
ጂۡጂۡ
ጂۡᗤȄ
2. ٺҢήጐ
ήጐήጐ
ήጐဴ
ဴဴ
ဴܖΰ
ΰΰ
ΰጐ
ጐጐ
ጐဴ
ဴဴ
ဴᗤଢ଼ڗདौޟџӖӟॲ७ Ȟԃ
೩
೩೩
೩ۡ
ۡۡ
ۡȟȂณࡣࡸጂ
ጂጂ
ጂۡ
ۡۡ
ۡᗤȄ
ђߒҬ
ђߒҬђߒҬ
ђߒҬ
षሯџӖӟॲኵޟׇᐌ఼ȂӖӟ ȶђߒҬȷȈ
1. ᒵڥࠉ७ݖΰޟђ
ђђ
ђ
ߒ
ߒߒ
ߒȂ
ȂȂ
Ȃณࡣࡸጂۡ
ጂۡጂۡ
ጂۡᗤȄ
2. ᒵᐅӖ
ӖӖ
Ӗӟђ
ӟђӟђ
ӟђ
ߒ
ߒߒ
ߒҬ
ҬҬ
ҬȂ
ȂȂ
Ȃณࡣࡸጂ
ጂጂ
ጂۡ
ۡۡ
ۡᗤȄ
6200-51

PHASER
®
6200 COLOR PRINTER
Connection Setup
Page 1 of 3
USB Connection
The USB connection requires a standard A/B USB cable. The "A" end of the cable connects to the computer's USB port;
the "B" end connects to the printer's USB port.
Windows 98 or later
Connect the USB cable to the PC and follow the Add New Hardware Wizard to create the USB port. Follow the Add
Printer Wizard to install the printer driver from your printer's software CD-ROM. For more details, refer to the infoSMART
Knowledge Base at www.xerox.com/officeprinting/infoSMART, Document # 18215.
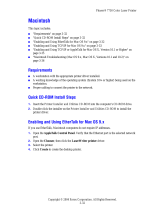
Macintosh (requires OS 9.0.4 or later)
A USB-connected printer will not show in the Chooser. Install the printer driver from your printer's software CD-ROM. Use
the Desktop Printer Utility (version 1.2 or later) to create a desktop USB printer. The utility is located in the PhaserTools
folder created during the software install. For more details, refer to the infoSMART Knowledge Base at
www.xerox.com/officeprinting/infoSMART, Document # 33225.
Parallel Connection
The printer's parallel connection uses a parallel cable to connect your computer's parallel port to the printer's parallel port.
Install the printer driver from your printer's software CD-ROM. Select the appropriate LPT parallel port.
Ethernet Connection (recommended)
Network
Use an Ethernet connection with two twisted-pair (Category 5/RJ-45) cables and an Ethernet hub. Connect the computer
to the hub with one cable and connect the printer to the hub with the second cable. Use any port on the hub except the
uplink port. TCP/IP and EtherTalk are the most common protocols used with Ethernet cables. To print using TCP/IP, each
computer and the printer requires a unique IP address. See Setting IP Addresses.
Standalone Use
Use a crossover cable to connect the printer directly to the computer via the Ethernet port.
Setting an IP address
If your computer is on a large network, contact your network administrator for the appropriate TCP/IP addresses and
additional configurations.
If you are creating your own small Local Area Network, or connecting the printer directly to your computer over Ethernet,
use this basic procedure. The printer and computer(s) should have unique IP addresses. It is important that the addresses
are similar, but not the same. For example, your printer can have the address 192.168.1.2 while your computer has the
address 192.168.1.3. Another device can have the address 192.168.1.4, and so on.
For more details, refer to the infoSMART Knowledge Base at www.xerox.com/officeprinting/infoSMART,
Document # 18545.

Note: If you use the installer from your printer's software CD-ROM, the IP Address is set automatically.
To manually set the printer's IP address:
1. At the printer's front panel, select Menus and press OK.
2. Scroll to the Connection Setup Menu and press OK.
3. Scroll to TCP/IP Address Menu and press OK.
4. Scroll to DCHP/BootP and press OK until it displays OFF.
5. Scroll to TCP/IP Address and press OK.
6. Enter an IP address like the example above.
7. Scroll to TCP/IP Network Mask and press OK.
8. Enter a network (subnet) address. (If you use the IP address in the above example,
set a Subnet Mask of 255.255.255.0)
9. Scroll to TCP/IP Gateway and press OK.
10. Enter a Gateway (router) address. (If you use the IP address in the above example,
set a Gateway address of 192.168.1.1)
11. Scroll to Exit and press OK.
To set a static IP address on your computer:
Windows 95/98/Me
1. From the Start menu, right-click Network Neighborhood and select Properties.
2. On the Configuration tab, select the TCP/IP protocol for your network card, then select Properties.
3. On the IP Address tab, select Specify an IP address. Enter an IP address and Subnet Mask, and click OK.
(If you use the IP address noted above, set a Subnet Mask of 255.255.255.0).
4. Click OK and restart Windows.
Windows 2000/XP
1. From the Start menu, right-click My Network Places and select Properties.
2. Right-click Local Area Connection and select Properties.
3. If you do not have TCP/IP available, you should first click Add and select Protocol. Click Add and select
Internet Protocol TCP/IP.
4. On the General tab, select the TCP/IP protocol for your network card. Click Properties.
5. On the General tab, select Use the following IP address. Enter an IP address and Subnet Mask, and then click
OK. (If you use the IP address in the above example, set a Subnet Mask of 255.255.255.0).
6. Click OK and restart Windows, if prompted.
Windows NT 4.x
1. From the start menu, right-click Network Neighborhood and select Properties.
2. On the Protocols tab, select TCP/IP Protocol and click Properties.
3. On the IP Address tab, select Specify an IP Address. Enter an IP Address and Subnet Mask in the field and
click OK. (If you use the IP address noted above, set a Subnet Mask to 255.255.255.0.)
4. Click OK and restart Windows.
Page 2 of 3

Installing the Printer Driver
To download the latest printer drivers, access the Xerox web site at: www.xerox.com/officeprinting/support.
Windows 95/98/Me, Windows 2000/XP, and Windows NT 4.x
Install the printer driver from your printer's software CD-ROM. The software CD-ROM installer automatically installs
and identifies the printer during the installation process.
For more details, refer to the infoSMART Knowledge Base at www.xerox.com/officeprinting/infoSMART, Document
# 9178 for Windows 95/98/Me, Document # 36894 for Windows 2000, and Document # 11338 for Windows NT.
Macintosh
EtherTalk
If you use EtherTalk, Macintosh computers do not require IP addresses.
1. Open the AppleTalk Control Panel.
2. Verify that the Ethernet port is the selected network port.
3. To install the printer driver, double-click the installer on your printer's software CD-ROM.
4. Open the Chooser, select the LaserWriter driver.
5. From the right column of the Chooser, select the printer. Click Create to create the desktop printer.
For more details, refer to the infoSMART Knowledge Base at www.xerox.com/officeprinting/infoSMART,
Document # 2562.
Macintosh OS X
Macintosh OS X supports TCP/IP as the default protocol, as well as AppleTalk. For a TCP/IP installation,
follow the instructions provided to set an IP address in the printer.
1. Open the Print Center Utility.
2. Select the Add Printer... button.
3. Choose the connection type you desire.
For LPR, enter the IP address of the printer that you set previously. The Queue Name field can remain blank if the Use
default queue on server box is checked (by default). Other options are PS, or AUTO. Select the appropriate PPD for
the printer model under the Printer Model pull-down menu.
For AppleTalk, select the appropriate printer from the list that is displayed. The printer should autoconfigure at this point.
Note: You may need to enable AppleTalk via the Network Control Panel. Follow the onscreen instructions provided.
Other Resources
For more information on network setup and troubleshooting, refer to the Networking section of the
Interactive Documentation CD-ROM.
Page 3 of 3

Phaser® 6200 ிՓႪৢӟߒᐠ
ގ᠌ܚԤ © 2002 Xerox CorporationȄ߳Ιϸ᠌ցȄ 9
ಋଢ଼
ಋଢ଼ಋଢ଼
ಋଢ଼
ӟߒᐠོσ໔ԤҢၥଉᓽԆԙџӖӟॲ७ȄήॲོᡗҰಋ
ಋಋ
ಋଢ଼ࡾ
ଢ଼ࡾଢ଼ࡾ
ଢ଼ࡾࠒ
ࠒࠒ
ࠒޟџӖӟॲ७Ȃ֙ວௌԃդ
ԊӒӴಋଢ଼ӟߒᐠȄ
ܚԤџӖӟॲ७ٺҢএਿԒȂ։ӵڏॲ७ޟഥᆒЅۻഋԤிՓనȄӵӟߒᐠࠉ७ݖΰ
Ӗӟٲॲ७Ȅ
ٺҢџӖӟॲ७
ٺҢџӖӟॲ७ٺҢџӖӟॲ७
ٺҢџӖӟॲ७
ٺҢџ
џџ
џӖӟ
ӖӟӖӟ
Ӗӟॲ
ॲॲ
ॲ७ђ
७ђ७ђ
७ђ
ߒ
ߒߒ
ߒΰޟٲॲ७Ȉ
1.
ӵࠉ७ݖΰȂٺҢή
ήή
ήጐ
ጐጐ
ጐဴ
ဴဴ
ဴܖΰ
ΰΰ
ΰጐဴ
ጐဴጐဴ
ጐဴࡸᗤଢ଼ՍџӖ
џӖџӖ
џӖӟ
ӟӟ
ӟॲ७
ॲ७ॲ७
ॲ७ђ
ђђ
ђߒ
ߒߒ
ߒȂ
ȂȂ
Ȃณࡣࡸጂۡ
ጂۡጂۡ
ጂۡᗤȄ
2. ٺҢήጐ
ήጐήጐ
ήጐဴ
ဴဴ
ဴܖΰ
ΰΰ
ΰጐ
ጐጐ
ጐဴ
ဴဴ
ဴᗤଢ଼ڗདौޟџӖӟॲ७ Ȟԃಋଢ଼
ಋଢ଼ಋଢ଼
ಋଢ଼ࡾ
ࡾࡾ
ࡾࠒ
ࠒࠒ
ࠒȟȂณࡣࡸጂ
ጂጂ
ጂۡ
ۡۡ
ۡᗤȄ
ђߒҬ
ђߒҬђߒҬ
ђߒҬ
षሯџӖӟॲኵޟׇᐌ఼ȂӖӟ ȶђߒҬȷȈ
1. ᒵڥࠉ७ݖΰޟђ
ђђ
ђ
ߒ
ߒߒ
ߒȂ
ȂȂ
Ȃณࡣࡸጂۡ
ጂۡጂۡ
ጂۡᗤȄ
2. ᒵᐅӖ
ӖӖ
Ӗӟђ
ӟђӟђ
ӟђ
ߒ
ߒߒ
ߒҬ
ҬҬ
ҬȂณࡣࡸጂ
ጂጂ
ጂۡ
ۡۡ
ۡᗤȄ
6200-51

PHASER
®
6200 COLOR PRINTER
Moving Guide
Page 1 of 1
Follow these guidelines to move the printer within the office or to prepare the printer for shipment.
Precautions regarding moving the printer
WARNING: Follow these guidelines to avoid injuring yourself or damaging the printer.
• Always use at least two people to lift the printer.
• Always turn off the printer using the power switch.
• Failure to repackage the printer properly for shipment can result in damage
to the printer not covered by the printer's warranty.
• Damage to the printer caused by improper moving is not covered by the printer's warranty.
Moving the printer within the office
The printer can be safely moved from one location within an office to another as long as it travels in an upright position,
gently over smooth surfaces. Any jarring movement, such as pushing the printer over a raised door threshold or across a
parking lot, can damage the printer.
Preparing the printer for shipment
To transport the printer by vehicle, the printer must be prepared according to a specific procedure. The printer must be
repackaged in an appropriate shipping carton. The Imaging Unit* and Transfer Roller need to be removed and stored in an
upright position. All Toner Cartridges must be locked in a normal operating position.
If you do not have all of the original packaging, order the repackaging kit from www.xerox.com/officeprinting/6200supplies
or contact your local Xerox service representative. Additional instructions for repackaging the printer are provided in the
repackaging kit and on the documentation CD-ROM. If you are unable to repackage the printer, contact your local Xerox
service representative regarding our repacking services.
*Note: Do not leave the Imaging Unit exposed to light for more than 10 minutes as damage could result. Use the dark bag
that came with the Imaging Unit or dark paper as a cover.
/