Page is loading ...

Waterline Wireless System
INSTRUCTIONS
Product programme
WLRC-19 Receiver
Connection of master and receiver
The receiver is connected to the master or the add on module using the tele plug or the 4 terminals
marked AO-MODULE.
Using the telewire delivered with the receiver: Connect the teleplug into the master and the 4 wires
into the receiver.
Using the 4 terminals in the master: Connect B to B, A to A, - to - and + to +. Max distance between
the master/add on module and receiver is 3 m. Up to 5 receivers can be connected. The wiring of the
master, add on module and receiver can be made in either a daisy chain or in parallel.
Position
Do not place the receiver inside a metal box. In case of communication
problems it may be necessary to move the location of the receiver, or to
add an additional receiver.
Master
The standard master can be used, if delivered with software version 1.9 or
later. Connect the receiver to the master, and the system will reconfigure
itself for wireless operation.
To set up the system
To set the master into learning mode press the accept button until all six
red output LED's are lighting up (approx. 8 secs). For the next ten minutes
the master will look for new thermostats that are in the learning mode. After
10 minutes the master returns to normal mode.
..RF LEARNINGMODE.. will be shown in the display.
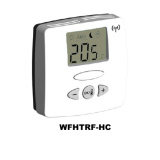
To set the thermostats into learning mode
Standard thermostats without display: Remove
the front cover and push the little learning mode button for approx. 2 sec
until the thermostat give
a little “bib”.
Clock thermostat: Press the clock symbol for 2
secs until it says “init”. The thermostats will now transmit its unique code in
the next 30 seconds,
and the system has been set up.
After a total factory reset, the learning mode procedure must be repeated.
Technical Data
Supply Voltage . . . . . . . . . . . . . . . . . . . . . . . . . . . . . . . . . 24 V from Master
Distance to master . . . . . . . . . . . . . . . . . . . . . . . . . . . . . . . . . . . . Max 3 m
Enclosure . . . . . . . . . . . . . . . . . . . . . . . . . . . . . . . . . . . . . . . . . . . . . . IP 21
Ambient temperature range . . . . . . . . . . . . . . . . . . . . . . . . . . . . . 0 to 40°C
Communication Frequency . . . . . . . . . . . . . . . . . . . . . . . . . . . . . 868 MHz
Communication distance . . . . . . . . . . . . . . . . . . . . . . . Up to 30 m inside,
. . . . . . . . . . . . . . . . . . . . . . . . . . . . . . . . . . . . . . . . . . Up to 100 m outside
OJ ELECTRONICS A/S
Stenager 13B · DK-6400 Sønderborg · Denmark
Tel +45 73 12 13 14 · Fax +45 73 12 13 13
www.oj.dk · [email protected]
57467B 11/05 (KIB)
Fig. 1. Master
Fig. 2. Standard thermostat
BA--+
Blue Red Brown Yellow

Waterline Wireless System
ANLEITUNG
Produktprogramm
WLRC-19-Empfänger
Anschluss von Master und Empfänger
Der Empfänger wird über den Telestecker oder die vier mit AO-MODULE gekennzeichneten Klemmen
mit dem Master oder dem Zusatzmodul verbunden.
Bei Anwendung des mit dem Empfänger mitgelieferten Telekabels: Den Telestecker am Master und die
vier Leiter am Empfänger anschließen. B: Blau, A: Rot, --: Braun, +: Gelb
Bei Anwendung der vier Klemmen am Empfänger: B mit B, A mit A, - mit - und + mit + verbinden. Der
max. zulässige Abstand zwischen dem Master/Zusatzmodul und dem Empfänger beträgt 3 m. Bis zu
fünf Empfänger können angeschlossen werden. Die Verdrahtung von Master, Zusatzmodul und
Empfänger kann entweder verkettet oder parallel erfolgen.
Platzierung
Der Empfänger darf nicht in einem Metallgehäuse angebracht sein. Bei
Verbindungsschwierigkeiten kann eine Änderung der Platzierung des
Empfängers oder ein zusätzlicher Empfänger erforderlich sein.
Master
Den Empfänger an den Master anschließen, wonach sich das System
automatisch für den drahtlosen Betrieb konfiguriert.
Konfiguration des Systems
Um den Master in den Lernmodus zu setzten, die Zugangstaste so lange
betätigen, bis alle sechs roten Ausgangs-LEDs aufleuchten (ungefähr 8
Sek.). Während der nächsten 10 Minuten sucht der Master nach neuen im
Lernmodus befindlichen Thermostaten. Nach 10 Minuten kehrt der Master
wieder in den Normalmodus zurück. Am Display kommt ..RF
LEARNINGMODE.. zur Anzeige.
Konfigurieren der Thermostate für den Lernmodus
Standardthermostate ohne Display: Den Frontdeckel entfernen und die
kleine Lernmodus-Taste ca. 2 Sekunden lang betätigen, bis vom
Thermostat ein kurzer Piepton abgeben wird.
Uhrenthermostat: Das Uhrsymbol 2 Sekunden lang betätigen, bis „init“
erscheint. Der Thermostat übermittelt jetzt während der nächsten 30
Sekunden seine eindeutige Kennung, wonach das System konfiguriert ist.
Nach einem kompletten Zurücksetzen auf die Werkseinstellungen muss der
Lernmodus wiederholt werden.
Technische Daten
Netzspannung . . . . . . . . . . . . . . . . . . . . . . . . . . . . . . . . . 24 V vom Master
Abstand zum Master . . . . . . . . . . . . . . . . . . . . . . . . . . . . . . . . . . Max. 3 m
Schutzart . . . . . . . . . . . . . . . . . . . . . . . . . . . . . . . . . . . . . . . . . . . . . . . IP 21
Umgebungstemperatur. . . . . . . . . . . . . . . . . . . . . . . . . . . . . . . . 0 bis 40°C
Kommunikationsfrequenz . . . . . . . . . . . . . . . . . . . . . . . . . . . . . . . 868 MHz
Kommunikationsreichweite . . . . . . . . . . . . . . . . . . . . . . . . . . . . . . . . . . . . .
. . . . . . . . . . . . . . . . . . . . . . . . . . . . . . . . . . Bis zu 30 m im Innenraum,
. . . . . . . . . . . . . . . . . . . . . . . . . . . . . . . . . . . . . bis zu 100 m im Freien
OJ ELECTRONICS A/S
Stenager 13B · DK-6400 Sønderborg · Dänemark
Tel +45 73 12 13 14 · Fax +45 73 12 13 13
www.oj.dk · [email protected]
Abb. 1. Master
Abb. 2. Standardthermostat
BA--+
Blau Rot Braun Gelb
57467B
/