Page is loading ...

PAC-SDW01RC-1
SIMPLE DUCTLESS WIRED
REMOTE CONTROLLER
OPERATION MANUAL
This manual is designed to help you get
acquainted with your new Simple Ductless
Wired Remote Controller. Check out the table
of contents on page 2 to browse by topic.
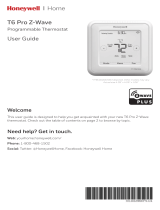
Need Help? Get in Touch.
Web: www.MitsubishiComfort.com
Phone: 1-800-433-4822

2SDW01 Operation Manual
Table of Contents
Table of Contents Read Before Installing
Controller Features . . . . . . . . . . . . . . . . . . . . . . . . . . . . . . . . . . . . . . . . . . . . . . . . . . .3
Controller Overview . . . . . . . . . . . . . . . . . . . . . . . . . . . . . . . . . . . . . . . . . . . . . . . . . . .4
Adjusting the Temperature . . . . . . . . . . . . . . . . . . . . . . . . . . . . . . . . . . . . . . . . . . . . . . .4
Adjusting the Temperature in Auto Mode
. . . . . . . . . . . . . . . . . . . . . . . . . . . . . . . . . . . . . . . .5
Selecting the System Mode . . . . . . . . . . . . . . . . . . . . . . . . . . . . . . . . . . . . . . . . . . . . . .6
Enabling Auto Dry . . . . . . . . . . . . . . . . . . . . . . . . . . . . . . . . . . . . . . . . . . . . . . . . . . .6
Setting the Fan Speed . . . . . . . . . . . . . . . . . . . . . . . . . . . . . . . . . . . . . . . . . . . . . . . . .7
Setting the Vane Direction . . . . . . . . . . . . . . . . . . . . . . . . . . . . . . . . . . . . . . . . . . . . . . .7
Scheduling Overview . . . . . . . . . . . . . . . . . . . . . . . . . . . . . . . . . . . . . . . . . . . . . . . . . .8
Setting a Schedule . . . . . . . . . . . . . . . . . . . . . . . . . . . . . . . . . . . . . . . . . . . . . . . . . . .9
Schedule Override (Hold) . . . . . . . . . . . . . . . . . . . . . . . . . . . . . . . . . . . . . . . . . . . . . . . 10
Locking the Controller . . . . . . . . . . . . . . . . . . . . . . . . . . . . . . . . . . . . . . . . . . . . . . . . 11
Setting the Time and the Day of the Week . . . . . . . . . . . . . . . . . . . . . . . . . . . . . . . . . . . . . . 12
Choosing Fahrenheit or Celsius . . . . . . . . . . . . . . . . . . . . . . . . . . . . . . . . . . . . . . . . . . . 13
Viewing Controller Information . . . . . . . . . . . . . . . . . . . . . . . . . . . . . . . . . . . . . . . . . . . . 13

Flexible Scheduling: The controller provides 3 preset
scheduling periods (Comfort, Away, Sleep), each of
which can be fully customized to meet your desired
time and temperature settings for every day of the week.
Displays Indoor Temperature and Humidity (RH%)
Displays the Indoor Temperature and Humidity (RH%)
being sensed at the controller (default) or indoor unit.
This setting can be changed in the ISU menu.
Reports HVAC System Status: Displays the current
Mode, Fan Speed, Vane Position, Schedule Hold and
Error Code status of the indoor unit.
Adjustable Brightness: Increase or decrease overall
brightness from the main screen.
3SDW01 Operation Manual
Controller Features
Auto Changeover: When Auto mode is selected, the
controller automatically determines whether your home
needs heating or cooling to reach the desired temperature.
Auto Dry: Automatically determines when to switch
between Cool mode and Dry mode to meet your tem-
perature and humidity preferences. Includes settings
which allow you to prioritize dehumidication over
temperature control and vice versa.
Wake Options: Choose between pressing a button or
using the built-in motion sensor to wake the controller
from a sleep state.

4SDW01 Operation Manual
Controller Overview
Adjusting the Temperature
Adjust
Temperature
Rotate dial
clockwise or
counter-clockwise
to set your desired
temperature for
the current mode
Fan
Touch to select
fan mode:
• Auto
• Adjustable
speeds 1-5*
Menu
Select via dial
to enter the
settings menu
and see other
customizable
options.
Indoor Temperature/
Humidity (RH%)
Shows current indoor
temperature or humidity
Temperature
Set Point
Shows desired indoor
temperature.
Mode
Touch to select
system mode:
• Heat
• Cool
• Dry
• Fan
• Auto
• O
To adjust the desired temperature up or down, rotate
the dial clockwise or counterclockwise on the controller
home screen.
Temperature changes will be held either temporarily or
permanently based on your schedule override settings.
For more information, see page 10.

5SDW01 Operation Manual
Note: Single set point is only available when the
system is connected to a central controller. If
there is no central controller connected, then
only dual set points will be available.
Auto mode (when the controller automatically chooses
heating or cooling to reach your desired set point) is
enabled by default. If your heating or cooling profes-
sional disabled it, you will not see Auto appear as an
option under Mode on the controller home screen.
When congured for dual set point:
When congured for single set point:
Adjusting the Temperature in Auto Mode
Adjusting the cool set point from 79 to 76
Adjusting the heat set point from 79 to 7
6
To choose your preferred cooling and heating set points
in Auto mode dual set point, follow the steps below.
1) Set the mode to Auto
2) Turn the dial to highlight a cooling or heating set
point, then press the dial to select the set point.
3) Adjust the set point to the desired value and press
the dial to lock it in.
4) Repeat steps 2-3 for the other set point

6SDW01 Operation Manual
Notes:
• To set your temperature preferences in
Auto mode, see page 6
• Auto mode is not recommended if this
indoor unit
is connected to a MXZ type
outdoor unit. When several
indoor units are
operated simultaneously, the unit may not
be able to switch operation mode between
Cool and Heat. In this case, the indoor
unit goes into
standby mode.
Notes:
• Auto Dry must be enabled in the ISU menu in
order to be selected in the Settings menu.
• While active, the current humidity level (68%)
and target humidity set point (60%) will be
displayed instead of the temperature.
• While active, you will not be able to change
the temperature or humidity set point, but you
can stilll change fan speed and vane direction.
Current system mode (Heat, Cool, Dry, Fan, Auto, O) is dis-
played in the upper-right corner of the controller home screen.
Press the Mode button to view the available modes,
then press the dial to select a preferred mode.
• Heat: Enjoy warm air at your desired temperature
• Cool: Enjoy cool air at your desired temperature
• Dry: Dehumidify your room. The room may be
slightly overcooled, and the temperature may not
be settable depending on your model.
• Fan: Circulate the air in your room.
•
Auto (changeover): The unit selects the operation
mode according to the dierence between the
room temperature and the set temperature.
• O: Turns the indoor unit o.
Enabling Auto Dry allows the system to switch
between Cool and Dry mode automatically in order to
maintain a comfortable balance between temperature
and humidity in your home.
When the humidity level rises above your chosen
setting, the system will switch from Cool to Dry mode.
When it meets or falls below below your chosen
setting, the system will switch from Dry to Cool mode.
See the SDW01 Installation Manual for more
information on setting up Auto Dry.
Selecting System Mode Enabling Auto Dry

7SDW01 Operation Manual
Setting the Fan Speed
Setting the Vane Direction
Press the Fan button to view the available fan speeds,
then press the dial to select a preferred speed.
Available Fan speed settings:
• Auto: SDW01 will
determine the
optimal fan speed
to meet the set
temperature.
• Fixed Speed
(Adjustable): The
fan will run continu-
ously, at one of ve
dierent speeds.
Scroll over to the Vane
menu on the con-
troller home screen
and press the dial to
view all available vane
directions. Once in the
vane menu, use the
dial to select desired
vane position: Auto,
Swing, or Fixed
Vane Directions:
• Auto
• Swing
• Ceiling
• High
• Middle
• Low
• Floor
Note: Available fan speeds will vary depending
on the indoor unit model type.
Note: Available vane directions will vary de-
pending
on the indoor unit model type.

8SDW01 Operation Manual
Schedule Periods
When a scheduling is enabled, the following icons will
appiear in the schedule menu.
By default, scheduling is enabled for both Residential
and Commercial settings. The default schedule for
both settings includes 4 scheduling periods with the
times and temperatures shown in the tables below.
Scheduling Overview
Residential Schedule Default Settings
Commercial Schedule Default Settings
Period Start Time Heat (Mon-Fri) Cool (Mon-Fri) Heat (Sat-Sun) Cool (Sat-Sun)
Comfort 6:00 a.m. 69° 79° 69° 79°
Away 8:00 a.m. 61° 86° 61° 86°
Comfort 6:00 p.m. 69° 79° 69° 79°
Sleep 10:00 p.m. 61° 83° 61° 83°
Period Start Time Heat (Mon-Fri) Cool (Mon-Fri) Heat (Sat-Sun) Cool (Sat-Sun)
Morning 6:00 a.m. 69° 79° 69° 79°
Midday 8:00 a.m. 61° 86° 61° 86°
Evening 6:00 p.m. 69° 79° 69° 79°
Night 10:00 p.m. 61° 83° 61° 83°
Holiday Override
Select this option when leaving your home vacant
for prolonged periods of time. When activated,
this feature will lock your chosen set points in
place and override all schedules. Fan Speed and
Vane Position can still be adjusted. Cancel anytime
through the Nevo menu on the main screen.
Residential
Comfort Morning
Away Midday
Sleep Evening
Night
Commercial

9SDW01 Operation Manual
Table of Contents
Follow the steps below to edit a schedule:
1) Navigate to the “sched.” menu and press the dial.
2)
Select “schedule” from the sched. drop-down menu.
3) If setting up schedules for the rst time, follow the
on-screen wizard to complete the setup process.
Otherwise, proceed to step 4.
4) Navigate to the day of the week and specic
schedule
period you wish to edit.
5) Select “Edit Temperature”.
6) Edit Heat and Cool set points then click “Save”.
7) Select “Edit Time”.
8) Edit start time and days of the week the schedule
period occurs, then click “Save”.
Setting a Schedule
Notes:
• The schedule menu will not be displayed if
scheduling is disabled in the ISU menu.
• Scheduling is automatically disabled when
a central controller is connected.
• Although the images on the right show
settings for Residential mode, the same
steps apply when adjusting the settings in
Commercial mode.

10SDW01 Operation Manual
Table of Contents
Schedule Override (Hold)
A schedule override occurs when the controller is run-
ning a schedule and the set point is adjusted. During
an override condition, the controller will display “Hold”
and maintain the set point temporarily or permanently
based on your preferred settings.
Temporary Hold: Overrides the current temperature
set point for a designated period of time.
Permanent Hold: Overrides the current temperature
set point permanently until you manually change it or
reactivate a schedule.
Schedule Override
(Temporary or Permanent)
1) Navigate to the Settings menu. (see page 4)
2) Select “Preferences” from the Settings menu.
3) Select “Temperature Hold” from the Preferences menu.
4) Set your temporary or permanent Hold.
• If temporary, set the duration of the temporary hold.
5)
To conrm your changes, return to the home screen
and verify that the word “Hold” appears next to the
set point.
Cancel Schedule Override
(Temporary or Permanent)
To end a Hold (temporary or permanent) and return to
the program schedule, repeat steps 1-3 listed to the
left and select “Cancel Hold”.
To conrm your changes, return to the home screen and
verify that the word “Hold” is no longer appears next to
the set point.

11SDW01 Operation Manual
Locking the Controller
To limit or prevent access to the controller, you can
enable either of the two lockout settings:
Child Lock: No access is allowed without a PIN code.
Comfort Lock: Only the temperature can be changed.
Selecting a Lock Setting
1) Navigate to the Settings menu.
2) Select to the Access Control sub-menu.
3)
Select the desired screen lock type. (Comfort or Child)
4) Set your desired PIN code.
5) Write it down _ _ _ _ and keep it in a safe place for
later reference.
6) Press Lock to activate the setting.
Removing a Lock Setting
1) Navigate to the Settings menu, press the dial, and a
pop-up will appear asking for your PIN code
2) Enter your PIN code and select Unlock.
Notes:
• A “locked” icon will appear by features that
are now locked. Child Lock, Comfort Lock,
and certain settings in the ISU menu can
trigger the lock symbol, but only Child and
Comfort Lock and be unlocked with the PIN.
• Child Lock and Comfort lock cannot be
selected or congured if a lockout is
enabled in the ISU menu.
• If entering your PIN does not remove the
lock symbol, then you must disable the
lockout setting in the ISU menu to make
the necessary changes.

12SDW01 Operation Manual
Setting the Time and the Day of the Week
1) Navigate to the Settings menu.
2) Navigate to the Time/Day sub-menu.
3) Select between a 24 hour and 12 hour clock.
4) Set the hour of the day.
5) Set the minute of the hour.
6) Set the day of the week.
Note:
Settings will be saved automatically
upon exiting the menu.

13SDW01 Operation Manual
Choosing Fahrenheit or Celsius
Viewing Controller Information
To select a temperature scale, follow the steps below.
1) Navigate to the Settings menu.
2) Navigate to the Temperature Format sub-menu.
3) Select between Celsius & Farenheit.
3a) If set to Celsius, select between 1 and 1/2 degree
increments.
To see your controller’s technical information, follow
the steps below.
1) Using the dial, navigate to the Settings menu.
2) Navigate to the About sub-menu.
/