Page is loading ...

INSTALLATION INSTRUCTIONS
P 847•244•1234 www.barclayproducts.com
6/16/08
1. Measure wall opening.
2. Place the two ends of the rod together, if it came as two pieces.
3. Measure rod. You can cut ends up to 1 1/2” off each end (3” total) to shorten rod. You can
increase size by sliding flange out up to 1/2” (1” total). For best results, have rods extend
into flange up to the end of the guides inside the flange.
4. When desired size is achieved, slide flanges on each end and install rod in opening.
** Do Not use set screws yet. **
5. After rod is secured to walls, use a level to make sure rod is level side to side and front to
back. Now install set screws. A 1/8” pilot hole is recommended for optimum strength.
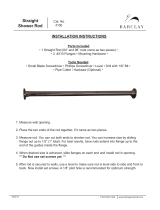
Parts Included
• 1 Curved Rod •
• 2 Rectangular Flanges • Mounting Hardware •
Cat. No.
4110
Tools Needed
• Small Blade Screwdriver • Phillips Screwdriver • Level • Drill with 1/8” Bit •
• Pipe Cutter / Hacksaw (Optional) •
Curved
Shower Rod
/