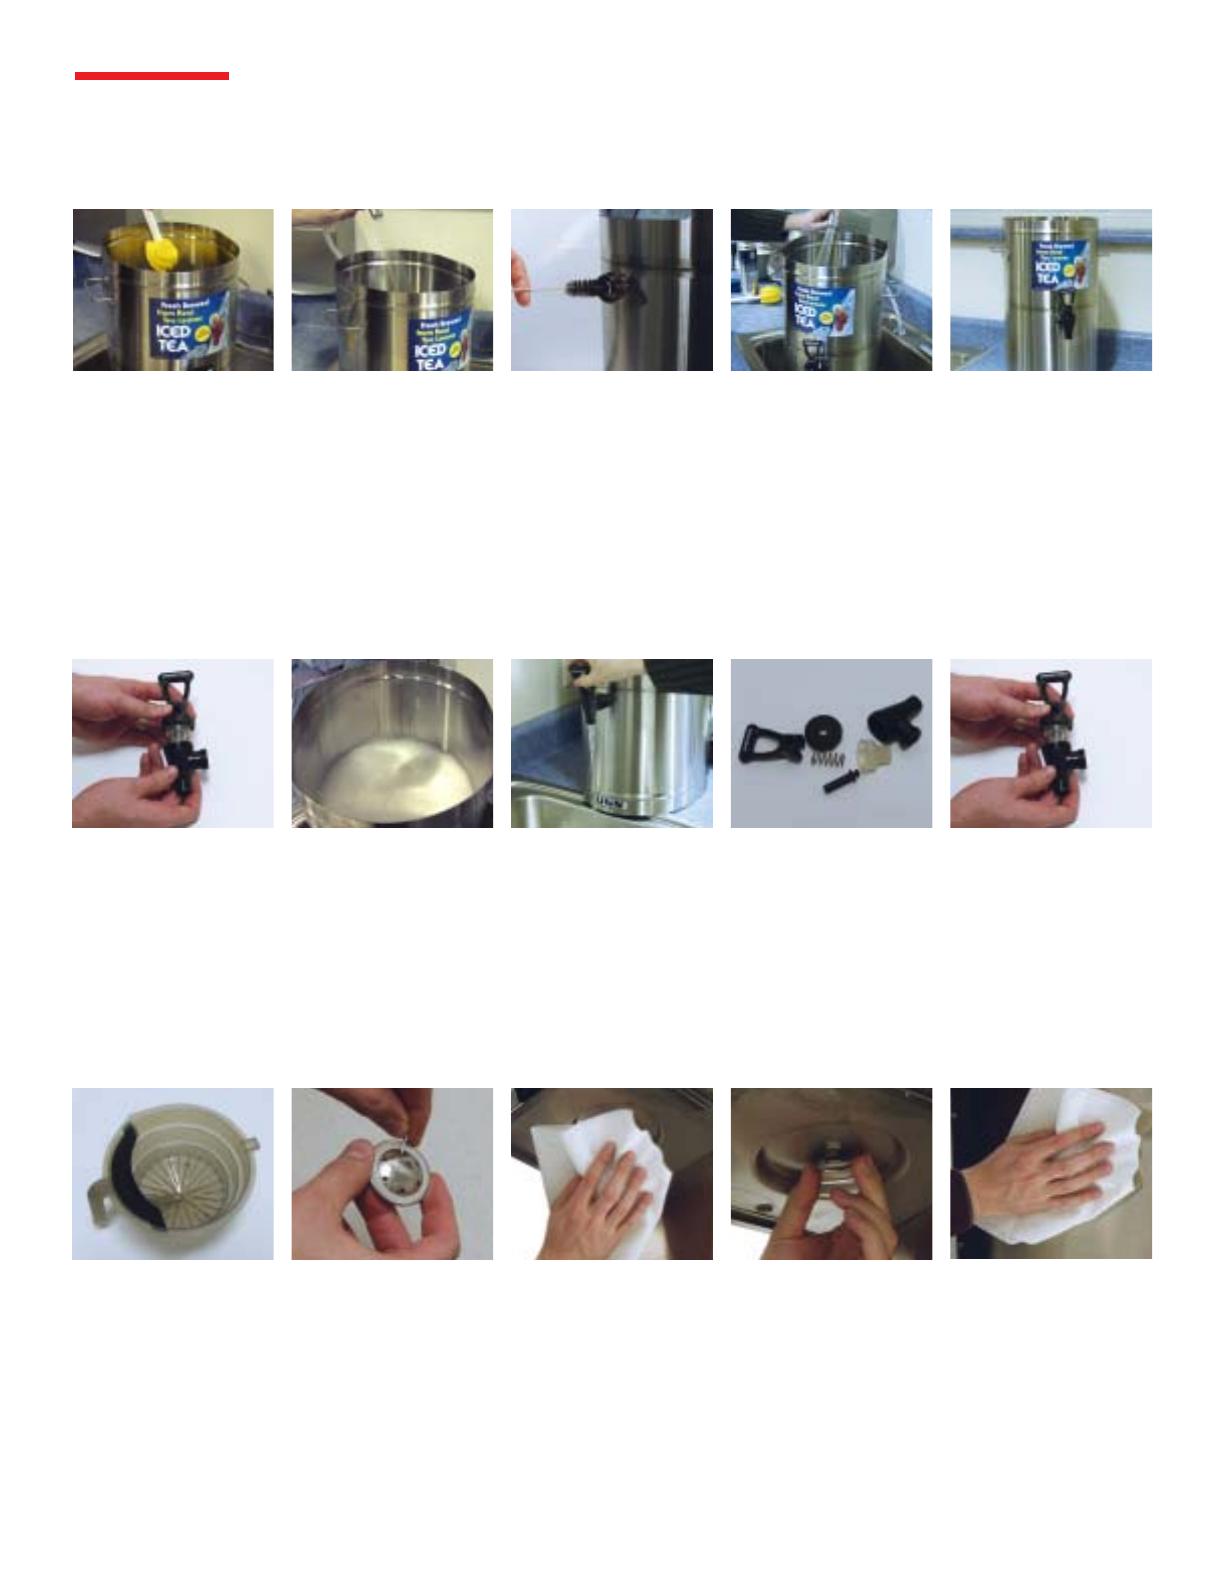
Draw a small amount (2 oz.)
of presoak through the fau-
cet making contact with the
faucet components. Allow the
dispenser to soak over night.
The next morning, perform
the daily cleaning procedures
on the faucet and dispenser.
Once a week, fill the dispenser
with a chlorine solution (75°F
warm chlorine solution of at
least 50-100 ppm).
Once a month, replace the
faucet seat cup (B.O.M.
#00600.0000). Discard the
old seat cup.
35287 012003
Thoroughly rinse the dis-
penser with clean water.
Allow the dispenser to air dry
over night
The faucet assembly (B.O.M.
#03260.0001) can be or-
dered for replacement.
STEP 7 STEP 8 STEP 9 STEP 10
STEP 12 STEP 13 STEP 14 STEP 15
Prepare a sanitizer solution
in a clean bucket (1/4 gal-
lon). Use a commercial sani-
tizer that has 50-100 ppm of
available chlorine with a con-
centration level of at least
3% available chlorine (KAY-
5 Sanitizer). Follow the mix-
ing instructions to ensure 100
ppm of available chlorine.
Pour a small amount of sani-
tizer solution into the dis-
penser. Use a small brush
(BOM #00674.0000) to clean
all the way through the fau-
cet shank. Repeat several
times.
CLEANING (Continued)
STEP 6
Thoroughly clean the entire
inside surface of the dis-
penser and the faucet shank
using a small brush (BOM
#00674.0000) mild detergent
and water solution. Thor-
oughly rinse the dispenser
with clean water.
Assemble the faucet compo-
nents and attach the faucet
to the dispenser turning
clockwise.
STEP 11
Insert the deliming spring
into the sprayhead tube until
about an inch is visible and
move it in and out five or six
times. Insert the spring into
the air vent hole in the
sprayhead panel and move it
in and out five or six times.
Reinstall the sprayhead.
Wipe down the entire out-
side surface of the brewer
with a clean damp cloth.
STEP 17 STEP 18 STEP 19 STEP 20
Clean and sanitize the brew
funnel, funnel tip and screen
assembly.
STEP 16
Remove and thoroughly rinse
the sprayhead. The holes
must be open and clear of
any mineral deposits.
Wipe the sprayhead panel
clean with a damp cloth.
TU3 & TDO-4
DAILY BREWING & CLEANING INSTRUCTIONS
BUNN
®

