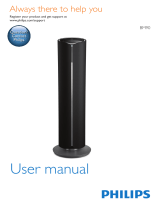
Philips BTM2460/96 User manual

Category
Bluetooth music receivers
Type
User manual

Philips BTM2460/96 lets you enjoy audio from various sources like discs, Bluetooth devices, USB devices, and external devices, as well as listen to FM radio. It features 5 preset sound effects to adjust the audio to your preference, including Powerful, Balanced, Warm, Bright, and Clear. With its remote control, you can easily control playback, adjust volume, select tracks, and more.

Philips BTM2460/96 lets you enjoy audio from various sources like discs, Bluetooth devices, USB devices, and external devices, as well as listen to FM radio. It features 5 preset sound effects to adjust the audio to your preference, including Powerful, Balanced, Warm, Bright, and Clear. With its remote control, you can easily control playback, adjust volume, select tracks, and more.

www.philips.com/support
User manual
Always there to help you
Register your product and get support at
BTM2460
Question?
Contact
Philips
1EN
Contents
1 Important 2
Safety 2
2 Your micro system 3
Introduction 3
What's in the box 3
Overview of the main unit 4
Overview of the remote control 5
3 Get started 7
Place the speaker 7
Connect FM antenna 7
Connect power 7
Prepare the remote control 8
Set clock 8
Turn on 8
4 Play 9
Play from disc 9
Play from USB 9
Control play 9
Skip to a track 10
Program tracks 10
Play from Bluetooth-enabled devices 10
5 Listen to the radio 12
Tune to a radio station 12
Store FM radio stations automatically 12
Store FM radio stations manually 12
Select a preset radio station 12
Select stereo/mono broadcast 12
6 Adjust sound 13
Select a preset sound effect 13
Adjust volume level 13
Mute sound 13
7 Other features 14
Set the alarm timer 14
Set the sleep timer 14
Listen from an external device 14
Listen through a headphone 15
8 Product information 16
Specications 16
USB playability information 17
Supported MP3 disc formats 17
9 Troubleshooting 18
10 Notice 20
2 EN
1 Important
Safety
Make sure that there is enough free space
around the product for ventilation.
Only use attachments or accessories
speciedbythemanufacturer.
Battery usage CAUTION – To prevent
battery leakage which may result in bodily
injury, property damage, or damage to the
product:
Install the battery correctly, + and - as
marked on the product.
Remove the battery when the product
is not used for a long time.
The battery shall not be exposed to
excessiveheatsuchassunshine,reor
the like.
The product shall not be exposed to
dripping or splashing.
Do not place any sources of danger on the
product(e.g.liquidlledobjects,lighted
candles).
Where the plug of the Direct Plug-in
Adapter is used as the disconnect device,
the disconnect device shall remain readily
operable.
Warning
Never remove the casing of this device.
Never lubricate any part of this device.
Never place this device on other electrical equipment.
Keep this device away from direct sunlight, naked
amesorheat.
Never look into the laser beam inside this device.
Ensure that you always have easy access to the power
cord, plug, or adaptor to disconnect this device from
the power.
Hearing safety
Caution
To avoid hearing damage, limit the time you use the
headphones at high volume and set the volume to a
safe level. The louder the volume, the shorter is the safe
listening time.
Be sure to observe the following guidelines
when using your headphones.
Listen at reasonable volumes for
reasonable periods of time.
Be careful not to adjust the volume as your
hearing adapts.
Do not turn up the volume so high that
you can't hear what's around you.
You should use caution or temporarily
discontinue use in potentially hazardous
situations.
Excessive sound pressure from earphones
and headphones can cause hearing loss.
3EN
2 Your micro
system
Congratulations on your purchase, and
welcometoPhilips!Tofullybenetfromthe
support that Philips offers, register your product
at www.philips.com/welcome.
Introduction
With this unit, you can:
enjoy audio from discs, Bluetooth-enabled
devices, USB storage devices, or other
external devices;
listen to FM radio stations.
You can select one of the following sound
effects:
DSC 1 (Powerful), DSC 2 (Balanced),
DSC 3 (Warm), DSC 4 (Bright), DSC 5
(Clear)
The unit supports these media formats:
What's in the box
Check and identify the contents of your
package:
Main unit
1 x FM wire antenna
Remote control (with one AAA battery)
Short User Manual
Table stand
Wall mounting sheet (with screws)
4 EN
Overview of the main unit
a
Turn the unit on or off.
Switch to standby mode or Eco
standby mode.
b SOURCE
Press to select a source: DISC, USB,
TUNER, BT, AUDIO IN.
c
/PAIRING
Start, pause, or resume play.
In Bluetooth mode, press and hold for
3 seconds to enter pairing mode.
d
Stop play or erase a program.
g
h
i
j
k
a
b
c
d
e
l
m
n
f
e
USB socket.
f Disc compartment
g
Open/close the disc compartment.
h
/
Skip to the previous/next track.
Search within a track/disc/USB.
Tune to a radio station.
Adjust time.
i VOL+/VOL-
Adjust volume.
j Display panel
5EN
k FM ANT
FM antenna socket.
l
Headphone socket.
m AUDIO IN
Audio input socket(3.5mm) for an
external audio device.
n DC IN 12V
2.5A
Power socket.
Overview of the remote
control
a
b
c
d
e
f
g
i
h
q
p
r
m
n
o
k
j
l
a
Turn the unit on or off.
Switch to standby mode or Eco power
standby mode.
b CD
Select the DISC source.
c FM
Press to select the FM source.
d
/
Skip to the previous/next track.
Search within a track/disc/USB.
Tune to a radio station.
Adjust time.
e
Play tracks randomly.
f ALBUM/PRESET
/
Select a preset radio station.
Skip to the previous/next album.
g DISPLAY
Adjust display brightness.
During playback, display the play
information.
h SLEEP/TIMER
Set sleep timer.
Set alarm timer.
i CLOCK/SCAN
Set the clock.
View clock information.
Scan FM radio stations.
j PROG
Program tracks.
Program radio stations.
k
Mute or restore volume.
l SOUND
Select a preset sound effect.
m +/-
Adjust volume.
n
Play a track or all tracks repeatedly.
6 EN
o
Stop play or erase a program.
p
Start, pause, or resume play.
q USB/AUDIO IN
Press repeatedly to select the USB or
AUDIO IN source.
r
PAIRING
Press to select the BT (Bluetooth)
source.
In Bluetooth mode with one device
connected, press and hold for
3 seconds to enter pairing mode.
In Bluetooth mode with two devices
connected, press and hold for
3secondstodisconnecttherst
connected device or the device
without music playback and enter
pairing mode.
7EN
3 Get started
Caution
Use of controls or adjustments or performance of
procedures other than herein may result in hazardous
laser exposure or other unsafe operation.
Always follow the instructions in this chapter in
sequence.
If you contact Philips, you will be asked for the
model and serial number of this apparatus. The
model number and serial number are on the
back of the apparatus. Write the numbers here:
Model No. __________________________
Serial No. ___________________________
Place the speaker
Tip
See the attached wall mounting sheet for how to
mount the speaker onto wall.
Connect FM antenna
Connect the supplied antenna to this
device before listening to the radio.
Connect power
Caution
Risk of product damage! Make sure that the power
supply voltage matches the voltage printed on the back
of the main unit.
Risk of electric shock! Before you plug the AC power
adaptor, make sure that the adaptor plug converter is
xedsecurely.WhenyouunplugtheACpoweradaptor,
always pull the plug, never the cord.
Before you connect the AC power adaptor, make sure
that you have completed all the other connections.
8 EN
Prepare the remote control
Caution
Risk of product damage! When the remote control is
not used for long periods, remove the battery.
To insert the remote control battery:
1 Open the battery compartment.
2 Insert the supplied AAA battery with
correct polarity (+/-) as indicated.
3 Close the battery compartment.
Set clock
1
In standby mode, press and hold CLOCK
on the remote control for 3 seconds.
» The [24H] or [12H] hour format is
displayed.
2 Press / to select the [24H] or
[12H] hour format.
3 Press CLOCKtoconrm.
» The hour digits are displayed and begin
to blink.
4 Press / to select hour and press
CLOCKtoconrm.
» The minute digits are displayed and
begin to blink.
5 Press / to select minute and press
CLOCKtoconrm.
Note
If no button is pressed in 10 seconds, the system exits
clock setting mode automatically.
Tip
You can press CLOCK to view clock information in
power-on mode.
Turn on
Press .
» The unit switches to the last selected
source.
Switch to standby mode
Press again to switch the unit to standby
mode.
» The clock (if set) is displayed on the
panel.
Switch to ECO standby mode:
Press and hold
for more than 3 seconds.
» The display panel is dimmed.
Note
The unit switches to Eco Power Standby mode after
15 minutes in standby mode.
9EN
4 Play
Play from disc
Note
Make sure that the disc contains playable audio content.
1 Press CD to select the DISC source.
2 Insert a disc into the disc compartment
with the printed side facing you.
» Play starts automatically. If not, press
.
Play from USB
Note
Make sure that the USB device contains playable audio
content (see 'Product information' on page 16).
1 Press USB/AUDIO IN repeatedly to select
the USB source.
2 Insert a USB device into the socket.
» Play starts automatically. If not, press
.
Control play
/ Select a folder.
/ Press to skip to the previous or
next track.
Press and hold to search
backward/forward within a track.
Pause or resume play.
Stop play.
Play a track or all tracks repeatedly.
Play tracks randomly(Not
applicable for the programmed
tracks).
10 EN
Skip to a track
For CD:
Press
/ to select another track.
For MP3 disc and USB:
1 Press ALBUM/PRESET / to select an
album or a folder.
2 Press / toselectatrackorale.
Program tracks
You can program a maximum of 20 tracks.
1 Stop play, and then press PROG/SCAN to
activate programming mode.
2 For MP3 tracks, press ALBUM/PRESET /
to select an album.
3 Press / to select a track, and then
press PROG/SCANtoconrm.
4 Repeat steps 2-3 to program more tracks.
5 Press to play the programmed tracks.
To erase the program, stop play, and
then press
.
Play from Bluetooth-enabled
devices
Note
Before pairing a device with this unit, read its user
manual for Bluetooth compatibility.
Compatibility with all Bluetooth devices is not
guaranteed.
Any obstacle between the unit and the device can
reduce the operational range.
The effective operation range between this unit
and your Bluetooth enabled device is approximately
10 meters (30 feet).
The unit can memorize up to 8 previously connected
Bluetooth devices.
To enjoy music through the speaker wirelessly,
you need to pair your Bluetooth enabled device
with the unit.
1 Press /PAIRING to select the Bluetooth
source.
» [BT] (Bluetooth) is displayed.
» TheBluetoothindicatorashesblue.
2 On your device that supports Advanced
AudioDistributionProle(A2DP),enable
Bluetooth and search for Bluetooth devices
that can be paired (refer to the user
manual of the device).
3 Select 'Philips BTM2460' on your
Bluetooth enabled device and if necessary
input '0000' as the pairing password.
» After successful pairing and connection,
the Bluetooth indicator turns solid
blue, and the unit beeps.
» 'BT’ is displayed.
Philips BTM2460
11EN
4 Play music on the connected device.
» Music streams from your Bluetooth
enabled device to this unit.
If you fail to search for 'Philips
BTM2460' or cannot pair with this unit,
press and hold
/PAIRING for three
seconds until you hear a beep sound
to enter pairing mode.
To disconnect the current Bluetooth-enabled
device:
Deactivate Bluetooth on your device.
Pair and connect a second device
You can pair and connect a maximum of two
Bluetooth-enabled devices to this product at
the same time.
To connect and play from a second Bluetooth-
enabled device
Press and hold
/PAIRING for 3 seconds
to enter pairing mode.
» TheBluetoothindicatorashesblue
quickly.
» The product beeps once.
To play from the other connected
device, stop music streaming from the
current device, and then play music
from the other device.
To connect and play from the third Bluetooth-
enabled device.
Press and hold
/PAIRING for 3 seconds
to enter pairing mode.
» Therstconnecteddeviceorthe
device with no music playback is
disconnected.
» The product beeps once.
12 EN
5 Listen to the
radio
Tip
Position the antenna as far as possible from TV or other
radiation sources.
Make sure that you have connected the supplied FM
antenna.
For optimal reception, fully extend and adjust the
position of the antenna.
Tune to a radio station
1
Press FM to select the tuner source.
2 Press and hold / for 3 seconds.
» The radio tunes to a station with
strong reception automatically.
3 Repeat step 2 to tune to more stations.
To tune to a weak station:
Press
/ repeatedlyuntilyound
optimal reception.
Store FM radio stations
automatically
Note
You can store a maximum of 30 preset radio stations (FM).
1 In tuner mode, press CLOCK/SCAN
for more than two seconds to activate
automatic programming.
» [AUTO] is displayed.
» All available stations are programmed
in the order of waveband reception
strength.
» Therstprogrammedradiostationis
broadcast automatically.
2 press / to select a preset station.
Store FM radio stations
manually
1
Tune to an FM radio station.
2 Press PROG to activate programming
mode.
» [PROG] (program) blinks.
3 Press ALBUM/PRESET / repeatedly
to select a radio frequency.
4 Press PROGagaintoconrm.
» The frequency of the preset station is
displayed.
5 Repeat the above steps to store more FM
stations.
Note
To remove a pre-stored station, store another station
in its place.
Select a preset radio station
In FM mode, press / to select a preset
radio station.
Select stereo/mono broadcast
Note
Stereo broadcast is the default setting for tuner mode.
For stations with weak signals: to improve the reception,
change to monaural sound.
In FM tuner mode, press to switch
between mono and stereo broadcast.
» [STEREO] (Stereo) is displayed when
the radio station is stereo broadcast.
13EN
6 Adjust sound
The following operations are applicable to all
supported media.
Select a preset sound effect
Press SOUND repeatedly to select a
preset sound effect.
DSC 1 (Powerful), DSC 2 (Balanced),
DSC 3 (Warm), DSC 4 (Bright), DSC
5 (Clear).
Adjust volume level
On the remote control, press +/-
repeatedly.
On the main unit, press VOL+/VOL-
repeatedly.
Mute sound
Press to mute or restore the sound.
14 EN
7 Other features
Set the alarm timer
This unit can be used as an alarm clock. You
can select DISC, USB, or TUNER as the alarm
source.
Note
Make sure that you have set the clock correctly.
1 In standby mode, press and hold SLEEP/
TIMER for three seconds.
2 Press / repeatedly to select an
alarm source (DISC, USB,or TUNER)
3 Press SLEEP/TIMERtoconrm.
» The hour digits begin to blink.
4 Repeat steps 2-3 to set the hour, minute,
and adjust volume of the alarm.
Note
If no button is pressed in 90 seconds, the system exits
timer setting mode automatically.
To activate or deactivate the alarm timer:
Press SLEEP/TIMER repeatedly to view
the alarm information and activate or
deactivate the alarm.
» If the timer is activated, [TIMER]
(Timer) is displayed.
» If the timer is deactivated, [TIMER
OFF] (timer off) is displayed and
[TIMER] (Timer) disappears.
Tip
If the DISC/USB source is selected, but no disc is placed
or no USB connected, the system switches to the tuner
source automatically.
Set the sleep timer
To set the sleep timer, when the unit
is switched on, press SLEEP/TIMER
repeatedly to select a set period of time
(in minutes).
[SLP 120]
[SLP 90]
[SLP 60]
[SLP 45]
[SLP 30]
[SLP 15]
[SLP OFF]
» When the sleep timer is activated,
[SLEEP] (sleep)is displayed. Otherwise,
[SLEEP] (sleep) disappears.
Listen from an external
device
You can listen to an external device through this
unit with an audio cable.
1 Press USB/AUDIO IN repeatedly to select
the AUDIO IN source.
2 Connect an audio cable (not supplied)
between:
the AUDIO IN socket (3.5 mm) on
the unit;
and the headphone socket on an
external device.
3 Start to play music on the connected
device (see the device user manual).
15EN
Listen through a headphone
Plug a headphone (not supplied) into the
socket.
16 EN
8 Product
information
Note
Product information is subject to change without prior
notice.
Specications
Amplier
Rated Output Power 2 x 10 W
Frequency Response 63 -20KHz, +/-3dB
Total Harmonic
Distortion
<1%(1 KHz)
Signal to Noise Ratio
(A-weighted)
>72dBA
AUDIO IN 650mV RMS 22kohm
Disc
Laser Type Semiconductor
Disc Diameter 12 cm
Support Disc CD-DA, CD-R, CD-
RW, MP3-CD
Audio DAC 24 Bits/44.1 kHz
Total Harmonic
Distortion
<1% (1 kHz)
Frequency Response 63Hz - 20kHz, ±3dB
S/N Ratio >72dBA
Bluetooth
Bluetooth version V3.0 +EDR
Bluetooth frequency
band
2.4GHz ~ 2.48GHz
ISM Band
Range 10 m (free space)
USB
USB Direct Version 2.0 full speed
Tuner (FM)
Tuning Range 87.5-108 MHz
Tuning grid 50 KHz
Preset stations 30
Sensitivity
- Mono, 26 dB S/N
Ratio
- Stereo, 46 dB S/N
Ratio
<22 dBf
<51.5 dBf
Search Selectivity <28dBf
Total Harmonic
Distortion
<3%
Signal to Noise Ratio >55dBA
General information
AC power Model:
AS360-120-AA250
Input: 100-240V~,
50/60 Hz, 1.2A
Output: DC 12.0 V,
2.5A
Operation Power
Consumption
15W
Eco Standby Power
Consumption
<0.5W
Dimensions
- Main Unit
(W x H x D)
- D-Box
465 x 233 x 107 mm
520 x 323 x 123 mm
Weight
- Main Unit
- With Packing
2.4 kg
3.6 kg
17EN
USB playability information
Compatible USB devices:
USBashmemory(USB2.0orUSB1.1)
USBashplayers(USB2.0orUSB1.1)
memory cards (requires an additional card
reader to work with this unit)
Supported USB formats:
USBormemoryleformat:FAT12,FAT16,
FAT32 (sector size: 512 bytes)
MP3 bit rate (data rate): 32-320 Kbps and
variable bit rate
Directory nesting up to a maximum of
8 levels
Number of albums/ folders: maximum 99
Number of tracks/titles: maximum 999
File name in Unicode UTF8 (maximum
length: 32 bytes)
Unsupported USB formats:
Empty albums: an empty album is an album
thatdoesnotcontainMP3les,andwill
not be shown in the display.
Unsupportedleformatsareskipped.
For example, word documents (.doc) or
MP3leswithextension.dlfareignored
and not played.
Supported MP3 disc formats
ISO9660, Joliet
Maximum title number: 128 (depending on
lenamelength)
Maximum album number: 99
Supported sampling frequencies: 32 kHz,
44.1 kHz, 48 kHz
Supported Bit-rates: 32~256 (kbps),
variable bit rates
18 EN
9 Troubleshooting
Warning
Never remove the casing of this unit.
To keep the warranty valid, never try to repair
the unit yourself.
If you encounter problems when using this
device, check the following points before
requesting service. If the problem remains
unsolved, go to the Philips Web page
(www.philips.com/support). When you contact
Philips, make sure that the device is nearby
and the model number and serial number are
available.
No power
Make sure that the AC power cord of the
device is connected properly.
Make sure that there is power at the AC
outlet.
As a power-saving feature, the system
switches off automatically 15 minutes after
track play reaches the end and no control
is operated.
No sound or poor sound
Adjust the volume.
No response from the unit
Disconnect and reconnect the AC power
plug, then turn on the unit again.
Remote control does not work
Beforeyoupressanyfunctionbutton,rst
select the correct source with the remote
control instead of the main unit.
Reduce the distance between the remote
control and the unit.
Insert the battery with its polarities (+/–
signs) aligned as indicated.
Replace the battery.
Aim the remote control directly at the
sensor on the front of the unit.
No disc detected
Insert a disc.
Make sure that the disc is inserted with the
printed side facing you.
Wait until the moisture condensation at
the lens has cleared.
Replace or clean the disc.
UseanalizedCDorcorrectformatdisc.
Cannot display some les in USB device
ThenumberoffoldersorlesintheUSB
device has exceeded a certain limit. This
phenomenon is not a malfunction.
Theformatsoftheselesarenot
supported.
USB device not supported
The USB device is incompatible with the
unit. Try another one.
Poor radio reception
Increase the distance between the unit and
your TV or other radiation sources.
Connect and fully extend the supplied
antenna.
Music playback is unavailable on this unit even
after successful Bluetooth connection.
The device cannot be used to play music
through this unit wirelessly.
The audio quality is poor after connection
with a Bluetooth-enabled device.
The Bluetooth reception is poor. Move the
device closer to this unit or remove any
obstacle between them.
Bluetooth cannot be connected with this unit.
Thedevicedoesnotsupporttheproles
required for this unit.
The Bluetooth function of the device is
not enabled. Refer to the user manual of
thedevicetondouthowtoenablethe
function.
This unit is not in pairing mode.
The unit has connected to two Bluetooth-
enabled devices. Disconnect one of those
two devices and try again.
  • Page 1 1
  • Page 2 2
  • Page 3 3
  • Page 4 4
  • Page 5 5
  • Page 6 6
  • Page 7 7
  • Page 8 8
  • Page 9 9
  • Page 10 10
  • Page 11 11
  • Page 12 12
  • Page 13 13
  • Page 14 14
  • Page 15 15
  • Page 16 16
  • Page 17 17
  • Page 18 18
  • Page 19 19
  • Page 20 20
  • Page 21 21
  • Page 22 22
  • Page 23 23
  • Page 24 24

Philips BTM2460/96 User manual

Category
Bluetooth music receivers
Type
User manual

Philips BTM2460/96 lets you enjoy audio from various sources like discs, Bluetooth devices, USB devices, and external devices, as well as listen to FM radio. It features 5 preset sound effects to adjust the audio to your preference, including Powerful, Balanced, Warm, Bright, and Clear. With its remote control, you can easily control playback, adjust volume, select tracks, and more.

Ask a question and I''ll find the answer in the document

Finding information in a document is now easier with AI