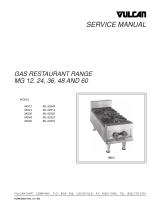
Vulcan-Hart 948A-ML-52600 User manual
- Category
- Electric griddles
- Type
- User manual

VULCAN-HART COMPANY, P.O. BOX 696, LOUISVILLE, KY 40201-0696, TEL. (502) 778-2791
INSTALLATION &
OPERATION MANUAL
FORM 30529 Rev. B (1-95) (Formerly 990408)
900A SERIES GAS GRIDDLES
MODEL
902A ML-52630
904A ML-52631
924A ML-52592
936A ML-52596
948A ML-52600
960A ML-52604
972A ML-52608

— 2 —
IMPORTANT FOR YOUR SAFETY
THIS MANUAL HAS BEEN PREPARED FOR PERSONNEL QUALIFIED TO INSTALL GAS
EQUIPMENT, WHO SHOULD PERFORM THE INITIAL FIELD STARTUP AND
ADJUSTMENTS OF THE EQUIPMENT COVERED BY THIS MANUAL.
POST IN A PROMINENT LOCATION THE INSTRUCTIONS TO BE FOLLOWED IN THE
EVENT THE SMELL OF GAS IS DETECTED. THIS INFORMATION CAN BE OBTAINED
FROM THE LOCAL GAS SUPPLIER.
IMPORTANT
IN THE EVENT A GAS ODOR IS DETECTED, SHUT
DOWN UNITS AT MAIN SHUTOFF VALVE AND
CONTACT THE LOCAL GAS COMPANY OR GAS
SUPPLIER FOR SERVICE.
FOR YOUR SAFETY
DO NOT STORE OR USE GASOLINE OR OTHER
FLAMMABLE VAPORS OR LIQUIDS IN THE
VICINITY OF THIS OR ANY OTHER APPLIANCE.
WARNING
IMPROPER INSTALLATION, ADJUSTMENT,
ALTERATION, SERVICE OR MAINTENANCE CAN
CAUSE PROPERTY DAMAGE, INJURY OR DEATH.
READ THE INSTALLATION, OPERATING AND
MAINTENANCE INSTRUCTIONS THOROUGHLY
BEFORE INSTALLING OR SERVICING THIS
EQUIPMENT.
IN THE EVENT OF A POWER FAILURE, DO NOT
ATTEMPT TO OPERATE THIS DEVICE.

— 3 —
Installation, Operation and Care of
900A SERIES GAS GRIDDLES
PLEASE RETAIN THIS MANUAL FOR FUTURE REFERENCE
Thoroughly read this entire manual and carefully follow all of the instructions provided.
Your Vulcan Model 900A Series Gas Griddle is produced with quality workmanship and material. Proper installation,
usage and maintenance of your griddle will result in many years of satisfactory performance.
INSTALLATION
UNCRATING
CAUTION: Do not use a fork lift to remove the griddle from the skid; it may result in damage to the components
underneath the griddle or to the front panel.
This griddle was inspected before leaving the factory. The transportation company assumes full responsibility for safe
delivery upon acceptance of the shipment. Immediately after unpacking, check for possible shipping damage. If the
griddle is found to be damaged, save the packaging material and contact the carrier within 15 days of the delivery.
Before installing, verify that the electrical service and type of gas supply (natural or propane) agree with the
specifications on the rating plate located behind the griddle control panel. If the supply and equipment requirements
do not agree, do not proceed with the installation. Contact your dealer or Vulcan-Hart immediately.
LOCATION
Keep the griddle free and clear from all combustible substances. For 902A and 904A hot top sections, the minimum
clearance from combustible and non-combustible construction is 7" from the sides and 3" from the back. For the 924A,
936A, 948A, 960A and 972A griddles, the clearance from combustible construction is 7" from the sides and 3" from
the rear. The clearance from non-combustible construction is 0" from the sides and 0" from the rear. A minimum
clearance of 32" is required for proper servicing and operation.
Do not obstruct the air flow into and around the appliance. This air flow is necessary for proper combustion of gases
and for ventilation of the appliance. Provisions for the ventilation of incoming air supply for the equipment in the room
must be in accordance with National Fuel Gas Code ANSI Z223.1 (latest edition).
Do not obstruct the flow of flue gases from the flue duct located on the rear of the appliance. Flue gases must be
ventilated to the outside of the building through a ventilation system installed by qualified personnel and in accordance
with National Fire Protection Association Standard #96.
Do not permit fans to blow directly at the griddle, and wherever possible, avoid open windows next to the griddle sides
and back. Avoid wall-type fans which create air cross currents within the room.

— 4 —
ASSEMBLY
Legs
Place the griddle on its back. Screw the legs into the permanently fastened nuts on the four corners of the griddle.
Hand-tighten the legs.
Set the griddle in its installation location. Turn the adjustment screw at the bottom of each leg to level the griddle plate.
Stand (Fig. 1)
1. Start external threaded end of leg extension into griddle frame.
2. On stands 72" or wider, attach undershelf brace to undershelf with
1
/4-20 x
1
/2 nut.
3. Start threaded end of adjustable leg through undershelf into internal threaded end of leg extension.
4. Tighten both leg extension and adjustable legs.
5. If casters are furnished instead of adjustable legs, the locking swivel casters must be placed in the front.
INSTALLATION CODES AND STANDARDS
Your Vulcan griddle should be installed in accordance with state and local codes, or in the absence of local codes,
with National Fuel Gas Code ANSI-Z223.1 (latest edition), available from the American Gas Association, Inc., 1515
Wilson Blvd., Arlington, VA 22209, and National Electrical Code ANSI/NFPA 70 (latest edition).
In Canada, installation should be in accordance with local codes, or in the absence of local codes, with Canadian
Standard CAN/CGA-B149.1 NATURAL GAS (latest edition), or CAN/CGA-B149.2 PROPANE GAS (latest edition)
available from the Canadian Gas Association, 55 Scarsdale Road, Don Mills, Ontario, Canada M3B2R3, and
Canadian Electrical Code Part 1 CSA-C22.1 (latest edition).
▼
▼
▼
PL-40556
Fig. 1

— 5 —
GAS CONNECTIONS
CAUTION: All gas supply connections and any pipe joint compound used must be resistant to the action of
propane gases.
Pipe gas supply to the griddle. Make sure the pipes are clean and free of obstructions, dirt, and piping compound.
Codes require that a gas shutoff valve be installed in the gas line ahead of the griddle.
All griddles are equipped with fixed orifices for use with natural or propane gas and no adjustment is necessary.
Griddles for operation on natural or propane gas are also equipped with a factory preset pressure regulator with an
outlet pressure of 4
1
/2" Water Column for natural gas supply, and 10" Water Column for propane gas supply. No
further adjustment should be required.
WARNING: PRIOR TO LIGHTING, CHECK ALL JOINTS IN THE GAS SUPPLY LINE FOR LEAKS. USE SOAP
AND WATER SOLUTION. DO NOT USE AN OPEN FLAME.
TESTING THE GAS SUPPLY SYSTEM.
When test pressures exceed
1
/2 psig (3.45 k Pa), the griddle and its individual shutoff valve must be disconnected
from the gas supply piping system.
When test pressures are
1
/2 psig (3.45 k Pa) or less, the griddle must be isolated from the gas supply system by
closing its individual manual shutoff valve.
FLUE CONNECTIONS
Ventilation requirements will vary with each installation. Information on the construction and installation of
ventilating hoods may be obtained from the standard for “Vapor Removal from Cooking Equipment,” NFPA No. 96
(latest edition).
ELECTRICAL CONNECTIONS
WARNING: ELECTRICAL AND GROUNDING CONNECTIONS MUST COMPLY WITH THE APPLICABLE
PORTIONS OF THE NATIONAL ELECTRICAL CODE AND/OR OTHER LOCAL ELECTRICAL CODES.
WARNING: APPLIANCES EQUIPPED WITH A FLEXIBLE ELECTRIC SUPPLY CORD ARE PROVIDED WITH A
THREE-PRONG GROUNDING PLUG. IT IS IMPERATIVE THAT THIS PLUG BE CONNECTED INTO A PROPERLY
GROUNDED THREE-PRONG RECEPTACLE. IF THE RECEPTACLE IS NOT THE PROPER GROUNDING
TYPE, CONTACT AN ELECTRICIAN. DO NOT REMOVE THE GROUNDING PRONG FROM THIS PLUG.
If the appliance is not equipped with a grounding plug and electric supply is needed, ground the appliance by using
the ground lug provided (refer to the wiring diagram located on the inside of the control panel).
Do not connect griddle to electrical supply until after gas connections have been made.
Power supply for electrical thermostats:
Electrical Rating: 120 Volts
50/60 Hertz 1 phase 5 amperes

— 6 —
OPERATION
WARNING: THE GRIDDLE AND ITS PARTS ARE HOT. USE CARE WHEN OPERATING, CLEANING AND
SERVICING THE GRIDDLE.
This griddle plate is steel, but the surface is relatively soft and can be scored or dented by carelessly using a spatula.
Be careful not to dent, scratch, or gouge the plate surface. Do not try to knock off loose food that may be on the spatula
by tapping the corner or the edge of the spatula on the griddle surface.
CAUTION: Do not overheat the griddle plate by setting the thermostats above recommended temperatures.
Overheating the plate may cause plate warpage, and will carbonize any grease on the plate which will cause
sticking.
BEFORE FIRST USE
The griddle is shipped covered with a protective coating of grease. Remove this grease only when the griddle plate
is being cleaned prior to its first use.
Seasoning Griddle
The metal surface of the griddle is porous. Food tends to get trapped in these pores and stick; therefore, it is important
to “season” or “fill up” these pores with cooking oil before cooking on any metal-surfaced griddle. Seasoning gives
the surface a slick, hard finish from which the food will release easily.
To season, heat the griddle to low temperature and pour on a small amount of cooking oil (about one ounce per square
foot of surface). With a cloth, spread the oil over the entire griddle surface to create a thin film. Wipe off any excess
oil with a cloth.
STANDARD GRIDDLES
Lighting the Pilot
NOTE: In case of power failure, do not attempt to operate the appliance.
Lighting instructions are inside the front panel. To open the front panel:
1. Remove two screws from upper front panel. Lift upper front panel until it clears the lower front panel.
2. To reinstall the upper front panel, place panel above lower front panel, slip upper panel down so it engages lower
front panel. Reinstall the two screws from the upper front panel.
If the pilot goes out, an automatic shutoff valve turns off the gas supply to the griddle burners. To relight the griddle
pilot, follow this procedure:
1. Turn the thermostat to OFF. Wait 5 minutes to allow gas which may have accumulated in the burner compartment
to escape.
2. Turn the main shutoff valve ON.
3. Depress and hold in on the red button (Fig. 2) on the automatic shutoff valve while lighting the pilot burner.

— 7 —
PL-40557-1
Red Reset Button
Fig. 2
4. When gas at pilot has been burning for about 45 seconds, release the red button. If pilot does not remain lit, repeat
the operation, allowing more time before releasing red reset button.
Operating a Standard Griddle
Turn the thermostat to the desired setting. Since all burners are lit from constantly burning pilots, this is all that is
required to put the griddle into service.
For the griddle plate, turn burners on about 15-20 minutes before cooking for preheating. Set the thermostat dials.
Each thermostat will control gas flow to burners to bring that area of the plate up to the set temperature.
Extended Shutdown
1. Turn manual shutoff valve to OFF.
2. Turn all control knobs to the OFF position.
3. Shut off the pilot flame by turning the adjusting screw on the pilot valve.
4. Turn off electric supply to the griddle.
If the griddle is to be shut down for an extended period, put a heavy coat of grease over the griddle plate to prevent
rusting.
GRIDDLES WITH ELECTRIC IGNITION
Lighting the Pilot
NOTE: In case of power failure, do not attempt to operate the griddle.
CAUTION: Do not turn on the electric supply without first making sure that gas is flowing to the pilots. Failure
to do this may shorten the life of the electric ignition igniter.

— 8 —
1. Turn all burner valves to OFF. Wait 5 minutes to allow gas which may have accumulated in the burner
compartment to escape.
2. Turn gas supply to the griddle ON.
3. Turn on the electric supply to the griddle by turning the toggle switch to ON. The red light will light.
4. At closing time, turn the toggle switch to OFF. The pilot, igniter, red light, and thermostat will be turned off.
Operating a Griddle with the Electric Ignition Option
1. Turn the toggle switch to ON. The red light will light, the igniter will spark (not visible) and ignite the pilot.
2. When the pilot is lit, the igniter will turn off.
3. The griddle may now be operated from constantly burning pilots. Turning the thermostats as desired is all that
is required to put the griddle into service.
For the griddle plate, turn burners on about 15-20 minutes before cooking for preheating. Set the thermostat dials
to the desired griddle plate temperatures. Each thermostat will control gas flow to burners to bring that area of
the plate up to the set temperature.
4. If the pilot goes out, the electric ignition will automatically relight the pilot.
5. If the electricity to the griddle goes off, the gas supply to the pilots and to the burners is automatically shut off.
Extended Shutdown
To turn the griddle completely off for an extended shutdown:
1. Turn electric supply to the griddle OFF.
2. Turn gas supply to the griddle OFF.
If griddle is to be shut down for an extended period, put a heavy coat of grease over the griddle plate to inhibit rusting.
LIGHTING THE STANDING PILOT ON THE OPEN BURNERS TO THE LEFT OR RIGHT OF THE GRIDDLE, OR
AS FREE-STANDING HOTPLATES
1. Turn all burner valves to OFF. Wait 5 minutes to allow gas which may have accumulated in the burner
compartment to escape.
2. Turn main gas supply to the griddle ON.
3. Light the pilot and adjust the pilot regulating valve (Fig. 3) to give a stable pilot flame.
4. If the pilot light goes out, turn the burner controls to the OFF position. To relight, repeat Steps 1, 2, and 3.
ADJUSTMENTS
Main burner air supply: For efficient burner operation, it is important that a proper balance of gas volume and primary
air supply is maintained to give complete combustion. Insufficient air supply results in a yellow streaming flame.
Primary air supply is controlled by the air shutter on the front of the burner venturi. Loosen the screws on the venturi
and adjust the air shutter to just eliminate yellow tips on burner flames. Lock the air shutter in place by tightening the
screws. Repeat this procedure with all burners.
The burners and pilot flames may be observed through round holes in the upper front panel.

— 9 —
Fig. 3
CLEANING
Empty the grease drawer at least daily. Clean the griddle regularly. A clean griddle looks better, lasts longer, and
performs better.
To produce evenly cooked, perfectly browned griddle products, keep the griddle free of carbonized grease.
Carbonized grease on the surface hinders the transfer of heat from the griddle surface to the food. This results in
spotty browning and loss of cooking efficiency. Worst of all, carbonized grease tends to cling to the griddled foods,
giving them a highly unsatisfactory and unappetizing appearance. To keep the griddle clean and operating at peak
efficiency, follow these instructions:
AFTER EACH USE: Clean the griddle with a flexible spatula or griddle scraper.
DURING THE DAY: Flush the hot griddle with water and scrape with griddle scraper to reduce the amount of
carbonized grease build-up. Follow with a light coating of oil to prevent product sticking.
ONCE A DAY: Thoroughly clean backsplash, sides, and front. Take care the integral backsplash is not vigorously
banged with the spatula.
Thoroughly clean and wipe out the grease trough on the griddle. As necessary during use, wipe out accumulated
material to provide good drainage.
Remove the grease drawer, empty it, and wash it out in the same manner as any ordinary cooking utensil.
Clean the griddle surface thoroughly with water and degreasing cleaner. Rub with the grain of the metal while the
griddle is still warm (not hot). Be sure the degreasing cleaner is thoroughly removed by flushing with clear water.
Clean stainless steel and chrome surfaces with a damp cloth and polish with a soft, dry cloth.
To remove discolorations, use a non-abrasive cleaner.
After each cleaning, the griddle must be reseasoned.
PILOT
TIP
PILOT
REGULATING
VALVE
ADJUSTING
SCREW
MANIFOLD
PL-50245

— 10 —
SUGGESTED TEMPERATURES & TIMES FOR GRIDDLING
TABLE 1
Food Control Settings Time in Minutes
American Fried Potatoes 375° F 3 to 4
Bacon 350° F6
Boiled Ham 375° F2
Beef Tenderloin 400° F 5 to 7
Canadian Bacon 350° F 3 to 4
Hamburgers 350° F 3 to 4
Club Steak 450° F 3 to 5
Ham Steak 400° F10
Sausage Links or Patties 350° F 3 to 4
French Toast 400° F 4 to 5
Pancakes 375° F2
Scrambled Eggs 300° F 3 to 4
Hard Fried Eggs 225-300° F 3 to 4
Soft Fried Eggs 250-300° F 2 to 3
Sunny Side Up Eggs 225-300° F 3 to 4
NOTE: These are only suggested griddle temperatures and cooking times. You may want to try others. For example,
some restaurants are cooking hamburgers at 300° F and under.

— 11 —
GRIDDLE TROUBLESHOOTING GUIDE
TABLE 2
Fat appears to
smoke excessively
Food sticks to
griddle
Food burned around
edges or contains
dark specks
Food undercooked
inside
Food tastes greasy or
has objectionable
off-flavor
Noticeable build-up
of gum on griddle
Heat set too high
Moisture in food may be
turning into steam
Griddle surface needs
cleaning and/or seasoning
Surface under food may not have
been covered with enough
cooking oil
Food may not have been cooked
for long enough time
Food itself may have off-flavor
Food may have been stored
improperly before cooking
Too much cooking oil used
Heat set too low
Problem
Possible
Cause
XX
X
X
X
X
XX
XX
X
X
XXXX
X

— 12 —
MAINTENANCE
WARNING: THE GRIDDLE AND ITS PARTS ARE HOT. USE CARE WHEN OPERATING, CLEANING AND
SERVICING THE GRIDDLE.
WARNING: UNPLUG THE POWER CORD BEFORE PERFORMING ANY MAINTENANCE ON THE GRIDDLE.
A properly operated griddle should require practically no service. If the griddle appears to require service, before
calling the service agency, check that personnel are following the procedures described in this manual.
The following suggestions may be helpful:
1. Burner air shutter openings must be kept clean.
2. Burner ports must be kept clean. To clean burners, boil them in a detergent and water solution for 15-20 minutes,
then either brush with a wire brush or clean gas ports with a sharp-pointed metal instrument to ensure open ports.
Use caution not to enlarge or damage ports.
3. The open burner pilot flash tubes and the burner ignition port must be clear for burners to ignite properly from the
pilot.
Other Checks to be Made Before Calling the Servicer
1. Make sure the gas supply is on.
2. Make sure the electric supply is on.
3. Make sure the griddle is plugged in.
4. On standard models, make sure the pilot light is lit.
LUBRICATION
All valves and thermostats must be checked and lubricated periodically. Contact your local service agency.
VENT
Annually check the flue to be sure it is free of obstructions.
SERVICE AND PARTS INFORMATION
To obtain service and parts information concerning the griddle covered in this manual, contact the Vulcan-Hart
Service Depot in your area (refer to listing supplied with the griddle), or Vulcan-Hart Company Service Department
at the address or phone number shown on the front cover of this manual.
FORM 30529 Rev. B (1-95) (Formerly 990408)
-
 1
1
-
 2
2
-
 3
3
-
 4
4
-
 5
5
-
 6
6
-
 7
7
-
 8
8
-
 9
9
-
 10
10
-
 11
11
-
 12
12
Vulcan-Hart 948A-ML-52600 User manual
- Category
- Electric griddles
- Type
- User manual
Ask a question and I''ll find the answer in the document
Finding information in a document is now easier with AI
Related papers
-
Vulcan-Hart MGG24 User manual
-
Vulcan-Hart VCCG60 Owner's manual
-
 Vulcan Materials MG12-ML-52549 User manual
-
Vulcan-Hart 936A-ML-52596 Datasheet
-
Vulcan-Hart ML-135313-972RX User manual
-
Vulcan-Hart 77 Specification
-
Vulcan-Hart MG12-ML-52549 Specification
-
Vulcan-Hart G60F Specification
-
Vulcan-Hart 24RRG-ML-135339-00024 Specification
-
Vulcan-Hart 924RX User manual
Other documents
-
Hobart GGO72D User manual
-
 VULCAN & WOLF Ranges-Broilers Ext Operating instructions
-
Cecilware HDECG2424 User manual
-
 VULCAN & WOLF Griddle Daily Operating instructions
-
Regency Equipment User manual
-
 VULCAN & WOLF Charbroilers Gas Ext Operating instructions
-
Magikitchn MKG48 User manual
-
Magikitchn MKG48 Operating instructions
-
Sierra SRTG-24 Owner's manual
-
Wells Manufacturing G-15 User manual


