6 cm
10 cm
cobas
®
Liat
®
Analyzer
Quick Start Guide
This Quick Start Guide is a reference for the cobas
®
Liat
®
Analyzer setup. Read the entire cobas
®
Liat
®
System Operator‘s Manual before using it, or running any cobas
®
Liat
®
Assay Tubes.
Unpacking the analyzer
IMPORTANT! Retain the shipping container and packaging materials in case you need to return the
analyzer to Roche for any reason.
• Unpack the analyzer from the shipping container.
• Do not apply any force to the door on the top of the unit.
• Handle with care. Use both hands to support the analyzer along the sides of the base.
• Unpack the power supply and other accessories.
• Inspect the outer case, front panel buttons, screen, and rear ports for any shipping damage. Check all
other items for shipping damage. Report any problems to your local Roche representative.
CAUTION! Using an inappropriate power supply may cause malfunction.
Only use the power supply provided, connected to a voltage of 100-240 V
AC, 50-60 Hz.
• Insert the power supply cable into the analyzer power connector
located at its rear.
• Connect the power cable to the power supply. Plug the other end of
the cable into a properly grounded mains outlet.
No special setup is required, all software and default settings are
preloaded prior to shipment.
Analyzer location and operating environment
• Place on a level, vibration-free and non-reective surface, away from
direct sunlight.
• Allow at least 10 cm (4 in) rear clearance for ventilation and at least
6 cm (2.5 in) front clearance for barcode scanning.
• Operating temperature is between 15°C and 32°C (59-90°F), and
relative humidity is between 15% and 80%.
• Locate the analyzer near a grounded mains outlet to avoid the power
cable being a trip hazard.
Connecting to the network enables remote software and assay updates,
automatic time/date synchronization (SNTP), and host connectivity.
• Connect the Ethernet jack on the rear of the analyzer to an appropriate
wall jack using a standard Ethernet data cable with RJ-45 connectors.
Refer to the Operator’s Manual for information on dening the network
environment.
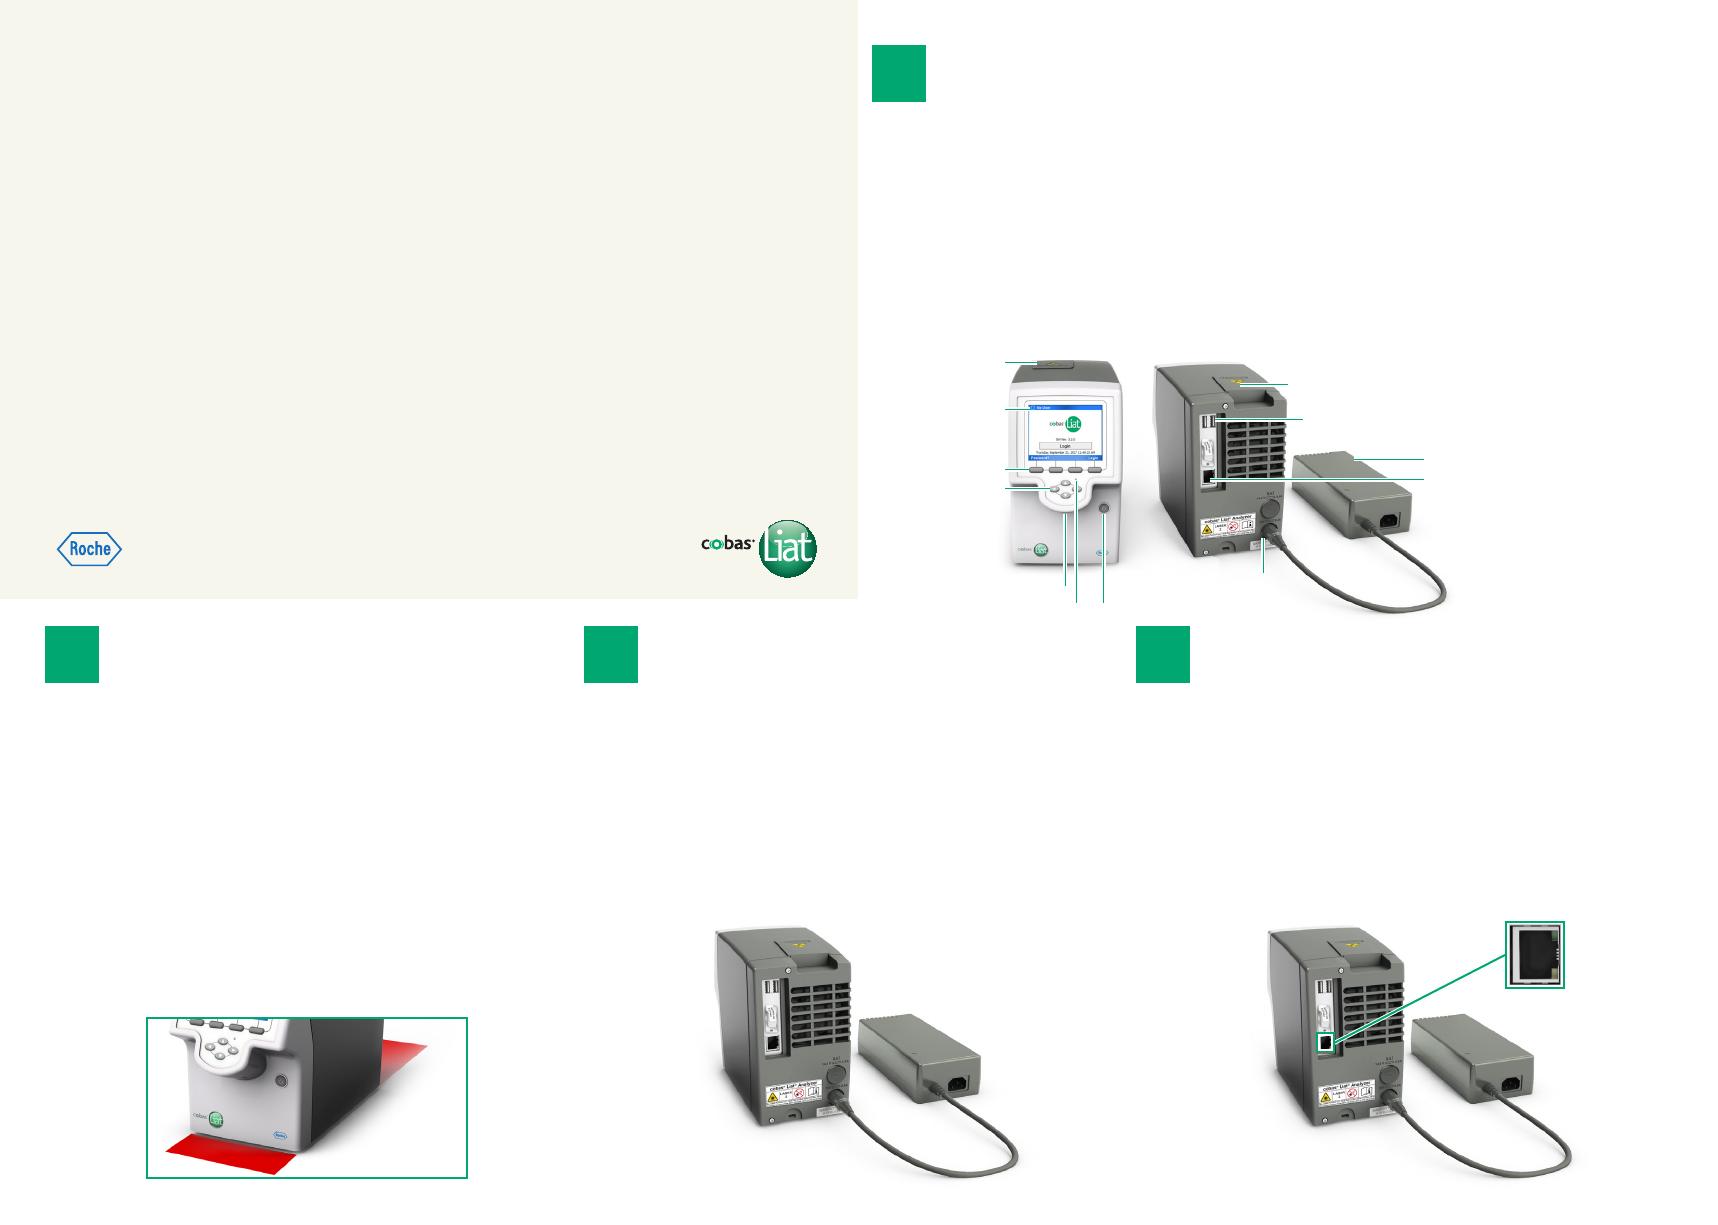
Function buttons
Touch screen
Navigation buttons
Barcode reader
Power indicator
Power button
Tube entry door
Tube entry door
USB port
Ethernet port
Power supply
Power connector
Documentation Hardware parts
cobas
®
Liat
®
Analyzer Quick Start Guide cobas
®
Liat
®
Analyzer
cobas
®
Liat
®
System Operator’s Manual cobas
®
Liat
®
User ID Card Kit
cobas
®
Liat
®
Advanced Tools Key Guide cobas
®
Liat
®
Advanced Tools Key
cobas
®
Liat
®
Cleaning Tool Guide cobas
®
Liat
®
Cleaning Tool Kit
Power supply
Power cable
Touch screen stylus
1
2
3 4
Parts list
Connect the power supply
Set up the analyzer
Network connectivity (optional)

