Page is loading ...

FRONT
INSTRUCTIVE
YOU MUST PUT IT INSIDE THE COLOR BOX
Instructive
Fold the instructive
sheet and put it
inside the color box.
TECHNICAL DATA
IMAGES / LINKS
SOFTWARE: Illustrator CC
MAC & PC Platform compatible
21.5 x 14 cm
Instructive
INKS & die cuts
Packaging:
Dimensions:
CUT-LINE
(Do not print)
PANTONE Blue 072 C
IMPORTANT:
INSTRUCTION SHEET MUST BE PRINTED ON REGULAR PAPER IN
PANTONE BLUE 072 C INK.
“Condential Information property of Truper, S.A. de C.V."
Conecte la lámpara al
portalámparas
7
Agregue el clip de
seguridad
8
Se debe retirar el
clip de seguridad
6
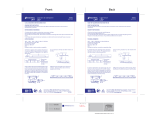
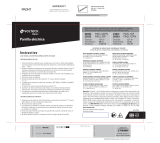
Diagrama para instalar una lámpara a 127 V~
10
Distancia mínima
de montaje
9
127 V~
Diagrama para instalar una lámpara a 12 V~
12 V~
Transformador
(no incluido)
127 V~
11
0.5 m= 0.5 m
30°
Importado por Truper, S.A. de C.V. Parque Industrial 1, Parque Industrial Jilotepec,
Jilotepec, Edo. de Méx. C.P. 54257 Made in/Hecho en China, Tel.: 76 1782 9100.
www.truper.com
04-2022
Empotrado dirigible
INSTALACIÓN
ATENCIÓN
Modelos:
EMP-103S
EMP-104S
EMP-105S
• Desconecte la fuente de energía durante la
instalación.
• Utilice guantes o un trapo al manipular el foco o
el luminario, ya que estos se pueden calentar y
causar quemaduras.
• Las características eléctricas del luminario se
podrán consultar en el marcado el producto.
ESPECIFICACIONES
Tensión:
Frecuencia:
Corriente:
Potencia:
Tipo de lámpara:
Base:
12 V~ / 127 V~
60 Hz
390 mA
50 W Máx.
Halógeno MR-16
Bipin GX5.3
INSTRUCTIVO
Lea este instructivo por completo antes de utilizar el aparato y guárdelo para futuras
referencias.
• Para lámpara de 12 V~ requiere un transformador
(no incluido)
D ( Ø ) 5 cm
2
Herramienta sugerida Dimensiones Perfore en el lugar
seleccionado para empotrar
1
30°
D ( Ø ) 8 cm
Inserte el luminario
Ponga el luminario en
la posición correcta Conecte el portalámparas y
fíjese que los cables no
queden enredados
3 4 5
Códigos:
46615
46617
46616

BACK
INSTRUCTIVE
YOU MUST PUT IT INSIDE THE COLOR BOX
TECHNICAL DATA
IMAGES / LINKS
SOFTWARE: Illustrator CC
MAC & PC Platform compatible
21.5 x 14 cm
Instructive
INKS & die cuts
Packaging:
Dimensions:
CUT-LINE
(Do not print)
PANTONE Blue 072 C
IMPORTANT:
INSTRUCTION SHEET MUST BE PRINTED ON REGULAR PAPER IN
PANTONE BLUE 072 C INK.
“Condential Information property of Truper, S.A. de C.V."
Connect the lamp
to the lamp holder
7
Add safety clip
8
The safety clip
must be removed
6
Diagram to install a 127 V~ lamp
10
Minimum
mounting distance
9
127 V~
Diagram to install a 12 V~ lamp
12 V~
Transformer
(not incluided)
127 V~
11
1.6 ft= 1.6 ft
30°
Imported by Truper, S.A. de C.V. Parque Industrial 1, Parque Industrial Jilotepec, Jilotepec,
Edo. de Méx. C.P. 54257 Made in/Hecho en China, Tel.: 76 1782 9100. www.truper.com
Directional recessed fixture
INSTALLATION
CAUTION
Models:
EMP-103S
EMP-104S
EMP-105S
Codes:
46615
46617
46616
• Disconnect the power supply during installation.
• Use gloves or a cloth when handling the lamp or
fixture, as they can become hot and cause
burns.
• The electrical characteristics of the fixture
can be found on the product marking.
SPECIFICATIONS
Voltage:
Frecuency:
Current:
Power:
Lamp type:
Base:
12 V~ / 127 V~
60 Hz
390 mA
50 W Max.
Halogen MR-16
Bipin GX5.3
INSTRUCTIONS
Read this instruction manual completely before using the device and keep it for future
reference.
• For 12 V~ lamp requires a transformer (not
included)
D ( Ø ) 2”
2
Suggested tool Dimensions Drill in the selected location
for embedding
1
30°
D ( Ø ) 3.14”
IInsert the fixture
Place the fixture
in the correct position Connect the lamp holder
and make sure that the
wires are not entangled
3 4 5
/


