Page is loading ...

ADVANCED|AVANÇÉ|AVANZADA
ADVANCED|AVANÇÉ|AVANZADA
VWD1006BLP
VWD1006W
CAUTION: Before using water
dispenser, read this manual and
follow all safety rules and
operating instructions.
MISE EN GARDE: Avant
d’employer votre distributeur
d’eau, lisez ce manuel et suivez
toutes les règles de sécurité et
les consignes d’utilisation.
PRECAUCIÓN: Antes de usar
el dosificador de agua, lea este
manual y siga todas las reglas
de seguridad e instrucciones de
funcionamiento.
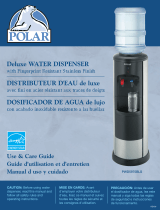
Use & Care Guide
Guide d’utilisation et d’entretien
Manual d uso y cuidado
High Efficiency Bottom Load
Water Dispenser
Distributeur d’eau
chargement du bas
à rendement élevé
Dosificador de agua
de Alta Eficiencia con Montaje
de Agua en la Sección Inferior
REV00
SAVE THESE INSTRUCTIONS
CONSERVER CES INSTRUCTIONS
GUARDE ESTAS INSTRUCCIONES

Thank you for purchasing a Vitapur (Bottom Mount) Water Dispenser. This unique design offers the benefits of :
• Nomorestrugglingandliftingofheavywaterbottles
• Nomoreaccidentalwaterspillageduringwaterbottleinstallation
• Nomorelookingatbruisedandbatteredrecycledwaterbottles
Please read the enclosed operating instructions carefully and retain this booklet for future reference. We have carefully
engineered your Vitapur Water Dispenser to give you years of enjoyment and trouble free operation.
IMPORTANT SAFEGUARDS
WARNING: This water dispenser is designed for indoor applications only. DO NOT use outdoors.
IMPORTANT NOTE: Your Vitapur® water dispenser is designed with a special "safety" feature (float switch
mechanism) that controls activation/operation of the Kettle Feature hot water tank heating system. If no water is
present and/or low water levels are detected inside the internal water reservoir, activation/operation of the
Kettle Feature hot water heating system is not possible. Likewise, if the hot water heating system is operational
and water is being drawn simultaneously causing internal water levels to drop below the established minimal
level set point, hot water tank operation is automatically suspended. To reactivate the hot water heating system,
you must replenish your water supply.
•Neverturnthedispenserupsidedownortiltmorethan45degrees.Iftheunithasbeenrestingonits’sideforalong
period of time, place the water dispenser in the upright position for approximately 12 hours before turning it on.
•Forusewith3or5gallon(12or19liter)waterbottles.
•Neverusethisdispenserwithwaterthatisunsafetodrinkorisfromanunknownsource.
•Neveruseanyotherliquidinthedispenserotherthanknownandmicrobiologicallysafebottledwater.
•Neverallowchildrentodispensehotwaterwithoutproperanddirectsupervision.
•Thiswaterdispenserisequippedwithagroundedpowercordplugforyoursafety.
•Keepyourwaterdispenserinadryplaceawayfromdirectsunlight.
•Neverputanythingammableclosetothedispenser.
•Leaveaminimumof2”(5cm)aroundthebackandsidesofthedispenserforproperventilation.
•Alwaysinstallyourwaterdispenseronaleveloor.Wait3minutesbeforerestartingmachineaftershuttingitdown.
•Alwaysunplugthewaterdispenserbeforeservicing.
• Regularcleaningofyourwaterdispenserisrequiredforyourwarranty.
Pleasefollowthecleaninginstructionsoutlinedinthismanualandcleanthedispenserevery4months.
GROUNDING INSTRUCTIONS
•Improperuseofthegroundingplugcanresultinariskofelectricshockcausingseriousinjury,evendeath.
•Thisappliancemustbegrounded.Intheeventofanelectricalshortcircuit,groundingreducestheriskofelectric
shock by providing an escape wire for the electric current.
•Thisapplianceisequippedwithapowercordhavingagroundingwirewithagroundingplugandmustbe
connected into a properly grounded polarized outlet. Consult a qualified electrician if the grounding instructions are
notcompletelyunderstood,orifdoubtexistsastowhethertheapplianceisproperlygrounded.Ifthewalloutletisa
standard 2 prong outlet, it is your personal responsibility and obligation to have it replaced with a properly grounded
3-prongwalloutlet.
• Donotunderanycircumstancescutorremovethethird(ground)prongfromthepowercordplug.
•Donotuseanadapterplugwiththisappliance.
• Donotuseanextensioncordwiththisappliance.Ifthepowercordistooshort,haveaqualiedelectricianinstall
an electrical outlet near the appliance.
1

YOUR VITAPUR® WATER DISPENSER
1. Control panel
2. KettleFeature(on/off)activationbutton
3. Ready-to-dispenseindicatorlights
RedLight:“Flashing”= Heater(hotwatertank)isoperational
R e d L i g h t : “ S t e a d y O n ” = T h e h o t w a t e r h a s r e a c h e d o p t i m u m t e m p e r a t u r e a n d i s r e a d y f o r d i s p e n s i n g .
RedLight:“Off”= Hotwatertankheatingsystemisoff,howeverwaterwithinthetankmaystillbeveryhot,
alwaysexercisecautionwhendispensingand/ordrainingwaterfromthehotwatertank.
B l u e L i g h t : “ S t e a d y O n ” = T h e c o l d w a t e r h a s r e a c h e d o p t i m u m t e m p e r a t u r e a n d i s r e a d y f o r d i s p e n s i n g .
BlueLight:“Off”= Thecoolingcycleisinprogress,itispossibletodispensewaterduringthecooling
cycle, however, optimum cooling temperature may not yet be achieved.
YellowLight:“Flashing”= Lowwaterlevelinsideinternalreservoir,waterbottleempty.
YellowLight:“Off”= Thestatusofallwaterlevelsarenormal.
4. Child resistant safety switch
5. Hotwaterdispensingbutton
6. Room temperature water dispensing button
7. Cold water dispensing button
8. Removable drip tray
9. Lowerdoor(bottlestoragecompartment)
10. Water dispensing spigots
11. Stainlesssteelstraw(waterbottle)
12. DoorSwitch(Controlswaterpumpoperation)
13. Adjustable“cold”waterthermostat.
(Note:hotwatertemperatureisfactory
set and cannot be adjusted)
14. Carry handle
15. Drain valve
16. Condenser coil
2
1
4
5
6
7
8
9
3
2
10
13
14
15
16
12
11

OPERATING INSTRUCTIONS
Initial Product Cleaning Procedure
Likemostappliances,yourwaterdispenserrequiresperiodicmaintenanceformaximumefciencyandperformanceand
mustbecleanedonaregularbasis(i.e.every4months).Tomaintainahygienicenvironmentwithinyourwaterdispenser
and prevent potential formation (growth) of bacteria, we strongly recommend regular cleaning. A cleaning kit is available
throughourCustomerServiceDepartmentat1-866-253-0447 or can be ordered on line
at www.greenwayhp.com.
1. Makesurethelowercompartmentstoragedooris“open”
(this will prevent activation of the water pump).
2. Make sure the power cord is plugged into electrical outlet.
3. Usingacleanjug/containerpre-mix(50ml/1.7ozs)waterdispenser
cleanerwith2L/0.5galofhotwater.Placethejug/containerontheoor
ofthebottlestoragecompartment.Insertthestainlessstrawintothe
cleaningsolution,(makesurethejug/containerdoesnottipover)andclose
the storage door. The water pump will start automatically and draw the
cleaning solution into the dispenser reservoirs. When all of the cleaning
solution has been drawn, the pump will continue to operate for
approximately20secondsandstopautomatically,followedbyaashing
yellowlight(addwater)condition(thisisnormal).Simplyopenthestorage
doortocanceltheashingyellowlight.Allowthecleaningsolutiontositinsidethedispenserfor20minutes.
4.Placeajug/containerunderthedispensingspigotsandpressboththehotandcolddispensingbuttonsuntilthe
cleaningsolutionstopsowing.Discardcleaningsolution.
5.Usingajug/container,draintheremainingcleaningsolutionfromtheinternalreservoirsbyunscrewingthedraincap
and removing the drain plug from the drain valve located at the back of the unit. Discard the cleaning solution.
6.Re-installthedrainpluganddraincapontheunitandushthesystemusing2Lcleanwateronly(nocleaning
solution)followingthesamebasicstepsoutlinedabove.(Seestep#3)Placejug/containerunderdrainvalveand
removedraincapanddrainplugallowingrinsewatertodrain.Whentherinsewaterstopsowing,re-installthe
drain plug and drain cap and tighten. The cleaning process is now complete.
Installing the Water Bottle
IMPORTANT: Always wash your hands first before handling water bottle! Clean the top of the water bottle with a
clean cloth. Water bottles can be purchased from your local retailer.
1. Make sure the lower door (bottle storage compartment) is open. The water pump cannot operate as long as the
door is in the open position.
2. Remove the protective label from the top of the bottle.
3. Most water bottles have a puncturable membrane in the top cap. To puncture the membrane, insert the straw into
thecapandpushdownwarduntilthemembraneopens.Insertthestrawallthewayintothebottleuntilthebottom
ofthestrawtouchesthebottomofthewaterbottle.NOTE:Thewaterbottledrinkingstrawfeaturesanexclusive
telescopicdesignforusewitheither18.9L(5gal)and11.4L(3gal)waterbottles.(SeeFig.1&Fig.2)Toadjustthe
lengthofthewaterbottledrinkingstraw,holdtheupperportionofthestrawandsimplypull/pushthelowerportion
of the straw to the desired length.
4. Toattachthewaterbottlestrawontotheneckofthewaterbottle,makesurethehandleispositioned“horizontally”
andpressrmlyontothetopofthebottleneck.(SeeFig.3)Whenthehandleisinthe“vertical”(locked)position,
(SeeFig.4)itispossibletolift/carrythewaterbottle.However,wheninstallingthe18.9L(5gal)waterbottleinside
thestoragecompartment,thehandlemustbeinthe“horizontal”position.(SeeFig.3)
Cleaning Kit
Available online at
www.greenwayhp.com
3

IMPORTANT: DO NOT BREAK OR REMOVE THE SEAL FROM AROUND THE NECK OF THE WATER BOTTLE,
(See Fig. 5) OTHERWISE YOU WILL NOT BE ABLE TO LIFT/CARRY THE WATER BOTTLE WITH THE CARRY
HANDLE. (See Fig. 6)
5. To install the water bottle inside the bottle storage compartment, simply position the bottle in front of storage
compartment ramp and (push) slide inside using the side of your leg until the bottle comes to a stop.
6. Close the lower compartment door and the water pump will start delivering water into the dispenser automatically.
When the internal reservoirs are full, the water pump will stop automatically.
IMPORTANT NOTE: Your Vitapur® water dispenser is designed with a special "safety" feature (float switch
mechanism) that controls activation/operation of the Kettle Feature hot water tank heating system. If no water is
present and/or low water levels are detected inside the internal water reservoir, activation/operation of the
Kettle Feature hot water heating system is not possible. Likewise, if the hot water heating system is operational
and water is being drawn simultaneously causing internal water levels to drop below the established minimal
level set point, hot water tank operation is automatically suspended. To reactivate the hot water heating system,
you must replenish your water supply.
NOTE:Thewaterpumpsystemalsoincorporatesaspecialsafetyfeaturethatprevents/stopsoperationintheabsence
of water. (i.e. empty water bottle conditions) Water pump operation is also linked to a door switch system mounted inside
the lower storage compartment.
i.e.Dooropen=pumpoperationsuspended.
Doorclosed=normalpumpoperation.
Dispensing Room and Cold Water
Placeaglassunderthedispensingspigotontherightsideofthewateroutletpanel.Forcoldwater,press/hold
dispensingbutton(#7)untilthedesiredamountofwaterisdispensedandrelease.Forroomtemperaturewater,
press/holddispensingbutton(#6)untilthedesiredamountofwaterisdispensedandrelease.
4
FIG. 1. 11.4L (3gal) bottle
FIG. 5. Water bottle seal in tact
CORRECT INCORRECT
FIG. 6. Water bottle seal removed
FIG. 2. 18.9L (5gal) bottle FIG. 3. Handle Open FIG. 4. Handle Closed

Adjusting the Temperature (Cold water only)
By turning the thermostat at the back of the unit, the temperature can be adjusted.
Turn the dial clockwise between the high (cool) and low (colder) levels until the
desiredtemperatureisreached.Ifthewaterdispenserisnotdispensingwater,there
couldbeapossibleicebuildupduetothethermostatbeingsettoocold.Ifthis
happens,unplugthedispenserovernightandthenreset.Setthermostattohigh,
slowly increasing based on your use and need for cold water.
Dispensing Hot Water
TheKettleFeaturedispensingsystemonthisunitisdesignedtosaveenergyandmoney.
Conventionalhotwaterdispensingsystemsoperate24/7regardlessofwaterusage.The
(ondemand)KettleFeatureactivatesthehotwatersystem"only"whentheKettleFeature(red)buttonisactivated
deliveringsteaminghotwaterinlessthan3minutes.
Tostop/canceltheKettleFeatureduringacycle,simplypresstheKettleFeaturebuttonasecondtimeandtheredLED
lightwillstopashing.
IMPORTANT NOTE: Your Vitapur® water dispenser is designed with a special "safety" feature (float switch
mechanism) that controls activation/operation of the Kettle Feature hot water tank heating system. If no water is
present and/or low water levels are detected inside the internal water reservoir, activation/operation of the Kettle
Feature hot water heating system is not possible. Likewise, if the hot water heating system is operational and
water is being drawn simultaneously causing internal water levels to drop below the established minimal level set
point, hot water tank operation is automatically suspended. To reactivate the hot water heating system, you must
replenish your water supply.
Child Resistant Safety Switch
To prevent hot water from being dispensed accidentally and possible harming
a child, the hot water dispensing button can only be operated when the child
resistant safety switch is activated. To dispense hot water, push the child safety
switch sideways, (in the direction of the arrow located on the switch) from
right to left, then depress the hot water button until the desired amount of hot
water is dispensed. Upon releasing the hot water button, the child safety lock
automaticallyreturnstothelockedposition.(gure7)
DANGER: The hot water is heated to approximately 194˚ F / 90˚C. Temperatures above 125˚ F / 52˚ C can cause
severe burns from scalding. DO NOT ALLOW CHILDREN TO USE THE HOT WATER DISPENSING
BUTTON WITHOUT PROPER AND DIRECT SUPERVISION.
CLEANING AND MAINTENANCE
Likemostappliances,yourwaterdispenserrequiresperiodicmaintenancefor
maximum efficiency and performance and must be cleaned on a regular basis
(i.e.every4months).Tomaintainahygienicenvironmentwithinyourwater
dispenser and prevent potential formation (growth) of bacteria, we strongly
recommend regular cleaning. A cleaning kit is available through our Customer
ServiceDepartmentat1-866-253-0447 or can be ordered on line at
www.greenwayhp.com.Pleasesee“InitialProductCleaningProcedure”and
follow instructions.
4
Cleaning Kit
Available online at
www.greenwayhp.com
5
Low
High
TEMP
COLD WATER
FIG. 7. Child Resistant Safety Switch

Cleaning the Outside of the Water Dispenser
The outside of the dispenser can be wiped clean with a vitapur® water dispenser cleaning solution or a mild soap and
watermixture.Neveruseharshchemicalsorabrasivecleaners.Rinsethoroughlywithcleanwaterandthendrysurfaces.
Cleaning the Drip Tray
Toremovethedriptray,(Fig.8)pullthetrayforwarddislodgingitfromtheguides.
Drain and clean.
The drip tray should be emptied and cleaned regularly to remove spotting and any
mineral deposits. Clean with vitapur® water dispenser cleaning solution or a mild
soapandwatermixture.Fortoughdeposits,addvinegarandletitsoakuntilthe
deposits come loose. Then wash, rinse and dry thoroughly. To replace, put the grill
back on the tray and slide the tray onto the guides (not dishwasher safe).
Cleaning the Condenser
Vacuum or sweep away the dust from the condenser coils at the back of the
dispenser.Forbestresults,youcanpurchaseabrushdesignedspecicallyfor
this purpose from your local appliance store. This will improve cooling
and efficiency.
Draining the Reservoirs
Drain the reservoirs before and after cleaning, when going on long vacations or
if not using the dispenser for long periods of time.
IMPORTANT! Unplug the dispenser before performing this procedure.
Dispense hot water until temperature drops to a safe level to avoid the risk
of scalding.
1. Remove the water bottle.
2. Press both dispensing taps until water no longer comes out.
3. Place a bucket beneath the drain valve on the back of the dispenser.
4. Removethecapandplugfromthedrainvalveandletthewaterowintothebucket.Replacethecapandplug.
IMPORTANT: Collect the water in a container, not the drip tray.
5. Replace the water bottle (see Installing the Water Bottle).
Going Away on Vacation
When not using the dispenser for long periods of time or when going on vacation, conserve energy, unplug the dispenser
and drain the reservoirs (see Draining the Reservoirs).FollowInitialProductCleaningProceduresuponreturnand
startup of the dispenser.
56
FIG. 8. Drip tray
and Grill
Drain Valve

TROUBLESHOOTING TIPS
Problem Possible Cause Suggested Solution
Water dispenser
is leaking
Drain cap and silicone seal are not secure. Ensure seal is secure in drain plug and
tighten drain cap.
Water is not hot or cold
enough
All the water in the tank has been used.
Replacewithfullbottleandwait;60minutesfor
watertocool,3minutesforwatertoheat(after
activating"Kettle"featurebutton).
The unit is unplugged. Plug it into the outlet.
"Kettle"Featurewasnotactivated. Activate"Kettle"Featurebypressingthebutton.
The circuit breaker in your home is
tripped or the fuse has blown.
Reset the breaker or replace the fuse.
Temperature limit tripped. Allow the temperature of the hot water tank to cool
forapproximately15-30minutes.Thetemperature
limitthermostatwillre-setautomaticallyonce
sufficiently cooled, and the cooling system will
reactivate automatically. To operate the hot water
system,presstheInsta-Hotbutton.
Thermostat needs to be adjusted colder. Adjust thermostat between high (cool) and low
(colder) levels to achieve desired temperature.
Water dispenser is not
dispensing water
Empty water bottle. Replace with full bottle.
Mineral deposits clogging tanks.
SeeCleaningtheReservoirs.
Possible air pocket. Push down on the dispenser buttons to prime
the unit.
Possible ice build up due to thermostat set too
cold.
Unplugovernight,thenreset.Setthermostatto
high, slowly increasing based on your use and
need for cold water.
Water dispenser is noisy
Bottle making a gurgling noise as it fills the tank. This is normal.
Water dispenser is uneven. Make sure the dispenser is on an even
surface that can support its full weight.
6 7

Retailer: ModelNumber:
SerialNumber: DateCode:
Purchase Date:
Warranty
DO NOT RETURN THIS PRODUCT TO THE STORE:
PleasecontactCustomerServiceat:1-866-253-0447 or [email protected]
GreenwayHomeProductswarrantsyourwaterdispensertobefreefrommanufacturer’sdefectsinworkmanshipormaterialundernormal
operating conditions for one (1) year from the original date of purchase. This warranty applies only in the country in which it is sold, and is
availabletotheoriginalpurchaseronly.Thiswarrantyisnon-transferable.
ThiswarrantyandtheCSAInternationallistingforthiswaterdispenserarevoidifthewaterdispenserisaltered,modified,orcombined
withanyothermachineordevice.Alterationofthiswaterdispensermaycauseseriousfloodingand/orhazardouselectricalshockorfire.
The provisions of this warranty shall not apply to the following:
• Waterbottles.
• Servicetripstoyourhometoteachyouhowtousetheproduct.
• Improperinstallation,delivery,ormaintenance(failuretomaintaintheproductaccordingtotheinstructionsoutlinedintheproduct
manual will automatically void the warranty).
• Failureoftheproductifitisabused,misused,altered,usedcommercially,orusedforotherthantheintendedpurpose.
• Productsthatareusedoutsidearesidentialorofficeenvironment.
• Replacementofhousefusesorresettingofcircuitbreakers.
• Useofthisproductwherewaterismicrobiologicallyunsafeorofunknownquality.
• Damagetotheproductifusedtodispenseanythingotherthanwater.
• Damagetotheproductcausedbyaccident,fire,floods,oractsofGod.
• Anyservicetotheproductbyunauthorizedpersonnel.
• Incidentalorconsequentialdamagecausedbypossibledefectswiththisappliance,itsinstallationorrepair.
ThiswarrantyshallbefulfilledatanauthorizedGreenwayRepairFacility.Allwarrantyrepairsmustbepre-authorizedbyGreenwayHome
Products. Greenway will, at its option, repair or replace free of charge any defective part, where the Purchaser has notified their Retailer or
GreenwayHomeProductswithinthewarrantyperiod.TheobligationofGreenwayHomeProductsunderthiswarrantyisexpresslylimited
to such repairs or replacement. This warranty does not cover the freight costs to and from the authorized repair facility.
Except as set forth herein or required by law, the Manufacturer makes no other warranty, guarantee, or agreement, express, implied,
or statutory including any implied warranty of merchantability or fitness for a particular purpose. The manufacturer does not assume or
authorizeanypersontoassumeanyobligationsofliabilityinconnectionwiththiswaterdispenser.Innoeventwillthemanufacturerbe
liable for indirect, special, or consequential damages (including, without limitation, economic loss) or for any delay in the performance of
this agreement due to causes beyond its control.
Somestatesorprovincesdonotallowlimitationsonhowlonganimpliedwarrantylasts,sotheabovelimitationmaynotapplytoyou.
Somestatesorprovincesdonotallowtheexclusionorlimitationofincidentalorconsequentialdamages,sotheabovelimitationor
exclusion may not apply to you. This warranty gives you specific legal rights, and you may also have other rights which vary from state to
state or from province to province.
Ifyourequireservice,pleasefirstseethe“Troubleshooting”sectionofthismanual.Additionalassistancecanbefoundbycheckingour
websiteatwww.greenwayhp.com,orbycallingourcustomerservicelineat1-866-253-0447,MondaytoThursdayfrom8:30AMto5:00
PM(EST),Fridayfrom8:30AMto4:00PM(EST),orwrite:GreenwayHomeProducts,CustomerServiceCenter,400SouthgateDrive,
Guelph,ON,CanadaN1G4P5orGreenwayHomeProducts,1270FlagshipDrive,Perrysburg,OH,USA43551.
Keepthismanualandyoursalessliptogetherforfuturereference.Youmustprovideproofofpurchaseforin-warrantyservice.
Write down the following information about your water cooler to better help you obtain assistance or service if your ever need it. You will
need to know your complete model number and serial number. You can find this information on the back of the water dispenser.
/