Likemostappliances,yourwaterdispenserrequiresperiodicmaintenanceformaximumefciencyandperformanceand
mustbecleanedonaregularbasis(i.e.every4months).Tomaintainahygienicenvironmentwithinyourwaterdispenser
and prevent potential formation (growth) of bacteria, we strongly recommend regular cleaning. A cleaning kit is available
throughourCustomerServiceDepartmentat1-866-253-0447 or can be ordered on line
at www.greenwaywt.com.
1. Makesurethelowercompartmentstoragedooris“open”
(this will prevent activation of the water pump).
2. Make sure the power cord is plugged into electrical outlet.
3. Usingacleanjug/containerpre-mix(50ml/1.7ozs)waterdispenser
cleanerwith2L/0.5galofhotwater.Placethejug/containerontheoor
ofthebottlestoragecompartment.Insertthestainlessstrawintothe
cleaningsolution,(makesurethejug/containerdoesnottipover)andclose
the storage door. The water pump will start automatically and draw the
cleaning solution into the dispenser reservoirs. When all of the cleaning
solution has been drawn, the pump will continue to operate for
approximately20secondsandstopautomatically,followedbyaashing
yellowlight(addwater)condition(thisisnormal).Simplyopenthestorage
doortocanceltheashingyellowlight.Allowthecleaningsolutiontositinsidethedispenserfor20minutes.
4.Placeajug/containerunderthedispensingspigotsandpressboththehotandcolddispensingbuttonsuntilthe
cleaningsolutionstopsowing.Discardcleaningsolution.
5.Usingajug/container,draintheremainingcleaningsolutionfromtheinternalreservoirsbyunscrewingthedraincap
and removing the drain plug from the drain valve located at the back of the unit. Discard the cleaning solution.
6.Re-installthedrainpluganddraincapontheunitandushthesystemusing2Lcleanwateronly(nocleaning
solution)followingthesamebasicstepsoutlinedabove.(Seestep#3)Placejug/containerunderdrainvalveand
removedraincapanddrainplugallowingrinsewatertodrain.Whentherinsewaterstopsowing,re-installthe
drain plug and drain cap and tighten. The cleaning process is now complete.
IMPORTANT: Always wash your hands rst before handling water bottle! Clean the top of the water bottle with a
clean cloth. Water bottles can be purchased from your local retailer.
1. Make sure the lower door (bottle storage compartment) is open. The water pump cannot operate as long as the
door is in the open position.
2. Remove the protective label from the top of the bottle.
3. Most water bottles have a puncturable membrane in the top cap. To puncture the membrane, insert the straw into
thecapandpushdownwarduntilthemembraneopens.Insertthestrawallthewayintothebottleuntilthebottom
ofthestrawtouchesthebottomofthewaterbottle.NOTE:Thewaterbottledrinkingstrawfeaturesanexclusive
telescopicdesignforusewitheither18.9L(5gal)and11.4L(3gal)waterbottles.(SeeFig.1&Fig.2)Toadjustthe
lengthofthewaterbottledrinkingstraw,holdtheupperportionofthestrawandsimplypull/pushthelowerportion
of the straw to the desired length.
4. Toattachthewaterbottlestrawontotheneckofthewaterbottle,makesurethehandleispositioned“horizontally”
andpressrmlyontothetopofthebottleneck.(SeeFig.3)Whenthehandleisinthe“vertical”(locked)position,
(SeeFig.4)itispossibletolift/carrythewaterbottle.However,wheninstallingthe18.9L(5gal)waterbottleinside
thestoragecompartment,thehandlemustbeinthe“horizontal”position.(SeeFig.3)
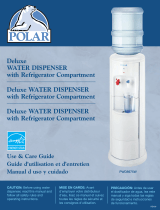
Cleaning Kit
Available online at
www.greenwayhp.com
3
Op e r a t i n g in s t r u c t i O n s
Initial Product Cleaning Procedure
Installing the Water Bottle