Page is loading ...

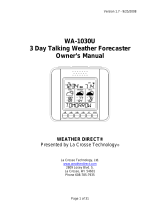
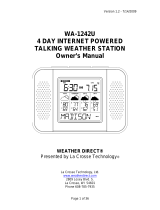
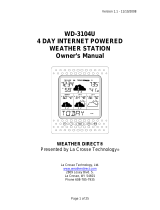
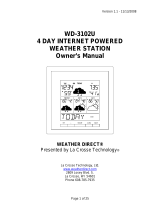
INTERNET BASED 4-DAY FORECAST WEATHER STATION Owner’s Manual
Thank you for purchasing the new generation of our Internet based 4-day forecast weather station. Designed
and engineered with state-of-the-art technology and components, this instrument will provide accurate and
reliable readings of 4-day weather forecast information. Read this manual carefully to fully explore the features
and functions of the new product.
Overview
REGIONAL FORECAST
4-day forecast data is updated from the Internet automatically
at regular intervals every 6 hours and sent to the
main unit wirelessly via the LAN Gateway transmitter.
Forecast includes:
- Weather Forecast
- High & low temperature
- Average humidity
- Change of precipitation
- Rainfall
- Maximum UV index
- Average wind speed & direction
City list:
- Europe: Over 9,200 cities selection
- North America: Over 10,900 cities selection
- Asia Pacific: Over 300 cities selection in Japan & Australia
Auto-Synchronized Clock from Internet
Sunrise & Sunset Time
Calendar, Weekday, Single Daily Alarm and Moon Phase
Quick start guide for basic setup
Main Unit
1) Connect 6.0V adapter to the main unit
2) Insert 3 pieces of AA battery in the main unit as backup power
Router (not included)
Main Unit (Receiver)
4-Day Forecast
Internet
> 20,000 Cities Selection
LAN Gateway
(4-Day Regional
Forecast)
AP038 Instructions & Guarantee

LAN Gateway Transmitter
3) Connect the LAN Gateway to an available LAN port on your network router with the LAN cable (included)
4) Connect the 6.0V adapter to the LAN Gateway
5) Insert the CD into your CD/DVD drive and copy the files “Multi-Day Forecast.exe” and “Multi-Day
Plugin.exe” to the same folder in your hard disc. Double click the “Multi-Day Forecast.exe” to run the
program.
6) “LAN Gateway found” should appear on the bottom of the PC program window. Click [SET LOCATION] to
find and select your own city. Click [Save & Exit] to complete the city selection and exit
7) Press [PC SEARCH] button repeatedly on the main unit until the RF icon
flashes. The main unit will
start searching for RF signal from LAN Gateway
8) Press [TRANSMIT] button on your LAN Gateway to force transmitting RF weather data to the main unit
9) Once the RF connection is established between the main unit & Gateway, RF icon with full strength
will appear. It may take 10 to 20 minutes or more to receive & display all forecast information on the main
unit. The time will appear first followed by the forecast.
Note: If your router is controlled by a server or if you want to connect the LAN Gateway directly to a LAN port in
a server instead of a router, it may be necessary to get the server administrator’s help to open the access of the
LAN Gateway to the LAN and to the internet. Please consult your server administrator for the necessary
arrangement.
Note: Only one LAN Gateway should be connected to the same router (or the same server network). If more
than one LAN Gateway is connected, your unit will not function properly.
Name and Functions of Buttons on Main Unit:
Top Key
[MODE/SNOOZE]
- Toggle forecast between
- Hi/Lo temperature
- Rainfall / chance of precipitation
- Maximum UV Index / average humidity
- Average wind direction / average wind speed
- Auto-scroll “
” display function
- Trigger snooze alarm

Buttons Functions – press once Functions if Hold 3 seconds
[PC SEARCH] Receive RF signal from USB transmitter
[CLOCK] Show time, day-of-week, date & sunrise/set
time
Set 12/24 Hour & day/month format
[ALARM] Show alarm time; enable/disable alarm Set Alarm time etc.
[WIND / ϧ]
Select wind speed’s unit or 1 step forward in
setting mode
Fast advance in setting mode
[C/F / ϰ]
Select degree C/F or 1 step backward in setting
mode
Fast backward in setting mode
[RAIN] Select rainfall’s unit (mm or inch)
Name and Functions of Buttons on LAN Gateway Transmitter:
Top Keys Press Functions
[TRANSMIT] Transmit forecast data & synchronize with main unit
INSTALLATION
SETTING UP THE MAIN UNIT (RECEIVER)
BATTERY & ADAPTER INSTALLATION:
Connect 6.0V adapter to the main unit.
Battery installation: Slide to open the battery door, install 3 pieces of AA battery according to the polarity
indicated and close the battery door
LAN GATEWAY & PC PROGRAM SETTING
- Connect the LAN Gateway to an available LAN port on your network router with the LAN cable (included).
(Your network router may look different than the diagram. Locate an available port on your router and plug in the
included LAN cable)
- Connect 6.0V adapter to the LAN Gateway
- Insert the CD into your CD/DVD drive and copy the files “Multi-Day Forecast.exe” and “Multi-Day
Plugin.exe” to the same folder in your hard disc. Double click the “Multi-Day Forecast.exe” to run the
program..
- “LAN Gateway Found” appears on the bottom of the window when the connection is successful

- Click [SET LOCATION] and select your home location by continent, country, region & city. Click [Save] to
confirm your location setting and your selected city & time will display. If the time appears on the PC
program does not match with your local time (eg. due to daylight saving), select the “Time offset” to adjust
the time offset. Click [SAVE & EXIT] to confirm your city selection and exit.
Note: If “Cannot find LAN Gateway” or other error message appears on the bottom of the window, please read
the “TROUBLESHOOTING” section in the manual for details.
Note: If your router is controlled by a server or if you want to connect the LAN Gateway directly to a LAN port in
a server instead of a router, it may be necessary to get the server administrator’s help to open the access of the
LAN Gateway to the LAN and to the internet. Please consult your server administrator for the necessary
arrangement.
Note: Only one LAN Gateway should be connected to the same router (or server network). If more than one
Gateway is connected, your unit will not function properly.
ESTABLISH RF CONNECTION WITH MAIN UINIT
- Place the LAN Gateway & main unit away from metal & source(s) of interference such as PC monitor,
mobile phones, appliances, TV etc. It is recommended to start with a short distance (eg. within 0.5 metre)
between the two units for initial RF setup. Once the RF connection is established, place the main unit within
the effective transmission range (30 metres in an open area) from the transmitter. Shorten the distance if
necessary for best reception.
- To search for RF signal from the LAN Gateway, press [PC SEARCH] button on the main unit repeatedly
until the RF icon
flashes.
- Press [TRANSMIT] button on the LAN Gateway to force transmitting RF weather data to the main unit
- Once the RF connection is established between the main unit & LAN Gateway, the RF icon “
“with full
strength will appear on the main unit. In the first few minutes of the RF reception, the main unit is showing
data on one part of the screen and this is normal. The rest of the screen display data will gradually appear
in the next 10 minutes or more.
NOTE:
- If you have waited half an hour or more without seeing the rest of the screen, shorten the distance between
the LAN Gateway & main unit, check the battery levels and repeat the setup procedure above

4-DAY FORECAST INFORMATION
4-Day forecast information on the main unit display is updated at regular intervals every 6 hours and retain their data until
new data is received.
(Note: If the LAN Gateway loses its connection to the Internet, the data will be updated again when the connection is
restored)
WEATHER FORECAST
4-day weather forecast with 28 different weather symbols

HIGH / LOW TEMPERATURE FORECAST
To view the high & low temperature forecast, press [MODE] repeatedly until “HI” & “LO” icons appear
Press [C/F] button to select degree C or F
AVERAGE HUMIIDTY FORECAST
To view the average humidity forecast, press [MODE] repeatedly until “RH%” icon appears
CHANCE OF PRECIPITATION
To view the precipitation forecast, press [MODE] repeatedly until “PRECIP” icon appears
RAINFALL FORECAST
To view the rainfall forecast, press [MODE] repeatedly until the “RAIN” icon appears.
Press [RAIN] to select rainfall unit between “mm” or “inch”
MAXIMUM UV INDEX FORECAST
To view the maximum UV forecast, press [MODE] repeatedly until “UVI” icon appears
UVI 1 to 2: Maximum UV level is low. Low danger to the average person
UVI 3 to 5: Maximum UV level is moderate. Moderate risk of harm from unprotected sun exposure
UVI 6 to 7: Maximum UV level is high. High risk of harm from unprotected sun exposure
UVI 8 to 10: Maximum UV level is very high. Very high risk of harm from unprotected sun exposure
UVI 11 to 15: Maximum UV level is extreme. Extreme risk of harm from unprotected sun exposure
AVERAGE WIND SPEED & WIND DIRECTION FORECAST
To view the wind speed/direction forecast, press [MODE] repeatedly until “WIND” icon appears
16 wind directions available: N for north, S for south, SW for south-west and so on
Press [ϧ/WIND] to select wind speed unit between km/h, m/s, knots & mph.
RF RECEPTION STATUS
The icon shows the RF connection status between the main unit and the LAN gatway.
Main unit is successfully synchronized to the LAN Gateway and is receiving weather data from
LAN Gateway periodically.
Flashing indicates that it is in registration mode and is searching for RF signal from LAN Gateway
Fail to receive RF signal from LAN Gateway
(see “ESTABLISH RF CONNECTION WITH MAIN UINIT” section to reconnect the LAN Gateway)

LAST UPDATE OF FORECAST
It shows the last update of forecast from the Internet.
“UPDATE: TODAY”: Forecast is updated today from the Internet
“UPDATE: -1 DAY”: Forecast is updated yesterday from the Internet
…. and so on
NETWORK TIME (Auto-synchronized clock)
The clock on the main unit is synchronized to the Internet network time automatically and is adjusted for optimal
accuracy.
NOTE:
- If your PC is not connected to the Internet for a long period of time, the clock display may not be accurate
- You may set the time offset (+/- 0.5, 1, 1.5 or 2 hours) of your home city in the PC program to adjust DST &
time zone if necessary and the time on your main unit will be updated accordingly
Hold [CLOCK] on the main unit to set the 12/24 hour format, press [ϧ] or [ϰ] to select and press [CLOCK] to
confirm. The “M” & “D” icons will flash, press [ϧ] or [ϰ] to select day/month or month/day format for the
calendar. Press [CLOCK] to confirm and exit.
SUNRISE / SUNSET TIME
To view the sunrise and sunset time of your home city, press [CLOCK] button repeatedly until the respective
“SUNRISE” or “SUNSET” icon appears
ALARM TIME
Press [ALARM] button to view the alarm time and “AL“ icon will appear. Press [ALARM] again to enable &
disable the alarm. “
“ icon appears when alarm is enabled. Press [CLOCK] to return to time display
Hold [ALARM] for 3 seconds to enter alarm setting mode. Press “ϧ”or “ ϰ” to enter the desired Hr/ Min values
and press “ALARM“ to confirm setting. When alarm is going off, press [ALARM] to stop alarm for one day. Press
[MODE/SNOOZE] to activate snooze function
CALENDAR
Press [CLOCK] repeatedly to show the time with day-of-the-week or seconds
Calendar can be displayed in day/month or month/day format. See section “NETWORK TIME” for setting.
DISPLAY BACKLIGHT
Once adapter is connected to the main unit, it will provide continuous backlight.
Press MODE/SNOOZE/LIGHT for an extended backlight if adapter is not connected.

LOW BATTERY INDICATION
Low battery indication is available for the main unit. Replace the batteries and follow the setup procedure in this
instruction manual
IMPORTANT NOTE:
After power reset of the unit, you are required to set up the RF connection again.
Main Unit & LAN Gateway: Press [PC Search] on main unit, then press [TRANSMIT] on LAN Gateway
BATTERY DISPOSAL
Replace only with the same or equivalent type recommended by the manufacturer. Please disposal of old,
defective batteries in an environmentally friendly manner in accordance with the relevant legislation.
LAN GATEWAY
Press [PC Search] on the main unit and then press [TRANSMIT] on the LAN Gateway to force transmitting RF
weather data and set up the RF connection with the main unit. (See “ESTABLISH RF CONNECTION WITH
MAIN UNIT” section for details)
TROUBLESHOOTING
1) “LAN Gateway not found” appears in the PC program window
- Make sure your PC is connected to the Internet. Try browsing through a couple of websites to make sure.
- Check and make sure your LAN Gateway is powered on with adapter connected to your power socket.
- Check the LAN cable is connected properly to the LAN port of your router (or your server network)
- If your router is controlled by a server or if you want to connect the LAN Gateway directly to a LAN port in a
server instead of a router, it may be necessary to get the server administrator’s help to open the access of
the LAN Gateway to the LAN and to the internet. Please consult your server administrator for the necessary
arrangement
- Only one LAN Gateway should be connected to your router (or server network)
2) Main unit display is not updated and fails to receive RF signal from the Gateway ( icon appears)
- Check if the battery level of the main unit is low. Replace batteries if necessary
- Re-establish the RF connection between main unit & LAN Gateway
- Press [PC SEARCH] button on the back of the main unit until the icon flashes
- Press [TRANSMIT] button on the top of the LAN GATEWAY
(See “ESTABLISH RF CONNECTION WITH MAIN UNIT” section for details)

- If this situation persists, shorten the distance between the main unit & the LAN Gateway and re-establish
the RF connection again.
- The Gateway is mainly powered by adapter and power outage (or reset of the Gateway) which will break
the RF synchronization. You need to establish the RF connection between the main unit & LAN Gateway
again.
3) “Cannot get time/DST from server” appear in the PC program window
- Make sure your PC is connected to the Internet. Try browsing through a couple of websites to make sure.
- The server may be busy. Please wait and retry after several minutes.
4) There is one short blink every 5 seconds on the LAN Gateway
- The Gateway is not connected to your router, or the LAN cable is damaged.
- If this situation persists, please check the connection to the LAN cable on both the Gateway and your
router.
5) There are two short blinks every 5 seconds on the LAN Gateway
- The Gateway is connected to your router, but cannot acquire an IP address.
- If this situation persists, please check your router’s settings to make sure that DHCP is enabled and that
free IP addresses are available.
6) There are three short blinks every 5 seconds on the LAN Gateway
- The Gateway has an IP address, but cannot resolve the domain name of the server. This means that your
router has no information about the domain name of the server. This situation should be rare.
- Make sure your router is connected to the Internet.
7) There are four short blinks every 5 seconds on the LAN Gateway
- The Gateway cannot get the weather data from the server.
- Make sure your router firewall has not blocked any web access for the Gateway.
- The server may be busy. Please wait and if the situation persists, power off the Gateway and power on it
again.
8) There is one long blink (around 1 second duration) every 40 seconds on the LAN Gateway
- The Gateway is sending data to the main display unit. This is normal.
9) The time displayed does not match with the correct local time.
- Please use the “time offset” settings on the PC program to adjust to the correct time.
10) The new weather forecast and/or time are not displayed after changing to a new city.
- Please wait for at least 10 minutes for the update.
- If there is still no update, please press the button on the top of the Gateway to resend the data to the main
display unit.
FAQ
- Do I have to connect the main display unit to a computer?
No. The main display units connect to the Gateway via RF radio transmission. They are never connected physically to the
Gateway or your computer.
- Do I have to turn on my computer to receive forecast data update?

No. Updated Internet forecast data is sent automatically from the Gateway at regular intervals to the main display unit even
the computer is turned off.
- Will LAN Gateway work with my dial-up internet connection?
No. The LAN Gateway requires a high speed (broadband) internet connection
- How often does the forecast data get updated on my main unit?
Forecast data is automatically updated every six hours.
- If I lose my internet connection, will I lose my weather data on the display?
No. The forecast information is updated at regular intervals and retain their data until new data is received. If the Gateway
loses its connection to the internet, the data will be updated again when the connection is restored.
- How will the LAN Gateway affect the speed of my internet connection?
The LAN Gateway uses very small network data packets and should have no noticeable effect on your internet connection.
- Do I need a wireless router?
No. You don't need a wireless router. The Gateway simply needs to be connected to your local area network router or your
dsl-router by using the network cable included in the box with your LAN Gateway. The main display unit communicates
wirelessly with the Gateway and not through your local area network.
SPECIFICATIONS
CD Software : Compatible with Windows 2000, XP, Vista & Windows 7
Transmission Range: 30 metres in open area
Clock : Auto-synchronized clock from Internet, Quartz back-up
Power : AA x 3 pieces & 6.0V adapter for main unit
6.0V adapter for LAN Gateway
Source of Internet weather data: Foreca Ltd.

Battery precautions
1. Use only fresh batteries of the required size and recommended type.
2. Do not mix old and new batteries, different types of batteries (standard, alkaline or rechargeable) or
rechargeable batteries of different capacities.
3. Never leave dead or weak batteries in the unit.
4. If the unit does not respond to your commands, replace the batteries.
5. If you do not plan to use the unit for several weeks, remove the batteries. Batteries can leak chemicals that
can destroy electronic parts.
6. Dispose of batteries promptly and properly. Do not burn or bury them.
7. Non-rechargeable batteries are not to be recharged. Rechargeable batteries are to be removed from the unit
before being charged. Rechargeable batteries are only to be charged under adult supervision.
8. The supply terminals are not to be short circuited.
9. Batteries are harmful if swallowed so keep away from young children. Do not remove outer casings.
10. The WEEE symbol indicates that waste electrical and electronic equipment should not be treated as
normal household waste. It should be segregated and recycled when it has reached the end of its
life, which can be done free of charge at local Civic Amenity Sites. For your nearest facilities see
www.recycle-more.co.uk
.
/