Page is loading ...

www.saxbylighting.com
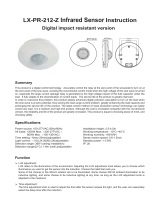
Instruction manual
95283
PIR Detector IP54 3-in-1
PIR Adjustment
We recommend cleaning with a soft dry cloth. Do not use solvents or abrasive cleaners as these could damage the finish.
For your safety, always switch off the power supply before changing lightbulbs, or cleaning.
Care and Safety
Technical data
The power supply is Double Insulated and does not require connection to an Earth circuit.
Waste electrical products should not be disposed of with household waste. Please recycle where facilities
exist. Check with your Local Authority or local store for recycling advice.
This product is rated at IP54.
IP
54
Supply Voltage: 220-240V~ Detection Range: 180º / 360º
Power Frequency: 50Hz Detection Distance: Max.12m (<24ºC)
Ambient Light: <10-2000LUX (adjustable) Working Temperature: -20~+40ºC
Time Delay: Min.10sec±3sec Working Humidity: <93%RH
Max.15min±2min Power Consumption: approx 0.5W
Rated Load: Max.2000W Installation Height: 1.8-2.5m wall mount / 2.2-4m ceiling mount
1000W Detection Moving Speed: 0.6-1.5m/s
V2 16/10/2021
EU Manufacturer: Brilliant AG,
Brilliantstrasse 1, D-27442 Gnarrenburg
UK Manufacturer: BH17 7BY
Conformity with all relevant EC Directive requirements.
Conformity with all relevant UKCA Directive requirements.
• Turn the TIME knob anti-clockwise on the minimum (10s). Turn the LUX knob
clockwise on the maximum (sun).
• Switch on the power, the sensor and its connected lamp will have no
signal at the beginning. After Warm-up 30sec, the sensor can start work.
If the sensor receives the induction signal, the lamp will turn on. While there
is no another induction signal any more, the load should stop working within
10sec±3sec and the lamp would turn off.
• Turn LUX knob anti-clockwise on the minimum (-). If the ambient light is
more than 10LUX, the sensor would not work and the lamp stop working too. If
the ambient light is less than 10LUX (darkness), the sensor would work. Under
no induction signal condition, the sensor should stop working
within 10sec±3sec.
Note: when testing in daylight, please turn LUX knob to (SUN) position,
otherwise the sensor lamp could not work!

Warning
Thank you for purchasing this light fitting. Please read the instruction carefully before use to ensure safe and satisfactory
operation of this product. Please retain these instruction for future reference.
Installation
This product is double insulated and does
not require connection to an Earth circuit.
Existing fittings must be completely removed before installation of a new product. Before removing the existing fitting,
carefully note the position of each set of wires.
Note that the switch is turned off before installation.
Ensure that the screws and cable entry points are sealed to
maintain the IP rating of the product.
After deciding the layout of the light fittings ensure that the
cables are long enough to connect to desired positions.
• Open one of two clips on both side of the product with
slotted screwdriver to separate the rear panel from the
SENS. Refer to Fig 1.
• Choose the screw holes on the rear panel and drill out
the holes according to the installed position. Holes 1 / 1’,
2 / 2’ are for Mounted on Wall and Mounted in Ceiling ,
Holes 3 / 3’ are for Mounted on Corner, Holes 4 / 4’ are
for Mounted in Corner. Refer to Fig 2.
• When choose the Mounted on Corner, parts 1 and 2 need
to be removed with tool in order to match the installation
position better. Refer to Fig 3.
• Pull the cable through the cable entry hole and seal to
maintain the IP rating and wire as detailed Wiring Diagram.
• Using the rear panel as a template, mark and drill the
fixing holes. The fixing holes are marked out in the rear
panel-drill through them too. Take care to avoid damaging
any concealed wiring or pipes.
Having correctly identified the wiring from your existing light fitting and connect to the connection block inside the product in
the following way:
Wiring
Check that...
You have correctly identified the wires
The connections are tight
Layout
The mains supply cable must have a minimum cross section area of 1.0mm2.
Cables must be protected using suitable conduit or plastic trunking.
Avoid pointing the detector towards objects with highly reflective surfaces, such as mirrors etc.
Avoid mounting the detector near heat sources, such as heating vents, air conditioning units, light etc.
Avoid pointing the detector towards objects that may move in the wind, such as curtains, tall plants etc.
Please read these instructions carefully before commencing any work.
This unit must be fitted by a competent and qualified electrician.
Install in accordance with the IEE Wiring regulations and current Building Regulations.
Check the pack and make sure you have all the parts listed.
To prevent electrocution switch off at the mains supply before installing or maintaining this fitting. Ensure other persons cannot
restore the electrical supply without your knowledge.
If you are in any doubt, please consult a qualified electrician.
If replacing an existing fitting, make a careful note of the connections.
This unit should be connected to a fused circuit.
Waste electrical products should not be disposed of with household waste. Please recycle where facilities exist. Check with
your local authority or retailer for recycling advice.
This product is double insulated and must not be earthed. If there are any incoming earth cables, they must be joined together
and well insulated with good quality insulation tape. This is to ensure earth continuity throughout your property.
It not only can install on the wall directly but
also can install on ceiling, in the inner corner
or outer corner with the help of the widget
(refer to right diagram):
Mounted on Wall Mounted in Ceiling Mounted on Corner Mounted in Corner
This product have two detectors, the installation height and the detection distance refer to photographo below:
Detector 1
Detector 2
Detector 1
Detector 2
4
4
• Re-clip the sensor back to the rear panel and then test it.
Rear panel
Cable entry hole
See Wiring diagram
No loose strands have been left out of the connection block
The cable clamp is fitted over the wires.
L N
IN~
OUT~
LOAD
L(BROWN)
N(BLUE)
N(BLUE)
A(RED)
PIR
Fig 1.
Press
down
Fig 2.
Holes 1 / 1’ , 2 / 2’ are for Mounted on Wall
and Mounted in Ceiling
Holes 3 / 3’ are for
Mounted on Corner
Holes 4 / 4’ are for
Mounted in Corner
4
3
3’
11’
22’ 4’
Mounted on Corner Fig 3.
Remove parts 1 and 2
when Mounted on Corner
1
2
/