MH-ST-328

MH LONDON MH-ST-328 User manual

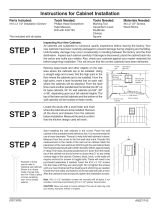
  • Hello! I've reviewed the user manual for the MH-ST 327,328,329,330,331,332 shelf. This manual covers the installation process, including the dual orientation feature, and provides a care guide. I'm ready to answer your questions about setting up your new shelf.
  • How should I clean the shelf?
    What should I do if I have missing or damaged parts?
    How long does the installation take?
estimated
installation time
10 : 00
people required
1 or more
MH-ST-327,328,329,330,331,332
1
Ok, let’s
get started!
Put on mood music!
To prevent damage to product, use the clean side of
package carton or rug as working surface for
assembly.
In the event of missing or damaged parts, delivery
problems etc., please reach out to our team.
We will be happy to x the problem!
2
care guide
Clean regularly with a soft and dry cloth.
To protect nish, avoid use of abrasive cleaners.
Wipe up spills immediately. Please!
3
(A)
Shelf
x1
product
parts
4
(B)- Screw
x6
(C) - Wall Plug
x6
what’s
included
5
6
installation
instructions
Friendly Tip: Take a deep
breath going on. This is easy
even if you are not used to
tools. Just follow these steps to
the T, and the outcome
will be worth it!
7
ONE SHELF, TWO STYLES: This shelf has a dual orientation
feature. It can be hung with the metal back facing up and
facing down. Follow the same installation steps for both styles.
Metal back upwards
Metal back downwards
Place the shelf on the wall and put a spirit level on it to check its
alignment. Adjust till the angle is straight.
Once the shelf is in a straight alignment, make marks on the wall
through the predrilled holes on the shelf.
step 1:
step 2:
8
A
Drill holes at the points you just marked.
Using a hammer, insert wall plugs (C) inside the hole.
step 3:
step 4:
C
9
To install the smaller shelf, follow the steps above. However, instead
of six drilling points, the smaller shelf has four drilling points.
step 6:
B
Place the shelf so that the predrilled holes on it are right above the
wall plugs. Fix the screws (B) into the wall plugs over the shelf. Use a
screwdriver to make sure they are secure.
step 5:
10
Voila! Your shelf is now installed and secure!
/