Buhler FK301 User manual

Category
Lawnmowers
Type
User manual

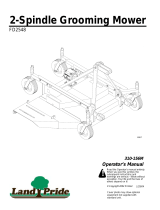
Buhler FK301 is a finishing mower designed to be used on a tractor with a standard category 1 three-point hitch. It is available in various cutting widths, including 48", 60", 72", and 84". The mower has three blades for a smooth, even cut, and four wheels to allow it to follow ground contours. It has both side and rear discharge options, and the cutting height can be adjusted using wheel spacers. The mower comes with a PTO shaft and safety chains, and assembly instructions are included in the manual.

Buhler FK301 is a finishing mower designed to be used on a tractor with a standard category 1 three-point hitch. It is available in various cutting widths, including 48", 60", 72", and 84". The mower has three blades for a smooth, even cut, and four wheels to allow it to follow ground contours. It has both side and rear discharge options, and the cutting height can be adjusted using wheel spacers. The mower comes with a PTO shaft and safety chains, and assembly instructions are included in the manual.

Finishing Mower
TABLE OF CONTENTS
DESCRIPTION PAGE NUMBER
Warranty 1
Operating Safety 2
Transport Safety 3
Maintenance Safety 3
Safety Signs 4
Hitch Assembly Instructions 5
Operating Instructions 6
Field Use Preparation 7
Field Operations 8
Disconnecting from Tractor 8
Maintenance 9
Bolt Torque 11
Side Discharge Assembly Drawing 12
Side Discharge Parts List 13
4’ Rear Discharge Assembly Drawing 16
4’ Rear Discharge Parts List 17
5’-7’ Rear Discharge Assembly Drawing 20
5’-7’ Rear Discharge Parts List 21
Gearbox Drawing 24
Gearbox Parts List 25
Spindle Assembly Drawing 26
Spindle Parts Lists 27
PTO Shaft Assembly Drawing 28
PTO Shaft Parts List 29
Chain Kit Instructions 30
Chain Kit Assembly Drawing 31
Quick Hitch Instructions 32
Quick Hitch Assembly Drawing 33
Bundle Numbers 34
Finishing Mower
- 1 -
WARRANTY REGISTRATION AND POLICY
Buhler Manufacturing products are warranted for a period of twelve (12) months from
original date of purchase, by original purchaser, to be free from defects in material and
workmanship under correct, normal agricultural use and proper applications.
Buhler Manufacturing’s obligations under this warranty shall be limited to the repair or
exchange, at Buhler Manufacturing’s option, of any Buhler Manufacturing product or
part which proves to be defective as provided. Buhler Manufacturing reserves the right
to either inspect the product at the buyer’s location or have it returned to the factory for
inspection.
The above warranty does not extend to goods damaged or subject to accident, abuse or
misuse after shipment from Buhler Manufacturing’s factory, nor to goods altered or
repaired by anyone other than an authorized Buhler Manufacturing representative.
Buhler Manufacturing makes no Express Warranties other than those, which are
specifically described. Any description of goods, including any references and
specifications in catalogues, circulars and other written material published, is for the
sole purpose of identifying goods and shall conform to such descriptions. Any sample
or model is for illustrative purposes only and does not create an Express Warranty that
the goods conform to sample or model shown.
The purchaser is solely responsible for determining suitability of goods sold. This
warranty is expressly in lieu of all other warranties expressed or implied. Buhler
Manufacturing will in no event be liable for any incidental or consequential damages
whatsoever. Nor for any sum in excess of the price received for the goods for which
liability is claimed.
WARRANTY CLAIMS:
Warranty requests must be prepared on Buhler Manufacturing Warranty Claim Forms
with all requested information properly completed. Warranty Claims must be submitted
within a thirty (30) day period from date of failure repair.
WARRANTY LABOR:
Any labor subject to warranty must be authorized by Buhler Manufacturing. The labor
rate for replacing defective parts, where applicable, will be credited at a rate determined
by the Company, Buhler Manufacturing.
IMPORTANT FACTS:
Buckets and Bucket Tines Carry No Warranty
Bent Spears Carry No Warranty
Snowblower Fan Shafts Carry No Warranty
Mower Blades Carry No Warranty
Portable Auger Parts Have Two (2) Year Warranty
Finishing Mower
- 2 -
FINISHING MOWER
There are both side or rear discharge mowers available:
Side Discharge Mowers: 1. F450S - 48" Cut
2. F550S - 60" Cut
3. F650S - 72" Cut
Rear Discharge Mowers: 1. F450R - 48” Cut
2. F550R - 60" Cut
3. F650R - 72" Cut
4. F750R - 84" Cut
All mowers have three blades to give a smooth even cut. Four wheels holding a free-
floating deck allow the mower to follow all ground contours. A specification sheet is
included with this manual.
SAFETY INSTRUCTIONS
Do not attempt to operate the mower until you have read the operator’s manual and all
the safety signs on the mower. NOTE: The words Danger, Signal or Caution on
the safety signs indicate a hazard or unsafe practice, which could result in injury or
death if proper precautions are not taken. Do not attempt any unauthorized
modifications to the mower as this could affect the function or the safety of the mower.
OPERATING SAFETY
1. Keep all safety signs clean and legible at all times. Replace damaged or
missing safety signs.
2. Ensure all shields are in place and in good condition before operating.
3. Ensure everyone is clear of the area before operating.
4. Never start or operate the mower except from the operator’s station on the
power unit.
Finishing Mower
- 3 -
OPERATING SAFETY cont’d.
5. Do not permit riders.
6. Stop engine, set brake, remove key and wait for all moving parts to stop
before servicing, adjusting, repairing and unplugging.
7. Never operate over 540 rpm PTO speed.
8. Inspect and clean the cutting area before cutting.
9. Never operate the mower in the raised position.
10. Do not wear loose fitting clothing during operation.
11. Keep hands, feet, clothing and hair away from moving parts.
12. Keep all bystanders away from the unit when it is operating.
13. Check to see that all controls are in neutral before starting the tractor.
TRANSPORT SAFETY
1. Do not transport on a public road without a slow moving vehicle sign and
flashers on the tractor.
2. Never have the mower in operation during transport.
3. Travel speed with a raised mower should be slow enough to maintain
stability of the tractor.
SERVICE AND MAINTENANCE SAFETY
1. Stop engine, set brake, remove key and wait for all moving parts to stop
before servicing, adjusting, repairing or unplugging.
2. Block up before working beneath unit.
3. Replace all shields removed during servicing before operating.
4. Use heavy leather gloves to handle sharp blades.
The safety signs used on the mower and their location are shown on the
following sheet along with the part number for the safety signs.
Finishing Mower
- 4 -
FINISHING MOWER SAFETY SIGNS
1
3
2
5
4
Replace safety sign immediately should it become damaged, torn or illegible. Obtain
replacements from your authorized dealer using the part numbers shown.
Finishing Mower
- 5 -
HITCH ASSEMBLY INSTRUCTIONS
1. The hitch is assembled except for the two pivot bars (#70). Bolt one end of each
pivot bar between the welded brackets at the back of the deck using the bolts
assembled in the mower.
2. Remove the 5/8” bolt (#64) at the top of the hitch assembly. Using the same bolt,
assemble with the pivot bars on both sides of the upper lift bracket weldment
(#63). The pivot bars should be between the lift bracket and the A-frame bars
(#38).
Finishing Mower
- 6 -
OPERATING INSTRUCTIONS
The Finishing Mower is designed to be used on a tractor with a standard category 1
three-point hitch. See the specification sheet for horsepower requirements. Using
excessive power will shorten the life of the drive train components.
CONNECTING TO TRACTOR:
Park the mower and tractor on a level dry area free of debris and foreign objects.
1. Slowly back the tractor up to the machine.
2. Adjust the three-point arms to align with the mower lift pins.
3. Stop the tractor, set the parking brake and remove the ignition key before
dismounting.
4. Slide the three-point arms on the lift pins and lock in place with the clips
supplied.
5. With the engine on the tractor shut off, attach the PTO shaft. Both ends of
the PTO have a standard 6-spline end with a spring-loaded locking collar.
Turn the round collar at the ends of the PTO clockwise to slide onto the
splined shafts. The spring-loaded pin in the PTO yoke must lock into the
groove on the splined shaft on the gearbox and tractor. Always check to
see that both ends of the PTO shaft are securely attached every time the
mower is used. This should always be done with the tractor engine shut
off. Attach the safety chains supplied with the PTO shaft, allowing
sufficient slack for the driveline during turns and operation. Check booklet
attached to the PTO for instructions.
NOTE: At lease one third of the telescoping length of the PTO
should overlap when the mower is in operation.
6. Attach the top link on the tractor to the link pin assembled in the upper lift
pin bracket (#63). Adjust the turnbuckle on the tractor top link so that the
upper lift bracket hangs straight down with the tractor and mower both on
level ground.
Finishing Mower
- 7 -
FIELD USE PREPARATION
1. Park the unit on hard level ground with the mower slightly raised.
2. Adjust the sway blocks or chains on the tractor so the mower is
centered between the rear wheels.
3. Adjust the three-point arms to level the mower side to side.
4. Adjust the turnbuckle on the top of the three-point hitch arms to level
the mower front and back.
5. Adjust the cutting height using the wheel spacers (#50 and #51) on the
wheel yokes. The spacers should be set at the same height on all four
wheels.
6. Check the oil level in the gearbox and add as required (see maintenance
section).
7. Grease spindle assembly, wheel bearings, wheel pivots and the PTO shaft
(see maintenance section).
8. Check tightness of belts, bolts and other hardware (see maintenance
section).
9. Check blades to see if they are damaged. Sharpen or replace blades
if necessary. Check that blade bolts are tight.
10. Clear the working area of foreign objects and check that all bystanders are
standing clear before starting.
11. Start the tractor with the mower resting on the ground on all four wheels.
12. Slowly engage the PTO and bring the PTO speed up to 540 rpm for
cutting.
Finishing Mower
- 8 -
FIELD OPERATION
1. The mower works best on dry grass. Slower cutting speed and occasional
cleaning may be required on damp or wet grass.
2. The PTO must run at the full 540 rpm for a good cut. Slower speeds or
double cutting could be required for very high grass.
3. Use a higher blade setting for rough areas to prevent scalping of the
surface.
4. Always cut counter-clockwise so grass clippings are thrown on the grass
already cut. This saves power and wear on the blades.
5. Sharpen blades if grass tears instead of cutting cleanly.
6. Slow down when cutting corners. Turning too sharply on corners can
leave a small strip of grass uncut.
DISCONNECTING FROM TRACTOR
1. Park on a firm level area and clean the mower.
2. Lower the mower until the load is off the hitch arms.
3. Disconnect the hitch arms and the PTO shaft.
4. Cover the mower for storage to prevent rust.
Finishing Mower
- 9 -
MAINTENANCE
1. GEARBOX: The gearbox should be filled with SAE 90 oil to the bottom of
level plug when shipped. Check the mower before using and at regular
intervals (approx. every 40 hours). See that this oil level is maintained.
2. GREASE: Grease wheel yokes, wheel bushing and PTO u-joints
approximately every 8 hours. Before using the mower for the first time,
grease wheel bushings until you can see the grease squeezed out at the
ends of the wheel hub. Lubricate the telescoping PTO tube and the quick
release collars on the ends of the shaft about every 20 hours. Clean all
grease fittings before injecting grease and immediately replace any
damaged or missing grease fittings. When using the safety chains
supplied with the PTO shaft, she shield bearings must be kept lubricated.
NOTE: There is no grease nipple on the spindles because they use
sealed bearings.
3. SHIELDING: Always keep all shielding in place and repair or replace if
damaged.
4. BLADES: When replacing or grinding blades, all three blades must be
replaced or reground at the same time to maintain the proper balance in
the cutting unit. Block up the mower securely before attempting to remove
the blades. Use heavy leather gloves to handle the blades. Be sure to
tighten center bolt and lock washer securely when replacing blades. Use
a torque wrench to re-tighten spindle bolts to 180 ft.-lbs. The bolts have a
patch of thread lock material pre-approved which will hold for up to five
usages. Always replace the lock washer with an extra heavy duty
supplied with the spindle
Finishing Mower
- 10 -
MAINTENANCE Cont’d.
5. BELTS: Remove the belt guards to check belt tightness. The center of
the belt span should deflect about ½” with nominal pressure. If the belts
slip or are too loose, the bolts holding the gearbox must be loosened. Use
the threaded tightener rod on the gearbox mount to tighten the belts. Lock
the rod in place and re-tighten the gearbox bolts when the belts are
properly tightened. Replace belt guards. Changing belts follows the same
procedure as given in the preceding paragraph, except you will have to
loosen the belts further to remove them. The belt installation is shown in
the following drawing. NOTE: Belts should always be replaced in
matched sets.
Finishing Mower
- 11 -
BOLT TORQUE
CHECKING BOLT TORQUE
The tables shown below give correct torque values for various bolts and hex bolts.
Tighten all bolts to the torques specified in chart unless otherwise noted. Check
tightness of bolts periodically, using bolt torque chart as a guide. Replace hardware
with the same strength bolt.
ENGLISH TORQUE SPECIFICATIONS
Bolt Bolt Torque *
Diameter SAE2 SAE 5 SAE 8
"A" N.m (lb-ft) N.m (lb-ft) N.m (lb-ft)
1/4" 8 (6) 12 (9) 17 (12)
5/16" 13 (10) 25 (19) 36 (27)
3/8" 27 (20) 45 (33) 63 (45)
7/16" 41 (30) 72 (53) 100 (75)
1/2" 61 (45) 110 (80) 155 (115)
9/16" 95 (70) 155 (115) 220 (165)
5/8" 128 (95) 215 (160) 305 (220)
3/4" 225 (165) 390 (290) 540 (400)
7/8" 230 (170) 570 (420) 880 (650)
1" 345 (225) 850 (630) 1320 (970)
NOTE: See page 9 for correct spindle torque. Do not use this chart for spindle
bolt only.
Torque figures indicated above are valid for non-greased or non-oiled threads and
heads unless otherwise specified. Therefore, do not grease or oil bolts or hex bolts
unless otherwise specified in this manual. When using locking elements, increase
torque values by 5%.
* Torque value for bolts and hex bolts are identified by their head markings.
Finishing Mower
- 12 -
FINISHING MOWER (SIDE DISCHARGE)
Finishing Mower
- 13 -
WHEN ORDERING PARTS
Always give your dealer the Model and Serial Number of your machine to assist him in
ordering and obtaining the correct parts. Use the exploded view and tabular listing of
the area of interest to exactly identify the required part.
SIDE DISCHARGE FINISHING MOWER
ITEM PART # DESCRIPTION
1 902663 4' Deck Weldment
902664 5' Deck Weldment
902665 6' Deck Weldment
2 912300158 Gearbox (Filled w/ Oil)
3 980004200 Gearbox Base Plate
4 906342 Gearbox Mount Plate (4')
906343 Gearbox Mount Plate (5' & 6')
5 966748 PTO Guard
6 966762 47" Axle Beam Weldment (4')
980008111 51" Axle Beam Weldment (5')
966763 53" Axle Beam Weldment (6')
7 906346 R.H. Pulley Guard (4')
906353 R.H. Pulley Guard (5')
906355 R.H. Pulley Guard (6')
8 906347 L.H. Pulley Guard (4')
906354 L.H. Pulley Guard (5')
906356 L.H. Pulley Guard (6')
9 966749 Discharge Shield (4')
966750 Discharge Shield (5')
966751 Discharge Shield (6')
10 966724 Roller Mt Brkt 10ga x 3 3/4" x 13 7/16" (4' & 5')
966182 Roller Mt Brkt 7ga x 4" x 16 3/16" (6')
11 966723 Lift Bracket
12 904250 B-61 Belt (4')
904251 B-70 Belt (5')
973506 B-78 Belt (6')
13 966722 12" Double Sheave c/w Set Screws
14 966601 Lift Pin Bushing 1 1/4" O.D. x 9/16" long
15 966727 Hitch Bushing 1" O.D. x 9/16" long
16 966823 Lift Pin c/w Nut & Washer (XL) (Cat. 1)
17 965911 7/16" Linch Pin (1493)
18 900929 Pulley Key 1/4" Sq x 1 5/8" long
19 81549 5/16" x 3/4" Hex Bolt (pl)
20 81569 5/16" Lock Washer (pl)
Finishing Mower
- 14 -
21
81570 5/16" B.S. Flat Washer (pl)
22 81568 5/16" Hex Nut (pl)
23 86170 3/8" x 1" Hex Bolt (pl)
24 86182 3/8" x 1 1/4" Carriage Bolt (pl)
25 84000 3/8" B.S. Flat Washer (pl)
26 81593 3/8" Lock Washer (pl)
27 81592 3/8" Hex Nut (pl)
28 84217 3/8" Wing Nut (pl)
29 964001 1'' x 7/16" I.D. x 10ga Flat Washer (pl)
30 81628 1/2" x 3 1/4" Hex Bolt (pl)
31 81637 1/2" Lock Washer (pl)
32 81636 1/2" Hex Nut (pl)
33 812769 1 1/2" O.D. x 9/16" I.D. x 10ga Washer (pl)
34 84270 5/8" x 1 3/4" Hex Bolt (pl)
35 81677 5/8" Lock Washer (pl)
36 81676 5/8" Hex Nut (pl)
37 84346 3/4" x 2 1/2" Hex Bolt (pl)
38 906789 A-Frame 24" long
39 81700 3/4" Hex Nut (pl)
40 9812377 5/16" x 3/4" Sq Head Set Screw (pl)
41 812482 5/8'' Lock Nut (pl)
42 812364 1/2" Lock Nut (pl)
43 906791 Arm Spacer 1''OD x 4 1/8''
44 81678 5/8'' BS Flat Washer Std (pl)
45 965807 Top Link Pin (Cat. 1)
46 84277 1/2" x 1 1/2" Hex Bolt (pl)
47 900931 1/4" Sq x 1.11" Key
48 81207 3/16" x 2" Cotter Pin
49 F0398 PTO Shaft (4')
F0399 PTO Shaft (5' & 6')
50 966731 1/2" long x 1 5/16" O.D. Bushing (pl)
51 966730 1" long x 1 5/16" O.D. Bushing (pl)
52 86171 3/8" x 1 1/4" Hex Bolt (pl)
53 904243 3 3/4" Single Sheave c/w Set Screws (4')
904245 4 1/2" Single Sheave c/w Set Screws (5' & 6')
54 904244 3 3/4" Double Sheave c/w Set Screws (4')
904246 4 1/2" Double Sheave c/w Set Screws (5' & 6')
55 966811 Sheave Spacer 1 1/4" O.D. x .70" long
56 900930 1/4" Sq x 1 1/2" Key
57 967164 Pound-in Grease Nipple (pl)
58 966729 3/16" Linch Pin (pl)
Finishing Mower
- 15 -
59
966855 Wheel Yoke
60 902614 3/4" x 6" Wheel Bolt (pl)
61 966190 5/8" Lock Wash (pl) Extra Heavy (Supp w/ Spndl)
62 84299 5/8" x 2" Hex Bolt (pl)
63 906792 Arm Brace Weldt
64 81674 5/8'' x 5 1/2'' Hex Bolt (pl)
65 9812433 3/16" x 1 1/2" Cotter Pin (pl)
66 966721 Nylon Ends (4' & 5')
966177 Nylon Ends (6')
67 966725 3" O.D. x 4" Roller Tube (4' & 5')
966179 4" O.D. x 5 3/8" Roller Tube (6')
68 81701 3/4" Lock Washer (pl)
69 905247 1'' Washer & Slotted Hex Nut Weldt Incl. W/ Gbox
70 902655 Pivot Bar 1/4" x 2" x 36" long (4')
902656 Pivot Bar 1/4" x 2" x 38 1/2" long (5')
902657 Pivot Bar 1/4" x 2" x 43 1/2" long (6')
71 812365 3/4" Lock Nut (pl)
72 966726 5/8" x 5 17/32" Roller Pin (4' & 5')
966180 5/8" x 7 1/16" Roller Pin (6')
73 966189 5/8" x 1 1/4" Gr. 8 Hex Bolt Lck (Supp w/ Spndl)
74 966188 2 1/2" O.D. x 21/32" I.D. Wash (Supp w/ Spndl)
75 966737 17 3/4" Standard Blade (4')
966719 21 3/4" Standard Blade (5')
966738 25 3/4" Standard Blade (6')
76 906339 Spindle w/ Hardware
77 912301558 1'' Snap Ring
78 966852 4.10/3.50-4 Tire w/Wheel (4 1/2" hub)
79 967140 Narrow Rim Washer 1" x 10ga (pl)
80 903488 Roller Holder 1/4'' x 4 5/32'' x 18 1/4''
81 903104 Roller Pin 3/4'' Dia x 8 3/4'' Long
82 903113 Roller Tube Assy
83 967445 1/4'' x 1 1/4'' Cotter Pin (pl)
84 9812436 1/4'' x 2 1/2'' Cotter Pin (pl)
85 81545 1/4'' Lock Washer (pl)
86 81544 1/4'' Hex Nut (pl)
87 81525 1/4'' x 3/4'' Hex Bolt (pl)
Finishing Mower
16
FINISHING MOWER (4’ REAR DISCHARGE)
Finishing Mower
17
4' REAR DISCHARGE FINISHING MOWER
ITEM PART # DESCRIPTION
1 903815 Deck Weldment (4')
2 912300158 Gearbox (Filled W/ Oil)
3 980004200 Gearbox Base Plate
4 906342 Gearbox Mount Plate
5 966748 PTO Guard
6 903804 53" Axle Beam Weldment
7 906346 R.H. Pulley Guard
8 906347 L.H. Pulley Guard
9 966724 Roller Holder 10ga x 3 3/4" x 13 7/16"
10 966723 Lift Bracket
11 904250 B-61 Belts
12 966722 12" Double Sheave c/w Set Screws
13 966601 Lift Pin Bushing (1 1/4" O.D. x 9/16" long)
14 966727 Hitch Bushing (1" O.D. x 9/16" long)
15 966823 Lift Pin c/w Nut & Washer (XL) (Cat. 1)
16 965911 7/16" Linch Pin (1493)
17 900929 Pulley Key (1/4" sq x 1 5/8" long)
18 86170 3/8" x 1" Hex Bolt (pl)
19 86182 3/8" x 1 1/4" Carriage Bolt (pl)
20 84000 3/8" B.S. Flat Washer (pl)
21 81593 3/8" Lock Washer (pl)
22 81592 3/8" Hex Nut (pl)
23 84217 3/8" Wing Nut (pl)
24 964001 1''O.D. x 7/16" I.D.x 10ga Flat Washer (pl)
25 81628 1/2” x 3 1/4" Hex Bolt (pl)
26 81637 1/2" Lock Washer (pl)
27 81636 1/2" Hex Nut (pl)
28 812769 1 1/2" O.D. x 9/16" I.D. x 10ga Washer (pl)
29 84270 5/8" x 1 3/4" Hex Bolt (pl)
30 81677 5/8" Lock Washer (pl)
31 81676 5/8" Hex Nut (pl)
32 84346 3/4" x 2 1/2" Hex Bolt (pl)
33 81701 3/4" Lock Washer (pl)
34 81700 3/4" Hex Nut (pl)
35 9812377 5/16" x 3/4" Sq Head Set Screw (pl)
36 84277 1/2" x 1 1/2" Hex Bolt (pl)
Finishing Mower
18
37 812364 1/2" Lock Nut (pl)
38 906789 A-Frame 24'' long
39 905247 1''ID Washer & Slotted Hex Nut Weldt Incl. W/Gbox
40 965807 Top Link Pin (Cat. 1)
41 812482 5/8'' Lock Nut (pl)
42 966737 17 3/4" Standard Blade
43 906791 Arm Spacer 1''OD x 4 1/8''
44 F0398 PTO Shaft
45 904243 3 3/4" Single Sheave Assy (machined end up)
46 966811 Sheave Spacer 1 1/4" O.D. x .70" long
47 904244 3 3/4" Double Sheave c/w Set Screws
48 912301558 1'' Snap Ring
49 906339 Spindle w/ Hardware
50 966731 1/2" long x 1 5/16" O.D. Bushing (pl)
51 966730 1" long x 1 5/16" O.D. Bushing (pl)
52 967164 Pound-in Grease Nipple
53 966729 3/16" Linch Pin (pl)
54 966855 Wheel Yoke
55 902614 3/4" x 6" Wheel Bolt (pl)
56 812365 3/4" Lock Nut (pl)
57 81207 3/16" x 2" Cotter Pin (br)
58 966726 5/8" x 5 17/32" Roller Pin
59 9812433 3/16" x 1 1/2" Cotter Pin (pl)
60 966721 Nylon End
61 966725 Roller Tube 3" O.D. x 4" long
62 84299 5/8" x 2" Hex Bolt (pl)
63 906792 Arm Brace Weldt
64 81674 5/8'' x 5 1/2'' Hex Bolt (pl)
65 900931 1/4" Sq. x 1.11" Key
66 966188 2 1/2" O.D. x 21/32" I.D. Wash (Supp w/ Spndl)
67 966189 5/8" x 1 1/4" Gr. 8 Hex Bolt Lck (Supp w/ Spndl)
68 966190 5/8" Lock Wash (pl) Extra Heavy (Supp w/ Spndl)
69 966852 4.10 x 3.50-4 Tire with Wheel
70 902655 Pivot Bar 36'' long
71 86171 3/8" x 1 1/4" Hex Bolt (pl)
72 900930 1/4" x 1 1/2" Key
73 967140 1'' x 10ga Narrow Rim Washer (pl)
74 903488 Roller Holder 1/4" x 4 5/32" x 18 1/4" long
Finishing Mower
19
75 903104 Roller Pin 3/4" dia. X 8 3/4" long
76 903113 Front Roller Assembly
77 9812436 1/4" x 2 1/2" Cotter Pin (pl)
78 81545 1/4" Lock Washer (pl)
79 81544 1/4" Hex Nut (pl)
80 81525 1/4" x 3/4" Hex Bolt (pl)
81 967445 1/4" x 1 1/4" Cotter Pin (pl)
82 81678 5/8'' BS Flat Washer Std (pl)
  • Page 1 1
  • Page 2 2
  • Page 3 3
  • Page 4 4
  • Page 5 5
  • Page 6 6
  • Page 7 7
  • Page 8 8
  • Page 9 9
  • Page 10 10
  • Page 11 11
  • Page 12 12
  • Page 13 13
  • Page 14 14
  • Page 15 15
  • Page 16 16
  • Page 17 17
  • Page 18 18
  • Page 19 19
  • Page 20 20
  • Page 21 21
  • Page 22 22
  • Page 23 23
  • Page 24 24
  • Page 25 25
  • Page 26 26
  • Page 27 27
  • Page 28 28
  • Page 29 29
  • Page 30 30
  • Page 31 31
  • Page 32 32
  • Page 33 33
  • Page 34 34
  • Page 35 35
  • Page 36 36

Buhler FK301 User manual

Category
Lawnmowers
Type
User manual

Buhler FK301 is a finishing mower designed to be used on a tractor with a standard category 1 three-point hitch. It is available in various cutting widths, including 48", 60", 72", and 84". The mower has three blades for a smooth, even cut, and four wheels to allow it to follow ground contours. It has both side and rear discharge options, and the cutting height can be adjusted using wheel spacers. The mower comes with a PTO shaft and safety chains, and assembly instructions are included in the manual.

Ask a question and I''ll find the answer in the document
Finding information in a document is now easier with AI