Page is loading ...

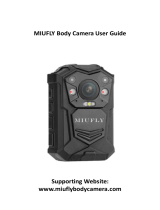
Body Worn Camera
User Manual
Product Overview
Body worn camera is a full HD video and audio recording device
with excellent quality.
With IP65 waterproof and night vision ability, It can help you to
collect high quality video and audio evidence under dark and rainy
circumstances.
Appearance and Key Description
Display Screen Description
Product Specifications
Item Parameter
Max Pixel Over 21 Mega Pixels
Video Resolution 1920x1080 30p
1280x720 60p
1280x720 30p
848x480 60p
16:9
Display Screen 2 inch TFT-LCD HD Clear colour
display screen
Wide Angle 140
O
wide-angle lens
Image without deformity
Memory Capacity Build-in 32G
Data Interface HDMI 1.3 Support 1080p
TV Output: NTSC
Continuous Recording
Time
10 hours
Shoulder Microphone Support all kinds of walkie-talkie
Positioning system
(Optional)
GPS
Red IR change
white light key
Boot
Turn off
Menu return key
Multifunction charging base port
HD Camera
Sensor
No shadow IR
night vision light
No shadow IR
night vision light
Auxiliary
location light
No shadow IR
night vision light
No shadow IR
night vision light
LED illumination
white light
OK confirm / auxiliary location light key
One key play / Up browse key
Menu / Down browse key
Reset Key
Video function
OK confirm / auxiliary location light key
Audio function
Photo function
Add * on
important file
key
USB Port
HDMI Port
AV Port
OUT Port

BASIC OPERATIONS
Power On / Off Key
Short press to return to previous screen.
Short press to enter / exit standby mode.
Press and hold 4 seconds to turn the camera off.
Audio Recording Key
Short press to start / stop audio recording.
Press and hold 4 seconds to start recording while power-off.
Photo Taking Key
Short press to take photos when the camera is on standby.
Press and hold 4 seconds to enable LED flashlight.
Video Recording Key
Short press to start / stop video recording.
Press and hold 4 seconds to enable video recording while power-off.
Playback Key
Short press to review the last recorded video, audio or photo files.
Infrared / LED Light Key
Short press to enable / disable IR red light.
Press and hold 4 seconds to enable / disable LED white light.
OK Confirm Key
Short press to access video, photo and audio folders.
Press and hold 4 seconds to enable / disable auxiliary light
Menu Key
Short press to access the camera’s menu settings.
Short press to select a file when browsing.
Add * On Important File Key
Short press to mark an important file during playback.
Press and hold 4 seconds to access the 3 modes.
(Traffic Control / Investigation / Public Security)
Reset Key
Reboot the camera using a pin while pressing the reset key.
FUNCTIONS
Adjusting Focus
Press and hold or key to adjust the focus.
(Note: focus cannot be adjusted under FHD 1920*1080 video
resolution)
Auxiliary Laser Pointer Location Light
Press and hold key 4 seconds to enable / disable auxiliary laser
pointer location light.
Changing Video Resolution
Press and hold key for 4 seconds to switch between
1080x720P30 and 848X480P30 resolution.
Charging (Li-ion Rechargeable Battery)
Camera can be charged via USB connected to a computer or
through multifunction base charging.
A full charge requires 4 hours and is completed when the blue
indicator light turns off.
Fast Forward / Fast Reverse
Press and hold or key to fast forward or fast reverse during
playback.
Power Saving Mode
Screen will enter standby mode if the camera is inactive for too long.
This option can be enabled / disabled in the main menu settings.
Video Snapshot
Short press key to capture a photo during video recording.
Long press key to activate flicker light.
Walkie-talkie
Short press key to talk after connecting the camera to a walkie-
talkie.
ALARMS
Insufficient Battery Alarm
Indicates that the camera’s battery life is running low and requires
charging.
Storage Full Alarm
Indicates that the camera’s memory is running low and requires
backing up of the files to free up the memory.
PORTS
USB Port
Connect this port to a computer using a cable to access the files and
charge the camera.
HDMI Port
Connect this port to a HD TV to playback the files.
AV Port
Connect this port to an external camera to access the files on its
screen.
INDICATOR LIGHT
Standby Indicator Light
Light turns green when camera power on.
Charge Indicator Light
Light turns blue when charging camera.
Light turns off when charging is completed.
Video Recording Indicator Light
Light turns red and flashing when recording video.
Audio Indicator Light
Light turns yellow and flashing when recording audio.
ATTENTION
Fully charge the camera before first time use.
Do not attempt to open / repair the camera by an unauthorized
personnel.
Prevent the bottom of the camera from being wet during
Charging.
/


