Page is loading ...

LEICA C-LUX
INSTRUCTIONS

2
Finding the information you need
In these instructions, you can find the information you need from the following pages.
Search from “Table of
Contents”
4 -
Search from the list of function
names
“Contents by Function”
10 -
Search from “Names and
Functions of the Main Parts”
15 -
Search from “List of monitor/
viewfinder displays”
269 -
Search from the list of
on-screen messages
“Message displays”
275 -
Search from the menu list
164 -
Search from “Q&A
Troubleshooting”
277 -
For details on how to use these
instructions, see the next page.

3
How to use these instructions
Recording mode icons
Recording modes:
In recording modes that show icons in black, you can select and execute the indicated
menus and functions.
(Custom Mode) has different functions depending on the recording mode that is
registered.
■
About the symbols in the text
Indicates that a menu item can be set after pressing the [MENU/SET] button.
Indicates that a Wi-Fi setting can be made after pressing the [Wi-Fi] button.
[AE|AF LOCK], [DISP], [
], etc. indicate the respectively labeled buttons.
Tips for skillful use and points for recording.
(→00) Indicates the reference page.
In these instructions, steps for setting a menu item are described as follows:
→ [Rec] → [Quality] → [ ]
• These instructions indicate the up, down, left, and right cursor buttons
as
.
• Ring, dial and lever operations are illustrated as below.
Turn the control ring
Rotate the thumb dial
Rotate the zoom lever

4
Table of Contents
■
Finding the information you need ..... 2
■
How to use these instructions ........... 3
■
Before use ......................................... 12
■
Scope of Delivery .............................. 14
■
Accessories ....................................... 14
Before Use
■
Names and Functions
of the Main Parts ............................... 15
Preparations
■
Attaching the Wrist Strap ................. 17
■
Charging the Battery ........................ 18
Inserting the battery ...................................19
Charging the battery ..................................20
■
Inserting and Removing the Card ... 24
■
About the Card .................................. 25
Formatting the card (initialization)..............26
Estimated recording capacity
(number of pictures/recording time) ........... 26
■
Setting Language, Time,
and Date ............................................. 28
■
Contents by Function ....................... 10
■
Holding the Camera .......................... 30
■
Buttons/Ring/Dials/Levers
Used for Recording ........................... 31
Switching between viewfinder and
monitor displays ......................................... 31
How to use the lens’ zoom function ...........32
Taking pictures ........................................... 33
Recording videos .......................................33
How to use the mode dial ..........................34
Control ring / Thumb dial ...........................35
Cursor buttons / [MENU/SET] button
(Selecting/setting items) ............................36
[DISP] button
(Switching the display information) ............ 36
■
Touch screen operations ................. 39
Focusing on the subject at the touched
position (Touch AF, Touch Shutter) ............40
Adjusting the exposure based on the
touched subject detail ([Touch AE]) ...........41
Basics
■
Menu Control ..................................... 42
■
Quick Menu ........................................ 44
Customizing the Quick Menu ..................... 45
■
Assigning Frequently
used Functions to the Buttons
(Function buttons) ............................ 46
Using the function buttons during
recording .................................................... 47
Using the function buttons during
playback.....................................................48
■
Changing the Settings Assigned
to the Control Ring/Thumb Dial ....... 49
■
Entering Text ..................................... 50

5
Table of Contents
Recording Modes
■
Snapshot Modes ............................... 51
[Snapshot Mode] menu..............................53
Setting coloring ..........................................54
Setting brightness (exposure)/
blurriness of the background
(Defocus control function) .......................... 55
■
Taking Pictures Using the
Exposure Control Modes
, , , and ............................... 56
Program exposure mode ...........................56
Aperture Priority Exposure Mode...............57
Shutter-Priority Exposure Mode.................58
Manual Exposure Mode ............................. 59
Checking the effects of the aperture
value and shutter speed settings
(Preview Mode)..........................................62
Easily set aperture value / shutter speed
for suitable exposure (One Push AE) ........63
■
Recording panorama pictures ......... 64
■
Scene Modes ..................................... 67
Types of Scene Modes ..............................68
■
Taking Pictures
with Different Effects
(Creative Control Mode) ................... 71
Types of picture effects .............................. 72
■
Creative Video Mode ......................... 77
Recording Slow Motion Videos
([High Speed Video]) .................................78
Panning or zooming while recording
with the camera in a fixed position
([4K Live Cropping]) ................................... 79
■
Registering your own
settings and recording
(Custom Mode) .................................. 81
Registering your own settings
([Cust.Set Mem.]).......................................81
Recording using a registered
custom set .................................................82

6
Table of Contents
4K Photo and Drive Settings
■
Recording with the 4K Photo
function and selecting pictures
to save .............................................. 108
Recording with the 4K Photo function .....108
Selecting pictures from 4K photo series
files and saving ........................................ 111
Notes on the 4K Photo function ............... 116
■
Selecting the focusing
plane after recording
([Post Focus]/[Focus Stacking]) .... 119
Recording using [Post Focus] .................. 119
Selecting a focus point and saving the
picture ([Post Focus])...............................121
Determining subject parts to be in focus by
combining several shots and creating
a single picture ([Focus Stacking])...........122
Notes on the [Post Focus]/
[Focus Stacking] ......................................123
■
Selecting a Drive Mode ................... 124
Continuous exposure function .................125
Taking pictures with the self-timer............127
■
Taking Picture Series with
Automatically Changing Settings
(Bracket Recording) ........................ 128
Exposure Bracket ....................................129
Aperture Bracket ...................................... 130
Focus Bracket .......................................... 130
■
Taking Pictures
Automatically at Set Intervals
[Time Lapse Shot] ........................... 131
■
Creating stop motion animation
[Stop Motion Animation] ................ 134
Focus, Brightness (Exposure) and Color tone Settings
■
Using Autofocus ............................... 83
Set the focusing operation to be
performed when the shutter button is
pressed halfway (AFS, AFF, AFC) .............84
Switching [AF Mode] .................................. 85
Changing the position and size of the
AF area ......................................................91
Setting the AF area position by touch ........94
Optimizing the focus and exposure
settings for a touched position ................... 95
■
Taking close-up pictures .................. 96
■
Taking pictures with
Manual Focusing ............................... 97
■
Taking pictures by locking the
focus and/or exposure settings ....... 99
■
Taking pictures with
Exposure Compensation ................ 100
■
Setting the ISO Sensitivity ............. 101
■
Setting the White Balance .............. 103

7
Table of Contents
Playing Back and Editing Pictures
■
Viewing your pictures ..................... 156
■
Viewing Videos ................................ 157
Extracting single frames from videos ....... 158
■
Switching the Playback Method .... 159
Zooming in and viewing
“Playback Zoom”......................................159
Viewing a list of pictures
“Multi Playback” .......................................159
Viewing pictures by their recording date
“Calendar Playback” ................................160
■
Viewing group pictures .................. 161
■
Deleting pictures ............................. 163
Stabilizer, Zoom and Flash
■
Compensating Camera Shake ....... 137
■
Using the Lens’ Zoom Function .... 139
Zoom types and use ................................139
Using Touch zoom ...................................142
■
Taking Pictures with the
Built-In Flash ................................... 143
Changing the Flash Control Mode ........... 144
2nd curtain sync.......................................147
Flash exposure compensation ................. 147
Recording Videos
■
Recording Videos/4K Videos ......... 148
Setting the resolution and the
frame rate ................................................150
Focusing while recording videos
([Continuous AF]) ..................................... 151
■
Taking Pictures While a Video is
Being Recorded .............................. 152
■
Recording Snap Videos .................. 153

8
Table of Contents
Wi-Fi/Bluetooth
■
What you can do with the
Wi-Fi
®
/Bluetooth
®
function ............. 223
■
Wi-Fi/Bluetooth Function ............... 224
■
Connecting the camera to a
smartphone ..................................... 227
Installing the smartphone/tablet app
“Leica C-Lux” ...........................................227
Connecting the camera to a smartphone
compatible with Bluetooth Low Energy .... 228
Connecting the camera to a smartphone
that does not support Bluetooth Low
Energy .....................................................230
■
Controlling the Camera with a
Smartphone ..................................... 235
Turning on/off the camera using a
smartphone .............................................. 235
Tripping the camera’s shutter using a
smartphone (remote recording) ...............236
Playing back or saving images stored
in the camera, or uploading them
on social media sites ...............................240
Transferring recorded images to a
smartphone automatically ........................ 241
Writing location information of a
smartphone on a recorded image ............ 243
Synchronizing the camera’s clock
with a smartphone ...................................244
■
Sending pictures to a
smartphone ..................................... 245
■
About Wi-Fi connections ................ 249
Connecting via a wireless access point
([Via Network]) .........................................249
Connecting directly ([Direct]) ...................252
Connecting quickly with the
same settings as used previously
([Select a destination from History] /
[Select a destination from Favorite]) ........ 253
■
[Wi-Fi Setup] .................................... 255
Using Menu Functions
■
Menu list .......................................... 164
[Rec] ........................................................165
[Motion Picture] ........................................ 180
[Custom] ..................................................182
[Setup] .....................................................196
[My Menu] ................................................206
[Playback] ................................................207

9
Table of Contents
Connecting with Other Devices
■
Viewing 4K videos .......................... 256
Saving 4K videos .....................................257
■
Viewing on a TV .............................. 258
Recording while monitoring camera
images .....................................................260
HDTV Link (HDMI) (HDAVI Control™) ....261
■
Copying the Recorded Image
Data to a Computer ......................... 262
Copying pictures and videos....................263
■
Storing recorded pictures and
videos in a recorder ........................ 265
■
Printing ............................................ 266
Printing with date and text .......................268
Others
■
List of monitor/viewfinder
displays ............................................ 269
■
Message displays ........................... 275
■
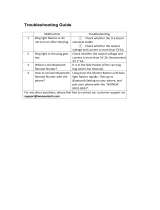
Q&A
Troubleshooting .............................. 277
■
Usage cautions and notes ............. 285
■
Leica Service Addresses ................ 293

10
Contents by Function
Recording
Recording mode ...........................................34
[Preview] ....................................................... 62
Panorama Shot Mode ...................................64
Macro recording ............................................96
Bracket recording .......................................128
[Time Lapse Shot] .......................................131
[Stop Motion Animation] ..............................134
[Silent Mode] ...............................................176
[Multi Exp.] .................................................. 179
4K Photo
[4K PHOTO]................................................108
[Post Focus] recording ................................ 119
Focus (AF/MF)
Autofocus ......................................................83
AF Mode .......................................................85
Adjusting the AF area position ...................... 91
Manual Focus ...............................................97
AF/AE Lock ...................................................99
Drive
Drive Mode .................................................124
Serial exposures ......................................... 125
[Self Timer] .................................................127
Exposure
[Touch AE] ....................................................41
[One Push AE] ..............................................63
AF/AE Lock ...................................................99
Exposure Compensation ............................100
ISO sensitivity ............................................. 101
Exposure Bracketing ..................................129
[Metering Mode] ..........................................172
Recording
Picture Quality and Color Tone
White Balance ............................................103
[Picture Size] ..............................................166
[Quality] ......................................................167
[Photo Style] ...............................................168
[Filter Settings] ............................................170
[Color Space] .............................................. 171
[Highlight Shadow] ......................................173
[i.Dynamic] .................................................. 174
[i.Resolution] ............................................... 174
[Long Shtr NR] ............................................ 175
[Diffraction Compensation] .........................176
[HDR] .......................................................... 178
Flash
[Flash Mode] ............................................... 144
2nd curtain synchro ....................................147
[Flash Adjust.] .............................................147
Monitoring
Recording while monitoring camera
images ........................................................260
Video recording
Creative Video Mode ....................................77
[High Speed Video] ....................................... 78
[4K Live Cropping] ........................................79
[Rec Quality] ...............................................150
Taking pictures while a video is being
recorded .....................................................152
[Snap Movie] ...............................................153
Video recording
Audio
[Wind Noise Canceller] ...............................181
Screen settings
[Monochrome Live View] ............................188
[Center Marker] ...........................................189
[Zebra Pattern] ............................................190

11
Contents by Function
Playback
Picture playback .........................................156
Video playback ...........................................157
Playback Zoom ........................................... 159
Multi Playback ............................................159
Delete .........................................................163
[Auto Review] .............................................187
[Slide Show] ................................................208
[Rotate]/[Rotate Disp.] ........................220, 222
Playback
Edit
[Post Focus] ................................................121
[Focus Stacking] .........................................122
[Title Edit] .................................................... 211
[RAW Processing] .......................................212
[4K PHOTO Bulk Saving] ...........................214
[Light Composition] ..................................... 215
[Sequence Composition] ............................216
[Clear Retouch] ...........................................217
[Text Stamp] ................................................ 218
[Resize] ....................................................... 219
[Cropping] ...................................................220
Image settings
[Protect] ......................................................210
[Rating] .......................................................210
Smartphone/tablet app “Leica C-Lux”
Leica C-Lux app .........................................227
Remote start-up .......................................... 235
Remote recording .......................................236
Auto transfer ...............................................241
Wi-Fi/Bluetooth
PC
Copying the Recorded Image Data to a
Computer .................................................... 262
TV
Playing back pictures on a TV screen ........258
[HDTV Link] ................................................261
Connecting with other devices
Recorder
Dubbing ......................................................265
Printer
PictBridge ...................................................266
Basic settings
[Format] ........................................................26
[Clock Set] ....................................................28
Diopter adjustment .......................................31
Quick Menu ..................................................44
[Beep] .........................................................198
[Economy] ...................................................199
[Reset] (initialization) ..................................205
Setup/Custom
Customization
Function buttons ...........................................46
Custom Mode ...............................................81
[Custom] menu ...........................................182

12
Before Use
Before use
■
Camera handling
Keep the camera away from excessive vibration, force, or pressure.
●
Avoid using the camera under the following conditions, which may damage the lens,
monitor, viewfinder, or camera body.
This may also cause the camera to malfunction or prevent recording.
• Dropping or hitting the camera against a hard surface
• Sitting down with the camera in your pants pocket or forcing it into a full bag
• Adding accessories to the camera strap
• Exerting excessive force on the lens or monitor
The camera is not dust resistant, splash resistant, or waterproof.
Avoid using the camera in places with excessive dust or sand, or where water can
come into contact with the camera.
●
Avoid using the camera under the following conditions, which present a risk that sand,
water, or foreign material may enter the camera through the lens or openings around
buttons. Be especially careful because these conditions may damage the camera, and
such damage may not be repairable.
• In extremely dusty or sandy places
• In the rain or by the shore, where the camera may be exposed to water
■
Condensation (When the lens, the monitor, or viewfinder, is fogged up)
●
Condensation may occur when the camera is exposed to sudden changes of
temperature or humidity. Avoid these conditions, which may make the lens, monitor, or
viewfinder dirty, cause mold, or damage the camera.
●
If condensation does occur, turn off the camera and wait about two hours before using
it. Once the camera adjusts to the surrounding temperature, the fogging will clear
naturally.

13
Before Use
Before use
■
Always take a test shot first
Before important events when you will use the camera (at weddings, for example), always
take a test shot to make sure that pictures and sound record correctly.
■
No compensation for missed shots
Leica Camera AG cannot compensate for missed shots if technical problems with the
camera or card prevent recording.
■
Carefully observe copyright laws
Unauthorized use of recordings that contain works with copyright for purposes other than
personal use is prohibited under copyright law. Recording of certain material may be
restricted even for the purpose of personal use.
■
Also refer to “Usage cautions and notes” (→285)

14
Before Use
Scope of Delivery
Order No.
Rechargeable battery pack
BP-DC15-E 18 544
BP-DC15-U 18 545
BP-DC15-TK 18 546
Battery charger/AC adapter
ACA-DC16-E 423-118.001-005
ACA-DC16-C 423-118.001-006
ACA-DC16-K 423-118.001-007
ACA-DC16-B 423-118.001-008
ACA-DC16-N 423-118.001-009
ACA-DC16-A 423-118.001-010
ACA-DC16-U 423-106.001-012
USB Cable Micro-B 423-118.001-014
Wrist strap 423-109.001-020
Short instructions 93 856 - 860
(delivery differs depending on markets)
Guarantee Card 439-399.100-026
Accessories
Please visit the Leica Camera AG website for information on the extensive range of Leica
C-LUX accessories:
www.leica-camera.com
Notes:
• Memory cards are optional.
• The battery pack is indicated as battery pack or battery in the text.
• SD, SDHC, and SDXC memory cards are referred to as card in the text.
• Check that all items belonging to the scope of delivery are included before using the
camera.
• Depending on the country or area where the camera was purchased, the items and
their shape may differ from the descriptions and illustrations in these instructions.
• Always keep small parts in a safe place out of the reach of children.
• Please dispose of all packaging appropriately.

15
Before Use
Names and Functions of the Main Parts
1
Shutter button (→33)
2
Zoom lever (→32, 139, 187)
3
Video button (→33, 148)
4
Thumb dial (→35, 49)
5
Main [ON/OFF] switch (→28)
6
Mode dial (→34)
7
Flash (→30, 143)
8
Viewfinder (→31, 269)
9
Diopter adjustment dial (→31)
10
Eye sensor (→31)
11
Stereo microphones (→30, 181)
Be careful not to cover the microphones
with your finger. Doing so may impair
sound recording.
12
Strap eyelet (→17)
13
Control ring (→35, 49)
14
Lens barrel
15
Front lens element
16
Self-timer indicator (→127) /
AF Assist Lamp (→30, 184)
1 2 3
46
8 9
12
131415
16
7
5
10
11

16
Before Use
Names and Functions of the Main Parts
12
Strap eyelet (→17)
17
[EVF] button (→31) /
[Fn4] button (→46)
18
Flash release lever (→143)
19
[AE|AF LOCK] button (→99)
20
Charging lamp (→21) /
WIRELESS connection lamp (→224)
21
[PF] ([Post Focus]) button (→119) /
[Fn2] button (→46)
22
[ ] (Delete) button (→163) /
[
] (Cancel) button (→44) /
[Fn3] button (→46)
23
[4K] (4K photo mode) button (→108) /
[Fn1] button (→46)
24
[ ] (Playback) button (→156)
25
Cursor buttons (→36)
[
] (Exposure compensation) ( )
(→100)
[
] (White balance) ( ) (→103)
[
] (Drive Mode) ( ) (→124)
[
] (Focus Mode) ( ) (→83, 96, 97)
26
[MENU/SET] button (→36, 42)
27
[DISP] button (→36)
28
[HDMI] socket (→258)
29
[USB/CHARGE] socket (→20, 263, 266)
30
Card/Battery door (→19, 24)
31
Release slider (→19, 24)
32
Tripod thread (→288)
Using tripod screws with lengths of
5.5mm (
7
/
32
″) or more may damage the
camera if attached.
33
Speaker (→30, 198)
34
Monitor (→269) with touch control
options (→39)
Function buttons [Fn5] to [Fn9] are
touch icons.
They can be called up by touching the [ ]
tab on the monitor screen.
20
21
22
23
24
25
26
27
28
29
17 12
32 31 3034
18 19
33

17
Preparations
Attaching the Wrist Strap
We recommend attaching the wrist strap when using the camera to prevent it from
dropping.
Strap eyelet

18
Preparations
Charging the Battery
Always use the dedicated AC adapter, USB cable, and battery for this camera.
• Always charge before first use! (battery is shipped uncharged)
• Charge the battery while it is in the camera.
Camera status Charge
Turned off Yes
Turned on No
About batteries that you can use with this camera
It has been found that counterfeit batteries which look very similar to the
genuine product are available in some markets. Some of these batteries are
not adequately equipped with internal protection to meet the requirements
of appropriate safety standards. Using such batteries may lead to fire or
explosion. Please be advised that Leica Camera AG is not liable for any accident
or failure occurring as a result of use of a counterfeit battery. To ensure that
safe products are used we urgently recommend to use only the Leica battery
BP-DC15 (→14).

19
Preparations
Charging the Battery
Inserting the battery
To charge the battery, insert it into the camera.
1
Push the release slider to the [OPEN]
position and open the card/battery door
Release slider
[OPEN] [LOCK]
2
Insert the battery all the way
• Insert the battery all the way and check that it
is locked by latch.
3
Close the card/battery door and then
push the release slider to the [LOCK]
position
Make sure to insert the battery in the correct
orientation.
Lever
■
To remove the battery
Move the latch in the card/battery
compartment in the direction of the arrow.
●
Use only the Leica battery BP-DC15 (→14).
●
Leica Camera AG cannot guarantee the quality of any other type of battery.
●
To remove the battery, turn the camera off and wait until the Leica logo on the monitor screen goes
off. (Failure to wait may cause the camera to malfunction and may damage the card or recorded
data.)
●
Remove the battery from the camera if you will not use it for a long period of time.

20
Preparations
Charging the Battery
Charging the battery
We recommend charging in a location where the ambient temperature is between 10°C
and 30°C (50°F to 86°F) (same for the battery temperature).
Insert the battery into the camera.
Make sure the camera is turned off.
The battery can be charged from an outlet or through a PC.
USB cable
AC adapter
To the electrical outlet
Computer
Getting ready: Turn on the computer.
When charging the camera, connect the USB cable to the [USB/CHARGE]
socket.
[USB/CHARGE] socket
• This socket is located at the bottom when the camera is in an
upright position.
• Always check the orientation of the plug, and hold it straight to insert
or remove it. (If it is inserted in the wrong direction, the socket could
be deformed and cause faulty operation.)
Also, do not insert into the wrong socket. Doing so may damage the
camera.
/