Page is loading ...

SP1790JK
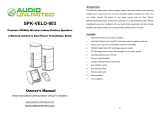
900MHz Wireless Indoor/Outdoor Speakers
User Manual
Page 1
INTRODUCTION
This 900 MHz digital hybrid wireless speaker system uses the latest wireless
technology that enables you to enjoy music and TV sound anywhere inside or
outside your home. You simply connect the system to any audio source such as
Radio, TV, VCR, Hi-Fi, and CD/MP3/VCD/DVD/Blu-Ray player. Without any
complicated wiring and installation, this system enables you to enjoy incredible
bona fide sound in minutes.
FEATURES
1. Weatherproof indoor and outdoor speakers
2. Automatic Phase Lock Loop (PLL) scanning system on speaker receivers
3. Phase Lock Loop (PLL) transmission system on transmitter
4. 900 MHz Digital Hybrid RF technology speaker system
5. Operating distance up to 150 feet
6. Virtually interference free audio quality
7. Standby Mode
8. Wireless remote control unit: Independently controls each speaker
A. Volume up/down
B. Power Off
9. Wall mountable using included mounting gaps on back of speakers.
10. 2-way speakers
IMPORTANT SAFETY INFORMATION
1. Read and follow all instructions and warnings.
2. Do not use liquid or aerosol cleaners. Use a damp cloth for cleaning. If
necessary use a mild soap.

Page 2
COMPONENT IDENTIFICATION
TRANSMITTER
SPEAKER RECEIVERS
REMOTE CONTROL
Page 3
INSTALLATION INSTRUCTIONS
TRANSMITTER
1. Insert the antenna tube onto the antenna wire.
2. Connect the supplied AC power adapter to an electrical wall outlet.
3. Plug the AC power adapter into the DC input jack located on the rear of the
transmitter.
4. When the AC adapter is plugged in, the red POWER LED illuminates. If
the red POWER LED does not illuminate, make sure the adapter is plugged
in.
SPEAKER RECEIVERS
1. Remove Battery cover located on the bottom of each speaker.
2. Insert 6 “C” alkaline batteries (not included) into the battery compartment
with correct polarity (+/-) as indicated or connect the 9V power adapter
(included) to the DC input jack located inside of the battery compartment.
Then plug the AC adapter into an electrical wall outlet.
3. Replace the Battery cover to close the battery compartment.

Page 4
4. Press On/Off button located on each speaker and turn the speakers ON.
The POWER LED will light up in Blue. To turn the speakers off, press the
ON/OFF button located on the speakers and the POWER LED will turn
off.*
5. To suit the needs of different users, these speakers are designed for optional
wall mounting. There are two holes at the back of each speaker so that they
can be hung easily on the wall.
*NOTE: Remote control unit does not turn speakers ON. Keep speakers within
reach.
REMOTE CONTROL UNIT
1. Remove the battery cover at the rear of the remote control unit and insert 2
“AAA” batteries (not included) into the battery compartment with correct
polarity (+/-) as indicated.
2. Replace the cover and close the battery compartment.
3. Remote can be used to:
- Adjust volume
- Auto tune
- Put speakers into and out of Standby mode – after 5 minutes,
Speakers will automatically power off.
*NOTE: Remote control unit does not POWER ON Speakers.
Page 5
CONNECTING TO MEDIA DEVICE
The rear of the transmitter has one audio cord that can be connected properly to
the audio output jack of TV, Computer, VCR, Radio, CD/MP3/VCD/DVD/Blu-
Ray players or to headphone/earphone jack with the connector provided.
Note: You may need the included iPhone Adapter to connect your iPhone to the
transmitter for audio streaming. Simply plug the cable from the transmitter into
one end of this Phone Adapter, and then plug the other end of the adapter into
your iPhone.
When the transmitter receives an audio signal, the blue SIGNAL LED and the
red POWER LED will illuminate together. If the blue SIGNAL LED does not
illuminate, ensure that the audio source is turned on.
If the blue light on the transmitter doesn’t light up, ensure audio source is turned
on and select “AUTO TUNE” on remote control unit or speakers.
OPERATION
1. Turn on the audio source (TV or audio component) to which the transmitter
is connected with. The blue signal LED on the transmitter will light up.
2. Select the channel (1 or 2) of the transmitter for best performance in your
location.
3. Turn on the ON/OFF button on the speakers (the Power button on the
remote control unit cannot be used to switch on the speakers). Press the
“AUTO TUNE” button to get the best tuning reception in the speakers.
When the button is pressed, frequency tuning starts automatically and it
stops when a signal is detected. Tuning process can also be activated by
pressing the “AUTO TUNE” button on the
remote control unit.
4. Volume can be adjusted up by pressing the “+”
button or down by pressing the “-“ button to
the desired listening level, or you can press the
“+” button or “-“ button on the remote control
unit to adjust the volume level.

Page 6
NOTE:
Press the “AUTO TUNE” button for the best reception. Should you experience
any frequency interference, move your channel switch from one channel to the
other channel (there are two channels for selection) on the transmitter, and then
press the “AUTO TUNE” button again.
5. When the batteries are installed, your speakers are portable and can be
carried freely from room to room (and outdoors) up to their maximum
range of 150 ft.. Should you encounter any sound disruption (signal cuts
off or carries distortion), press the speaker’s “AUTO TUNE” button to
maximize the best reception.
If you hear interference from the components, switch on the channel control of
transmitter, and then move the speakers to another location. You can re-adjust
the tuning control by changing the channel to 1 or 2 on the transmitter, and then
pressing the “AUTO TUNE” button located on each speaker or the remote
control for best reception.
When transmitting/receiving over long distances, the signal from the system
will become weaker. This system will transmit through walls, floors and other
obstacles However, range will be maximized by the “line of sight” placement
with no obstacles between the transmitter and the speakers. Keep this in mind
when placing your equipment throughout your house.
Page 7
6. To put unit in Standby Mode:
a) To protect the transmitter and save power, the transmitter will turn
off automatically if it detects that the unit is not being operated or,
there is weak reception from the signal audio source, for 5 minutes.
In other words, if the signal comes back, the transmitter will work
again automatically
b) To put the speakers in Standby mode, press the power button on the
remote control unit. The LED light will change from Blue to Green.
c) You can take the speakers out of Standby mode by pressing the
power button on the remote control unit. If the speakers remain in
Standby mode, after 5 minutes they will automatically power off.
ATTENTION:
The transmitter for this speaker set is designed to work with a variety of
devices. Our tests have shown the default volume levels of iPods, MP3
players and other devices connected to the transmitter through the
headphone jack does not have the signal strength required by the
transmitter. Raising the volume of your device will increase the signal
strength to the receiver. The blue signal LED will light when the required
signal strength from your device is reached. We recommend that you keep
the volume set on your iPod or MP3 player at a minimum of ¾ of full
volume.
To Turn Speakers Off
1) Press ON/OFF button on individual speakers.
2) Put in Standby mode using remote control unit – will shut off
automatically within 5 minutes.
3) Unplug media unit – will shut off automatically within 5 minutes.
WARNING
The AC/DC power adapters are for indoor use only. For all weather use, please
use “C” alkaline batteries (not included) in each speaker.
This device must be used with the AC/DC adapters supplied in the package.

Page 8
TROUBLE SHOOTING
NO SOUND
- Ensure the AC/DC adapter is fully inserted into the wall outlet and the
jack located on the transmitter.
- Ensure the speakers are switched on and Blue LED light is visible.
- If the speaker’s battery capacity is too low, replace with new batteries
or connect the AC/DC adapters to the speakers.
- Ensure the TV or audio (media) component is on.
- The connected audio/video (media) equipment is not playing. Start
playing the equipment.
- If the volume on the speakers is too low, adjust the volume to an
appropriate level on the speakers or using remote control unit.
DISTORTED
- Press the “AUTO TUNE” button on the speakers until matching the
frequency of the transmitter.
- Change the position of the channel selector on the transmitter. You
must then press the “AUTO TUNE” on the speakers.
- Battery capacity is too low. Replace with the new battery.
- Ensure the volume level of speakers is adjusted properly.
- If the speakers are too far away from the transmitter (beyond 150 ft.),
move them closer.
- The input level of the audio is too low. Turn up the volume of the
audio source
equipment.
Page 9
TECHNICAL SPECIFICATIONS
Transmission Mode : UHF
Carrier Frequency : 900 MHZ Digital Hybrid
Operation Voltage : Transmitter, DC 12V 150mA
Speakers, 6 x ‘C’ size Alkaline batteries or DC 9V
1A adapter.
Remote Control Unit, 2 X ‘AAA” size batteries
Frequency Response : 40Hz – 12KHz
Distortion : 1%
S/N Ratio : 65dB (typical)
Operation Distance : Up to 150 feet
Speakers : 2-way
Output Power : 2 x 5 Watts
NOTE: This equipment has been tested and found to comply with the limits of
a Class B digital device, pursuant to Part 15 of the FCC Rules. These limits are
designed to provide reasonable protection against harmful interference in a
residential installation. This equipment generates uses and can radiate radio
frequency energy and, if not installed and used in accordance with the
instructions, may cause harmful interference to radio communications.
However, there is no guarantee that the interference will not occur in a
particular installation. If this equipment does not cause harmful interference to
radio or television reception, which can be determined by turning the equipment
off and on, the user is encouraged to try to correct the interference by one or
more of the following measures:
- Reorient or relocate the receiving antenna.
- Increase the separation between the equipment and receiver.
- Connect the equipment into an outlet on a circuit different from that to
which the receiver is connected.
- Consult the dealer or an experienced radio/TV technician for help.
Changes or modifications not expressly approved by the party responsible for
compliance could void the user’s authority to operate the equipment.

Page 10
BATTERY NOTICE:
Do not mix old and new batteries. Do not mix alkaline standard (carbon-zinc)
or rechargeable (nickel-cadmium) batteries. Replace all batteries at same time
when they appear to be worn and unit is not operating properly. Remove
batteries when unit is not used for long periods of time. To avoid leakage or
explosion, do not put batteries in fire.
WARNING
This product may contain chemicals known to the state of California to cause
Cancer and birth defects and other reproductive harm.
Warranty
Please return damaged or defective merchandise to the Kohl’s store where it
was purchased. For customer service, please visit www.markfeldstein.com
or
call 1-800-755-6504 Mon. – Fri. 8:15 am – 5:00 pm Eastern time.
/