Page is loading ...

FOOD DEHYDRATOR
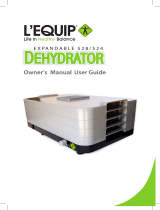
74-1001-W
DUE TO CONSTANT FACTORY IMPROVEMENTS, THE PRODUCT PICTURED MIGHT DIFFER
SLIGHTLY FROM THE PRODUCT IN THIS BOX. 022515

GENERAL SAFETY RULES
COMPONENT LIST
CLEANING INSTRUCTIONS
GROUNDING INSTRUCTIONS
OPERATING INSTRUCTIONS
CHOOSING FOODS
PRE-TREATMEN OF FOODS
TIPS
RE-HYDRATING
MAKING JERKY
FOOD SAFETY
WARRANTY
REGLAS IMPORTANTES DE SEGURIDAD
LISTA DE COMPONENTES
INSTRUCCIONES DE LIMPIEZA
INSTRUCCIONES PARA HACER TIERRA
INSTRUCCIONES DE OPERACIÓN
SELECCIONE LOS ALIMENTOS
PREPARACIÓN DE LOS ALIMENTOS
CONSEJOS
REHIDRATACIÓN
CÓMO HACER CECINA
SEGURIDAD DE LOS ALIMENTOS
INFORMACIÓN DE GARANTÍA WESTON
IMPORTANTES RÈGLES DE SÉCURITÉ
DESCRIPTION DE LA PIÈCE
INSTRUCTIONS DE NETTOYAGE
INSTRUCTIONS DE MISE À LA TERRE
MODE D'EMPLOI
CHOIX DES ALIMENTS
PRÉPARATION DES ALIMENTS
CONSEILS
RÉHYDRATATION
PRÉPARATION DE VIANDE SÉCHÉE
SÉCURITÉ ALIMENTAIRE
INFORMATION SUR LA GARANTIE
3
4
6
6
7
7
8
9
9
10
11
12
14
15
16
16
17
17
18
19
19
20
21
22
24
25
26
26
27
27
28
29
29
30
31
32
TABLE OF CONTENTS / ÍNDICE / TABLE DES MATIÈRES
2

1. CHECK FOR DAMAGED PARTS.
Before using the Dehydrator, check that all
parts are operating properly and perform
the intended functions. Check for alignment
of moving parts, binding of moving parts,
mounting and any other conditions that may
affect the operation. DO NOT use if power
cord is damaged or frayed. DO NOT use
this appliance after malfunctions or if the
appliance is dropped or damaged in any
manner.
2. Reduce risk of unintentional starting.
Make sure the Power Switch is in the “OFF”
position before connecting the Dehydrator to
the power source.
3. Avoid contact with moving parts.
4. ALWAYS DISCONNECT the Dehydrator
from the power source before servicing,
changing accessories or cleaning the unit.
Unplug the Dehydrator when not in use.
5. Make sure the detachable power cord
is securely attached to the unit during
operation.
6. NEVER LEAVE THE APPLIANCE
UNATTENDED. It is important to monitor
the Dehydrator while in use.
7. KEEP CHILDREN AWAY. NEVER
LEAVE THE APPLIANCE UNATTENDED.
This appliance is NOT a toy. Close
supervision is necessary when any
appliance is used by or near children.
8. The Manufacturer declines any
responsibility in the case of improper use
of the Dehydrator. Improper use of the
Dehydrator voids the warranty.
9. Electrical repair must be done by an
authorized dealer. Use only factory original
parts and accessories to avoid injury and
retain the warranty. Modication of the
Dehydrator voids the warranty.
10. DO NOT pull the Power Cord to unplug.
Use care when using extension cords.
11. Be sure the Dehydrator is stable during
use. All four feet should be secure on a
GENERAL SAFETY RULES
READ AND FULLY UNDERSTAND ALL INSTRUCTIONS AND WARNINGS
PRIOR TO USING THIS UNIT. YOUR SAFETY IS MOST IMPORTANT!
FAILURE TO COMPLY WITH PROCEDURES AND SAFE GUARDS MAY
RESULT IN SERIOUS INJURY OR PROPERTY DAMAGE. REMEMBER:
YOUR PERSONAL SAFETY IS YOUR RESPONSIBILITY!
level surface. The Dehydrator should not
move during operation.
12. DO NOT operate the Dehydrator outdoors
or near any ammable or combustible
materials.
13. DO NOT block the air vents at the rear
of the Dehydrator. Keep the Dehydrator at
least 12” (31 cm) away from any wall, any
combustible materials and/or surfaces to allow
for proper air circulation.
14. DO NOT operate the Dehydrator on
ammable surfaces such as carpeting.
15. To prevent electric shock, DO NOT
IMMERSE IN WATER OR LIQUID. Serious
injury and electric shock could result. DO
NOT use this machine with wet hands or bare
feet. DO NOT operate near running water.
16. NEVER open or remove the back panel of
the Dehydrator.
17. Disconnect from power source before
cleaning the components of this machine.
READ ALL DIRECTIONS on how to clean
this Dehydrator before attempting to clean it.
18. After cleaning, make sure Dehydrator is
completely dry before reconnecting to the
power source – if not; ELECTRIC SHOCK
may result.
19. DO NOT operate the Dehydrator on a hot
stove-top, gas burners or inside an oven. DO
NOT allow the Power Cord to drape over the
Dehydrator, hot surfaces or over the edge of
the work surface.
20. BEWARE! Some surfaces may become
very hot during use! Serious injury may result!
DO NOT move the Dehydrator while in use.
DO NOT move the Dehydrator while hot.
Allow the appliance to cool before handling.
Use Handles. Extreme caution must be used
when moving an appliance containing hot oil
or other hot liquids.
21. DO NOT use while under inuence of
drugs or alcohol.
22. Household use only.
SAVE THESE INSTRUCTIONS
3
ENGLISH INSTRUCTIONS

ENGLISH INSTRUCTIONS
4
Dehydrator
Cabinet
6
Control
Panel
Drying
Guide
Power Switch
4
5
2
3
CAUTION!
EDGES
MAY BE
SHARP!
7
1

COMPONENT LIST
If any components of this unit are broken, the unit does not operate properly or you
need a replacement instruction manual, visit us on the web at
WestonProducts.com
Or call Weston Products LLC Toll Free at 1-800-814-4895
Monday thru Friday 8:00am-5:00pm ET. Outside the U.S. call 001-440-638-3131
DIAGRAM NUMBER PART DESCRIPTION PART NUMBER
1 TRAY (10) 74-1007
2 TEMPERATURE CONTROL KNOB 74-1008
3 TIMER CONTROL KNOB 74-1008
NOT SHOWN FEET (4) 74-1005
4 DOOR WITH HANDLE 74-1006
NOT SHOWN SHELF BRACKET -LEFT SIDE (5) 74-1002
5 SHELF BRACKET -RIGHT SIDE (5) 74-1003
6 CONTROL PANEL 74-1009
7 POWER CORD 74-1019
NOT SHOWN FUSE 15 AMP / 250 VOLT 74-1018
5
ENGLISH INSTRUCTIONS
5

ENGLISH INSTRUCTIONS
6
CLEANING INSTRUCTIONS
1. Clean the Trays and inside the Cabinet before using the Dehydrator for the
rst time and after each use.
2. Turn the Power Switch OFF “O”. Disconnect the Power Cord from the
electrical outlet.
3. Allow the Dehydrator to completely cool before cleaning.
4. Remove the Trays from the Cabinet.
5. Wipe the Cabinet clean, inside and out, with damp sponge or soft cloth.
Be careful not to splash water onto the heating element (located behind the
screening and fan in the back of the Cabinet) while cleaning the inside of the
Cabinet. Water could damage the heating element and the increases the risk
of electric shock. DO NOT immerse the Dehydrator in water.
6. Clean the Trays with warm, soapy water. Rinse with clear water and dry
immediately.
GROUNDING
This appliance must be grounded while in use
to protect the operator from electrical shock.
The appliance is equipped with a 3-conductor
cord and a 3-prong grounding type plug to t
the proper grounding-type receptacle. The
appliance has a plug that looks like Figure
A. An adapter, Figure B, should be used
for connecting Figure A plugs to two-prong
receptacles. The grounding tab which extends
from the adapter must be connected to a
permanent ground such as a properly grounded
outlet box as shown in Figure C using a metal
screw.
EXTENSION CORDS
Use only 3-wire extension cords which have
3-prong grounding-type plugs and a 3-pole
cord connector that accepts the plug from the
appliance. Use only extension cords having
an electrical rating not less than the rating of
the appliance. Do not use damaged extension
cords. Examine extension cord before using and
replace if damaged. Do not abuse extension
cord and do not yank on any cord to disconnect.
Keep cord away from heat and sharp edges.
FIGURE A
FIGURE B
FIGURE C
Circuit
Grounding
Conductor
Grounding
Prong
Metal
Grounding
Screw
Cover of
Grounded
Outlet Box
Grounding
Means
AA2220
GROUNDING INSTRUCTIONS
WARNING!! Before cleaning or servicing the Dehydrator, make sure it is unplugged
from the power source. It is important to read & fully understand all of the instructions
& safeguard prior to use of the Dehydrator.
!

7
ENGLISH INSTRUCTIONS
CLEANING INSTRUCTIONS ASSEMBLY
CAUTION!
EDGES
MAY BE
SHARP!
WARNING!! Before cleaning or servicing the Dehydrator, make sure it is unplugged
from the power source. It is important to read & fully understand all of the instructions
& safeguard prior to use of the Dehydrator.
!
1. The Shelf Brackets (5 on each side of the cabinet) will
need to be installed on the inside of the Dehydrator.
2. Insert a Shelf Bracket, so that the stoppers are in the
back of the dehydrator (FIGURE 1).
3. Starting at bottom, install the Shelf Bracket by sliding it
into notches on sides of Dehydrator (FIGURE 2).
4. Assemble 5 rails on each side of the Dehydrator.
5. Slide a Tray onto each Shelf Bracket rail.
FIGURE 1
Shelf Bracket -
Left Side
Shelf Bracket -
Right Side
Stoppers
Go in the Back
FIGURE 2
Notches on the
inside (Left) of
the Dehydrator
Shelf Bracket -
Left Side
Back of Dehydrator

ENGLISH INSTRUCTIONS
8
1. Insert the connector end of the Power
Cord into the Power Cord Port on the
back side of the unit. Insert the Plug
on the Power Cord into a standard
120-volt grounded electrical outlet. DO
NOT modify the plug to t an unsuitable
outlet.
2. Position the Dehydrator as to NOT
block the air vents at the rear of the
Dehydrator. Keep the Dehydrator
at least 12” (31 cm) away from any
wall, any combustible materials and/
or surfaces to allow for proper air
circulation. DO NOT operate the
Dehydrator on or near ammable
surfaces such as carpeting.
3. Install the Shelf Brackets. The
right-side Shelf Brackets mount on
the interior wall on the right side of the
Cabinet. The left-side Shelf Brackets
mount on the interior wall on the left
side of the Cabinet. Insert the tabs on
each Shelf into the corresponding slots
in the interior walls. Press down on
each Shelf during installation to make
sure they fully seat in the slots.
4. Make sure the Power Switch and
Timer Knob are both in the off “O”
position (FIGURE 3).
5. Plug the Dehydrator into an electrical
outlet.
6. Turn the Temperature Control Knob
to the desired heat setting. Use the
“Drying Guide” on top of the Dehydrator
as a reference.
7. Set the Timer Control Knob to the
desired drying time.
OPERATING INSTRUCTIONS
8. Turn the Power Switch ON “I.”
9. Preheat the Dehydrator for 5-10
minutes at the desired temperature
before loading food onto the Trays.
10. Remove any excess water from
the food (this can be done by patting
the food with a paper towel or napkin).
Excess moisture may cause the
Dehydrator temperature to drop.
11. Load the Trays with the items to
be dried. Position the pieces so that
they do not touch each other. Do
not overlap or allow the product to
touch. Allow ample space between the
products for proper air circulation. You
do not need to install unused Trays.
12. Water droplets may form on
the surface of some products while
dehydrating. Periodically blot the
product with a clean paper towel.
NOTE: Drying times may vary based
on many circumstances including but
not limited to: the relative humidity of
the room, the temperature of the food at
the beginning of the drying process, the
amount of food in the Dehydrator, the
leanness of the meat, etc.
13. Install the Door onto the Dehydrator
by hanging it on the lip on top of the
Cabinet at the front. Make sure the
sides of the Door are securely closed
against the front of the Cabinet. Be
careful when removing the Door
during operation. The Dehydrator
may become hot depending on the
temperature setting.
FIGURE 3

ENGLISH INSTRUCTIONS
9
As with most types of cooking, proper preparation is essential for successful
results. Adhering to a few basic guidelines will greatly increase the quality of
your dried foods and decrease the amount of time necessary to dry them.
Pre-treated foods often taste better and have a better appearance than
non-treated foods. There are several methods to pre-treat food to prevent
oxidation, which will darken apples, pears, peaches and bananas while
drying:
• Remove any pits, skin or cores.
• Shred, slice or dice the food uniformly. Slices should be between 1/4” (0.6
cm) and 3/4” (1.9 cm) thick. Meats should be cut no more than 3/16” (0.5
cm) thick.
• Steam or roast meat to 160˚F (71
o
C) and poultry to 165˚F (74
o
C) as
measured with a food thermometer before dehydrating.
• The temperature of the Dehydrator must be maintained at 130-140˚F (55-
60
o
C) throughout the drying process.
• Drying sh into jerky requires a lot of attention. It must be cleaned and de-
boned properly and rinsed thoroughly to ensure that all the blood is washed
away. Steam or bake the sh at 200˚F (93
o
C) until aky before dehydrating.
• Soak cut fruit in either lemon or pineapple juice for a few minutes before
placing out on the Dehydrating Trays.
• Use an ascorbic acid mix which can be purchased in most health food
stores or pharmacies. It may come in either powder or tablet form. Dissolve
approximately 2-3 tablespoons into 1 quart (1 liter) of water. Soak the fruit
slices into the solution for 2-3 minutes, then place on the Dehydrating Trays.
• Fruits with a wax coating (gs, peaches, grapes, blueberries, prunes, etc.)
should be dipped in boiling water to remove the wax. This allows moisture to
escape easily when dehydrating.
• Blanching can pre-treat food for dehydrating. Blanching does not destroy
helpful enzymes and helps retain nutrients. There are two ways to blanch
food:
1. WATER BLANCHING: (Water Blanching will leave a cooked
avor)Use a large pan; ll it half way with water. Bring water to a
boil. Place food directly into boiling water and cover. Remove after
three minutes. Arrange food on the Dehydrating Trays.
2. STEAM BLANCHING: Using steamer pot bring 2-3” (5-7 cm)
of water to a boil in bottom section. Place food in steamer basket
and steam for 3-5 minutes. Remove steamed food and arrange on
Dehydrating Trays.
PRE-TREATMENT OF FOODSOPERATING INSTRUCTIONS

ENGLISH INSTRUCTIONS
10
CAUTION! It is important to follow the “Food Safety” guidelines outlined in this
manual. For the most up to date instruction visit the USDA website.
CHOOSING FOODS
• Use the best quality foods. Fruits and vegetables in peak season have more
nutrients and more avor. Meat, sh and poultry should be lean and fresh.
• Do not use food with bruises or blemishes. Bad fruits and vegetables may
spoil the entire batch.
• Always use lean meat. Remove as much fat as possible before dehydrating.
NOTE: Use a paper towel under meat when dehydrating to absorb fat.
DRYING FLOWERS & CRAFTS
• The owers should be dry to start with, best if picked after the dew has dried
and before the night damp sets in. Dry the owers as soon as possible after
picking.
• The best condition for drying owers is a dry, warm, dark, clean and well
ventilated area, which makes a dehydrator an ideal setting. Flowers will retain
the best color and condition when dried quickly.
• A low temperature should be used to retain the natural oils.
• Strip off the leaves or if you prefer to keep the foliage. Discard any brown or
damaged leaves.
• Place on the Dehydrator Tray in a single layer, avoiding overlapping.
• Drying times will vary considerably depending on the size of the ower and
the amount of foliage. Dry at 100˚F (38oC).
• Dough art and beads can be dried in the Dehydrator. Temperatures may
vary.

ENGLISH INSTRUCTIONS
11
MAKING JERKY
Your meat should be as lean as possible. Using lean meat will help the
meat dry faster and aid in cleanup by decreasing fat drippings. Ground meat
should be 80% to 90% lean. Ground turkey, venison, buffalo and elk are other
excellent choices for jerky.
Jerky seasonings are available for all tastes, or you can get creative and
make your own. Whenever you make jerky, you should cure the mixture with
cure (sodium nitrite). The cure is used to help prevent botulism during drying
at low temperatures. Follow the manufacturer’s directions on the cure packet.
Keep raw meats and their juices away from other foods. Marinate meats
in the refrigerator. Do not leave meats un-refrigerated. Prevent cross-
contamination by storing dried jerky away from raw meat. ALWAYS wash
hands thoroughly with soap and water before and after working with meat
products. Use clean equipment and utensils.
Keep meat and poultry refrigerated at 40°F (5
o
C) or slightly below; use or
freeze ground beef and poultry within 2 days; whole red meats, within 3 to 5
days. Defrost frozen meat in the refrigerator, not on the kitchen counter.
Special considerations must be made when using venison or other wild game,
since it can become heavily contaminated during eld dressing. Venison
is often held at temperatures that could potentially allow bacteria to grow,
such as when it is being transported. Refer to the USDA Meat and Poultry
Department for further questions or information on meat and food safety.
When using a Dehydrator, check the temperature of the Dehydrator with
a dial thermometer before drying jerky. The minimum recommended
temperature or drying meats is 145°F (63
o
C). Temperatures below 145°F
(63
o
C) are not recommended. IMPORTANT: Before you place the meat in
a dehydrator, it is highly recommended to heat the meat to 160°F (71
o
C)
BEFORE the dehydrating process. This step assures that any bacteria
present will be destroyed by wet heat. After heating to 160°F (71
o
C),
maintaining a constant dehydrator temperature of 130-140°F (55-60
o
C) during
the drying process is important because:
1.) the process must be fast enough to dry food before it spoils; and
2.) it must remove enough water so that microorganisms are unable to
grow.
If you are using a marinade, shake off excess liquid before placing the meat
in evenly spaced single layers approximately 1/4” (0.64 cm) apart on the
Dehydrator racks.
Dry meat at 145-150°F (63-66
o
C) for 4-7 hours. You may need to blot fat
droplets from the surface of the meat occasionally, using a paper towel.
Drying times may vary based on many circumstances including but not limited
to: the relative humidity of the room, the temperature of the meat at beginning
of drying process, the amount of meat in the dehydrator, leanness of meat,
etc. Always allow jerky to cool before taste testing.
CHOOSING FOODS
DRYING FLOWERS & CRAFTS

• Do not overlap foods. Lay foods at on the Dehydrating Trays.
• Check dryness after 6 hours, then check every 2 hours until crisp, pliable or
leathery depending on the product.
• Check foods to make sure they are completely dry before removing. Open
or cut down the middle of a few samples to check internal dryness. If the food
is still moist, dehydrate longer.
• Label each container with the food name, date of drying and the original
weight. Keep a journal to help improve drying techniques.
• Proper storage is essential to maintain quality food. Package the food when
cool. Foods can be kept longer if stored in a cool, dark, dry place. The ideal
storage temperature is 60
o
F (16
o
C) or lower.
• Place dried foods in plastic freezer bags before storing in metal or glass
containers. Remove as much air as possible before sealing.
• Vacuum sealing is ideal for keeping dried foods.
• Remember, foods will shrink approximately 1/4 to 1/2 their original size and
weight during the dehydration process, so pieces should not be cut too small.
One pound of raw meat will yield approximately 1/3 lb. (0.2 kg) to 1/2 lb. (0.2
kg) of jerky.
• Use the Drying Guide on the Control Panel as a reference for proper
temperature settings. If the heat is set too high, food may harden and dry
on the outside...yet be moist on the inside. If the temperature is too low, the
drying time will increase.
TIPS
While it is not necessary to reconstitute your dried foods, you can do so with ease.
Vegetables can be used as a side dish or in recipes very effectively after being
reconstituted in the following way.
• Dehydrated food can be re-hydrated by soaking in cold water for 3-5 minutes.
Use 1 cup of water for 1 cup of dehydrated food. Once re-hydrated, the food can
be cooked normally. Soaking foods in warm water will speed up the process,
however, it may result in loss of avor.
• Dehydrated fruits and vegetables can be soaked in cold water for 2-6 hours in the
refrigerator. WARNING! Soaking at room temperature allows harmful bacteria to
grow.
• Do not add seasoning. Adding salt or sugar during re-hydration may change the
avor of the food.
• To make stewed fruits or vegetables, add 2 cups of water and simmer until
tender.
• Consume dehydrated foods as soon as possible once the storage container is
opened. Keep any unused portions in the refrigerator to avoid contamination.
RE-HYDRATING
ENGLISH INSTRUCTIONS
12

TIPS
ENGLISH INSTRUCTIONS
13
THERMAL OVERLOAD PROTECTOR
FIGURE 4
FIGURE 5
The Dehydrator will automatically shut down
if it overheats. If this occurs:
1. Turn the Dehydrator “OFF” and unplug
the Power Cord. Allow the Dehydrator to be
completely cool.
2. Remove all Trays from the Dehydrator.
3. In the back of the Dehydrator, there is a
Grid Panel protecting the Fan (it resembles
the trays) (FIGURE 4). Remove the Wing
Nut (FIGURE 4A) and the Grid Panel to
access the electric components.
4. Using a small at-head screw driver,
t it into the slot in the Electronics Cover
(FIGURE 5). NOTE: Do not remove the
Electronics Cover.
5. Once you feel for the Reset Button (Figure
5a), push the screwdriver left to push the
Reset Button in to reset it.
6. Remove the screwdriver from the unit.
Plug in the unit to see if the power of the
Dehydrator has been restored.
7. Once you have resotred the power to the
Dehydrator, turn the Dehydrator “OFF” and
unplug the Power Cord.
8. Replace the Grid Panel.
9. Secure the Grid Panel into place with the
Wing Nut.
10. Plug in the Power Cord and resume
normal operation.
FIGURE 4A
Electronics
Cover
DO NOT
REMOVE
FIGURE 5A
INTERNAL VIEW
Electronics Cover
DO NOT REMOVE
COVER
Reset Button
Wing Nut
Grid Panel
Inside
View
of the
Dehydrator
FUSE
This unit is includes a fuse on the back side
of the unit to protect electric components from
damage and overheating. In the event that the
dehydrator stops functioning or will not maintain
its temperature consistently, you make need to check the fuse.
1. Turn the Power Switch off “O”. disconnect the Power Cord from the electrical
outlet.
2. Allow the Dehydrator to completely cool before attempting to move the
dehydrator to access the back of the unit.
3. Unscrew the fuse and inspect the fuse to check for signs of burning or damage.
4. If you suspect the fuse is damaged, please call Customer Service for a
replacement fuse.
WARNING!! Before cleaning or servicing the Dehydrator, make sure it is unplugged
from the power source. It is important to read & fully understand all of the instructions
& safeguard prior to use of the Dehydrator.
!

There are basic rules to follow when handling food.
They are COOK, SEPARATE, CLEAN, and CHILL.
COOK
It’s crucial to cook food to a safe internal temperature to destroy bacteria that is present.
The safety of hamburgers and other foods made with ground meat has been receiving a lot
of attention lately, and with good reason. When meat is ground, the bacteria present on the
surface is mixed throughout the ground mixture. If this ground meat is not cooked to at least
160
o
F to 165
o
F (71
o
C to 74
o
C), bacteria will not be destroyed and there’s a good chance you
will get sick.
Solid pieces of meat like steaks and chops don’t have dangerous bacteria like E. coli on the
inside, so they can be served more rare. Still, any beef cut should be cooked to an internal
temperature of at least 145
o
F (63
o
C) (medium rare). The safe temperature for poultry is 165
o
F
(75
o
C) and solid cuts of pork should be cooked to 145
o
F (63
o
C).
SEPARATE
Foods that will be eaten uncooked and foods that will be cooked before eating MUST
ALWAYS be separated. Cross-contamination occurs when raw meats or eggs come in
contact with foods that will be eaten uncooked. This is a major source of food poisoning.
Always double-wrap raw meats and place them on the lowest shelf in the refrigerator so
there is no way juices can drip onto fresh produce. Then use the raw meats within 1-2 days
of purchase, or freeze for longer storage. Defrost frozen meats in the refrigerator, not on the
counter.
When grilling or cooking raw meats or sh, make sure to place the cooked meat on a clean
platter. Don’t use the same platter you used to carry the food out to the grill. Wash the utensils
used in grilling after the food is turned for the last time on the grill, as well as spatulas and
spoons used for stir-frying or turning meat as it cooks.
Make sure to wash your hands after handling raw meats or raw eggs. Washing hands with
soap and water, or using a pre-moistened antibacterial towelette is absolutely necessary after
you have touched raw meat or raw eggs. Not washing hands and surfaces while cooking is a
major cause of cross-contamination.
CLEAN
Wash your hands and work surfaces frequently when you are cooking. Washing with soap
and warm water for at least 15 seconds, then dry with a paper towel.
CHILL
Chilling food is very important. The danger zone where bacteria multiply is between 40
o
F and
140
o
F (4
o
C and 6
o
C). Your refrigerator should be set to 40
o
F (4
o
C) or below; your freezer should
be 0
o
F (-17
o
C) or below. Simple rule: serve hot foods hot, cold foods cold. Use chang dishes
or hot plates to keep food hot while serving. Use ice water baths to keep cold foods cold. Never
let any food sit at room temperature for more than 2 hours - 1 hour if the ambient temperature
is 90
o
F (32
o
C) or above. When packing for a picnic, make sure the foods are already chilled
when they go into the insulated hamper. The hamper won’t chill food - it just keeps food cold
when properly packed with ice. Hot cooked foods should be placed in shallow containers and
immediately refrigerated so they cool rapidly. Make sure to cover foods after they are cool.
NOTE: Special considerations must be made when using venison or other wild game, since it
can become heavily contaminated during eld dressing. Venison is often held at temperatures
that could potentially allow bacteria to grow, such as when it is being transported. Refer to
the USDA Meat and Poultry Department for further questions or information on meat and
food safety.
FOOD SAFETY
ENGLISH INSTRUCTIONS
14

Weston Brands LLC warrants to the ORIGINAL RETAIL PURCHASER of this product that if operated in accordance
with the printed instruction accompanying it, then for a period of 2 year from the date of purchase, the product shall be free
from defects in material and workmanship.
The Warranty Card, along with a copy of the original receipt, must be received by Weston Brands LLC within 30 days
from purchase date for the warranty to apply. Failure to send the completely lled out Warranty Card, along with a copy of
the original receipt, will void the warranty.
The product must be delivered to or shipped freight prepaid to Weston Brands LLC for warranty services, in either
its original packaging or similar packaging affording an equal degree of protection. Damage due to shipping is not the
responsibility of the company. Weston Brands LLC charges a $35.00 per hour bench charge. NOTE: No repairs will
be started without the authorization of the customer. The return shipping cost to the customer will be added to the repair
invoice.
Prior to returning the product for Warranty Repair, the product must be thoroughly cleaned and free from any food
particles or other debris. Failure of the purchaser to comply with this standard will result in the unit being returned without
repair. In some cases, a $50 cleaning surcharge may apply.
Weston Brands LLC will repair (or at its discretion, replace) the product free of charge, if in the judgment of the
company, it has been proven to be defective as to seller’s labor and material, within the warranty period.
New or rebuilt replacements for factory defective parts will be supplied for two (2) year from the date of purchase.
Replacement parts are warranted for the remainder of the original warranty period.
For non-warranty repairs, contact Weston Brands LLC’s Customer Service at 1-800-814-4895 M-F 8am-5pm ET
(outside of the United States 001-440-638-3131) to obtain a Return Merchandise Authorization Number (RMA Number).
Weston Brands LLC will refuse all returns that do not contain this number. DO NOT RETURN THE UNIT WITHOUT
PROPER AUTHORIZATION FROM WESTON BRANDS LLC.
LIMITATIONS: The warranty is void if the product is used for any purpose other than that for which it is designed.
The product must not have been previously altered, repaired, or serviced by anyone else other than Weston Brands
LLC. If applicable, the serial number must not have been altered or removed. The product must not have been subjected
to accident in transit or while in the customer’s possession, misused, abused, or operated contrary to the instructions
contained in the instruction manual. This includes failure caused by neglect of reasonable and necessary maintenance,
improper line voltage and acts of nature. This warranty is not transferable and applies only to U.S. and Canadian sales.
Except to the extent prohibited by applicable law, no other warranties whether expressed or implied, including
warranty merchantability and tness for a particular purpose, shall apply to this product. Under no circumstances shall
Weston Brands LLC be liable for consequential damages sustained in connection with said product and Weston Brands
LLC neither assumes nor authorizes any representative or other person to assume for it any obligation or liability other than
such as is expressly set forth herein. Any applicable implied warranties are also limited to the two (2) year period of the
limited warranty.
This warranty covers only the product and its specic parts, not the food or other products processed in it. Weston is
not responsible for missing or damaged parts on discounted/clearance, resale or nal sale items where the seller may not
be able to guarantee full functionality or completeness of the unit.
CUT ALONG THE DOTTED LINE AND SEND THE WARRANTY CARD ALONG WITH A COPY OF YOUR
ORIGINAL PURCHASE RECEIPT TO:
Weston Brands LLC / WARRANTY
20365 Progress Drive, Strongsville, OH 44149 USA
Customer Name:
Address:
City/State/Zip/Country:
Telephone Number:
E-Mail Address:
Original Date of Purchase:
Product Model #:
Serial # (if applicable):
I have read the warranty information. Initial here:
WESTON WARRANTY INFORMATION
SAVE THIS WARRANTY INFORMATION FOR YOUR RECORDS!
WESTON WARRANTY CARD
SEND THIS CARD ALONG WITH A COPY OF YOUR ORIGINAL PURCHASE RECEIPT TO:
WESTON BRANDS LLC / WARRANTY, 20365 PROGRESS DRIVE, STRONGSVILLE, OH 44149 USA
Copy of Receipt
Included

DESHIDATADOR
DE ALIMENTOS
74-1001-W
DEBIDO A CONSTANTES MEJORAS EN LA FÁBRICA, EL PRODUCTO QUE SE MUESTRA PUEDE
SER LIGERAMENTE DIFERENTE DEL PRODUCTO EN ESTA CAJA. 022515

INSTRUCCIONES EN ESPAÑOL
20
Gabinete
deshidratador
6
Panel de
control
Power Switch
4
5
2
3
CAUTION!
EDGES
MAY BE
SHARP!
7
1
Guía de
secado

INSTRUCCIONES EN ESPAÑOL
21
LISTA DE COMPONENTES
Si cualquier componente de esta unidad está roto, si no funciona debidamente, o si necesita un
instructivo de repuesto, visítenos en la Web en
WestonProducts.com
O llame a Weston Products LLC larga distancia sin costo 1-800-814-4895
De lunes a viernes, de 8:00 am a 5:00 pm tiempo del ET. Fuera de Estados Unidos llame
al 001-440-638-3131
NÚMERO DE DIAGRAMA DESCRIPCIÓN DE LA PIEZA NÚMERO DE PIEZA
1 TRAY (10) 74-1007
2 PERILLA DE CONTROL DE
TEMPERATURA
74-1008
3 PERILLA DE CONTROL DEL
TEMPORIZADOR
74-1008
NO MOSTRADA PATAS (4) 74-1005
4 PUERTA CON MANIJA 74-1006
NO MOSTRADA SOPORTE DEL ESTANTE -
LADO IZQUIERDO (5)
74-1002
5 SOPORTE DEL ESTANTE -
LADO DERECHO (5)
74-1003
6 PANEL DE CONTROL 74-1009
7 CABLE DE ALIMENTACIÓN 74-1019
NO MOSTRADA FUSIBLE 15 A / 250 V 74-1018
5

DESHYDRATEUR
MODÉLE A
74-1001-W
PARCE QUE NOS PRODUITS BÉNÈFICIENT DE PERFECTIONNEMENTS CONSTANTS
APPORTÉS EN USINE, LES ILLUSTRATIONS PRÉSENTES PEUVENT ÊTRE LÉGÈREMENT
DIFFÉRENTES DU PRODUIT REÇU. 022515

DESCRIPTION DE LA PIÈCE
N’hésitez pas à visiter notre site Web WestonProduct.com/support si un composant est cassé, l’outil
fonctionne mal, ou pour commander un nouveau mode d’emploi.
WestonProducts.com
Veuillez appeler Weston Products, LLC au numéro sans frais : 1-800-814-4895
Du lundi au vendredi: de 8h00 à 17h00 ET. En dehors des États-Unis, veuillez
appeler le 001-440-638-3131
NUMÉRO DE SCHÉMA DESCRIPTION DE LA PIÉCE NUMÉRO DE LA PIÉCE
1 PLATEAU DE DESSICCATION (10) 74-1007
2 PLATEAU DE DESSICCATION 74-1008
3 BOUTON DE COMMANDE DU
MINUTEUR
74-1008
NON ILLUSTRÉ PIEDS (4) 74-1005
4 PORTE AVEC LA POIGNÉE 74-1006
NON ILLUSTRÉ CONSOLE POUR TABLETTE -
CÔTÉ GAUCHE (5)
74-1002
5 CONSOLE POUR TABLETTE - CÔTÉ
DROIT (5)
74-1003
6 TABLEAU DE COMMANDEL 74-1009
7 CORDON D’ALIMENTATION 74-1019
NON ILLUSTRÉ FUSIBLE 15 AMP / 250V 74-1018
5
37
INSTRUCTIONS EN FRANÇAIS
/