Page is loading ...

Wheel
Owner’s Manual
ENGLISH

Important:
Keep for future reference
This manual shows how to ride your new wheelset safely. Even if you have ridden a bicycle for
years, it is important for EACH person to read this information before riding this wheelset! In
addition to the information in this manual, you should also read the owner’s manual that came
with your bicycle. For installation instructions and additional information, visit our web site.
Some maintenance should only be done by your dealer. The manual gives these tasks.
Welcome
Wheel Owner’s Manual
Table of Contents
Introduction
Meaning of safety signs and language ..................................................... i
If you have questions ............................................................................... i
Chapter 1: Wheels Overview
Special instructions .................................................................................1
Chapter 2: Guide to Safe On and Off-Road Operation
Use common sense when you ride ......................................................... 3
Check your wheels regularly ...................................................................5
Using wheels with disc brakes ................................................................ 7
Using tubular (sew-up) wheels ................................................................8
Using carbon rims ..................................................................................9
Using tubeless ready (tlr) wheels ...........................................................10
Using track (fixed-gear) wheels .............................................................11
Chapter 3: clincher wheel setup
Installing traditional rim tape ..................................................................12
Installing tubeless ready rim strip and valve ........................................... 13
Installing a traditional tire and tube ........................................................15
Installing a tlr tire on a tlr mountain wheel .............................................. 17
Installing a tlr tire on a tlr road wheel .....................................................19
Chapter 4: tubular wheel setup
Stretching the tire .................................................................................21
Preparing the tubular rim ......................................................................22
Applying the glue .................................................................................. 23
Attaching the tubular tire to the rim .......................................................25
Completing the tubular installation ........................................................27
Chapter 5: operating a quick release
Testing the attachment .........................................................................28
Adjustment and operation.....................................................................30
Chapter 6: adjustment
Tire pressure.........................................................................................32
Wheel bearings .....................................................................................32
Chapter 7: lubrication
Each year .............................................................................................33
Chapter 8: valve extenders
Types of valves and extenders ..............................................................34
External valves ......................................................................................35
Inline valves ..........................................................................................36
Bontrager limited warranty .................................................................... 37

i 1
Meaning of safety signs and language
In this manual the safety alert symbol, a triangle with an exclamation mark, shows a hazardous
situation which, if not avoided, could cause injury:
‘CAUTION’ indicates the possibility of mild or moderate injury.
‘WARNING’ indicates the possibility of serious injury or death.
Assembly and parts installation, including tires and correct installation of parts, is critical to
performance and safety. If you are not familiar with installation procedures, have your dealer
do this work. Special tools and skills are necessary for the assembly and the first adjustment
of your wheelset. Consider having your dealer assemble the wheels and install them into your
bicycle. If you prefer to do this work yourself, make sure you read the instructions on our web
site before you begin.
If you have questions
There are many models of wheels with a variety of equipment, so this manual may contain
some instructions or illustrations that do not apply to your wheelset. If you have questions
after you read this manual, speak to your dealer. If you have a question your dealer can not
answer or problem that your dealer can not repair, tell us:
Bontrager Components
Attention: Customer Service
801 W. Madison Street
Waterloo, Wisconsin 53594
Web site: http://www.trekbikes.com
Phone (in the U.S.): 920.478.4678
Chapter 1—
Wheels overview
The wheels of a bicycle (Figure 1) let the bicycle roll down the road smoothly. On many
bicycles, the quick-release mechanism (Figure 2) attaches the wheels to the bicycle. Also,
many bicycles use the wheels as part of the brake system. The integrity and strength of the
wheels is important for your safety. These instructions tell how to use, adjust, and lubricate the
wheels of a bicycle.
Special instructions
Some models of Bontrager wheels have special properties, so special maintenance is
necessary. If your wheels include any of these features, read these extra sections carefully:
• Disc brakes
• Tubular (sew-up) tires
• Carbon rims
• Tubeless tires
• Fixed-gear (track) hubs
Figure 1. Bicycle wheels and parts:
1. Rim
2. Hub
3. Spokes
1
2
3
Figure 2. Hub and quick-release
1. Hub
2. Quick-release (for parts of the
quick-release, see Figure 28)
12

2 3
Useful life of wheels
Wheels are not indestructible. As with anything mechanical, every part of a wheel has a limited
useful life due to wear, stress, and fatigue. Fatigue is a low stress force that, when repeated
over a large number of cycles, can cause a material to crack or break. If you ride hard or
aggressively, you must replace the wheel and/or its parts more frequently than riders who ride
gently or carefully. Several factors can change the condition of your wheels: weight, speed,
skill, terrain, maintenance, environment (humidity, salinity, temperature, and more). Because
there are many variables, it is not possible to give an accurate timetable for replacement. To
be safe, replace the wheel or parts more frequently. If you are not sure, speak to your dealer.
Light-weight, high-performance wheels and parts require better care and more frequent
inspections even though in some cases they have a longer life than heavier ones. With wheels,
remember that a rim wears as you use your brakes, so the rim must be replaced occasionally.
Chapter 2—
Guide to safe on and off-road operation
This section explains some of the basics of how to use your wheelset safely. Also read your
bicycle owner’s manual, which contains additional safety information.
Use common sense when you ride
Many cycling accidents could be avoided by using common sense.
Here are a few examples:
• Do not ride with ‘no hands.’
• Do not ‘ride double.’
• Do not ride with loose objects attached to the handlebar or any other part
of the bicycle.
• Avoid objects that might get into the spokes.
• Do not ride while intoxicated or while using medications that might make you drowsy.
• For road bicycles, ride only on paved surfaces.
• Use special care when riding off-road. Ride only on the trails. Avoid rocks, branches,
or depressions.
• When approaching a descent, reduce speed, keep your weight back and low, and
use the rear brake more than the front.
• Do not ride in an abusive manner.

4 5
Avoid riding too fast
Higher speeds create higher risks and greater forces in the event of a crash. At higher speeds,
it is more likely that wheels will slip or that a small bump can create a significant impact to your
frame, fork, or wheels. Keep your bicycle under control, at a reasonable speed, at all times.
Watch for cars, pedestrians, and other obstacles
A bicycle rider is hard to see, and many drivers do not know the rights and special
considerations of a bicycle rider. Ride defensively; watch for cars, pedestrians, and other trail
users. Be prepared for all situations. Watch for and avoid potholes, drain grates, soft or low
shoulders, and other deviations which could impact your wheels or cause them to slip. If you
are not sure of riding surface conditions, walk your bike.
Do not make changes to the wheelset
If you make a change to the wheelset, you will void the manufacturer’s warranty. Also, this
is not safe. Do not install parts on this wheelset that do not have approval. Parts that lack
approval can cause damage to the wheelset and are not safe. If you are not sure if a part has
approval, speak to your Bontrager dealer.
The following abusive riding practices increase your risk of injury:
• Jumping your bicycle
• Performing bicycle stunts
• Severe off-road riding
• Downhill riding
• Any abnormal bike riding
Each of these practices increases the stress on every part of your bicycle. Bicycles or
parts under high stress may fatigue prematurely, causing them to malfunction or break,
increasing the risk of injury to the rider. To decrease your risk of injury, avoid these riding
practices.
WARNING
Check your wheels regularly
You can stop trouble before it occurs by examining your wheels regularly. If a wheel is not in
satisfactory condition, the power of the brakes and the strength of the wheel can be greatly
decreased. If you change tires or tubes, make sure an approved rim strip is in the correct
location to avoid puncture or sudden air loss.
Before each ride
Make sure your wheels are correctly attached to your bicycle. For instructions on how to use
wheel quick-releases, read Chapter 5 or speak to your Bontrager dealer. For thru-axles, read
the information that came with your suspension fork or frame. Make sure your tires are inflated
to the pressure shown on the sidewall of the tire. However, never inflate a tire on a carbon
clincher road rim to a pressure higher than 120 psi (8,3 atm) or a carbon clincher mountain rim
to a pressure higher than 60 psi (4,1 atm). Use a gauge and a bicycle pump when possible.
Examine your tires for wear and other damage. Replace the tire if you can see the inner tube
through any cuts or separations which go through the tire. If you can see a part of the tire
casing through the tire tread (contact surface) or if tire knobs are worn or are not there, replace
the tire. Make sure the wheels are straight and circular. Turn the rim. If the rim moves up-and-
down or side-to-side, have your Bontrager dealer repair the wheel. Make sure your rims are
clean. Dirty or greasy rims make your brakes less powerful. Clean your rims with a clean rag,
or clean them with soap and water, rinse, and let them air dry.
NOTICE: Do not fill your tires at gas stations because gas stations use compressors.
A compressor releases pressure and volume very fast, so it could explode your tire.

6 7
Each week
Make sure there are no loose, bent, worn, or broken spokes. If the spokes are not in good
condition, have your Bontrager dealer repair your wheels.
Each month
Examine your rims for wear. Some rims have marks on the brake surface that show wear.
Some aluminum rims have a continuous indented band or several small spherical“dents” at
regular distances around the brake surface. If the marks are worn or are not there, have your
dealer replace the rim. Carbon fiber rims have a layer of scrim, a woven material, on the brake
surface of the rim. Under the scrim layer, the carbon fibers are straight and parallel. If you can
see straight fibers showing through the scrim layer, have your dealer replace the rim.
With rim brakes, brake-pads remove rim material when you apply the brake. If too much
material is removed, the rim can become weak and break, decrease your control, and
cause you to fall. Regularly examine your rims. Replace the rims when they are worn.
WARNING
Make sure the bearings of the wheels are correctly adjusted. Lift the front wheel of the bicycle
off the ground with one hand and try to move the rim laterally, left to right. Look, feel, and
listen for loose bearings. Turn the wheel and listen for grinding or other noise. For the rear
wheel, do these procedures again. If a bearing feels loose or makes noise, have your dealer
adjust the bearings.
An incorrectly adjusted bearing can cause you to lose control and fall. Examine the
bearings once a month, and correct the problem before you ride the bicycle.
WARNING
Every 100 hours of use
Have your hubs serviced by an authorized Bontrager Wheel Works dealer after every 100
hours or 6 months of use. More frequent service may be required for wheels under heavy usage.
Using wheels with disc brakes
For wheels with disc brakes, make sure the brake rotor attachment (Figure 3 or Figure 4) is tight:
• Tighten rotor bolts (Figure 3) to 45-55 Lb•in (5-6.2 Nm).
• Tighten a centerlock nut (Figure 4) to 350 Lb•in (40.2 Nm).
Figure 3. Rotor bolts
Figure 4. Centerlock nut

8 9
Using tubular (sew-up) wheels
Regularly examine your tubular tires and keep them in good condition. Examine the casing
and tread of the tire for cuts or tears to the tubular casing. Make sure the base tape does not
have cuts or tears. Most important, make sure the tire is correctly installed.
An incorrectly installed tubular tire can come off the rim, causing you to lose control and
fall. Install the tires correctly and regularly inspect the attachment and condition of the tires.
WARNING
Clean tires with a weak, soapy solution. Do not use cleaners that contain hydrocarbons,
dilutants, or corrosives. Store tubular tires, on or off a rim, in a dry location, away from light,
and inflated to 70-90 psi (5-6 atm).
NOTE: See Chapter 4 for instructions on installing a tubular tire.
Using carbon rims
Carbon rims are very light and strong, but they require special care and parts. Brakes perform
differently on carbon rims, especially when wet, or hot from a long descent. At slow speeds,
your brakes may shudder. Only use Bontrager Carbon Stop cork brake pads. Other pads
may not stop as well and could overheat the rim, causing the carbon fiber to delaminate. Do
not use latex inner tubes. Carbon rims can get hot during hard braking, and latex tubes do
not withstand heat well. The tubes could lose air suddenly and leave you with a flat tire. Do
not apply force to the sides or tops of aero rims or disc wheels. Do not clamp an aero rim or
disc wheel in a bicycle rack, car carrier, or other mechanism. Do not hang the bicycle by aero
rims or disc wheels. Such forces can damage an aero rim or a disc wheel. Do not clean the
rims with solvents, harsh chemicals, or abrasives, which can cause damage to the rims. If
a solution of water and dish detergent does not clean the rims, use a clean soft cloth and a
small quantity of acetone. We recommend using either Bontrager or Velox rim tape.
Do not exceed the maximum inflation for carbon rims. Over inflation may damage the rim.
• Carbon mountain clincher rims= 60 psi (4,1 atm) maximum.
• Carbon road clincher rims= 120 psi (8,3 atm) maximum.
• Carbon road tubular rims= see tire for maximum pressure.
Pound for pound, carbon fiber is stronger than steel, aluminum, or titanium. But it behaves
differently when it is overloaded in an accident or impact. An overloaded metal part will bend
or deform before it breaks, showing evidence of the load. An overloaded carbon fiber part will
not bend or deform, so a damaged carbon part (with reduced strength due to the damage)
may look normal—even after the same load that bent the metal part. But when the sum of the
forces finally exceeds the strength limit of the carbon fiber, the carbon fiber part breaks, it does
not bend. Examine your carbon rims carefully for damage before and after each ride, or after a
high force load. High force loads include crashes, but you do not have to crash to put a high
force load on your rims. For example, if your wheels fall in a large hole in the road or you ride
over a sharp bump such as a railroad track, you can put large forces on your rims.
Carbon fiber parts with damage can break suddenly. Carbon fiber can conceal damage
from an impact or crash. If you suspect your bicycle has had an impact or crash,
immediately stop the bicycle. Have your dealer examine the bicycle or visit our web site to
learn about carbon fiber inspection.
WARNING

10 11
Using tubeless ready (TLR) wheels
Mountain bike wheels: Your Bontrager TLR mountain bike wheels work with both UST
Tubeless tires and Bontrager TLR tires when used with a special TLR rim strip; or with a
standard tire with a rim strip and an inner tube. Make sure the parts of your tire system work
together.
Rim
Tire
Tubeless TLR Standard
Standard Requires rim strip and inner tube.
TLR
Requires TLR rim strip
and TLR valve.
Requires TLR rim strip
and TLR valve.
Requires rim strip and
inner tube.
Road bike wheels: Your Bontrager TLR road wheels work with both Road Tubeless and
Bontrager TLR tires when used with a special TLR rim strip; or with a standard tire with an
inner tube. Make sure the parts of your tire system work together.
Rim
Tire
Road Tubeless TLR Standard
Standard Requires rim strip and inner tube.
TLR
Requires TLR rim strip
and TLR valve.
Requires TLR rim strip
and TLR valve.
Requires rim strip and
inner tube.
The Tubeless system requires specific components and installation techniques. An
improperly assembled or installed tire could lose air suddenly and cause you to lose
control and fall. If you are not sure your tire system is installed correctly, take your bicycle
to your dealer for service.
WARNING
Using track (fixed-gear) wheels
With a fixed-gear bicycle, the rider controls his or her speed by resisting the motion of the
pedals with their legs. This requires additional strength, skill, and reflexes. Until you have
mastered the fixed-gear technique, do not ride your fixed-gear bicycle without hand brakes.
Even after you have mastered this skill, do not ride a fixed-gear bicycle on public roads or
paths unless your bicycle has hand-operated caliper brakes; riding without brakes is only
suitable for a velodrome or a special bicycle track. Riding without hand brakes on public roads
may be illegal.
A sudden stop in pedaling motion on a fixed-gear bicycle can cause the rear wheel to skid
and lose traction or the cranks to lift the rider up and forward over the handlebar, which
can cause you to lose control and fall. Do not ride a fixed-gear bicycle at speed or in traffic
until you have mastered fixed-gear riding technique and learned the reflexes necessary to
control the bicycle.
WARNING
Before every ride, make sure your wheels are correctly attached. Tighten front axle nuts
(Figure 5) to 180-240 Lb
•
in (20.3-27.1 Nm) and rear to 250-300 Lb
•
in (28.2-33.9 Nm).
1
Figure 5. Fixed-gear rear hub
1. Axle nuts

12 13
Chapter 3—
Clincher wheel set-up
Installing traditional rim tape
The following steps will prepare a Bontrager rim for the installation of a traditional clincher tire
and tube. We recommend either Bontrager or Velox rim tape. Installing Bontrager tape is easy
and self-explanatory. The following instructions explain how to install Velox rim tape.
1. Orient the tape so that as you unroll it, the tape will cross the valve hole and cover
the hole.
2. Attach the initial end of the tape so that it is centered between two spokes but not
at the valve hole (Figure 6).
3. As you apply the tape, center it in the bottom of the well of the rim (Figure 7). If the
tape is centered correctly, the spoke holes will be completely covered. If a hole is not
covered, it could puncture the inner tube.
4. Cut the tape so that it does not overlap itself (Figure 8). If there is tape overlap, the
effective diameter of the rim will increase, so installing the tire will be more difficult.
5. With a Phillips screwdriver or similar tool, create a valve hole through the rim tape by
pushing firmly into the rim valve hole (Figure 9).
6. Follow the procedure to install the tire.
Figure 6. Start the rim tape centered between
the spoke nodes.
Figure 7. Center the rim strip. Figure 9. Push the tool through the rim tape
to create a valve hole.
Figure 8. Do not overlap the ends of rim tape.
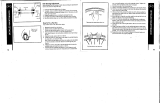
Installing tubeless ready rims strip and valve
The following steps will prepare a Bontrager TLR rim for the installation of a tubeless ready
or tubeless tire.
1. Check the tubeless ready rim strip for tears, holes or deformed areas near the valve
hole or along its edges. Only use a Bontrager tubeless ready rim strip that has not
been damaged.
2. Align the rim valve hole and the valve hole of the rim strip. The U shape of the rim strip
should face toward the center of the rim and offset rim strips should match the offset in
the rim (Figure 10).
3. Place the tubeless ready valve through the rim strip’s valve hole and then through the rim.
On mountain rims, make sure that the rubber o-ring is on the valve before dropping it into
rim (Figure 10).
Figure 10. The U shape of the rim strip
should face towards the center of the rim.
Figure 11. Place the tubeless ready valve
through the rim strip and the rim.
Mountain TLR Road TLR
o-ring
Rim strip Rim strip
Valve nut
Valve nut
Mountain TLR Road TLR

14 15
4. Be sure the rim strip snaps into place under both beads.
5. Align the flat sides of the valve base with the walls of the rim (Figure 12 & 13).
6. Tighten the valve nut over the threads of the valve until finger tight. Do not tighten
with a tool.
7. Work the rim strip into the rim, moving away from the valve stem in both directions
using only your thumbs. Do not use tools because they can damage the rim strip.
Mountain
Figure 12a. Correct alignment. Flat sides of
valve are aligned with rim wall.
Road
Figure 12b. Correct alignment. Flat sides of
valve are aligned with rim wall.
Mountain
Figure 13a. Incorrect alignment. Flat sides of
valve not aligned with rim.
Road
Figure 13b. Incorrect alignment. Flat sides of
valve not aligned with rim.
Installing a traditional tire and tube
The following steps are necessary for proper installation of a traditional tire and tube on a
Bontrager clincher wheel.
A traditional rim strip must be in place prior to proceeding with these steps.
1. Inflate the inner tube until it begins to take shape.
2. Place the inner tube in the tire.
3. Insert the valve stem through the hole in the rim.
4. Install the first bead onto the rim (Figure 14). Start at the valve stem.
5. Push the tire and inner tube over until the inner tube is inside the rim (Figure 15).
6. Push the second bead into the rim. Start at the valve stem. Be careful not to pinch the
inner tube between the rim and the tire (Figure 16) when you install the tire.
7. Push the base of the valve stem up into the tire so that it is not caught between a tire bead
and the rim (Figure 17).
Figure 14. Place the rst tire bead in the rim. Figure 15. Push the rst bead to the side and
insert the inner tube.
Figure 16. Do not pinch the inner tube be-
tween the tire and the rim.
Figure 17. Make sure the inner tube is not
caught under the tire beads.

16 17
8. Inflate the tire to 20-30 psi (1.5-2 atm).
9. Check the inner tube. Push in the sidewall of the tire slightly and make sure the inner tube
is not pinched between the rim hook and the tire bead. Continue all the way around the
rim, on both sides.
10. Check for correct tire bead engagement in the rim (Figure 18 and 19). Most tires have a
mold line near the bead of the tire where it engages the rim. All the way around the rim,
the distance between the mold line and the top edge of the rim must be even and equal.
If the distance is not equal, deflate the tire and repeat this procedure.
11. Inflate the tire to the pressure indicated on the side of the tire. Do not exceed the
maximum inflation rate of 120 psi (8,3 atm) on carbon road clincher rims and 60 psi
(4,1 atm) on carbon mountain clincher rims.
12. Check for correct tire bead engagement again.
x
x x
x x
Figure 18. Correct. Make sure the mold line of
the tire is equal (X distance) with the rim all the
way around.
x
Figure 19. Incorrect. The mold line of the tire is
not equal all the way around.
Do not over-inflate. Over-inflation may damage the rim. Do not exceed the maximum
inflation rate of 120 psi (8,3 atm) on carbon road rims.
WARNING
Installing a TLR tire on a TLR mountain wheel
The following steps are necessary for correct installation of a tubeless ready tire on a
Bontrager tubeless ready wheel. Before you proceed, install a TLR rim strip and valve;
see page 13.
1. Starting opposite the valve stem, push the first bead of the tire into the rim well.
2. Starting opposite the valve stem, push the second bead into the rim until approximately
three inches (75mm) of the bead remains outside the rim well, leaving an open section
of tire.
3. Pour the sealant into the open section of tire (Figure 20). See the sealant container for the
recommended amount.
4. While being careful not to spill sealant, finish pushing the second bead into the rim.
5. While holding the wheel, rock the wheel back and forth and spin to spread the sealant
around the inside of the tire (Figure 21).
Figure 20. Pour sealant into the open section
of tire.
Figure 21. Spin/shake the wheel

18 19
Installing a TLR tire on a TLR road wheel
The following steps are necessary for correct installation of a tubeless ready tire on a
Bontrager tubeless ready wheel. Before you proceed, install a TLR rim strip and valve.
See page 13.
1. Starting opposite the valve stem, push the first bead of the tire into the rim well.
2. Starting opposite the valve stem, push the second bead into the rim well.
3. Remove the valve core (Figure 24).
4. Pour the sealant through the valve (Figure 25).
See the sealant container for the recommended amount.
Figure 24. Turn key counter-clockwise to
remove core.
Figure 25. Pour sealant through the valve.
6. Inflate the tire to the pressure indicated on the side of the tire.
7. Check for correct tire bead engagement in the rim (Figures 22 and 23). Most tires have a
mold line near the bead of the tire where it engages the rim. All the way around the rim, the
distance between the mold line and the top edge of the rim must be even and equal. If the
distance is not equal, deflate the tire and repeat steps 6 and 7.
8. Bounce the wheel on the ground while spinning it. This spreads the sealant over the entire
inner surface of tire.
9. Re-check the tire inflation and if need, correct it.
10. Re-check for correct tire bead engagement (Figures 22 and 23).
Check the tire sealant every 3 to 4 months. Add more as needed.
Figure 22. Correct. Make sure the mold line of
the tire is equal (X distance) with the rim all the
way around.
x
x
x
Figure 23. Incorrect. The mold line of the tire is
not equal all the way around.
x
x
x

20 21
5. Replace the valve core.
6. While holding the wheel, rock the wheel back and forth and spin to spread the sealant
around the inside of the tire (Figure 26).
7. Inflate the tire to the pressure indicated on the side of the tire.
8. Check for correct tire bead engagement in the rim (Figures 27 and 28). Most tires have a
mold line near the bead of the tire where it engages the rim. All the way around the rim, the
distance between the mold line and the top edge of the rim must be even and equal. If the
distance is not equal, deflate the tire and repeat steps 7 and 8.
9. Bounce the wheel on the ground while spinning it. This spreads the sealant over the entire
inner surface of tire.
10. Re-check the tire inflation and if need, correct it.
11. Re-check for correct tire bead engagement (Figure 27 and 28).
Check the tire sealant every 3 to 4 months. Add more as needed.
Figure 26. Spin/shake the wheel
x
x
x
Figure 27. Correct. Make sure the mold line
of the tire is equal (X distance) with the rim all
the way around.
x
x
x
Figure 28. Incorrect. The mold line of the tire
is not equal all the way around.
Chapter 4—
Tubular wheel setup
This is a multi-day procedure. On the first day, you stretch the tire without glue. On following
days, you apply layers of glue that must completely dry (usually each layer dries for a full day)
as you prepare the rim and mount the tire.
Required tools:
• Truing stand
• 120 grit sand paper or emery cloth
• Acid brush
• Acetone
• Clean rags
• Floor pump
• Knife or scrapper
• Protective gloves
• Tubular glue- we recommend using a strada or road specific glue, not a pista or track
specific glue. Do not use tubular tape or glues not specifically designed for tubular
bicycle wheel use.
The glue and cleaning agents used in this process contains chemicals that are poisonous
and flammable. Read product labels before proceeding.
WARNING
Stretching the tire
1. Without glue, mount your new tubular tire on the rim to which you plan to glue the tire.
2. Inflate the tire to 10-20 psi (1-1.24 atm) less than the maximum rated pressure. This will
stretch the tire, make it easier to install, and make sure it fits the rim. You may want to
repeat this for practice because after there is glue on the tire, you only get one chance!

22 23
Preparing the tubular rim
If you are gluing a tire onto a rim that was previously prepared, scrape off as much old/loose
glue as possible and continue on as if it was a new rim (Figure 29).
1. Remove the tire from the rim and set it aside.
2. Place the wheel in the truing stand.
3. Put on the protective gloves.
4. Starting at the rim’s valve hole, lightly sand the surface of the entire tire bed with 120 grit.
Sanding removes remaining mold release and leaves a texture for the glue to grip.
5. Apply a small amount of acetone to a clean rag (Figure 30).
6. Starting again at the rim’s valve hole, wipe the sanded area of the rim. This cleans the rim
so that it is ready for glue.
Figure 29. Lightly sand the surface of the wheel
bed. Wipe clean with acetone on a clean rag.
Figure 30. Wipe the sanded area of the rim with
a clean rag and a small amount of acetone and
prepare it for glue.
Applying the first layer of glue
Follow the glue manufacturer’s installation instructions for using their glue, especially
suggested drying times. The first layer of glue on the rim must be very thin and allowed to dry
fully (usually around 24 hours). This first layer is the foundation of the correct attachment of a
tubular tire.
1. Place the wheel in the truing stand.
2. Put on the protective gloves.
3. With the acid brush, apply a thin layer of glue to the rim’s tire bed, edge to edge, all the
way around the rim (Figure 31).
4. Inflate the tire just until it rolls over and the base tape is exposed (Figure 32).
5. Apply a thin layer of glue to the base tape.
6. Allow the glue to completely dry.
Figure 31. Apply a thin layer of glue to the rim’s
tire bed.
Figure 32. Inate tire until base tape is exposed.
Apply a thin layer of glue.

24 25
Applying the second layer of glue
1. If it is not already there, place the wheel back in the truing stand.
2. Put on the protective gloves.
3. With the acid brush, apply a second thin layer of glue to the rim.
4. Inflate the tire just until it rolls over and the base tape is exposed.
5. Apply a thin layer of glue to the base tape.
6. Allow the glue to completely dry.
Attaching the tubular tire to the rim
Tighten the removable valve core before gluing the tubular on the rim. When riding, the valve
stem can rattle in a deep section rim. To reduce the chance of noise, prior to this procedure
wrap a layer of electrical tape around the valve stem or apply a drop of glue on the side of the
valve stem.
As this process nears completion, it is important to work quickly before the glue dries.
1. If it is not already there, place the wheel back in the truing stand.
2. Put on the protective gloves.
3. With the acid brush, apply a third layer of glue to the rim. Let the rim stand for a few
minutes. Do not apply any more glue to the tire.
4. Remove the wheel from the truing stand.
5. Deflate the tire and place the valve stem into the rim’s valve hole.
6. With your hands to the right and left of the valve, grasp the tread and sidewall of the tire
and press down as you work the tire onto the rim bead (Figure 33 and 34).
Figure 34.Figure 33.

26 27
7. Continue working down the tire, pressing it into the rim until there are only a few inches of
the tire remaining outside the rim bead (Figure 35).
8. Pick up the wheel and slide the tire on the remaining few inches by pushing with your
thumbs (Figure 36).
9. Check the alignment of the valve stem. If it is not straight, slide the tire on the rim until it is.
10. Quickly center the tread over the rim. Place the wheel in the truing stand and look closely
at the alignment of the base tape in the rim. If the base tape is not centered over the rim,
move the tire sideways so that the base tape is equally exposed. Also check that the tread
runs straight.
11. Inflate the tire to slightly less than its recommended pressure and check the base tape
tread alignment again. This is the last time you’ll be able to move the tire around. When
the glue dries, you will not be able to move it around.
Figure 35. Figure 36.
Completing the tubular installation
1. Inflate the tires to the manufacturer’s maximum recommended pressure.
2. Check the rim for glue that might be on the braking surface or other areas. If it has, use
acetone and a clean rag to clean the rim.
3. Allow the glue to dry for roughly 24 hours.
4. After the glue is completely dry, test the mounting strength. With the tire deflated, roll
the tire slightly to check that the tire is adhered up to the edge of the tire well. Check the
whole way around the rim and on both sides. If the tire appears to have full adhesion it is
ready for inflation.
NOTE: You should occasionally check the adhesion of the tire to the rim to ensure
the glue is still holding.

28 29
Chapter 5—
Operating a quick-release
This section tells you how to operate (open and close) a traditional wheel quick-release
(Figure 37). For correct and safe operation and adjustment of a wheel quick-release, read and
follow these instructions carefully.
Testing the attachment: quick-check
Before each ride, test the attachment of your wheels. If a quick-release does not pass a test,
either do the adjustment procedures (and tests) again or have your Bontrager dealer repair
your bicycle.
• Test A. Lift the bicycle and sharply hit the top of the tire (Figure 38).
The wheel must not come off, be loose, or move from side to side.
Figure 38. Lift the front tire off the ground and hit
the top with your hand to test for looseness.
Figure 37. Hub and quick-release parts:
1. Hub
2. Skewer
3. Adjustment-nut
4. Springs (small ends to inside)
5. Lever
1
2
4
5
4
3
A quick-release that is not correctly closed can let the wheel be loose or come off when
not expected, which can cause you to lose control and fall. Close the quick-release
correctly before you ride the bicycle.
WARNING
• Test B. Make sure the quick-release lever can not be turned in a circle (Figure 39).
• Test C. When the quick-release is correctly adjusted and in the CLOSE position, the clamp
force embosses the dropout surfaces.
• Test D. Evaluate the Closing Force of the Quick-release: If more than 45 pounds (200
Newton) force is necessary to move the quick-release lever to the CLOSE position, move
the lever to the OPEN position and slightly loosen the nut. If less than 12 pounds (53.4
Newton) force is necessary to start to move the lever to the OPEN position, move the lever
to the OPEN position and slightly tighten the nut. Do the test again. If necessary, do the
adjustment again.
Figure 39. Make sure the lever does not turn.

30 31
Adjustment and operation
These instructions explain how to adjust and operate (open and close) a traditional
quick-release. When you move the lever on a quick-release from the OPEN to CLOSE
position, the ends of the quick-release move inward, clamping the wheel into the fork tips.
The security of the clamping depends on two things: the correct motion of the lever and the
correct adjustment of the adjustment-nut.
1. Move the lever of the quick-release to the OPEN position (Figure 40, #3) and set the
wheel so it fully touches the inner surfaces of the fork ends.
2. With the lever in the adjustment position (Figure 40, #2), tighten the adjustment-nut
(Figure 27) until it is slightly tight.
3. Lock the quick-release; with the lever in the palm of your hand, move the lever to the
CLOSE position (Figure 40, #1).
C
L
O
S
E
O
P
E
N
Figure 40. Lever positions:
1. Locked (CLOSE)
2. Adjustment position
3. Released (OPEN)
3
2
1
• Do not turn the lever in a circle to increase the quick-release tension (Figure 41); this will
not correctly hold the wheel in its location.
4. Align the levers so they do not touch a part of the bicycle or an accessory part (such as
rack or fenders), and so obstacles in the path of the bicycle can not catch the levers
(Figure 42 and 43).
• If necessary, speak to your dealer about a quick-release that closes correctly and does not
touch the bicycle.
5. Do the Quick Check on page 28 to make sure the quick-release is correctly adjusted and
locked.
Figure 42. Front lever position
Close
Figure 43. Rear lever position
O
P
E
N
OPEN
O
P
E
N
O
P
E
N
Figure 41. Do not turn the lever in a circle

32 33
Chapter 6—
Adjustment
This section explains the adjustment of tire pressure and of wheel bearings.
Tire pressure
Inflate the tire to the pressure recommended on the tire sidewall. Do not under-inflate or
over-inflate the tire. If the tire loses pressure, it probably has a hole in the tube or Tubeless tire
casing.
• Standard tire: repair or replace the inner tube.
• Tubeless tire: repair or replace the tire.
• Tubular (sew-up) tire: Replace the tire.
Wheel bearings
Special tools and skills are necessary to adjust the bearings, so only your dealer must do this
procedure.
Chapter 7—
Lubrication
This section explains the lubrication and intervals required for your wheelset. It also explains
how to lubricate a quick-release.
Each year
Each year, lubricate the wheel bearings. Special tools and skills are necessary to lubricate the
bearings, so only your dealer should do this procedure. Some Bontrager wheels use sealed
bearings that do not require grease every year. If you do not know which type of bearings your
wheels have, speak to your dealer.
Each year, lubricate the wheel quick-releases. Put several drops of light oil on the parts of the
quick-release that move (Figure 44):
• Where the quick-release lever slides on the concave washer.
• Where the quick-release lever turns on the end of the skewer.
Each year, lubricate a thru-axle. There are several types of thru-axles, so this manual
cannot cover them all. Read and follow the manufacturer’s instructions that came with your
suspension fork or frame.
Figure 44. Lubrication points of a quick-release

34 35
Chapter 8—
Valve extenders
Select the correct extender for your valve.
Valve Extender Compatibility
Schrader
Not Compatible
Presta without removable valve core
External - screws onto end of valve
Presta with removable valve core
Inline - ts between valve core and valve body
Requires Bontrager Valve Key
To install an external extender
1. Turn valve counter-clockwise. Give it a firm twist to lock in fully-open position which
prevents it from vibrating closed while riding (Figure 45).
2. Wrap four thin layers of Teflon plumber’s tape around the end of the valve covering both
the narrow threads and a small portion of the wider body. Warning: Do not cover the air
opening at the end of the valve (Figure 46).
3. Screw the external extender onto the valve by turning clock-wise firmly with fingers.
Notice: Do not over tighten as this may damage the extender (Figure 47).
Figure 45. Turn valve counter
clockwise.
Figure 47. Screw extender
clockwise onto valve.
Figure 46. Wrap four layers of
plumbers tape around.
/