Page is loading ...

User’s Guide
motorola TK30


1
Congratulations
Your Motorola TK30 Music & Handsfree Car Kit is a
professionally installed system dedicated to hands-free
conversation and music enjoyment. Following your
installation, you can enjoy:
•Premium Audio
—The TK30 includes true 4-channel
audio amplification to drive your car's speakers for rich,
loud audio performance.
• Plugging In Your Music
—The TK30 is compatible with
iPod®, iPhone®, MP3 players and offers a USB
connection to play your personal music collection
through your car's vehicle entertainment system. You
can also stream music via Bluetooth to your TK30 from
a compatible music device.
• Advanced Multipoint System
—Allows you to connect
two phones at the same time and allows you to place a
call on hold while receiving a new incoming call from
your second phone.
•Convenient Text Messaging
—The TK30 smartly
“speaks” incoming text messages and provides the
convenience of a quick response with the touch of a
button.
Note:
Text message readout is not supported for all
TK30 display languages or by all phones.

2
Congratulations
Contents
Contents . . . . . . . . . . . . . . . . . . . . 2
Installation . . . . . . . . . . . . . . . . . . 3
Before you begin. . . . . . . . . . . . . 3
Install the vehicle
integration kit . . . . . . . . . . . . . . . 3
Connect the audio cable(s) . . . . . 4
Set install preferences . . . . . . . . 11
Selective mute feature . . . . . . . 12
Basics. . . . . . . . . . . . . . . . . . . . . . 13
Buttons and scroll knob . . . . . . 13
Home screen . . . . . . . . . . . . . . 13
Icons . . . . . . . . . . . . . . . . . . . . . 14
Text pr ompts . . . . . . . . . . . . . . . 15
Pair & connect. . . . . . . . . . . . . . . 16
Pair to Bluetooth devices . . . . . 16
Connect to devices . . . . . . . . . . 16
Set Bluetooth
device preferences . . . . . . . . . . 17
Calls . . . . . . . . . . . . . . . . . . . . . . . 18
Receive a call. . . . . . . . . . . . . . . 18
Make a call . . . . . . . . . . . . . . . . 18
While on a call . . . . . . . . . . . . . . 19
Swap phones. . . . . . . . . . . . . . . 21
Music . . . . . . . . . . . . . . . . . . . . . . 22
From a Bluetooth device . . . . . . 22
From an iPod/iPhone . . . . . . . . . 23
From a USB storage device. . . . 23
From an auxiliary device . . . . . . 24
Control your music . . . . . . . . . . 24
Volume . . . . . . . . . . . . . . . . . . . 24
Set music preferences . . . . . . . 25
Phonebook . . . . . . . . . . . . . . . . . 25
Synchronize contacts
from your phone . . . . . . . . . . . . 25
Messages. . . . . . . . . . . . . . . . . . . 26
Read new messages. . . . . . . . . 26
Read existing messages . . . . . . 26
Reply to message . . . . . . . . . . . 26
Call message sender. . . . . . . . . 26
Preferences. . . . . . . . . . . . . . . . . . 27
Set user preferences . . . . . . . . . 27
Set audio prompt preferences . . 27
Set display preferences . . . . . . . 27
View software version . . . . . . . . 27
Safety, Regulatory & Legal. . . . . 28

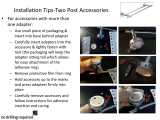
3
Installation
Installation
Before you begin
Caution:
Only qualified personnel should install this car kit.
Because of the wide variety of vehicle types and models, it
may be necessary to contact the vehicle manufacturer for
detailed installation information.
Caution:
An air bag inflates with great force. Do not place
objects, including communication equipment, in the area
over the air bag or in the air bag deployment area. If the
communication equipment is improperly installed and the
air bag inflates, serious injury could occur. If needed,
contact the vehicle manufacturer for air bag information
specific to the vehicle.
Please follow these guidelines:
•
Mount components securely on strong surfaces to
prevent shifting that could cause injury or interfere with
safe vehicle operation. Use the supplied mounting
hardware as needed.
•
Mounted components and attached wires or cables
must not interfere with seating or leg space.
•
Route cables so they are protected from pinching, sharp
edges and crushing. Keep all in-line connectors easily
accessible.
•
The car kit is intended for use in 12 Volt negative ground
systems only. The car kit draws less than 10 Amps.
Confirm that the vehicle's electrical system can supply
this current.
Install the vehicle integration kit
The vehicle integration kit is the central connection point
for the car kit. Connections to the vehicle, microphone,
audio input device, and user interface module (UIM) are
made from the vehicle integration kit.
The vehicle integration kit should be secured to the vehicle
after the rest of the car kit components are installed and
cables are secured

4
Installation
Mount the vehicle integration kit securely. The best location
for the kit is under the dashboard. The kit should be
protected from dirt and moisture, have adequate space for
cooling, and allow for cable connections.
Caution:
The User Interface Module (UIM) should be
connected before vehicle power is applied to the vehicle
integration kit, otherwise damage may occur.
Caution:
The location must not interfere with the vehicle’s
air bag.
The vehicle integration kit consists of these connectors:
Connect the audio cable(s)
Use the audio cable(s) to connect the car kit to your music
input device(s). You can connect:
•
an iPod/iPhone
•
a USB storage device with music (AAC, M4A, MP3, and
WMA audio files are supported)
•
a music device with 3.5mm headphone jack
To connect the audio cable:
1
Connect cable connector J to vehicle integration kit
connector D (shown on page 4).
2
Connect your music device to the audio cable(s):
•
To p la y music
from a USB storage device
,
connect cable connector K to the USB storage
device.
Note:
Only one USB device at a time can be
connected to your car kit.
Audio Cable
(connector D)
ISO Cable
(connector A)
Selective
Mute Switches
User Interface Cable
(connector B)
Microphone
(connector C)
Reserved for
Future Use
J
K
L

5
Installation
•
To p la y music
from an auxiliary device
, connect
cable connector L to the 3.5mm headphone jack on
the auxiliary music device.
•
Connecting or disconnecting your music player
from the Auxiliary input while that source is
selected on your TK30 could result in a short static
or pop noise.
•
To p la y music
from an iPod/iPhone
, use the
second audio cable (supplied):
1
Connect cable connector O to the iPod/iPhone.
2
Connect cable connectors K and L on first audio cable
to connectors M and N on second audio cable.
Note:
Route the cable so the USB connector and the
3.5mm connector are accessible to the end user.
Mount and connect the user interface module
Use the User Interface Module (UIM) to operate your car
kit.
M
N
O
K
L
M
N
P

6
Installation
The UIM can be mounted in two different configurations:
•
directly on a flat spot within easy reach of the driver
using the supplied mounting tape
•
using the supplied mounting bracket.
Caution:
Do not mount in a location that obstructs driver’s
vision or interferes with operation of the vehicle.
For optimal adhesion to the vehicle dashboard:
•
Ensure the adhesive and the dashboard surface are
warm (temperature above 15º C). For better adhesion in
cold conditions, ensure the vehicle interior and adhesive
are heated for 30 minutes before applying the adhesive,
and 30 minutes after applying the adhesive.
•
Prepare the dash surface with an appropriate adhesion
promoter. Test the cleaner on a small, inconspicuous
area of the mounting surface to ensure it does not
result in blemishing. The surface must be completely
dry before moving to the next step.
•
Position and install the mount with the supplied
adhesive.
•
Optimal curing time at room temperature is 24 hours,
and in cold conditions the adhesive needs 48 hours to
properly cure.
Direct to flat surface
To install the UIM directly on a flat service:
Note:
It is recommended to install the UIM directly on a flat
surface as a curved surface can cause difficulties in pushing
the buttons, and can cause the UIM to come loose.
Caution:
The location of the UIM must not interfere with
the vehicle's air bag deployment.
1
Clean mounting surface thoroughly with an alcohol
wipe (not supplied).
2
Select UIM orientation (controls on left or right of display).
Note:
To change screen display orientation, see “Set
install preferences” on page 11.
optimal for
right-handed
operation
optimal for
left-handed
operation

7
Installation
3
Remove adhesive backing from and press key tabs
(supplied) onto UIM:
•
Place key at top position.
•
Place \ key at bottom position.
4
Verify cable is fitted into a groove on the back of the
UIM. The cable must be contained in the slot to
provide a flat surface for mounting.
5
Connect cable connector P (shown on page 5) to the
vehicle integration kit connector B (shown on page 4).
6
Remove one side of mounting tape (supplied) and
press firmly onto rear of the UIM.
7
Remove other side of mounting tape and attach UIM to
flat spot location on your vehicle.
Use mounting bracket
To install the UIM using the mounting bracket:
Caution:
The location of the UIM must not interfere with
the vehicle's air bag deployment.
1
Clean mounting surface thoroughly with an alcohol
wipe (not supplied).
2
Select UIM orientation (controls on left or right of
display).
Note:
To change screen display orientation, see “Set
install preferences” on page 11.
3
Remove adhesive backing from and press key tabs
(supplied) onto UIM:
•
Place key at top position.
•
Place \ key at bottom position.
4
Verify cable is fitted into a groove on the back of the
UIM. The cable must be contained in the slot to
provide a flat surface for mounting.
optimal for
right-handed
operation
optimal for
left-handed
operation

8
Installation
5
Connect cable connector P (shown on page 5) to the
junction box connector B (shown on page 4).
6
Place mounting nut (straight or curved) onto selected
mounting arm.
7
Push arm into mounting base, and fasten onto base
using mounting nut.
8
Slide mounting bracket onto arm.
9
Attach mounting base to flat spot location on your
vehicle.
10
Attach one side of mounting tape (supplied) to back of
mounting bracket.
11
Remove other side of mounting tape on bracket, and
press the UIM firmly into place.

9
Installation
Install the microphone
Caution:
The location of the microphone and microphone
cable must not interfere with the vehicle's air bag
deployment. In particular, side airbags located with the
windshield pillar or door jamb.
1
Mount the microphone in a suitable location using
either the screw, velcro, or clip (supplied).
•
For optimal hands-free performance, mount the
microphone on the overhead console/dome light
assembly near the front center of the vehicle, away
from the window, pointed toward the driver's mouth.
•
Locate the microphone no more than 16 inches (40 cm)
from the driver.
•
Do not allow anything (such as a rear-view mirror or sun
visor) to block the path between the microphone and
the driver.
•
Mount the microphone firmly so that vibrations do not
affect audio quality.
•
Refrain from locating the microphone directly in the
path of heat/AC vents.
•
Refrain from mounting the microphone on door pillars
or windows that can transmit exterior wind noise to it.
•
Do not attach microphone to the vehicle's visor.
2
Route the microphone cable down the side of the
windshield, through the dash, and to the vehicle
integration kit.
3
Connect the microphone to the vehicle integration kit
connector C (shown on page 4).
Connect the ISO cable
Use the ISO cable to connect the car kit to your vehicle. It
connects the vehicle's power, ignition, and entertainment
system to the car kit.

10
Installation
Install third-party vehicle specific adapter harness
(if needed)
Some vehicles require a vehicle-specific adapter harness
(not supplied) that allows integration of the harness into the
vehicle entertainment system. The connectors on the ISO
cable are designed to connect directly to such a third-party
harness. If you choose to use a vehicle-specific harness,
follow the guidelines provided with that harness.
Install the ISO cable
Failure to follow these steps may result in product
malfunction or damage.
1
Disconnect battery from vehicle.
Caution:
Removing battery power may set trouble
codes that can only be reset by a factory diagnostic
tool on some vehicles. Please check with your vehicle
manufacturer if you are unsure how your vehicle may
react.
2
Disconnect appropriate connections on the vehicle
entertainment system to allow installation of the ISO
cable (and adapters, if needed).
3
Connect cable connectors H and I to the vehicle
entertainment system (or adapters, if needed).
4
Connect cable connector G to the vehicle wiring
harness ISO connectors (or adapters, if needed).
5
Connect cable connector F to vehicle integration kit
connector A (shown on page 4).
Note:
Make sure cable connector is plugged all the
way into the vehicle integration kit.
6
If needed, the connection points for mute, battery and
ignition can be configured to match your vehicle’s
harness using the alternate connection points on the
ISO harness.
7
Reconnect battery to vehicle.
Install to auxiliary input (optional)
If you wish to connect your car kit's music audio output to a
stereo auxiliary input on your vehicle entertainment
system:
should be no gap
between connector
and housing

11
Installation
Note:
Not all vehicle entertainment systems offer a stereo
auxiliary audio input. In some cases, if your system does
not support this input, one may be created using an adapter
from a third-party vendor.
1
Connect an RCA cable (not supplied) to connector E on
the ISO cable.
2
Connect the other connectors on the RCA cable to the
vehicle entertainment system’s Auxiliary input.
3
From the Installer menu, set the Line Out parameter to
ON (see “Set install preferences” on page 11 for
details).
Set install preferences
1
Turn off your vehicle’s ignition.
2
Turn on your vehicle’s ignition while pressing and
holding the Green button for at least 5 seconds.
Note:
See page 13 for location of buttons and knobs
on UIM.
3
Use the scroll knob to view and change settings.
4
Turn vehicle’s ignition off and on to store settings.
Installer Menu
Setting...
Language set language displayed on the UIM.
Display
Orientation
set the display orientation for left- or
right-hand operation.
Line Out set to ON when using an auxiliary
input to your vehicle entertainment
system for music.
Privacy Mute set whether to unmute the vehicle
entertainment system when a call is
switched to privacy mode.
Install Test test and verify:
ignition source
left-side speakers
right-side speakers
auxiliary input to vehicle
entertainment system (if used).
Factory
Reset
reset all settings back to standard
default factory settings
About list car kit’s software version

12
Installation
Selective mute feature
Whenever your car kit plays music or a hands-free call, it
automatically disconnects (or “takes over) the speakers
from the vehicle’s entertainment system.
However, some vehicles have features that play audio
prompts over the vehicle entertainment system (such as
audio navigation, parking sensors, etc.,). In these
scenarios, you will still need to maintain an audio path (or
“channel”) to the vehicle entertainment system.
On the vehicle integration kit, the multi-position switch
allows you to select a channel to remain connected to the
vehicle entertainment system during hands-free calls.
Each position on the switch corresponds to one of the four
speaker channels.
When the switches are all down (or "on"), then the channels
are all connected to car kit audio. When one of the
switches is moved up (or "off"), the audio from the vehicle
entertainment system will pass-through to the speaker.
Note:
Do not disable both front speaker channels or
hands-free call audio will not be heard.
Selective Mute
Switch
switch speaker channel
1 right - rear
2 right - front
3 left - rear
4 left -front

13
Basics
Basics
Use a combination of buttons, scroll knob, and menus to
operate your car kit.
Buttons and scroll knob
Buttons have different functions based on the car kit’s
current operating mode (music, calls, etc.,). To execute a
function, you will either “press” or “press and hold” the
button.
The Green and Red buttons change to blue when the car kit
is in music playing mode.
The scroll knob allows you to scroll through and select
menu items, and adjust call and music volume.
Home screen
The home screen is your entry into the car kit’s menus. It
displays the top item of the main menu.
Which menus are displayed is dependent on whether
phone(s) are currently connected to your car kit.
Use the scroll knob to move through menu options. To
select a menu item, press the scroll knob. To scroll back in
the menus, press key.
Phonebook
Recent Calls
Menu button
Green button
Red button
Play/Pause
button
scroll
knob
status
icons
menu
icon
menu item
Menu Displays when...
Phonebook, Recent Calls,
Voice Commands,
Dial Number, Messages
a phone is
connected to your
car kit
Music always displayed
Go to <phone> two phones are
connected to your
car kit
Settings always displayed
Phonebook
Recent Calls

14
Basics
Icons
Your car kit shows icons to provide status and identify
menu and phonebook contact types.
Status icons
On the right side of menu and music playing screens,
status icons show car kit connection status.
These icons show overall status of your car kit:
Hands-free call icons
You’ll see these icons during hands-free call operation.
hands-free connection to phone 1
hands-free connection to phone 2
no hands-free connection to phone(s)
in network phone service (phone 1)
Phonebook
Recent Calls
phone 1
connect status
phone 2
connect status
music
connect status
phone 1 (or
“primary”) phone
service status
roaming (phone 1)
no phone service (phone 1)
new text message
low battery (on phone)
music connection (iPod)
music connection (Bluetooth)
music connection (USB)
music connection (auxiliary)
incoming call
outgoing call

15
Basics
Music playing icons
You’ll see these icons when playing music.
Phonebook icons
You’ll see these icons in your car kit’s phonebook.
Text prompts
Occasionally you’ll see a prompt to answer a yes/no
question like shown below.
call connected
call ended
call muted
call rejected
call in privacy mode
play music
pause music
stop music
fast-forward music
rewind music
home phone number
work phone number
mobile phone number
To...
accept/yes press Green button
decline/no press Red button
ignore or go back in
menus
press
<device name>
Make primary phone?

16
Pair & connect
Pair & connect
Pair to Bluetooth devices
To use the hands-free calling and/or streaming music
features of your Bluetooth device with your car kit, they
must first be paired together.
1
Turn on the Bluetooth feature on your device.
2
From the home screen, select Settings > Bluetooth >
Pair Device.
3
Set your phone or music device to search for Bluetooth
devices.
4
Select Motorola TK30 from the search results on your
device.
5
Select OK or Yes to pair your car kit with your
Bluetooth device.
Note:
If prompted, enter 0000 for the passkey.
When successful, you‘ll see:
Once paired and connected, your car kit automatically
downloads contact names and numbers from your phone’s
contact list.
To cancel pairing mode, press the Red button.
Connect to devices
Your car kit turns on automatically when starting your
vehicle. Once turned on, the car kit establishes a wireless
connection with paired Bluetooth devices, (phone and/or
music devices) as well as a wired connection to your iPod,
USB, or auxiliary device.
Note:
To connect with your car kit, your Bluetooth devices
must be paired first. See “Pair to Bluetooth devices” on
page 16 to do this.
Pairing Mode - Enter 0000,
if pin code required
<device name>
connected

17
Pair & connect
Once connected to your device(s), you see the home
screen:
Status icons tell you which devices are connected to your
car kit (see “Status icons” on page 14 for reference).
If connecting to a Bluetooth device is unsuccessful, press
and hold the Green button to try again.
Your car kit turns off when you turn off your vehicle.
Set Bluetooth device preferences
1
From the home screen, select Settings > Bluetooth.
2
Using scroll knob, locate and select Bluetooth device.
Phonebook
Recent Calls
To...
connect/disconnect
device
select Connect or
Disconnect
delete device from
paired list
select Delete
make device primary
phone on car kit
select Make primary phone?
select type of phone
audio sent to car
speakers
select Audio Pass-thru, then:
•
select No to allow only
call audio to pass through
•
select Yes to allow all
audio (key tones, audio
prompts, etc.,) to pass
through

18
Calls
Calls
Note:
Your car kit supports the Hands-free (HFP) Bluetooth
Profile. Accessing call functions depends upon which
profile features your phone supports. See the instructions
that came with your phone.
Note:
Some call features are phone/network dependent.
Receive a call
When there’s an incoming call, you hear a ringtone and
caller ID over your speakers, and you see the incoming call
icon on the screen.
If music is playing when a call is received, it is automatically
paused (except for music from an auxiliary device or
Bluetooth device not supporting AVRCP profile).
Make a call
To make a call with your car kit, you can:
•
use a phonebook contact
•
use voice dialing on phone
•
use number dialing from the car kit
•
use recent call list
•
dial a number from your phone
Note:
Calls are made using the primary phone. To make a
call on the other phone, you must swap phones (see
“Swap phones” on page 21. for details).
Use a phonebook contact
1
From the home screen, select Phonebook.
2
Using scroll knob, locate and select name you want to
call.
3
Press the scroll knob or Green key to call.
To...
answer call press Green button
reject call press Red button
John Hutchinson
Alberts, Trey
Adams
,
Mark
Allen Cathy
/