Recording a Video
From the Start screen, tap Camera.
Select Video Mode .
Tap the screen to start or stop recording.
Microsoft
®
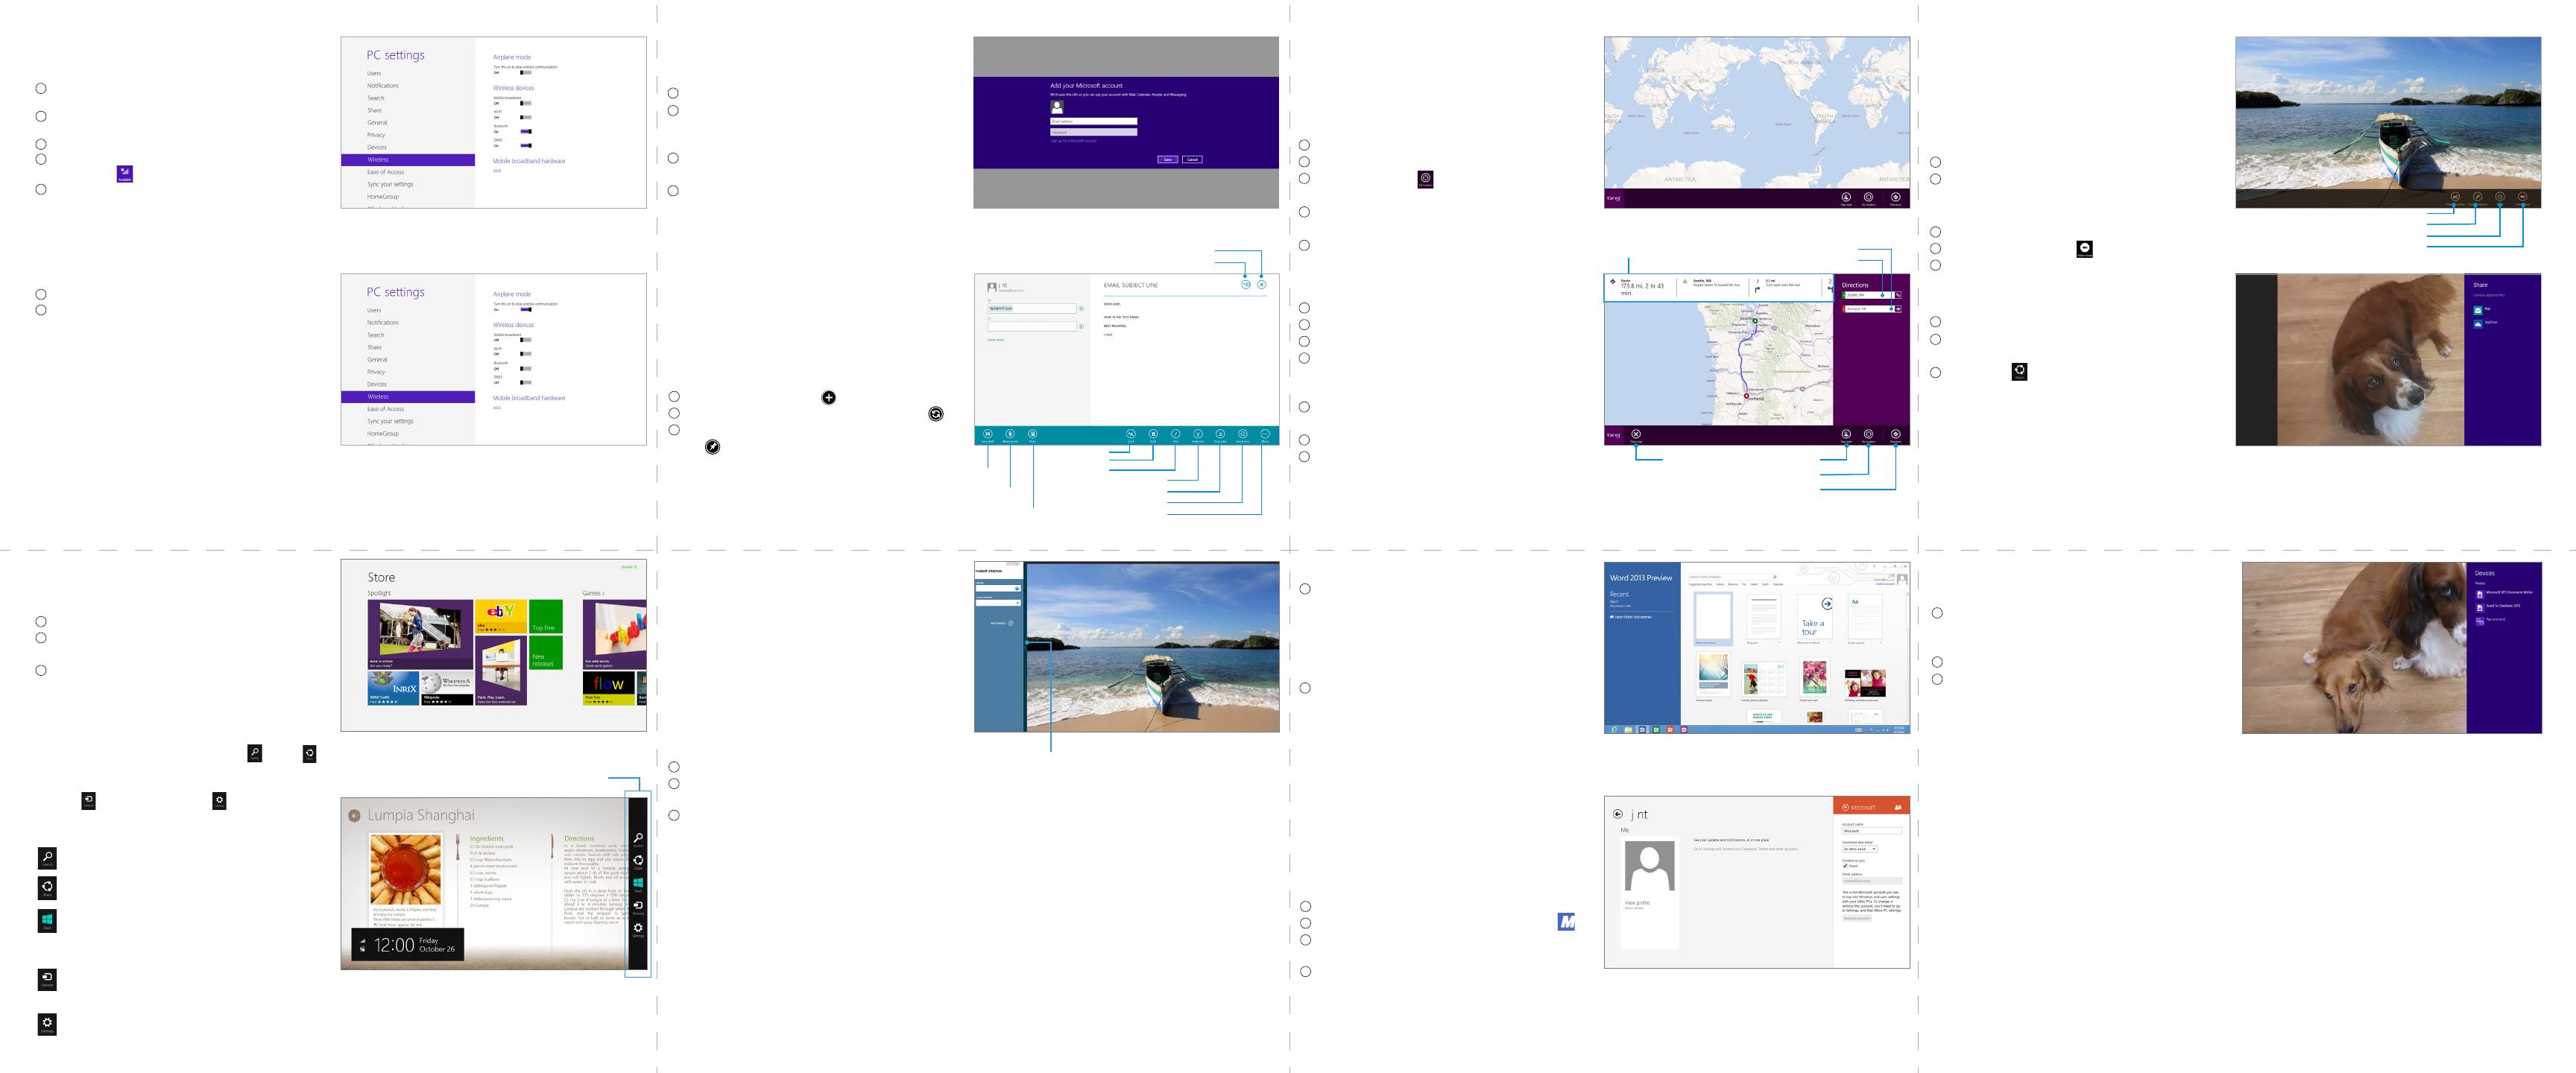
Store
Search and discover Metro style
applications for your VivoTab RT device
From the Start screen, tap Store.
Microsoft Store windows displays. Select a
desired app to install.
In the application window, tap Install.
Note: To download apps, you need to sign in
with your Microsoft account.
Synchronizing Content
NFC Sharing
From the Start screen, swipe from the
the right edge of the screen to launch the
Charm bar.
Tap Devices to list available devices.
Tap on a transfer method. For Tap and send,
gently tap the Asus VivoTab RT against
another NFC enabled device to send the
selected content.
File Transfer
There are several options for your transfer files to your tablet:
•MicroSDcard,supportupto64GB
•Insertthein-boxUSBadaptertothechargingport,usethumbdriveorportableharddrive
to transfer file
•Homegroupfeature–FirstsetuphomegroupfromaWindows7/8laptop;thengoto
PC setting on the tablet to join the homegroup and access shared files/media. For more
information, refer to the website below:
http://windows.microsoft.com/is-IS/windows7/products/features/homegroup
•Skydriveoranyothercloudstoragesolution
Your Asus VivoTab RT can now be synchronized with your PC.
Multitasking
Snap Feature
The Snap feature displays two apps side-
by-side, allowing you to work or switch
between apps.
Using Snap
IMPORTANT! Ensure that your VivoTab RT
screenresolutionissetto1366x768before
using the Snap feature.
Launch the apps that you wish to snap.
Slowly swipe from the left edge of the
tablet until the snap bar appears.
You can drag to move the snap bar to
enlarge the desired app or drag the snap
bar to the edge to close the snap view.
Map and Navigation
Find places, view real-time traffic and
conditions, receive detailed directions to
your destination.
Explore Maps
From the Start screen, tap Maps.
Swipe the bottom border of the tablet.
Tap My Location to show your current
location.
Check out nearby places by panning and
zooming in and out on the map.
Press and hold a location on the map to learn
more about that location.
Email
Setting Up Mail
From the Start screen, tap Mail.
Enter the email address and password of
the account you would like to set up and tap
Next.
Tap Sign up for a Microsoft account to
create a Microsoft account.
Enter the account and name as it will
appear on outgoing messages and then
tap Done.
Note: To use Mail, you need to sign in with
your Microsoft account.
Using Mail
Mail supports multiple email accounts, printing
from email, and multitasking functionality
From the Start screen, tap Mail.
To draft an email, tap .
To sync your app to your account, tap .
To pin a specific folder to the Start menu,
tap .
Wi-Fi and Airplane Mode
Connecting to Wi-Fi
Swipe in from the right edge to launch the
charm bar.
Tap Settings > Change PC settings >
Wireless.
Tap Wi-Fi to enable.
From the Start screen, tap Settings >
Networks
.
Tap a network to select and tap Connect. If
the network is secure, enter the passcode.
Turning the Airplane mode on or off
Launch the Charm bar.
Tap Settings > Change PC settings >
Wireless.
•MovetheslidertothelefttoturnAirplane
mode off.
•Movetheslidertotherighttoturn
Airplane mode on.
Charm bar
Get Directions
From the Start screen, tap Maps.
Swipe the bottom border of the tablet.
Tap Directions.
Use your current location as the starting
point, or enter the start location you
choose.
Enter your destination in the second text
box.
Tap Go.
Tap an item in the Directions list to view it
on the map.
Note: You must enable “Let apps use my lo-
cation” under Privacy section in PC Settings.
Charm bar
The Charm bar allows you to search , share
content through email or social networking,
return to the Start panel, sync content via
device
or access settings .
To launch the Charm bar, swipe from the right
edge of the screen
.
Search:allows you to search for files,
apps or settings.
Share: allows you to share applications
via social networking sites or email.
Start: reverts the display back to the
Start screen. From the Start screen,
you can also use this to revert back to
a recently opened app.
Devices: allows you to access and
share files with the devices such as
external displays or printers.
Settings: allows you to access the
settings of your Tablet PC.
Microsoft Office
From the Start screen, tap a Microsoft
Office application:
•Word
®
•Excel
®
•PowerPoint
®
•OneNote
®
You will be taken to the desktop mode
where the Office application is running.
Social Networking
People supports multiple social
networking accounts.
Your Microsoft account is used to log
into Windows and sync settings.
From the Start screen, tap People.
In the People screen, tap Connect to
.
In Accounts, tap your Microsoft
account.
Tap to setup, configure, or remove your
account.
Camera
Take pictures and record videos with
rear and front facing cameras, and then
quickly and easily share them with friends
and family.
Taking a Picture
From the Start screen, tap Camera.
Tap the screen to take a picture.
Sharing a Picture
From the Start screen, tap Photos.
Swipe in from the right edge to launch the
charm bar.
Tap Share and select the application or
device to share the selected image.
Change camera
Camera options
Timer
Video mode
Directions From (A)Route
Directions To (B)
Map style
My location
Directions
Clear map
Note: Contact your airline provider to learn
about related inflight services that can be
used and restrictions.
Text color
Cancel
Font
Send
Bold
More
Save draft
Italic
Emoticons
Attachments
Underline
Paste
Snap bar
1
2
3
4
5
1
2
1
2
3
1
2
3
1
2
3
1
2
3
1
2
3
4
4
5
5
6
7
1
2
1
2
3
4
1
2
3
4
1
2
1
1
2
2
3
3
1
2
3


