Quick Start Guide
RP-N12
Wireless-N300 Range Extender
Q10205
First Edition
March 2015
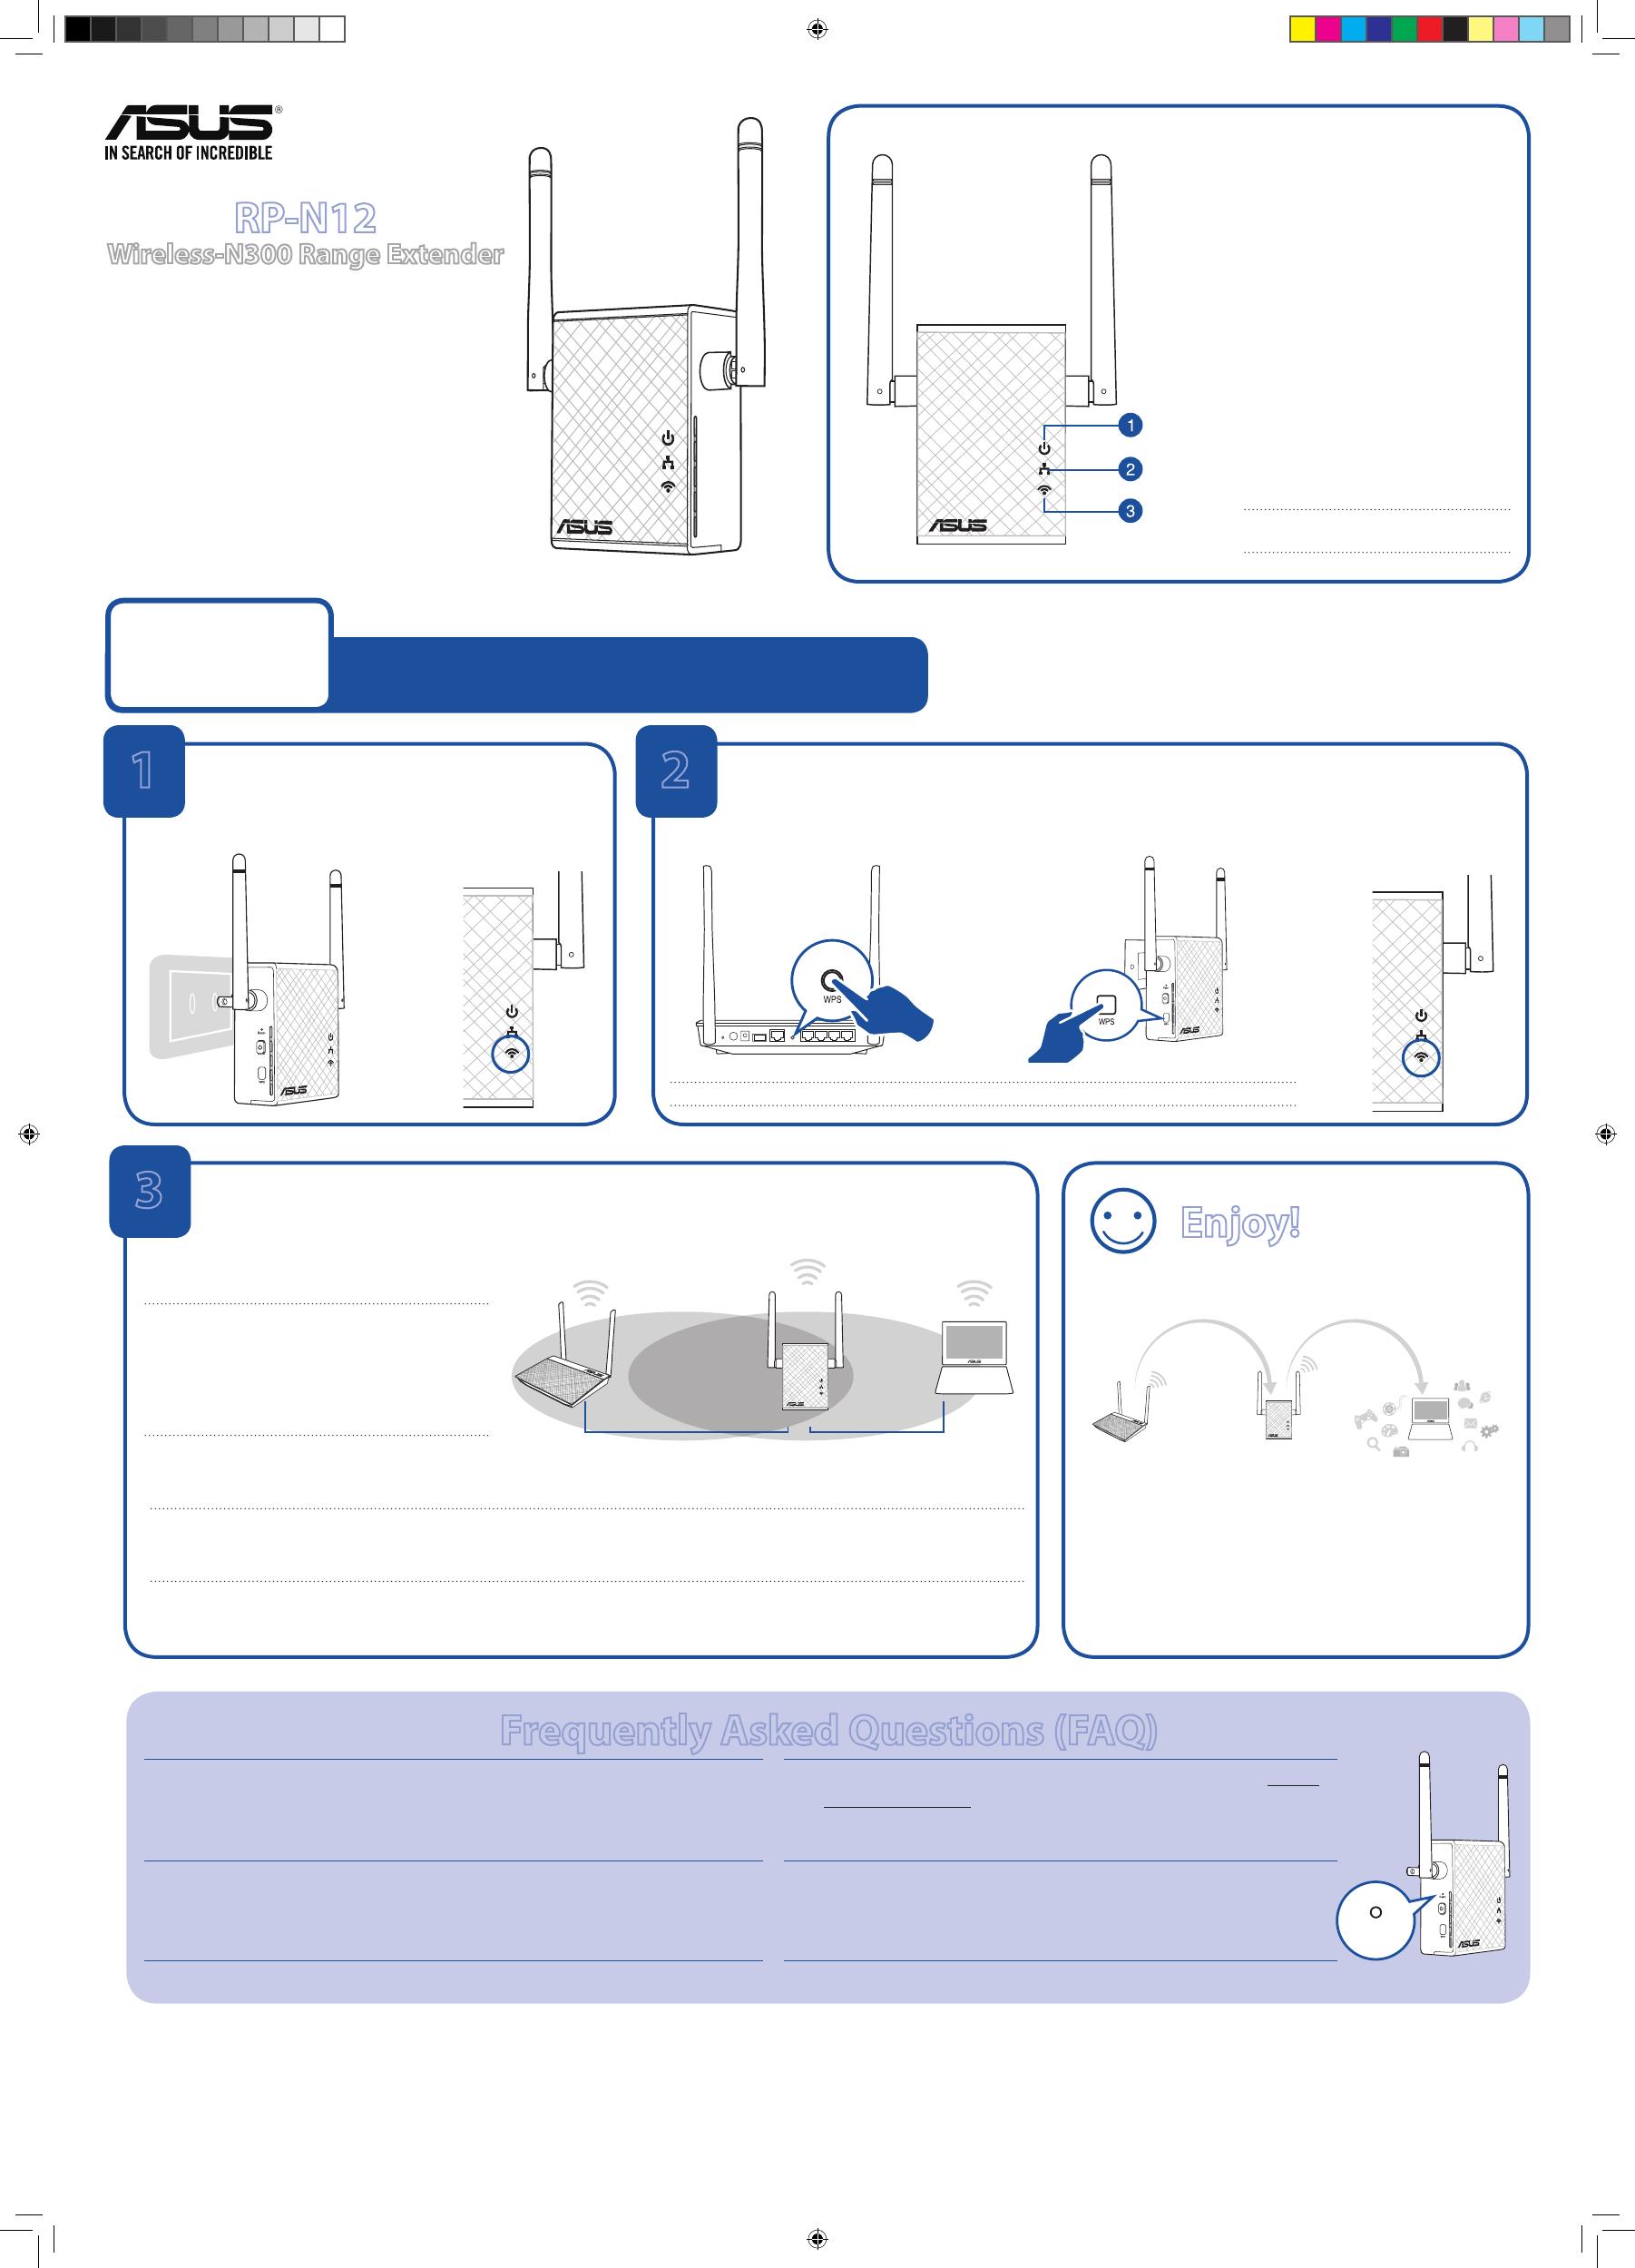
1. Power LED
On: RP-N12 is on
O: RP-N12 is o
2. Ethernet LED
On: Device is connected to the
Ethernet port.
O: Device is not connected to the
Ethernet port.
3. Wi-Fi LED
Green: RP-N12 provides the best
Wi-Fi extender performance.
Red: RP-N12 provides poor Wi-Fi
extender performance.
O: RP-N12 is not connected to a
router/AP.
Quick Setup with WPS (Wi-Fi Protected Setup)
For router/Access Point(AP) with WPS support
Power On
Place your RP-N12 near your router/AP and plug it to
a power outlet.
Wait until the Wi-Fi LED starts
to blink green.
Connect via WPS (Wi-Fi Protected Setup)
1. Press the WPS button on your Router/AP. 2. Press the WPS button on your RP-
N12.
NOTE: Ensure that your router/AP supports WPS. Otherwise, use Method TWO.
The Wi-Fi LED ashs for
about two (2) minutes and
then turns solid green or
red. The color of the LED
indicates the Wi-Fi signal
strength.
3
Place in an ideal location
After placing your RP-N12 in an ideal location, RP-N12 connects to your router/AP in about one (1) minute.
NOTES:
• PlaceyourRP-N12betweenyourrouter/AP
and wireless device to get the best extender
performance.
• PlaceyourRP-N12inalocationwhereyoucan
get green Wi-Fi LED.
IMPORTANT!
• Tominimizeinterference,keepRP-N12awayfromdeviceslikecordlessphones,Bluetoothdevicesandmicrowaveovens.
• WerecommendthatyouplaceyourRP-N12inopenorspaciouslocation.
Enjoy!
1 2
Frequently Asked Questions (FAQ)
Q1: What should I do if my router does not support WPS?
A1: You can use Method Two to set up RP-N12.
Q3: Why is it that I cannot see the login page after entering http://
repeater.asus.com in the browser?
A3: Ensure that your computer is connected to the extender network only, and
set your computer to Obtain an IP address automatically.
Q2: Why is that the Wi-Fi LED does not light up after completing Method
Two?
A2: You may have entered the wrong router SSID and password. Reset your RP-N12,
double check your router SSID/password, and set up RP-N12 again.
Q4: How do I reset RP-N12?
A4: Using a pin, press the RESET button for about two (2) seconds. Wait for
about ve (5) seconds until the Wi-Fi LED ashs red.
Method One
Reset
Your RP-N12’s wireless network name (SSID) changes
to your existing Wi-Fi network name, ending with
_RPT and shares your router/AP’s Wireless Password.
NOTE: Please refer to step 3 in Method
One for the best Wi-Fi performance.
Q10205_RP-N12_QSG_Special_second.indd 1 2015/4/13 15:27:34


