Page is loading ...

TUTORIAL:
How To Install a Kitchen Sink Drain Basket
Just like removing and installing a sink, installing a kitchen sink drain basket yourself is not a difficult thing to do. But it
needs to be done correctly, so there are not any leaks. Depending on the size of the sink, a full sink of water can weigh
200 lbs or more. That amount of weight will expose any gaps in the putty or caulking and find a way to leak out.
1. Parts of Kitchen Sink Drain Basket Assembly:
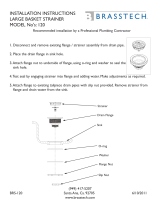
The type of drain assembly used is shown in Figure 1 with all
parts separated and in Figure 2 with all parts re-assembled.
It is shown again in Figure 3 assembled under the sink. The
paper gasket is not shown in Figure 1.
This type of drain assembly has a 2nd cup that acts as a
giant washer to hold pressure against a rubber
washer/gasket and the underside of the sink when the nut is
tightened. Other types of drain assemblies may just use a
single nut for this purpose.
2. Assembled Kitchen Drain:
The basket strainer has a flange that fits on the inside of the
sink and has a threaded pipe that extends out through the
hole underneath the sink.
The basket is the removable part that plugs the drain when
you want to fill the sink with water and the strainer catches
large chunks of food to prevent clogs.
The Flange of the basket strainer goes on the inside of the
sink and the rubber washer/gasket, paper gasket, pressure
cup and nut are under the sink. The rubber washer seals
the sink from below, putty or caulk seal the flange to the
sink from above.

3. Parts of Kitchen Drain Assembly under the Sink:
As the nut is tightened, it squeezes the lower part of the
basket assembly towards the bottom of the sink and at the
same time pulls the flange down onto the upper part of
the sink. The threads also used to attach the drain line to
the basket strainer.
The flange of the basket strainer must be sealed on the
upper part of the sink with plumbers putty or silicon
sealant. Both types of sealant have their pros and cons,
but either will work if installed correctly.
Plumbers putty will stain porous materials, like marble, so
caulk must be used. Plumbers putty is easy to install and
easy to clean up. It is also very easy to remove if the drain
needs to be removed in the future. Silicon caulk or sealant
is also easy to install, but harder to clean up, especially if it skims over and will require lots of hard work and/or the
solvents to remove from the sink in the future.
Remember the purpose of the putty or the caulking is keep water from leaking out of the sink from under the drain
flange. The purpose is not to stick the drain to the sink. The drain assembly is sealed from below by the rubber
washer/gasket.
Steps to Install Drain Assembly in Kitchen Sink
Clean all dirt, dust or old putty from around the drain hole and the drain assembly
Place a rope of plumbers putty or apply caulk evenly around the drain hole
Place strainer flange over putty or caulk in the drain hole
Assemble rubber washer/gasket, paper gasket, pressure cup and nut under the sink
Hand tighten nut, then tighten firmly with channel lock pliers
Clean away excess putty from drain inside the sink
After making sure the area around the drain hole is clean, if using plumbers putty, roll a golf ball sized piece of putty
between your hands until if forms a thin rope.

4. Rope of Plumbers Putty Applied in Ring around Drain Hole:
Apply the rope of putty around the drain hole as in Figure 4. If using caulk, apply a
continuous bead around the hole.
Place the flange of the drain carefully on the rope of putty or the bead of caulk,
then assemble the parts of the drain as shown if Figures 2 and 3.
On the underside of the sink, make sure the rubber washer is against the sink and
the paper gasket is between the rubber washer and the cup or nut that contacts
it from below.
The paper gasket is a friction gasket, the purpose of which is to allow the cup or
nut to slide easily past the rubber washer as the nut is tightened. The paper
gasket does not go between the flange and the sink on the upper side of the sink.
If using plumbers putty, tighten the nut completely and then clean up excess putty as shown in Figure 5.
Figure 5. Installed drain assembly showing excess plumbers putty:
If using caulk, tighten the nut only part way until caulk starts to compress and
starts to squeeze out. Allow the caulk to skim over then tighten the nut
completely.
It helps to holding the basket with needle nose pliers so it does not rotate while
tightening the nut.
For a professional look, make sure any brand names or logos that show on the
flange are centered and upright.
After clean up, fill the sink and check for leaks. Chances are, if there are no leaks
now, the drain will not leak for many years unless the sink are is vibrated by a
washing machine or drier.
Just make sure to check under the sink on a regular basis to make sure there are no leaks from any source. We had a
fairly expensive band name faucet that started leaking. The faucet would have to be repaired or replaced, but my failure
to check under the sink allowed a small leak to turn into a larger problem.
/
