Page is loading ...

INSTALLATION INSTRUCTIONS
Universal Security Lockbox #029
For office use only
RSP60
SHIPPING PACKAGE
WARRANTY CARD
Checked by ______
Please read and fill out the enclosed warranty registration card to
activate your warranty.
PARTS CHECKLIST
(4) 5/16 x 11/4” BOLTS (4) 5/16 NYLOCK NUTS (8) 5/16” WASHERS
RUBBER SEAL Tuffy Lockbox #029
TOOLS NEEDED
• Electric drill
• 3/8” Drill bit
• Marker or pencil
• Knife
• ½” Socket and ratchet
• ½” Wrench
• Silicone sealant (Recommended)
PLEASE READ ALL INSTRUCTIONS THOROUGHLY BEFORE STARTING INSTALLATION.
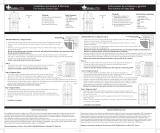
1. Install rubber seal on lid and between the hinge leaves. Check lock operation.
2. Place the lockbox in the vehicle in the desired mounting location.
3. Using a marker or pencil, mark (4) spots through the 3/8” mounting holes in the box.
WARNING!
Make sure that there is nothing under the vehicle that will be damaged by the drill bit when drilling.
4. Remove the box. Cut the carpet at the (4) marked holes. Using a 3/8” drill bit, drill out the (4) marked
spots in the floor.
5. It is recommended to use silicone sealant in any holes drilled in the vehicle to prevent rusting.
6. Fasten down the box using the hardware provided. (For security, it is best to insert the bolts from
underneath the vehicle.)
For Technical Support Call (970)564-1762
/


