Page is loading ...

1
Condensed Operating Manual for Door Control Unit AT18
Rev. 09, Issue Date 8/2007
www.siemens.de/edm
SIDOOR
Condensed Operating Manual AT18

2
Condensed Operating Manual for Door Control Unit AT18
1 Overview of operating elements
Substructure group AT18:
X1:Auxiliarymoduleatcableconnection
X3: Mains current transformer connection
X4: Current output 24V / 0.4A
X5: Emergency power module input signal
X6: Input signals connection
- Light barrier
- Nudge
- Close
- Open
X7: Motor plug
X8: Connection for user terminal and USB
adapter (AT Frontend PC)
H5000: 7-segment display for door status
and error code
S5000: Door parameter button
S5001: Service button “OPEN”
S5002: Service button “CLOSE”
Relay module (Option):
X11: Relay output “CLOSE”
X12: Relay output “Reversed”
X13: Relay output “OPEN”
X14: Flat cable connection to the control
unit
Terminal module (Option):
X15: Flat cable connection to the control
unit
H1: LCD-Display
S1-S4: Operating button for terminal
Illustration 1 module

3
Condensed Operating Manual for Door Control Unit AT18
2 Safety instructions
WARNING
Only qualied personnel should work on or be in the vicinity of this equipment.
This staff must be thoroughly familiarized with all warnings and maintenance procedures according to
the operating manual.
3 Mechanical installation and conguration
1. Mount the motor on the motor mounting (rubber-bonded metal/vibration shock mount).
Thereafter the motor is mounted on the mounting bracket if necessary.
2. Mount the overhead pulley, if necessary with mounting bracket. Make sure of the alignment of
the drive pinion and the overhead pulley; these should be aligned with each other as precisely as
possible.
3. Bolt the timing belt and the door clutch holder together and set it up.
4. Tighten the timing belt with the aid of the tensioning equipment. The correct tension is achieved
when the timing belt can be pushed in by 1cm per every meter distance between the drive pinion
and the overhead pulley.
5. Mount the control unit close to the drive motor (take length of cable into account).
4 Initial electrical operation
1. Slide door to “CLOSE” position.
2. Open housing lid
3. Plug in motor plug X7
4. Connect mains current transformer to mains (230 V AC). The onsite fuse protection should be a
maximum of 10A.
5. Press red “DOOR PARAM” button (S5000) and keep pushed in.
6. Connect mains current transformer with X3.
7. Press red “DOOR PARAM” button so long until the 7-segment display (H5000) displays “_”.
8. After a short pressing of the “OPEN” (S5001) button or the “CLOSE” button (S5002) the teach-in
drive is started. The 7-segment display (H5000) displays “H”.
The teach-in drive includes an opening of approximately 10 cm wide and closing once or twice at
crawl speed.
Subsequently an opening and closing once over 25 cm in the crawl movement follows to
determine the friction of the door system.
Thereafter the door opens and closes with reduced speed (complete trip). Herewith a short
additional acceleration incline is passed through at the opening after an approximately 10 cm trip
to determine the door weight.
The door parameter and the detected door width are stored in the “CLOSE” position.
The 7-segment display (H5000) displays “u”.
9. The door can now be opened with the “OPEN” button.
The 7-segment display (H5000) displays “o” during the opening.
10. Switch off control by pulling of the mains plug or of plug X3.
11. Connect control signals to plug X6 as in the terminal circuit diagram (see attachment 9).

4
Condensed Operating Manual for Door Control Unit AT18
12. Connect the light barrier to X6 (see illustration 1 or lid imprint).
Insofar as the light barrier input is not used, X6 must be wired to X4 according to the lines on the
connection layout.
13. Plug in clip plugs X6 and X4.
CAREFUL
The control is operative after the next switch-on. At a presented control signal the door moves into the
specieddirection.
14. Switch control on (plug in mains current plug, or plug X3).
The four LEDs next to the plug-in connector X3 indicate which control signal is active at the
time. Thereby the LED for the light barrier should glow continuously, if there is no obstacle in the
movement area of the door.
15. At a presented control signal “CLOSE” the door closes with the initial speed in the “CLOSE” position.
At a presented control signal “OPEN” the door opens with the initial speed in the “OPEN” position.
16.Ifthecontrolhasrecognizedthenaldoorpositions“OPEN” and “CLOSE”, the subsequent opening
and closing movements are performed in the normal speed.
17.Forspecialapplicationsthemovementvaluescanbespecicallyadaptedtothedoor.However,for
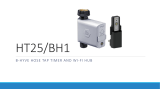
that the terminal module (option), the user terminal HT18 (HT25) must be connected to a PC, or
be connected via a USB adapter (option), on which the operating program AT Frontend has been
started. The operation is described in attachment 11 of the operating instructions.
Simple settings can also be executed with the three buttons and the 7-segment display of the basic
equipment (see section 5).
WARNING
The service staff should test the acceptable energies and forces after the putting into operation of the
elevator door on the heaviest door in the complete system (elevator) and to adjust it to the critical
limits in case of an exceeding of the values.
5 Electrical conguration with the “MinimalEditor”
Thesimpleadjustabilityoftheproleandoftheclosingforcesisindicatedasminimaleditorviathe
three internal buttons with the aid of the 7-segment display. For this purpose no terminal module,
user terminal or AT Frontend PC is necessary. The closing force is set in the form of a counterweight,
wherebysimplied1kgto10Niscalculated.Thisvaluemustbedeductedfromthemaximumvalue
150N.
Conguration:
1. Start of the minimal editor: press service button – “OPEN” and – “CLOSE” (S5001 and S5002)
immediately at the same time as supplying the mains current and keep pushed in.
The LED display (H5000) displays an “8” for approximately 5 seconds.
2. Let go of both buttons after switch-off of the LED display “8”.
3. After approximately 3s a “C”(movementprole)andanumericalvalueisdisplayedalternatively.
ThedisplayednumericalvaluerepresentstheprolenumberdepositedintheAT18.
4. Thedesiredprolecanbeselectedwiththeservicebuttons–“OPEN” and – “CLOSE” (S5001, or
S5002).
5. The set value is saved by a long pressing of (>2s) of the parameter button (S5000). A dot appears

5
Condensed Operating Manual for Door Control Unit AT18
in the bottom right corner of the display.
6. With a short pressing of the red parameter button (S5000) one can switch to parameter “A”
(counterweight). The alternatively displayed numerical value represents the counterweight in kg
(adjustment range 0 kg to 6 kg). It can be adjusted with the service button – “OPEN” and – “CLOSE”
(S5001, or S5002).
7. The set value is saved by a long pressing of (>2s) of the parameter button (S5000).
8. Exiting the minimal editor takes place by switching the power supply off and on again.
NOTICE
Anentryinthe“C”parametermenu(proleselection)alwaysoverwritethesetvalueinthe“A”
parameter menu. Therefore, set the counterweight last.
WARNING
So that the closing and nudge speed can be limited dependent on the door weight, it is imperative
thatanewteach-indrivemustbeperformedaftertakingoveranothermovementprole(startwith
button S5000).
6 Relay contacts (option)
The relay contacts of the optional relay module can be set to relay the following door statuses to the
elevator control of higher ranking order:
X11 (Pin1 and Pin3 closed) – door has reached “CLOSE” position.
X12 (Pin1 and Pin3 closed) – door reversed due to a blocking.
Interruption of light barrier or opening demand.
X13 (Pin1 and Pin3 closed) – door has reached “OPEN” position.
In illustration 1 the contacts are shown in an inactive status (Pin2 and Pin3 closed).
WARNING
It is imperative that the instructions in the operating manual are followed when the current >42V is
connected to the relay module.

6
Condensed Operating Manual for Door Control Unit AT18
7 Parameter setting with terminal module or user terminal
The terminal module (option) or the user terminal can equally be used for the diagnosis and setting of
theparameter.Thebuttonsofthetoolshaveidenticaldesignationsandsignicance.
Accept key, jump to next menu below
Escape key, jump back to menu above
Menu selection key, increase of a parameter value
Menu selection key, reducing of a parameter value
The taking over/acceptance of an adjusted parameter always takes place in the door position “CLOSE”.
Menu of the HT18:
ESC
Jump to
RESET
SIEMENS AT18
USER TERMINAL
LANGUAGE-MENU
German
LANGUAGE-MENU
English
MAIN-MENU
Total alignment
MAIN-MENU
Quick alignment
MAIN-MENU
Monitor
MAIN-MENU
Service
SERVICE-MENU
FW version
SERVICE-MENU
Fault/Status
SERVICE-MENU
Maintenance
SERVICE-MENU
Special
MONITOR-MENU
Door status
MONITOR-MENU
Input signals
MONITOR-MENU
Output signals
QUICK-MENU
Door status
QUICK-MENU
Proleselection
QUICK-MENU
Movement instructions
QUICK-MENU
Parameter setting
Proleparameter
Movement instructions
Start teach-in drive
withstandardprole
Start teach-in drive
Load
Standardprole
Standard
optional

7
Condensed Operating Manual for Door Control Unit AT18

8
Condensed Operating Manual for Door Control Unit AT18
Ýçindekiler
1 Ýçindekiler ...........................................................................................................2
2 Giriþ .....................................................................................................................
4
3 Güvenlik notlarý ...................................................................................................
5
3.1 Genel güvenlik bilgileri ...............................................................................
5
4 Kavramlar ..............................................................................................................
6
5 Kumanda elemanlarýna genel bakýþ ......................................................................
7
6 Fonksiyonlar ve cihaz tepkileri ...............................................................................
8
6.1 Adaptasyon ve test sürüþü ..........................................................................
8
6.2 KAPI AÇMA komutu .....................................................................................
8
6.3 KAPI KAPATMA komutu ...............................................................................
8
6.4 Servis butonu .............................................................................................
8
6.5 Parametre ayarý ..........................................................................................
8
6.6 Blokaj algýlama “KAPALI” .............................................................................
9
6.7 Blokaj algýlama “AÇIK” ................................................................................
9
6.8 Gerilim düþüþü sonrasý yeniden çalýþma ...................................................
9
6.9 Kapanma gücü ............................................................................................10
6.10 Acil kurtarma ..............................................................................................10
6.11 Sýkýþma .....................................................................................................10
6.12 Fotosel .......................................................................................................10
6.13 Acil durumda akým beslemesi (opsiyonel) ...................................................
11
6.14 Aþýrý yük emniyeti .....................................................................................
11
7 Mekanik montaj ve ayarlar ....................................................................................
12
8 Elektriksel ayarlar ve kullanýma alým .....................................................................13
9 Röle temaslar (Opsiyon) .........................................................................................16
10 Hareket eðrisi ........................................................................................................18
11 Çalýþma konumu göstergesi .................................................................................19
12 Hýz sýnýr eðrisi .....................................................................................................20
13 Geliþim modülü (Opsiyon) .....................................................................................
21
13.1 Geliþtirme modüllerinin montajý ................................................................
21
13.2 Acil akým modülü
.......................................................................................25
13.2.1 AT18 ile acil durum modülünün baðlantýsý ..................................................25
14 Teknik bilgiler .......................................................................................................26
14.1 Doðru akýmlý þanzýman motoru .................................................................26
14.2 Þebeke transformatörü ...............................................................................26
14.3 Kontrol ünitesi ............................................................................................26
Contact partner
Siemens AG
Electronic Design and Manufacturing
Services (I&S EDM)
Am Brabrinke 14
30519 Hannover
Telefon +49 (0) 40 / 22 89- 43 22
Telefax +49 (0) 511 / 8 77- 12 17
E-Mail: mike.alt[email protected]
www.siemens.de/edm
/