Page is loading ...

2-Line Wireless Desk
Phone with Intercom
User’s Guide
V i S Y
S
™
V i S Y
S
25260

2


5
Equipment Approval Information 2
Interference Information 3
Licensing 3
Hearing Aid Compatibility 3
FCC RF Radiation Exposure Statement 4
Information for DECT Product 4
Introduction
7
Parts Checklist 7
-Telephone Jack Requirements
Installation 8
-Digital Security System
Important Installation Guidelines 8
9 tuoyaL esaB
Base Station 10
Installing the Phone 11
-Installing the handset battery 11
-Base Station 12-14
Programming the Phone 15
-Standby Screen 15
-Programming Functions 15
-Phone Setting 15
-Date/Time 16
-Auto Answer 16
-Auto Answer Intercom 17
-Dial Mode 17
-Area Code 17
-Registration 17
-Register 18
-Remove Handset 18
-De-Register 18
-2nd Call Alert 19
-Handset Name 19
-Update Handset List 19
-Display Setting
19
-Contrast 20
-Backlight 20
-Sound Setting 20
-Ring Tone 20
-Ring Volume 21
-Key Tone 21
Voice Mail 21
-Voice VM 21
-Settings 21
Table of Contents
Telephone Operation 22
-Making calls with the cordless handset 22
-Making calls with the corded handset (from the base) 22
-Making calls in the speakerphone mode (from the base) 22
-Making calls in the speakerphone mode (from the handset) 22
-Making Calls with the RCA Wireless Headset 22
-Making Calls with a Wired Headset 22
-Switching between the speakerphone, handset & headset
mode
23
-Mute 24
-Do not disturb 24
-Flash 24
-Inserting a pause in the dialing sequence 24
-Redial 25
-Reviewing the Redial Numbers 25
-Storing a Redial Record in Directory 25
-Transferring a call to another extension 26
-Receiving a transferred call from another extension 26
-Ringer on/off and ringer volume 26
-Speakerphone, handset and headset volume 26
-Hold 27
-Conference calls 27
Intercom Calls 28
-One-touch /memory log 28
-Answering an intercom call 28
-Page 28
-Auto Standby 28
Caller ID (CID) 29
-Receiving and storing CID records 29
-Reviewing CID records 29
-Saving a CID record to the phone directory 30
-Deleting a CID record 30
-Deleting all call records 30
-Dialing back 30
-Call waiting caller ID 31
Directory & One-Touch Memory 32
-Adding directory entries 32
-Storing a record in the one-touch/memory buttons 32
-Reviewing directory records 33
-Editing a name or number stored in the one-touch/
memory log
33
-Reviewing record in the one-touch/memory 33
-Editing a directory record 33
-Copying a directory record 34
-Deleting a directory record 34
-Deleting all directory records 34
-Deleting a one-touch/memory 35
-Dialing a directory record 35
-Dialing a one-touch memory/record 35
Wirelessly Connect Accessories
-Adding 25055 or 25065 to 25260 13
13
-Adding 25260 to a Another RCA Phone
14
-Pre-Dialing 23
-Answering a Call 23

6
Table of Contents Cont.
Display Messages
Handset Sound Signals 37
-Backup battery operation 37
Troubleshooting Guide 38
-Caller ID solutions 39
General Product Care 40
Causes of Poor Reception 40
Warranty Assistance 41
Limited Warranty 42-43
36
-No Dial Tone 38
-Can’t Dial Out 38
-Handset Doesn’t Ring 38
-Static/Noise/Fading In and Out 38
-Memory Dialing Doesn’t Work 38
-Unit Locks Up 38
-Out of Range 38
-Date/Time Setting Default 38

7
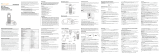
Base & Desk Stand (included assembled)
Corded handset
fyouaresettingupasystemwithmultiplephones,onlyone
phone(theunitinMain/Wired mode) needstobepluggedintoa
phonejack.Additionalphonescanbewirelesslyconnectedto
thisphoneusingtheExtension/Wireless mode.


9
Intercom
Directory
Caller ID
Privacy
Exit
Flash
Do Not Disturb
Prev
Page Main
Base Layout

10
Thephonemaybeconnectedtoone2-line(RJ14C)ortwo1-line(RJ11C)
walljackstoaccommodatebothlines.
You can use the two included 1-line phone cords to connect the phone lines to the jacks
in the back of your phone.
If operating the unit in MAIN/EXT mode, choose an area near an electrical outlet and a telephone
Installing Your Phone
NOTE: Please use the included power adaptor for
normal use; the 25260 is designed to run on the back
up batteries for short periods only.
If you are connecting to two 1-line phone jacks with two phone cords:

11
Line 1
Line 2
If you are connecting to one 2-line phone jack with one phone cord:
If you are connecting to two 1-line phone jacks using a phone coupler:
If you are mounting the phone on the wall and connecting to two 1-line
phone jacks with two phone cords:

12
Connect the handset cord:
Connect one end of the coiled handset cord to the jack on the side of the base and the
other end into the jack in the handset, and place the handset in the cradle.
Line 1 & 2
If you are mounting the phone on the wall and connecting to
one 2-line phone jack using one phone cord:
If you are mounting the phone on the wall and connecting two 1-line
phone jacks using a phone coupler:


15
After powering up the unit for the first time, it will prompt you to select Main/Wired mode or Extension/Wireless mode.
Each system must have one phone on Main/Wired mode and can have up to 10 other 25260s on Extension/Wireless
mode. The phone set to Main/Wired mode must be plugged into a phone line, and the phones set to Extension/Wireless
mode must be registered to the phone set to Main/Wired mode.
The base displays the current date, time and the Soft keys.
NOTE: The Soft keys will change according to the status of the unit.
NOTE: The base LCD has a dedicated “SET CLOCK” icon flashing when the clock
is not set. Please go to menu “Phone Setting- Date /Time” to set the clock.
The system uses a menu structure to give you access to all of the built-in features. You have the following menu
Select Mode, Phone Setting, Display Setting, SoundSetting, Voice Mail and
Restore Setting.
Select mode
2. Press the MENU soft key (left) to go to the main menu.
3. Press VOL (- or +) button to scroll to Select Mode.
Main/Wired Mode or EXT/Wireless Mode.
Main/Wired Mode
From the Select Mode Menu:
1. Press the VOL (- or +) button to scroll to Main/Wired Mode.
2. Press SELECT Sof key, the screen display Please Plug In A Phone Line.
3. Press Yes soft key to confirm.
NOTE: During programming, you may press the BACK Soft key (left) at any time to exit the sub-menu
and return to the main menu, or press exit key to exit programming and return to standby screen.
NOTE: If no key is pressed for 30 seconds, the handset or base will automatically exit programming
and return to standby screen.
options in the main menu:
Note: Each system of 25260s must have one phone set to Main/Wired
mode with a wired connection to the phone lines.
SELECT MODE
MAIN MODE
EXTENSION MODE
Vol +
BACK SELECT
1. Make sure your phone is IDLE (not in Talk mode).
4. Press SELECT soft key (right) to confirm and you may select

16
Registration (EXT/Wireless unit),
De-Registration (Main/Wired unit),
2nd Call Alert (both Main/Wired unit and EXT/Wireless unit),
Handset Name (EXT/Wireless unit),
Update Handset List (Main/Wired unit),
YEAR 2011.
Note: Some options are system-wide and can only be programmed from the phone
while in Main/Wired mode.
Extension/Wireless Mode
From the Select Mode Menu:
1. Press the VOL (- or +) button to scroll to EXT/Wireless Mode.
2. Press SELECT Sof key, the screen display Please Register To Base Station.
3. Press Yes soft key to confirm.
Phone Setting
1. Make sure your phone is OFF (not in Talk mode).
2. Press the MENU soft key (left) to go to the main menu.
3. Press VOL (- or +) button to scroll to Phone Setting.
4. Press SELECT Soft key (right) to confirm and you may program the following items:
Date/Time (Main/Wired unit only),
Auto Answer Intercom (both Main/Wired unit and EXT/Wireless unit ),
Dial Mode (Main/Wired unit),
Area Code (Main/Wired unit),
Note: Each phone set to Extension/Wireless mode must be registered to another 25260 or other RCA device
that is set to Main/Wired mode and has a wired connection to the phone lines. For help with the
registration process, please see page 16.
first
NOTE: The Date/Time setting item only exists in the Main/Wired unit, EXT/Wireless unit Date/Time
should update automatically after it is set in the Main/Wired unit.

Prev or Next
17
Dial Mode (only applicable for Main/Wired mode)
Area Code (only applicable for Main/Wired mode)
Registration (only applicable for Extension/Wireless mode)
A phone in Extension/Wireless mode will not operate until it is registered to a phone in Main/Wired mode with a wired
connection to the phone lines. Up to 10 25260s in Extension/Wireless mode can be registered to one 25260 in
Main/Wired mode.
Note: If an optional cordless headset (RCA model 25065) has been registered to
the 25260 in Main/Wired mode, up to 9 additional 25260s in Extension/Wireless mode can be
registered to that same device.
Auto Answer Intercom
(applicable for Main/Wired mode and Extension/Wireless mode)
If it is set to On, the unit will auto answer the intercom call when it receives an intercom call.
EXT/Wireless unit.

From the Registration Menu:
From the Registration Menu:
18
4. The Main/Wired unit phone will display Registration to indicate it is searching for phones in Extension/Wireless mode.
5. If the registration is successful, the Extension/Wireless phone will beep and display Registration Complete.
If the registration fails, the Extension/Wireless phone will beep and display REGISTRATION FAILED! If the phones
fail to register several times, you may need to place the Extension/Wireless phone closer to the Main/Wired
phone's location.
Remove Extension/Wireless Unit
Deregistering an Extension/Wireless phone will remove its pairing from the Main/Wired unit.
Note: Once an Extension/Wireless phone is deregistered from the Main/Wired phone, you will not be
able to access the phone lines or make calls from that unit. You must reregister the phone in
Extension/Wireless mode or switch the unit to Main/Wired mode and plug in phone lines to make calls.
Deregistering (only applicable for Main/Wired mode)
4. Press the YES soft key to confirm deregistration. The screen will display Saved, and the screen
on the Extension/Wireless phone will display Press REG to initiate registration.
1. On the EXTENSION/WIRELESS MODE phone,press the VOL (- or +) button to scroll to REGISTER.
3. Press and hold the PAGE button on the Main/Wired unit for 5 seconds.
Remove EXT/Wireless unit.
Remove EXT/Wireless unit?
displays Remove EXT/Wireless unit?.

Prev/Next
Press the MENU soft key to go to the main menu.
19
Extension/Wireless Unit Name
Update Device List
(only applicable for Main/Wired mode)
BACK SELECT
PHONE SETTING
2ND CALL ALERT
HANDSET NAME
BACK SELECT
HANDSET NAME
OFFICE
...
3. The Device List containing the names of each device registered to the MAIN/WIRED phone will be
updated on all devices registered to that phone.
EXT/Wireless name.
EXT/Wireless.
EXT/Wireless List.
(only applicable for EXT/Wireless mode)

Press the MENU soft key to go to the main menu.
Prev or Next
20
/