RQT7800
6
Disc Information
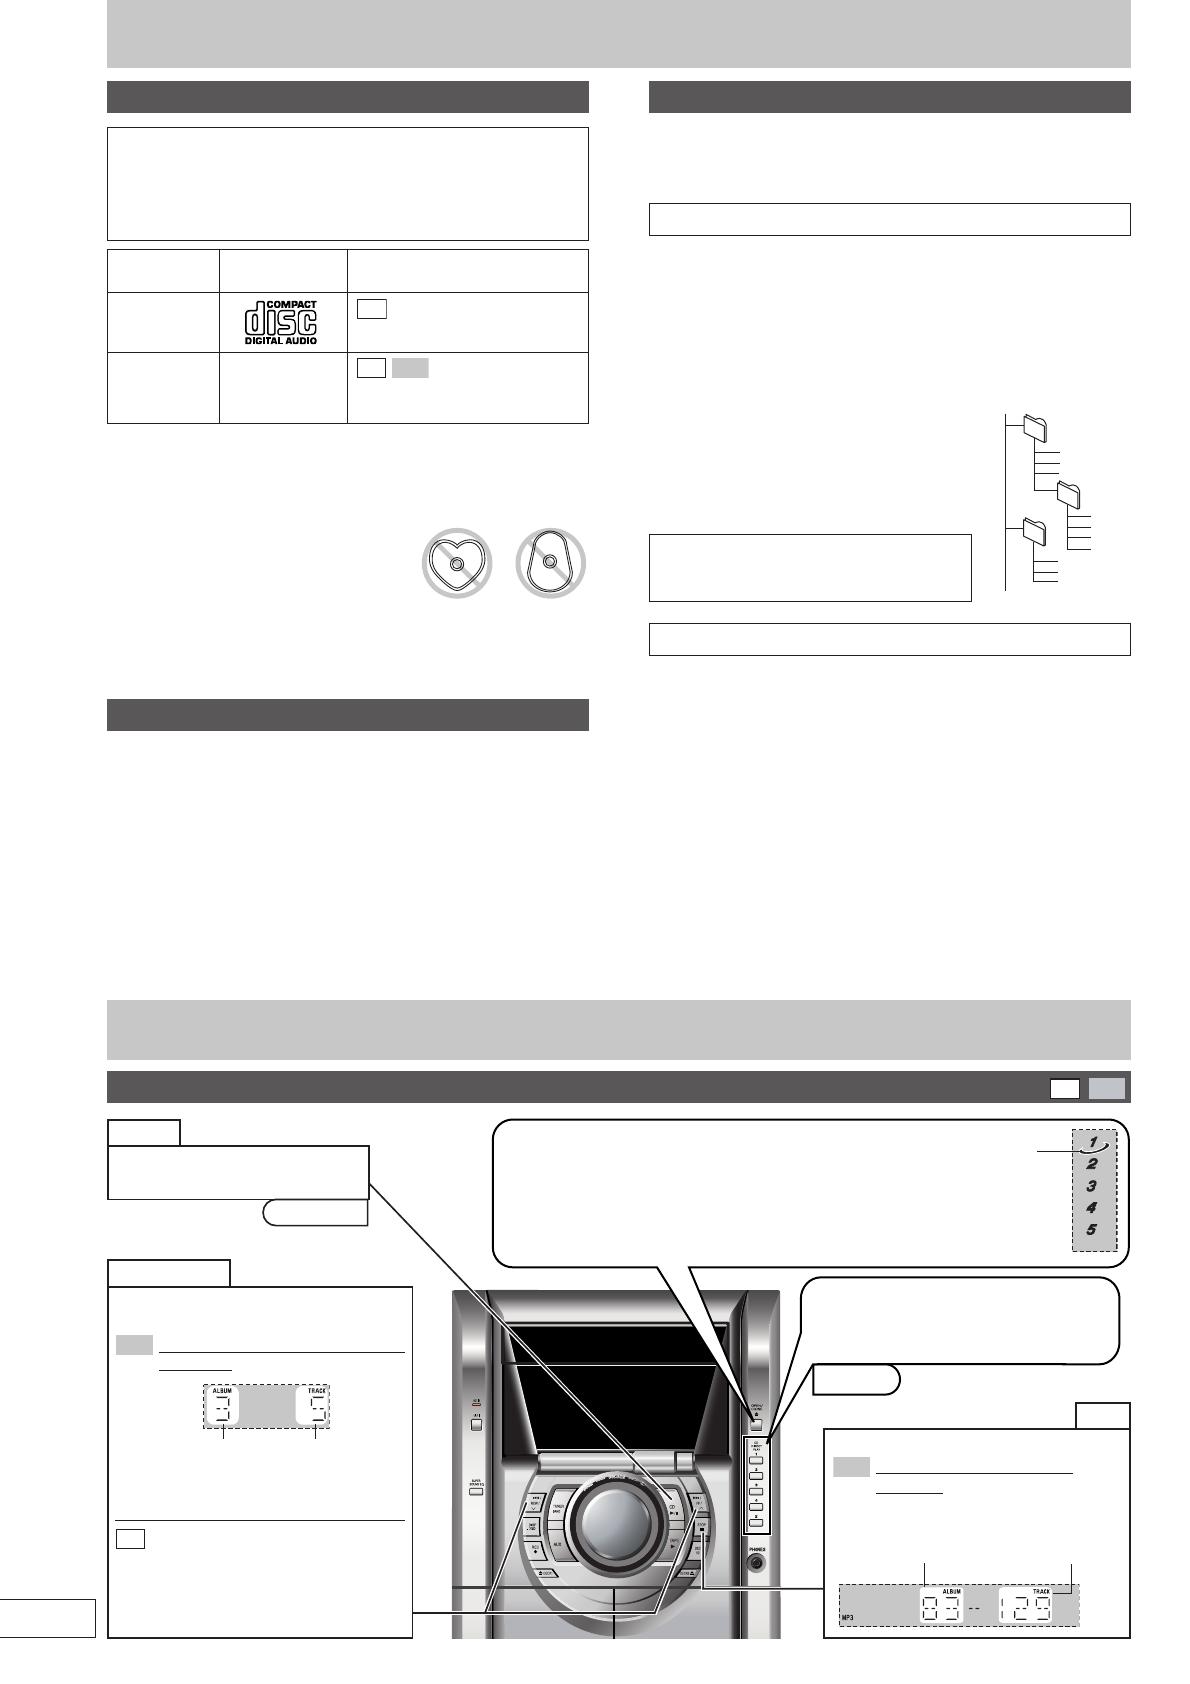
POWER
1 Press [c, OPEN/CLOSE] to open the tray.
The unit comes on.
Load discs with label facing up.
To load discs in other trays, press [1]–[5] to select the
tray, then press [c, OPEN/CLOSE].
2 Press [c, OPEN/CLOSE] to close the tray.
Discs
Basic play
CD
MP3
Skip/Search
Press [g/REW/3] or [f/FF/4]
to skip.
MP3
Display when skipping in stop mode
(example):
•
During random play (A page 7), you
cannot skip to tracks already played.
CD
Hold down during play or
pause to search.
•
During program play (A page 8), or
random play (A page 7), you can search
only within the track.
Pause
Press [:/J, CD] during play.
Press again to resume play.
[1]–[5]
Press [L
, STOP] during play.
MP3
Display when in the stop mode
(example):
“MP3”: Indicates the disc contains MP3 files
Stop
3 Press [1]–[5] to play the disc.
You can also press [:/J, CD] if the
current disc is your desired disc.
Current disc
indicator
[:/J, CD]
Total number
of tracks
Total number
of albums
Disc type Logo Indication used
in instructions
Audio CD
CD-R/RW –
CD
MP3
(Depending on the
recording format A see above)
This unit can play MP3 and CD-DA (digital audio) format audio
CD-R and CD-RW that have been finalized (a process that enables
CD-R/CD-RW players to play audio CD-R and CD-RW) upon
completion of recording.
It may not be able to play some CD-R or CD-RW due to the
condition of the recording.
Disc selection
This unit can play MP3 files recorded on CD-R/RW with a computer.
Files are treated as tracks and folders are treated as albums.
This unit can access up to 999 tracks, 255 albums and 20 sessions.
When making MP3 files to play on this unit
Disc format
Discs must conform to ISO9660 level 1 or 2 (except for extended
formats).
File format
MP3 files must have the extension “.MP3” or “.mp3”.
To play in a certain order
Prefix the folder and file names with 3-digit
numbers in the order you want to play them.
Files may not be recorded in numbered order if
the prefixes have different numbers of digits. For
example: 1track.mp3, 2track.mp3, 10track.mp3.
However, some writing software may also
cause recording to occur in a different order.
MPEG Layer-3 audio decoding technology
licensed from Fraunhofer IIS and Thomson
multimedia.
Limitations on MP3 play
•
This unit is not compatible with packet-write format.
•
When both MP3 and CD-DA data is recorded on the disc over a
number of sessions:
•
If the first session contains MP3 recordings, the unit will play from
the MP3 made in that session till the session before the first CD-DA
recordings.
•
If the first session contains CD-DA recordings, the unit will play
only the recordings made in that session. The subsequent sessions
will be ignored.
•
Some MP3 may not be played due to the condition of the disc or
recording.
•
Recordings will not necessarily be played in the order you recorded
them.
•
Lower case letters will be displayed as upper case.
MP3 information
CD
Do not:
•
use irregularly shaped discs.
•
attach extra labels and stickers.
•
use discs with labels and stickers that
are coming off or with adhesive exuding
from under labels and stickers.
•
attach scratch proof covers or any other kind of accessory.
•
write anything on the disc.
•
clean discs with liquids. (Wipe with a soft, dry cloth.)
•
use discs printed with label printers available on the market.
To prevent damage
Always observe the following points:
•
Load only 1 disc on the tray.
•
Always stop the changer before loading or changing discs. Do not
change discs while a disc is playing.
•
Set the system on a flat, level surface.
•
Always unload all discs before moving the unit.
Do not:
•
set the unit on top of magazines, inclined surfaces, etc.
•
move the unit while a tray is opening/closing, or when loaded.
•
put anything except a disc in the tray.
•
use cleaning discs or discs which are badly warped or cracked.
•
disconnect the AC power supply cord from the household AC outlet
during disc changing operation.
root
001
002
003
001.mp3
002.mp3
003.mp3
001.mp3
002.mp3
003.mp3
004.mp3
001.mp3
002.mp3
003.mp3
Example:
x
x
x
x
x
x
x
x
x
x
x
x
x
x
x
x
x
x
x
x
x
x
x
x
x
x
x
x
x
x
x
x
x
x
x
x
x
x
x
x
x
x
x
x
x
x
x
x
x
x
x
x
x
x
XXXX XXXX XXXXX XXXX XX
XXXX XXXX XXXXX
XXXX XXXX XXXXX
XXXX XXXX
Note about using a DualDisc
The digital audio content side of a DualDisc does not meet the technical
specifications of the Compact Disc Digital Audio (CD-DA) format so
play may not be possible.
Current trackCurrent album


