Page is loading ...

Eastman Kodak Company
343 State Street
Rochester, NY 14650 U.S.A.
© Kodak, 2010. All rights reserved.
TM: Kodak
6J7418A
CYAN
MAGENTA YELLOW BLACKCYAN
8.5 x 11” Folded
GUIDE COVER-KODAK SCANNERS
FONTS
Whitney K Family
SIZE
P/N SWATCHES
FILE FORMAT
DESIGN/IMPLEMENTATION
DATE
03.05.10
6J7418A
DE MEYER
4 COLOR PROCESS
ARTWORK NAME
PRINTING INFORMATION
0000-000
ECO
LANGUAGES
ILLUSTRATOR CS4
EN
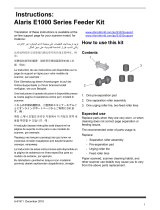
User’s
Maintenance
Guide
i1800 Series Scanners
A-61555
6J7418

A-61555 May 2010 5-1
5 Maintenance
This chapter provides:
• a cleaning frequency chart
• a list of cleaning tools and materials
• a list of supplies, consumables and accessories
• cleaning procedures for the scanner
• replacement procedures for customer-replaceable parts
IMPORTANT: Scanner components marked with a green tab indicate
operator-accessible parts.
Cleaning your scanner and preventative maintenance on a regular
basis is required to ensure the best possible image quality. The
following is a preventative maintenance procedure that is
recommended to prevent costly interruptions during production
scanning. Following this procedure as recommended should take
approximately 5 to 10 minutes.
Some document types generate more paper dust and debris and may
require more frequent cleaning than recommended.
NOTES:
• Some debris from the rubber tires on the feed module and separation
roller is normal. Tire debris does not always mean that the tires are
worn or damaged. After cleaning, inspect the tires for wear and
replace the separation roller or feed module if necessary.
• When cleaning rollers/tires, allow the rollers/tires to dry completely
before scanning.
• Use only the recommended cleaning supplies.
• Do not use canned/compressed air.
• Using unapproved cleaning fluids or solvents may damage the
rubber tires.

5-2 A-61555 May 2010
Cleaning frequency
chart
A recommended cleaning sequence includes vacuuming the scanner
transport, cleaning the residue from the feed module, separation roller
or drive rollers and cleaning the imaging guides.
Use the chart below as a guide to the order and how frequently you
should clean your scanner.
Cleaning tools and
materials
Use only these cleaning tools and materials when performing routine
maintenance on your scanner. Use of any other cleaning materials
could damage your scanner.
• Kodak Digital Science Transport Cleaning Sheets
• Kodak Digital Science Roller Cleaning Pads
• Staticide wipes for Kodak Scanners
• A vacuum cleaner and tools
Procedure Start of
day
Middle of
shift
Start of new
shift
Vacuum output tray and input
areas (input elevator and
transport)
x
Clean all rollers x x
Vacuum transport area x x x
Remove and vacuum under
background strips
x
Run transport cleaning sheet x x
Clean imaging guides - basic x x x
Clean imaging guides - thorough x x

A-61555 May 2010 5-3
Supplies,
consumables and
accessories
Contact your scanner supplier to order supplies.
NOTE: Items and catalog numbers are subject to change.
Ordering parts The following parts can be ordered from Parts Services.
Supplies/Consumables CAT No.
Kodak Feeder Consumables Kit for i600/i1800 Series
Scanners
108 4755
Kodak Feeder Kit for Ultralightweight Paper for i600/i1800
Series Scanners
896 5279
Kodak Extra-Large Feeder Consumables Kit for i600/i1800
Series Scanners
842 6157
Kodak Extra-Extra-Large Feeder Consumables Kit for i600/
i1800 Series Scanners
134 3680
Kodak Imaging Guide Set / for i600/i1800 Series Scanners 197 6703
Kodak Printer Ink Blotters, Front Side for i1800 Series
Scanners
125 7633
Kodak Printer Ink Blotters, Rear Side for i1800 Series
Scanners
114 1472
Enhanced Printer Black Ink Cartridge for Kodak i800/i1800
Series Scanners
818 3386
Enhanced Printer Red Ink Cartridge for Kodak i800/i1800
Series Scanners
159 6832
Kodak Digital Science Transport Cleaning Sheets (qty 50) 169 0783
High Resolution Printer Maintenance Kit 877 6254
High Resolution Printer Black Ink Cartridge for Kodak i1800
Series Scanners and Kodak Imagelink Microimager 70
822 1376
High Resolution Printer Red Ink Cartridge for Kodak i1800
Series Scanners and Kodak Imagelink Microimager 70
145 6532
Kodak Digital Science Roller Cleaning Pads (qty 24) 853 5981
Staticide Wipes for Kodak Scanners (qty 144) 896 5519
Kodak Calibration Targets (qty 5) 127 1436
Black Background (for i1800/i700/i600 Series Scanners) 801 4755
Accessories CAT No.
Kodak White Background Accessory 894 9000
Kodak Manual Feeder for the i1800 Series Scanners 874 1894
Kodak High Resolution Printer Accessory 815 0237
Parts Part No.
Exit deflector
3E9575
26 in. document extenders (qty 1 per box)
5E4754
30 in. document extenders (qty 1 per box)
9E3216
34 in. document extenders (qty 1 per box)
9E5277

5-4 A-61555 May 2010
Cleaning procedures Follow the cleaning procedure below to ensure the best scanner
performance and image quality.
Cleaning the OCP
touchscreen
The touchscreen requires very little maintenance. However,
periodically, it is recommended that you use a Staticide wipe to clean
the screen and dry it with a lint free cloth.
Vacuuming the output tray
and input elevator
1. Power down the scanner.
2. Remove the output tray.
3. Thoroughly vacuum the output tray area and the input elevator area.

A-61555 May 2010 5-5
Cleaning the rollers Cleaning the rollers includes all of the rollers in the transport area, the
separation roller tires and the feed module tires.
1. Pull up on the pod release lever and open the pod.
2. Manually rotate and wipe the rollers with a roller cleaning pad.
IMPORTANT: The roller cleaning pad contains sodium lauryl ether
sulfate and sodium silicate which can cause eye
irritation. Refer to the MSDS for more information.
3. Dry the rollers with a lint-free cloth.

5-6 A-61555 May 2010
Cleaning the separation roller tires
4. Pull the separation pad holder forward and remove the separation
roller.
5. Manually rotate and wipe the separation roller tires with a roller
cleaning pad. For best results wipe parallel to the ribs in order to
remove any residue between the ribs.
6. Inspect the tires. If the tires show signs of wear or damage, replace
the separation roller. See “Replacement procedures” later in this
chapter.
7. Reinstall the separation roller by aligning the slots on the separation
roller with the holders.
8. Close the pod.

A-61555 May 2010 5-7
Cleaning the feed module tires
9. Lift up the printer access cover.
10.Push the release lever down (located underneath the printer access
cover) to release and remove the feed module.

5-8 A-61555 May 2010
11.Manually rotate and wipe the feed module tires with a roller cleaning
pad. For best results wipe parallel to the ribs in order to remove any
residue between the ribs.
12.Inspect the tires. If the tires show signs of wear or damage, replace
the feed module tires. See “Replacement procedures” later in this
chapter.
13.Reinstall the feed module by aligning the pins and fitting it into
position. Pull up on the release lever to lock it into place. Verify that
the feed module is securely in place and moves freely after you
install it.
14.Close the printer access cover.
Align
these
areas

A-61555 May 2010 5-9
Vacuuming the transport
area
1. Open the pod.
2. Thoroughly vacuum the entire transport area, paying particular
attention to these areas:
Vacuuming under the
background strips
1. Using the green tabs pull off the upper and lower background strips
and set them aside.
2. Vacuum the areas where the background strips are adhered to.
3. Reinstall the upper and lower background strips.
the edges of the transport the reflective tape near the
front of the transport
the reflective tape near the
front of the pod
the three multifeed sensors at the base
of the transport and the pod

5-10 A-61555 May 2010
Cleaning the imaging
guides — basic cleaning
1. Open the pod.
2. Wipe the upper and lower imaging guides with a Staticide wipe.
IMPORTANT: Staticide wipes contain isopropanol which can cause eye
irritation and dry skin. Wash your hands with soap and
water after performing maintenance procedures. Refer to
the MSDS for more information.
3. Wipe the upper and lower imaging guides again with an almost-dry
Staticide wipe to remove any streaks.
4. When finished, close the pod.

A-61555 May 2010 5-11
Cleaning the imaging
guides — thorough
cleaning
Thorough cleaning of the imaging guides is recommended at the start
of the day and beginning of each shift.
NOTE: Hold the imaging guides at the green tabs to avoid getting
fingerprints on the imaging guides during the cleaning
procedure.
Upper imaging guide
1. Open the pod.
2. Turn the screw on each end of the upper imaging guide and remove
it from its position.
3. Clean the imaging guide thoroughly with a Staticide wipe.
4. Wipe the imaging guide again with an almost-dry Staticide wipe to
remove any streaks.
IMPORTANT: There is no cover glass between the upper lamps. Do not
insert any objects into the area between the upper lamps,
as you may damage the reflective mirrors in the scan
module.
5. Reinstall the upper imaging guide.

5-12 A-61555 May 2010
Lower imaging guide
1. Turn the screw on each end of the lower imaging guide, remove it
from its position and set it aside.
2. Carefully vacuum the areas between the lamps, then use a Staticide
wipe to thoroughly clean the glass plate between the lamps.
3. Clean the lower imaging guide thoroughly with a Staticide wipe.
4. Wipe the imaging guide again with an almost-dry Staticide wipe to
remove any streaks.
5. Reinstall the lower imaging guide.
6. Close the pod.

A-61555 May 2010 5-13
7. When finished with all cleaning procedures, reinstall the output tray.
8. Turn on the scanner.
Running a transport
cleaning sheet
The transport should be cleaned with a Transport Cleaning Sheet fed
several times.
1. Remove the wrapping from the Transport Cleaning Sheet.
2. Adjust the side guides to the widest position.
3. Place the transport cleaning sheet in the center of the input elevator
in landscape orientation with the adhesive side up.
4. Select Count Only Mode from the Idle screen.

5-14 A-61555 May 2010
The Count Only screen will be displayed.
5. Touch Scan.
6. Remove the transport cleaning sheet from the output tray and place
it in the center of the input elevator in landscape orientation with the
adhesive side down and touch Scan.
7. When finished, touch End Job.
NOTE: When the transport sheet gets dirty, discard it and use a new
one.
Final cleaning steps When finished running the transport cleaning sheet:
1. Open the pod.
2. Wipe the exposed side of the upper and lower imaging guides with a
lint-free cloth.
3. Close the pod and scan a test image to ensure image quality.

A-61555 May 2010 5-15
Replacement
procedures
This section provides procedures for replacing the following parts. Use
the list below as a guideline for frequency of replacement.
• Feed module tires and separation roller tires — tire life will vary
depending upon paper types, environment and cleanliness. Nominal
tire life is approximately 600,000 documents; results will vary.
Degradation of feeder performance, multiple feeds, stoppages, etc.
indicate a need to change tires. Change all the tires on the feed
module and separation roller at the same time.
• Feed module and separation roller — it is recommended that you
install a new feed module and separation roller approximately every
4th tire change. Install a new feed module and separation roller at the
same time.
• Pre-separation pad — it is recommended that you change the pre-
separation pad at least as often as you change the feed module/
separation roller tires.
• Imaging guides — replace when the imaging guides are heavily
scratched and defects show in the image.
Replacing the feed module
or feed module tires
1. Remove the output tray.
2. Lift up the printer access cover.
3. Open the pod.

5-16 A-61555 May 2010
4. Push down on the release lever (located underneath the printer
access cover) to release and remove the feed module.
5. If you are just replacing the feed module, do the following. If you are
replacing the tires, go to Step 6.
• Insert the new feed module by aligning the pins, fitting it into
position and pulling up on the release lever to lock it into place.
Verify that the feed module is securely in place and moves freely
after you install it.
• Close the pod and the printer access cover.
• Reinstall the output tray.
Align
these
areas

A-61555 May 2010 5-17
If you want to replace the tires, proceed as follows:
6. With one hand, press the locking tabs (one on each side) while
holding the bottom housing with the other hand, pull the upper
housing up and away from the rollers.
7. Remove one core assembly.
8. Replace each tire by sliding the tire off the core.
9. Install each new tire by gently pulling it over the core. The tires do
not need to be installed in any specific orientation.
IMPORTANT:Do not overstretch the tire; it may tear.
10.Replace the core assembly in the lower feed module housing.
11.Repeat the replacement procedure outlined above for the other core
assembly.
Locking tab

5-18 A-61555 May 2010
12.Align the tabs on the upper housing with the slots on the lower
housing.
13.Press the upper and lower housings together until they snap into
place.
14.Reinstall the feed module by aligning the pins, fitting it into position
and pulling up on the release lever to lock it into place. Verify that
the feed module is securely in place and moves freely after you
install it.
15.Close the pod.
16.Close the printer access cover.
17.Reinstall the output tray.
Locking tab
Align
these
areas

A-61555 May 2010 5-19
Replacing the separation
roller or separation roller
tires
1. Open the pod.
2. Pull the separation pad holder forward and remove the separation
roller.
If you want to replace the separation roller, do Steps 3 and 4. If you
want to replace the separation roller tires, go to Step 5.
3. Insert the new separation roller. Be sure to line up the slots on the
separation roller with the holders.
4. Push the separation roller holder back in place and close the pod.
To replace the tires:
5. Replace each tire by sliding the tire off the core.
6. Install each new tire by gently pulling it over the core.
IMPORTANT:Do not overstretch the tire; it may tear.
7. Reinstall the separation roller. Be sure to line up the slots on the
separation roller with the holders.
8. Push the separation roller holder back in place and close the pod.
/