CommScope FACT Installation Instructions Manual

Type
Installation Instructions Manual

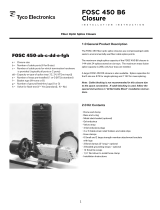
CommScope FACT is a versatile fiber optic cable termination unit designed to accommodate 1x fiber cable with an outer diameter between Ø 8.5 mm - Ø 15 mm or 1x flex tube Ø 12 mm. It provides a secure and efficient way to terminate and manage fiber optic cables, ensuring reliable and high-performance connectivity. With its ability to handle various cable types and sizes, the CommScope FACT offers flexibility and adaptability for a wide range of applications, including data centers, enterprise networks, and telecommunications installations.

CommScope FACT is a versatile fiber optic cable termination unit designed to accommodate 1x fiber cable with an outer diameter between Ø 8.5 mm - Ø 15 mm or 1x flex tube Ø 12 mm. It provides a secure and efficient way to terminate and manage fiber optic cables, ensuring reliable and high-performance connectivity. With its ability to handle various cable types and sizes, the CommScope FACT offers flexibility and adaptability for a wide range of applications, including data centers, enterprise networks, and telecommunications installations.

860642215
Rev. A
Page 1 of 9
© 2018 CommScope, Inc. All Rights Reserved
Contents
Installation Instructions
FACT CABLE TERMINATION UNIT (FACT-ACCCTULLT)
TC-40112-IP-EN
Rev A, March 2018
www.commscope.com
1. General product information
The loose tube cable termination unit is designed to accomodate 1x ber cable with an outer cable diameter be-
tween Ø 8.5 mm - Ø 15 mm or 1x ex tube Ø 12 mm.
The cable needs to be exible enough to allow a bend radius less than 75 mm for IFC cable strength members
with a diameter less than Ø 2.5 mm.
The kit contains all parts to install 1 piece of ber cable / ex tube on 1 ,2 or 3 FACT elements.
2. Warnings and caution
Fiber optic cables may be damaged if bent or curved to a radius that is less than the recommended minimum
bend radius. Always observe the recommended bend radius limit when installing ber optic cables and patch
cords.
Exposure to laser radiation can seriously damage the retina of the eye. Do not look into the ends of any optical
ber. Do not assume the laser power is turned off or that the ber is disconnected at the other end.
Pay attention to the routing of the patch cords. These should move/hang freely, where they leave the bend control.
If you see that there is tension occuring on the patch cords, please reroute these.
1. General product information ................................................ 1
2. Warnings and caution ............................................................ 1
3. Product image......................................................................... 1
4. Kit content ............................................................................... 2
5. Cable preparation ................................................................... 2
5.1. General cable preparation .......................................................................2
5.2. Cable preparation without central strength member........................ 3
5.3. Cable preparation with central strength member .............................. 3
5.4. Loose tube Ø < 2,5 mm handling.......................................................... 4
5.5. 1x Flex tube Ø 12 mm ............................................................................... 4
5.6. Loose tube Ø > 2,5 mm and possibility to divide bare bers .........4
6. Routing and termination on FACT-xESPL (splice element) 5
6.1. Termination................................................................................................... 5
6.2. Inside routing and termination................................................................ 6
7. Routing and termination on FACT-xExHP (splice/patch
element) ................................................................................... 7
7.1. Termination................................................................................................... 7
7.2. Inside routing and termination................................................................ 7
8. Trademarks...............................................................................9
9. Contact Information................................................................9
Page 2 of 9
© 2018 CommScope, Inc. All Rights Reserved
3. Product image
4. Kit content
1x Cable termination unit large
1x Cover for ex tube Ø 12 mm
1x Cable termination cover
12x Transportation tubes 460 mm
8x Low tube holders
4x Tube holder
2x Foam
2x Tie wrap black
1x Allen key
Note: Check kit content and length of tubes before
installation.
For FACT-xExHP 460 mm is ok, cut these to 430 mm
for FACT-xESPL!
Example when installed.
Flex tube
Cover
Fopt tube
Cable Ø < 15 mm and
bend radius < 75 mm
Foam +
Tie Wraps
Fopt tube
Strength
member
Page 3 of 9
© 2018 CommScope, Inc. All Rights Reserved
5. Cable preparation
5.1. General cable preparation
5.1.1. Mark the stripping point on the cable jacket. Make
sure that you have at least 2 meter of cable left.
5.1.2. Cut the cable jacket at the marked point and
approx. 150 mm from the cable end to get access to the rip
cord.
5.1.3. Use the rip cord to strip off the cable jacket.
5.1.4. Separate the aramid yarns from the loose tubes.
Apply 2 pieces of foam.
5.2. Cable preparation without central
strength member
5.2.1. Fix the cable with 2 tie wraps. Route the aramid
yarns to the backside of the bracket.
5.2.2. Make several turns around the strength member
connector to x the aramid yarns, by using the allen key.
5.3. Cable preparation with central
strength member
5.3.1. Cut the strength member on length of+/- 55 mm.
Page 4 of 9
© 2018 CommScope, Inc. All Rights Reserved
5.3.2. Feed the strength member to the backside.
Fix the calbe with 2 tie wraps and cut them.
Fix the strength member by using the allen key.
5.4. Loose tube Ø < 2,5 mm handling
5.4.1. If loose tubes are Ø 2-2,5 mm, guide the tubes
one by one into the tube holder of the cable termination
unit.
5.4.2. If loose tube are < Ø 2 mm, guide them via the side
slit into the tube holder of the cable termination unit.
5.5. 1x ex tube Ø 12 mm
5.5.1. Install the Ø 12 mm ex tube with special ex cover
as shown in the picture.
5.5.2. Feed all loose tubes through, as shown.
5.6. Loose tube Ø > 2,5 mm and
possibility to divide bare bers
5.6.1. For loose tubes Ø > 2,5 mm and dividing bare
bers, secure the cable and ex tube in the rack where the
FACT is mounted. Feed the loose tubes into the ex. Mark
the loose tubes at 2 cm. Strip the loose tube and clean the
bers.
5.6.2. Example of dividing bare bers to different trans-
portation tubes.
2 cm
Page 5 of 9
© 2018 CommScope, Inc. All Rights Reserved
6. Routing and termination on
FACT-xESPL (splice element)
6.1. Termination
6.1.1. Slide on the CTU bracket. Mark the loose tubes at 4
cm of the tube holder.
6.1.2. Strip the loose tubes at the marked point and
clean the bers.
6.1.5. Feed the bers into the transportation tubes.
Note: These transportation tubes have to be cut to 430mm
(for FACT-xESPL) rst!
6.1.6. Slide the transportation tube over the loose tube
into the tube holder. Make sure the transportation tube is
pushed to the end of the tube holder.
6.1.7. Slide the other side of the transportation tubes in
the 2nd tube holder. Avoid crossings. Make sure that the
transportation tubes are pushed in, until the end.
6.1.8. Open the lids. Push / slide all transportation tubes
one by one into the tray.
Page 6 of 9
© 2018 CommScope, Inc. All Rights Reserved
6.1.9. Push and click the tube holder into the tray. Route
the transtportation tubes into the FACT element.
6.1.10. If needed, repeat previous step for transportation
tubes 5 to 8.
6.2. Inside routing and termination
6.2.1. Overview
6.2.2. Route the ber throughout the groove plate to the
dedicated splice trays.
6.12. Pay attention to store the ber correctly. A properly
stored ber doesn’t touch the bend radius limiter on inner or
outer side and can move freely.
Page 7 of 9
© 2018 CommScope, Inc. All Rights Reserved
7. Routing and termination on
FACT-xExHP (splice/patch element)
7.1. Termination
7.1.1. Slide on the CTU bracket. Mark the loose tubes at
4 cm from the CTU bracket.
7.1.2. Strip the loose tubes at the marked point and
clean the bers.
7.1.3. Feed the bers into the -correct length-
transportation tubes.
7.1.4. Feed the transportation tube into the tube holder.
Make sure that the transportation tube is pushed in, until the
end.
7.2. Inside routing and termination
7.2.1. Remove the transparent cover of the splice island.
Remove the velcro, if needed.
7.2.2. Open the lids (front and back).
Page 8 of 9
© 2018 CommScope, Inc. All Rights Reserved
7.2.3. Place the rst tube in the low tube holder, in the
left position (when splicing on the left side)
7.2.4. Mount the tube holder in the tray. A second tube
holder can be mounted, if needed.
7.2.5. Place the additional tube, if needed.
7.2.5. Guide the tubes through the channels and close the
lids.
7.2.6. Guide the bers into the splice island.
7.2.7. Make sure that the bers follow the correct path
(as shown).
7.2.8. Take the bers out of the splice island, splice them
and reroute them in the splice island.
7.2.9. Put the transparent cover back on the splice island.
Page 9 of 9
© 2018 CommScope, Inc. All Rights Reserved
7.2.10. Put the velcro back (if it was removed) and close
the drawer later.
8. Trademarks
All trademarks identied by ® or ™ are registered
trademarks or trademarks, respectively, of CommScope,
Inc. This document is for planning purposes only and is
not intended to modify or supplement any specications
or warranties relating to CommScope products or services.
CommScope is committed to the highest standards of
business integrity and environmental sustainability, with a
number of CommScope’s facilities across the globe certied
in accordance with international standards, including ISO
9001, TL 9000, and ISO 14001.
Further information regarding CommScope’s commitment
can be found at
www.commscope.com/About-Us/Corporate-Responsibility-
and-Sustainability.
9. Contact information
Visit our website or contact your local CommScope
representative for more information.
For technical assistance, customer service, or to report any
missing/damaged parts, visit us at:
http://www.commscope.com/SupportCenter
This product may be covered by one or more U.S. patents or
their foreign equivalents.
For patents, see www.cs-pat.com
  • Page 1 1
  • Page 2 2
  • Page 3 3
  • Page 4 4
  • Page 5 5
  • Page 6 6
  • Page 7 7
  • Page 8 8
  • Page 9 9

CommScope FACT Installation Instructions Manual

Type
Installation Instructions Manual

CommScope FACT is a versatile fiber optic cable termination unit designed to accommodate 1x fiber cable with an outer diameter between Ø 8.5 mm - Ø 15 mm or 1x flex tube Ø 12 mm. It provides a secure and efficient way to terminate and manage fiber optic cables, ensuring reliable and high-performance connectivity. With its ability to handle various cable types and sizes, the CommScope FACT offers flexibility and adaptability for a wide range of applications, including data centers, enterprise networks, and telecommunications installations.

Ask a question and I''ll find the answer in the document

Finding information in a document is now easier with AI