Easy Elegance
™
Ceiling Panel
Installation Instructions
RC3223-320
DESIGN CONSIDERATIONS
• Clearance: Easy Elegance
™
ceiling panels are a drop/suspended ceiling, using Armstrong Prelude
®
15/16-in Grid. You will need to have
approximately 6-in of clearance above the grid face to install deep coffer panels and 3-in above shallow coffer panels and only 2.5-in
above for flat panels.
• Lighting: Easy Elegance panels work with most modern light fixtures. Leave a 1/8-in gap between recessed light housing and panel.
Additionally, the deep coffer panel is 2.5-in tall, so light fixtures may require a height extension component to provide clearance above the
panel when installed. Consult local electrical code or lighting fixture manufacturer for all light fixture requirements.
•
Heat Source: Do not install Easy Elegance products in direct contact with open flame or a heat source that can exceed 130 degrees
fahrenheit. Most recessed lighting options will meet this requirement, especially modern CFL (Compact Fluorescent Lighting) and
LED lights.
• Cutting Panels for Border/Perimeter: Cutting coffer panels is not recommended. We recommend using flat panels for all border cuts or
finishing off your perimeter with drywall using our MBAC and DWAC clips installed on your 15/16-in grid.
• Directional Installation: Flat panels must be installed directionally. Arrows on the back of the panels will show the proper orientation.
Installation Instructions
(RESIDENTIAL USE ONLY)
WARNING: Panels should not be exposed to temperatures in excess of 130° F.
MATERIALS AND TOOLS
Materials Needed:
• 12-gauge Hanger Wires and Wire Fasteners or QuickHang
™
hooks and brackets
• Prelude
®
Main Beams and Coordinating Tees
• UHDC Universal Clear Hold Down Clips
• Easy Elegance
™
Panels
• Wall Moldings (7800R)
• Main Beam Attachment Clips (MBAC) and Drywall Attachment Clips (DWAC)—for use with drywall perimeters
Tools Needed:
• Safety Glasses • Utility Knife
• Cut-resistant Gloves • Metal Snips
• Chalk Line • Carpenter’s Level or Laser Level
• Measuring Tape • Drill with Driver bit
• Hammer • Ball of String
• Pencil • Clamps (4–6)

STEP 1: PLAN LAYOUT
Sample Room Panel Layout
See illustrations 1 & 6
Start by determining the size of your border panels. Armstrong Ceilings
recommends border panels are 1-ft or larger for a clean visual in your space.
To achieve this visual, you will need to measure the room dimensions and
determine how many full size panels will fit along the wall, starting with your
main beam direction (mains always run opposite of the joists). This can be
calculated by sectioning the length of your wall into 2-ft increments (full size
panels) until you have a remainder less than 2-ft. Next, take your remainder
and add 2-ft (one full size panel) and divide by 2 for equal panels on opposite
sides. This number indicates your border panel size for your first wall. Repeat
this process to determine the size of the border panel for the adjacent wall.
EXAMPLE: The length of Wall A (illus. 1) is 15-ft 7-in. Section this wall into
2-ft increments, finding a remainder of 1-ft 7-in. Now add 2-ft for a total of
3-ft 7-in and divide by 2, to get 1-ft 9-1/2-in. This is the size of the border
panel for Wall A.
The length for Wall B is 11-ft 3-in. Section this wall into 2-ft increments,
finding a remainder of 1-ft 3-in. Now add 2-ft for a total of 3-ft 3-in, and
divide by 2, to get 1-ft 7-1/2-in. This is the size of the border panel for
Wall B.
Once you know the border panel size for the adjacent wall, locate the
placement of the first main beam. This will be 2-ft plus the border panel size
from the wall. For Wall B, our border panel size was 1-ft 7-1/2-in, plus 2-ft
for a total of 3-ft 7-1/2-in. See illustration 1
The remainder of the main beams are installed on 4-ft centers from the first
main beam.
Install 4-ft cross tees as shown in illustration 1, then install 2-ft cross tees as
shown in illustration 6. See illustrations 1 & 6
STEP 2: INSTALL WALL MOLDING
See illustration 2
• Mark height desired for new ceiling (A). REMINDER: You need 6-in of
clearance above the face of your wall molding to install deep coffer
panels and 3-in for shallow coffer panels and only
2.5-in above for flat panels.
• Add height of Wall Molding and mark a level line around 3 walls (B).
• Snap a connecting chalk line on the 4th wall.
• Nail Wall Molding to the wall studs (C). Use anchors as appropriate
for wall type.
• If nailing molding directly to wall is not possible (for example, a solid
concrete or stone wall), hang a section of main beam next to the wall
as a substitute for regular wall molding (D).
Easy Elegance
™
Ceiling Panel
Installation Instructions
RC3223-320
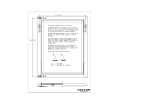
Grid layout, example: main beams, 4-ft tees and hanger wire.
1
15' 7"
1' 9 -1/2"
Main Beams
3' 7-1/2"
Rows of 4-ft Cross Tees
Snap chalk lines for wire fasteners and secure hanger wires every 4-ft along chalk lines
11' 3"
Wall A
Wall B
6
11' 3"
Rows of 2-ft
Cross Tees
15' 7"
3' 7-1/2"
1' 9-1/ 2"
Example of complete installed grid system.
B
A
C
D
2

STEP 3: INSTALL SUSPENSION GRID
Install fasteners and Hanger Wires
See illustration 3
• Snap chalk lines for Main Beams 4-ft apart.
• Screw in Wire Fasteners 4-ft apart (B).
• Wrap Hanger Wire securely around itself 3 times (C).
Pre-bend hanger wires
See illustration 3
• Measure up 7/8-in from the bottom of the molding. Drive nail into wall joist
just above molding.
• Do the same on the other side of the room. Stretch a string from nail to
nail along a row of wires (A).
• Swing hanger wire over to string and bend each one at 90° where they
touch the string (B). Stretch additional strings to prebend other hanger
wires, to help level entire ceiling.
• Remove Leveling Strings after prebending wires.
NOTE: For a DIY-friendly residential installation, try QuickHang
™
hooks and
brackets (see Addendum for instructions).
Trim the main beam
See illustration 4
• Refer to your room layout. Trim end of first Main Beam (A) so that a Cross
Tee slot on the Main Beam is the border panel distance from the wall (B).
(In our example in Illustration 1, this is 3-ft 7-1/2-in from wall.)
Hang the first main beam
See illustration 6
• Stretch a guide string from one end of the room to the other 1/2-in past
the center of the first main and below the bottom of the
wall molding.
EXAMPLE: If the first main should be 3-ft 7-1/2-in from the wall, measure
out 3-ft 8-in from the wall at each end of the room and stretch the string
from one end of the room to the other.
• Place the cut end of the main on the wall molding and insert a hanger wire
into a hole in the main directly under the wire fastener so the wire is plumb
and wrap the wire around itself at least three times.
• Insert any other wires into the main and wrap the wire around itself at least
three times.
Cut Border Cross Tees
See illustration 5
• Find the location of the first border cross tee. (Border panel distance from
end of main beam).
• Place the end of the white face of the cross tee against the edge of the
wall molding at the side and cut the cross tee where it crosses the guide
string (B).
Easy Elegance
™
Ceiling Panel
Installation Instructions
RC3223-320
Wall molding outside corner
Wall molding inside corner
3
A
4
Step 1
Step 2
Level string
B
90 °
A
Joist

Easy Elegance
™
Ceiling Panel
Installation Instructions
• Insert the uncut end of the cross tee into the main and rest the cut end of
the tee on the molding (A-1, Illus. 7).
• The far edge of the main should be directly above the string.
• If you are using hook end cross tees, measure from the wall to the string
and cut the cross tee to that length. The string will then line up with the
near edge of the main.
• Cut the second cross tee to length and insert it.
• Temporarily fasten the tees to the wall molding so they do not move
using clamp.
•
Illustration 6 shows an example of a completely installed grid system.
Squaring the Grid
See illustration 5
• Now install the first section of the second row of mains after cutting off
one end so a cross tee slot is the border panel distance from the end.
• Install two four foot cross tees between the two mains in line with the first
two border tees (C).
• Measure across the diagonals of the 2-ft x 4-ft opening. The
measurements will be the same if the grid is square. If the measurements
are not the same, shorten one of the mains until the diagonals are equal.
Install Grid
See illustration 7
• Complete the rows of mains joining the ends.
• Finish cutting border cross tees between the wall and the first row
of mains.
• Use the left-over ends of the mains to start other rows of mains if your
room requires them.
• If you have additional rows of mains to install, stretch a second string
from one side of the room to the other aligning it with the first 4 foot cross
tee as shown (D). See illustration 5
• This second string will be your guide for cutting the remaining rows of
mains. Just measure from the end wall to the string to determine the
distance for the first cross tee slot you will use.
• You must line up cross tee slots for the grid to be square!
• Measure and cut border cross tees at the other side of the room.
STEP 4: INSTALL PANELS
See illustration 8
• Cut panels that will integrate with lighting; leave 1/8-in gap
between panel and recessed lighting.
• Install lights (need height extension when using deep coffer panels).
– 2 1/2-in above grid line for deep coffer panels
– 7/16-in above grid line for shallow coffer panels
RC3223-320
Guide String
2nd Guide String
Check Diagonal Measurements
B
D
C
A
Border Cross
Tees cut and
clipped to
molding so
Main Beam
aligns with
string
Section of 1st
Main Beam
Full 4-ft
Cross Tees
Section of 2nd
Main Beam
5
6
11' 3"
Rows of 2-ft
Cross Tees
15' 7"
3' 7-1/2"
1' 9-1/ 2"
A-1
A
7
B
Wall Molding
Border Panel Distance
Set trimmed end
of Main Beam on
Wall Molding
Cross Tee Slot

Easy Elegance
™
Ceiling Panel
Installation Instructions
RC3223-320
• Cut flat panels, using a sharp mat knife.
• Install UHDC Universal Hold Down Clips as necessary to keep panels
from shifting (possible near doors/windows).
ADDENDUM
QuickHang
™
Hardware
FOR RESIDENTIAL USE ONLY:
NOTE: The QuickHang
™
hardware is designed to work with solid wood
and engineered wood joists in residential ceiling applications. QuickHang
hardware allows for ceiling drops from 2.5" to 6" with 6" grid hook kits
or 2.5" to 12" with 12" grid hook kits, below the bottom of the joists.
QuickHang hardware is not for use on finished drywall ceilings.
Safety Tips
• Do not cut QuickHang hooks. If the hook needs to be shortened due to an
obstruction, the top portion can be bent by hand or with pliers.
TIPS: Measure and mark your joists prior to installation. Use a string line or
chalk line to align marks perpendicular to joists across the room.
How to Install the QuickHang
™
Hooks and Brackets
• Hang your string line or snap your chalk line to position your main beams
4' apart.
• Make a 1" long vertical mark up the side of each joist where a bracket will
be located (A).
• Use the center hole in the brackets to line the brackets up with your
marks (B).
• Hammer in the 2 tabs for a temporary hold (C).
• Nail the bracket to the joist through the two openings above the hammer
tabs with the nails included in the kit (D).
– OPTIONAL: You can also secure the bracket to the joist with a single
#5 Wood Screw through the center hole (screws not included in kit
hardware).
• With the bracket securely attached to the joist, insert the grid hook using
the diamond-shaped holes in the brackets. Thread the small end of the
hook, from the back, through the lower hole (E). Push the hook up and
rotate to thread through the upper hole, squeezing the spring tabs to allow
the wire to go through (F).
IMPORTANT: Do not cut QuickHang hooks. If the hook needs to be shortened
due to an obstruction, the top portion can be bent by hand or with pliers.
• Turn all hooks in the same direction, parallel to the joists.
• Set the hooks at about the same height; the bottom of the hooks should
align with the top of the wall molding.
• To adjust the height of the hook, squeeze the upper and lower spring tabs
while lifting or lowering the hook.
NOTE: You will do final leveling once all of the grid is installed.
7800 Wall Molding
Main Beam
Cross Tee
Cross Tee
Easy Elegance
™
Panel 1280BXA
12 ga Hanger Wire to Structure
Flat Panels
Flat Panels
Main Beam
7800 Wall Molding
Main Beam
12 ga Hanger Wire to Structure
Easy Elegance
Panel 1280BXA
8
Insert
grid hook
Main beam
Existing
cross tee
Insert to
the RIGHT side
of existing tee
Align
center
of bracket
with vertical
mark
1" long
vertical
mark
Bracket
Hammer
tabs
Joist
C
Insert
grid hook
Main beam
Existing
cross tee
Insert to
the RIGHT side
of existing tee
Align
center
of bracket
with vertical
mark
1" long
vertical
mark
Bracket
Hammer
tabs
Joist
A
Insert
grid hook
Main beam
Existing
cross tee
Insert to
the RIGHT side
of existing tee
Align
center
of bracket
with vertical
mark
1" long
vertical
mark
Bracket
Hammer
tabs
Joist
B
Insert
grid hook
Main beam
Existing
cross tee
Insert to
the RIGHT side
of existing tee
Align
center
of bracket
with vertical
mark
1" long
vertical
mark
Bracket
Hammer
tabs
Joist
E
Insert
grid hook
Main beam
Existing
cross tee
Insert to
the RIGHT side
of existing tee
Align
center
of bracket
with vertical
mark
1" long
vertical
mark
Bracket
Hammer
tabs
Joist
D
Insert
grid hook
Main beam
Existing
cross tee
Insert to
the RIGHT side
of existing tee
Align
center
of bracket
with vertical
mark
1" long
vertical
mark
Bracket
Hammer
tabs
Joist
F

Easy Elegance
™
Ceiling Panel
Installation Instructions
RC3223-320
Easy Elegance
™
FAQ’s
Can I paint Armstrong
®
Easy Elegance PVC panels?
• All Armstrong Easy Elegance products can be painted with latex paint before installation. Make sure that your ceiling panels are
clean and dry, and experiment on a sample with your paint of choice before painting the ceiling in its entirety. Field painting will
void the warranty.
Are Armstrong Easy Elegance panels fire rated?
• All Armstrong Easy Elegance products meet residential building codes for safety. While we do not recommend for commercial use,
local code officials can provide guidance.
Are your ceiling tiles moisture resistant?
• Our rigid PVC ceiling tiles are extremely moisture resistant. In fact, they are unaffected by humidity, and will not absorb water at all.
They are moisture, mold and mildew resistant.
Can I mount Armstrong Easy Elegance Panels directly to my ceiling?
• Our lightweight designs are made exclusively for grid mount/drop ceiling applications.
Will air flow cause my tiles to lift out of the ceiling grid?
• For normal installations, most designs do not require hold down clips. Hold down clips are only required in extreme conditions. If there is
a rapid change in the air pressure above and below the tiles, they may move. You can purchase hold down clips (Item #UHDC) if you feel
that you will need them for your ceiling tile installation.
Where can I find black grid?
• You can purchase a 24-in x 24-in black Suspended Ceiling Installation Kit (model #6362BL). Each kit includes everything you need to
install 64-sq ft of panels.
How do I maintain my panels?
• Simply wipe clean with a damp cloth.
For additional information on installing Easy Elegance ceilings, including special installation tips, please visit our website at ceilings.
com or call customer service at 1 877 ARMSTRONG (276-7876).
For warranty information, please visit ceilings.com
-
 1
1
-
 2
2
-
 3
3
-
 4
4
-
 5
5
-
 6
6
Armstrong Ceilings 1283 Operating instructions
- Type
- Operating instructions
Ask a question and I''ll find the answer in the document
Finding information in a document is now easier with AI
Related papers
-
Armstrong Ceilings 1278 Installation guide
-
Armstrong BPSC942B Operating instructions
-
Armstrong Ceilings 266B Installation guide
-
Armstrong Ceilings 9769 Installation guide
-
Armstrong 6362BL Installation guide
-
Armstrong Ceilings 5400GWH1 Installation guide
-
Armstrong Ceilings 273 Installation guide
-
Armstrong Ceilings 7300XRWH Installation guide
-
Armstrong Ceilings 1270 Installation guide
-
Armstrong Ceilings 403A User manual
Other documents
-
Delta RS1000W User manual
-
Omega iTCX-W Owner's manual
-
 Flow Wall FSS-MB2412-2S User guide
-
 Kichler Lighting 41011OZ User manual
-
Luxor WB9640W Operating instructions
-
Armstrong Ceilings User manual
-
Ledalite VersaForm Recessed Install Instructions
-
 Great Lakes Tin Y5406 Installation guide
-
 Finished Elegance 10003374 User manual
-
 !P INSP!RED PRODUCT DEVELOPMENT GROUP Easiest Picture Hanging and Leveling Tool Owner's manual


