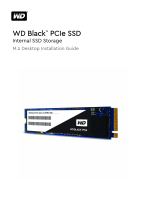
PCIe M.2 Solid State Drive
Installation Guide
Tech Support Hotline: +1-614-850-3670
US, Business Hours: Monday - Friday, 9AM-5PM

ALL RIGHTS ARE STRICTLY RESERVED. ANY PORTION OF THIS PAPER SHALL NOT BE REPRODUCED, COPIED, OR
TRANSLATED TO ANY OTHER FORMS WITHOUT PERMISSION FROM MICRO ELECTRONICS INC.
Inland may make changes to specifications and product description at any time without notice. INLAND and
the Inland logo are trademarks of Micro Electronics, Inc., registered in the United States and other countries.
Products and specifications discussed herein are for reference purposes only.
©2018 Micro Electronics, Inc. All Rights Reserved.

SAFETY INSTRUCTIONS
• No matter in any step, gently handle the SSD.
• Before installing the SSD, please place the SSD in the protective anti-static sleeve.
• Touching the gold connectors on your SSD is prohibited.
• To minimize the damage from static electricity, touch metal material before
holding the SSD.
• Disassemble the SSD is prohibited.
Before you begin
• Make sure you have the below tools for your installation scenario:
1. Screwdriver suitable for your desktop computer/laptop to open the case/cover.
2. Screwdriver for fastening the Inland PCIe M.2 device to the motherboard.
3. Locate the M.2 slot & screw holes for Inland PCIe M.2 devices (2280/2242)
4. Screws for an M.2 device (may have been included with your motherboard).
* It is strongly suggested to install by a professional computer technician and it is
your responsibility to review the warranty policy and instructions of your
motherboard/laptop to ensure you are aware all the risk and procedure of adding
an additional storage device.

Step by Step Installation
Step1. Insert the Inland PCIe SSD to the M.2 slot at an angle as illustrated.
Step2. Lower down the edge until it is align to the screw hole.
Step3. Fasten the M.2 device with your screw & screwdriver.

Laptop SSD Installation
1. Please backup your data to another storage device before the installation.
2. Make sure your computer is power off and the power cable is unplugged.
3. Remove base cover and disconnect the battery. (Refer to your computer’s
manual for instructions).
4. Turn the notebook over, press and hold the power button for 5 seconds to
ground the system.
5. Gently remove the original M.2 device.
6. Follow the steps of M.2 device installation.
7. To reassemble your laptop just follow the instructions in reverse
Desktop computer SSD Installation
1. Please backup your data to another storage device before the installation.
2. Make sure your computer is power off and the power cable is unplugged.
3. Open your case cover and disconnect the power supply. (Refer to your
computer’s manual for instructions).
4. Gently remove the original M.2 device.
5. Follow the steps of M.2 device installation.
6. To reassemble your Desktop computer just follow the instructions in reverse
-
 1
1
-
 2
2
-
 3
3
-
 4
4
-
 5
5
INLAND N/A Installation guide
- Type
- Installation guide
- This manual is also suitable for
Ask a question and I''ll find the answer in the document
Finding information in a document is now easier with AI
Other documents
-
 proHT 04037 User guide
-
Seagate FireCuda 520 SSD Installation guide
-
ARC AISLink CA2 Installation guide
-
Seagate FireCuda 510 SSD Installation guide
-
Seagate BarraCuda 510 SSD Installation guide
-
Dell Latitude 7424 Rugged Extreme Owner's manual
-
Dell Latitude 7424 Rugged Extreme Owner's manual
-
 Western Digital WDS256G1X0C Installation guide
-
Dell Latitude 5424 Rugged Owner's manual
-
Dell Latitude 7212 Rugged Extreme Owner's manual


