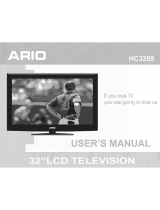
Toshiba 32L2400U User manual

Category
LCD TVs
Type
User manual

This manual is also suitable for

TOSHIBA
Leading Innovation
IntegratedHighDefinition
LEDTelevisionUser'sGuide:
32L2400U
40L2400U
50L2400U
If you need assistance:
Toshiba's Support Web site support.toshiba.corn
For more information, see "Troubleshooting" on page 97 in this guide.
O_vller's Record
The model number and serial number are on the back and side of your
T_
Print out this page and write these numbers in the spaces below. Refer
to these numbers whenever you communicate with your Toshiba dealer
about this T_
Model number:
Serial number:
Register your Toshiba Television at register.toshiba.com
Note: To display a High Definition
picture, the TV must be receiving a
High Definition signal (such as an
over-the-air High Definition TV
broadcast, a High Definition digital
cable program, or a High Definition
digital satellite program). For details,
contact your TV antenna installer,
cable provider, or satellite provider
GMA300033010
3/14
2
DearCustomer,
Thank you for purchasing this Toshiba LED TV. This
document will help you use the many exciting features
of your new LED TV. Before operating your LED TV,
carefully read this document completely.
Safety Precautions
WARNING: TO REDUCE THE RISK OF FIRE
OR ELECTRIC SHOCK, DO NOT EXPOSE THIS
APPLIANCE TO RAIN OR MOISTURE.
WARNING
WARNING:TOREDUCETHERISKOFELECTRIC
SHOCK,DO NOTREMOVECOVER(ORBACK).
NO USER-SERVICEABLE PARTS INSIDE.
REFERSERVICING TO QUALIFIED SERVICE
PERSONNEL.
Thelightningflashwitharrowheadsymbol,withinan
equilateraltriangle,is intendedtoalerttheuserto the
presenceofuninsulated"dangerousvoltage"withinthe
)roduct'senclosurethatmaybed sufficientmagnitudeto
constituteariskofelectricshocktopersons.
z_The exclamationpointwithinanequilateraltriangleis
intendedto alerttheuserto thepresenceof important
operatingandmaintenance(servicing)instructionsinthe
literatureaccompanyingtheappliance.
WARNING
Improper location and installation of a television can
lead to the death of your child. Never place the
television on furniture or in a location where children
can climb up on and tip over the television. Please refer
to the Child Safety information in item 26) on page 5 of
the Important Safety Instructions/Installation section.
WARNING: Ifyou decide to wall mount this
television, always use a mounting bracket that has
been Listed by an independent laboratory (such as
UL, CSA, ETL) and is appropriate for the size and
weight of this television. The use of inappropriate
or non-Listed mounting brackets could result in
serious bodily injury and/or property damage. See
"To Display your LED TV on the included Pedestal
Stand:" on page 6
NOTETOCATVINSTALLERS
This is a reminder to call the CATV system installer's
attention to Article 820-40 of the U.S. NEC, which
provides guidelines for proper grounding and, in
particular, specifies that the cable ground shall be
connected to the grounding system of the building, as
close to the point of cable entry as practical. For
additional antenna grounding information, see 33) on
page 5 and 34) on page 5.
CHILD SAFETY:
PROPER TELEVISION PLACEMENT MATTERS
TOSHIBA CARES
*Manufacturers, retailers and the rest of the consumer electronics industry are committed to
maki ng home entertai nment safe and et-ijoya ble
*Asyouer-ijoyyourtelevision, pleasenotethatalltelevisions newandold mustbesL:pportedon
proper stands or installed according to the manuf:/cturer's recommendations televisions that
are inappropriately situated on dressers, bookcases, shelves, desks, speakers, chests, carts, etc,
may f_ll over, resulting in mjury
TUNE IN TO SAFETY
• ALWAYS follow the manufactL_rer's recommendations for the safb installation of your television
• ALWAYS read and fbllow all instructions fbr proper L:se of your television
• NEVER allow children to climb on or play on the television or the furniture on which the television
is placed
• NEVER place the television on furniture that can easily be used as steps, such as a chest of
drawers
• ALWAYS install the television where it cannot be pushed, pulled over or knocked down
• ALWAYS route cords and cables connected to the television so that they cannot be tripped
over, pulled or grabbed
WALL OR CEILING MOUNT YOUR TELEVISION
• ALWAYS contact your retailer about professional installation if yoL_have any doL_bts aboL_t yoL_r
ability to safely mount your television
• ALWAYS use a mount that has been recommended by the television manufbcturer and has a
safety certif cation by an independent laboratory (such as UL, CSA, E[ L)
• ALWAYS follow all instructions supplied by the television and mount manufhcturers
• ALWAYS make sure that the wall or ceiling where you are mounting the television is appropnate
Some mounts are not designed to be mounted to walls and ceilings with steel studs or cinder
block construction f you are unsure, contact a professional installer
• lelevisions can be heavy A minimum of two people is required for a wall or ceiling mount
installation
MOVING AN OLDER TELEVISION TO A NEW PLACE IN
YOUR HOME
*Marly new television bL:yers move their older CRY televisions into a secondary room after the
purchase of a fat panel television Special care should be made in the placement of older CRT
televisions
*ALWAYS place your older CR f television on fL,rniture that is sturdy and appropriate for its size
and weight
, NEVER place your older CR f television on a d resser where children may be tempted to use the
drawers to climb
*ALWAYS make sure your older CR r television does not hang over the edge of your fL_rniture
4
ImportantSafetyInstructions
1) Read these instructions.
2) Keep these instructions.
3) Heed all warnings.
4) Follow all instructions.
5) Do not use this apparatus near water.
6) Clean only with dry cloth.
7) Do not block any ventilation openings. Install in
accordance with the manufacturer's instructions.
8) Do not install near any heat sources such as
radiators, heat registers, stoves, or other apparatus
(including amplifiers) that produce heat.
9) Do not defeat the safety purpose of the polarized or
grounding type plug. A polarized plug
has two blades with one wider than the
other. Agrounding type plug has two
blades and a third grounding prong.
The wide blade orthe third prong are
provided for your safety. Ifthe provided
plug does not fit into your outlet, consult an electrician
for replacement of the obsolete outlet.
10) Protect the power cord from being walked on or
pinched, particularly at plugs, convenience
receptacles, and the point where they exit from the
apparatus.
11) Only use attachments/accessories specified by
the manufacturer.
12) Use only with the cart, stand, tripod, bracket, or
table specified by the manufacturer, or
sold with the apparatus. When a cart is
used, use caution when moving the cart/
apparatus combination to avoid injury
from tip-over.
13) Unplug this apparatus during lightning storms or
when unused for long periods of time.
14) Refer all servicing to qualified service personnel.
Servicing is required when the apparatus has been
damaged in any way, such as when power-supply cord
or plug is damaged, liquid has been spilled or objects
have fallen into the apparatus, the apparatus has been
exposed to rain or moisture, does not operate normally,
or has been dropped.
AdditionalSafetyPrecautions
14a)CAUTION: If the TV is dropped and the cabinet or
enclosure surface has been damaged or the TV
does not operate normally, take the following
precautions:
• ALWAYS turn offthe -IV and unplug the power cord
to avoid possible electric shock or fire.
• NEVER allow your body to ceme in centact with any
broken glass or liquid from the damaged television.
The LCD panel inside the -iV contains glass and a
toxic liquid. Ifthe liquid comes in centact with your
mouth or eyes, or your skin is cut by broken glass,
rinse the affected area thoroughly with water and
contact your doctor immediately.
• ALWAYS contact a service technician to inspect the
TV any time ithas been damaged or dropped.
15) CAUTION:
• Toreduce the risk ofelectric shock, donot use the
polarized plug with an extension cord, receptacle, or
other outlet unless the blades can be inserted
completely to prevent blade exposure.
• Toprevent electric shock, match wide blade of plug
towide slot; fully insert.
16) CAUTION:
• Do not let children swallow any small parts included
on or with the product or play with the plastic bag.
Keep the small parts and the plastic bag out of the
reach ofchildren.
17) CAUTION:
• Do not let water or other liquids come into centact
with the product, as itmay result in damage.
18) WARNING:
• Toprevent the spread of fire, keep candles or other
open flames away from this product at alltimes.
• Keep the product away from direct sunlight, fire or a
heat source such as a heater. This may reduce the
product life time or result in fire.
Installation,Care,andService
Installation
Follow these recommendations and precautions and
heed all warnings when installing your TV:
1
9)
to excessive heat such as sunshine,WARNING: Never expose the batteries
" " fire, orthelike.
20) ALWAYS plug the product into an outlet that is located
in such a manner that it can be easily unplugged in
case the product requires service.
21) NEVER route the product's power cord inside a wall or
similar enclosed area.
22) Never modify this equipment. Changes or
modifications may void: a) the warranty, and b) the
user's authority to operate this equipment under the
rules of the Federal Communications Commission.
23) _ DANGER: RISKOF
SERIOUSPERSONAL
INJURY,DEATH,OR
EQUIPMENT DAMAGE!
Never place the -iV on an unstable
cart, stand, or table. The "iV may
fall, causing serious personal injury,
death, or serious damage to the "IV.
5
24) When selecting a location forthe TV,
• NEVER allow any part of the TV to hang over the
edge of the supporting furniture,
• NEVER place the TV on tall furniture (for example,
entertainment centers or bookcases) without
anchoring both the furniture and the TV toa suitable
support,
• Never place cloth or other material between the TV
and the supporting furniture.
• NEVER allow children to climb on the TV
25) Toavoid damage to this product, never place or store
the TV in direct sunlight; hot, humid areas; or areas
subject to excessive dust or vibration.
26) Always place the "iV on the floor or a sturdy, level,
stable surface that can support the weight ofthe unit.
Secure the'iV using one of the following methods:
(1) Secure the TV with a mounting screw
(Recommended).
• Place the TV on a sturdy surface that has a sufficient
thickness and screw the unit on the surface securely
by using the mounting screw and the fall-prevention
screw hole.
• If secured to furniture or other movable objects, the
furniture must be secured to an immovable structure
using the method shown initem 2 below.
-- f_ ......... i
TVBack Mountingscrew
Screwhole
(2) Secure the TV with a sturdy strap to awall stud,
pillar, or other immovable structure. When connecting
the strap:
- attach the strap to the TV using the hooks on the back
of the TV, the clips on the pedestal, or the hole in the
base of the pedestal as available.
- make sure the strap istight, secure, and parallel to the
floor.
TV side TV top
27) The product shall not be exposed to dripping or
splashing, and that no objects filled with liquids, such
as vases, shall be placed on the apparatus.
28) Never block or cover the slots or openings in the TV
cabinet back, bottom, and sides. Never place the TV:
• on a bed, sofa, rug, or similar surface;
• too close to drapes, curtains, or walls; or
• in a confined space such as a bookcase, built-in
cabinet, or any other place with poor ventilation.
29) Always leave a space of at least 4 (four)inches around
the TV. The slots and openings are provided to protect
the TV from overheating and to help maintain reliable
operation of the TV.
30) Never allow anything to rest on or roll over the power
cord, and never place the TV where the power cord is
subject towear or abuse.
31) Never overload wall outlets and extension cords.
32) Always operate this equipment from a 120V AC, 60 Hz
power source.
33) Always make sure the antenna system is properly
grounded to provide adequate protection against
voltage surges and built-up static charges (see Section
810 of the National Electric Code),
34)
DANGER: RISK OF SERIOUS
PERSONAL INJURY OR DEATH!
• When installing a rooftop antenna, use extreme care
to make sure you arenever in a position where your
body (or any item you are in contact with, such as a
ladder or screwdriver) can accidentally touch
overhead power lines. Never locate the antenna
near overhead power lines or other electrical
circuits.
• Never attempt to install any ofthe following during
lightning activity: a) an antenna system; or b) cables,
wires, or any home theater component connected to
an antenna or phone system.
Care
For better performance and safer operation of your
TOSHIBA TV, follow these recommendations and
)recautions:
35) Ifyou use the TV ina room where the temperature is
32° F (0° C) or below, the picture brightness may vary
until the LED warms up. This is not a sign of
malfunction.
36) _ WARNING: RISK OF SERIOUS
PERSONAL INJURY OR EQUIPMENT
DAMAGE!
• Never use chemicals (such as air fresheners,
cleaning agents, etc.) on or near the TV pedestal.
6
Studies indicate that plastics may weaken and crack
over time from the combined effects of chemical
agents and mechanical stress (such as the weight of
the TV). Failure to follow these instructions could
result inserious injury and!or permanent damage to
"FVand 'rv pedestal.
• Alwaysunplugthe-I'Vbeforecleaning. Gentlywipe
the display panel surface (the 'rv screen) using a
dry, soft cloth (cotton, flannel, etc.). A hard cloth may
damage the surface ofthe panel. Avoid contact with
alcohol, thinner, benzene, acidic or alkaline solvent
cleaners, abrasive cleaners, or chemical cloths,
which may damage the surface. Never spray volatile
compounds such as insecticide on the cabinet.
Such products may damage or discolor the cabinet.
37) Never hit, press, or place anything on the back cover.
These actions will damage internal parts.
38) ....... WARNING: ....
........... RISKOFELECTRICSHOCK! ,
Never spill liquids or push objects of any kind into
the 'rv cabinet slots.
39) During a lightning storm, do not touch the connecting
cables or product.
40) For added protection of yourrv from lightning and
power surges, always unplug the power cord and
disconnect the antenna from the "IV ifyou leave the -IV
unattended or unused for long periods of time.
41) Always unplug the "FVto completely disconnect from
mains power. When the "IV is turned off using the on/
off switch, itis not completely disconnected from power
and a minute amount of current is still consumed.
42) During norma! use, the TV may make occasional
snapping or popping sounds. This is normal, especially
when the unit is being turned on or off. Ifthese sounds
become frequent or continuous, unplug the power cord
and contact aToshiba Authorized Service Provider.
43)
PERSONAL INJURY OR EQUIPMENTWARNING: RISK OF SERIOUS
' _ ' DAMAGE!
Never strike the screen with a sharp or heavy
object.
44)
• The LCD screen of this product can be damaged by
ultraviolet radiation from the sun. When selecting a
location for the television, avoid locations where the
screen may be exposed to direct sunlight, such as in
front of a window.
• Nevertouch, press, orplaceanythingontheLCD
screen. These actions will damage the LCD screen.
Ifyou need to clean the LCD screen, follow the
instructions in item 36) on page 5.
Service
45)
WARNING: i ...........
RISKOFELECTRICSHOCK!
Never attempt to service the TV yourself. Opening
and removing the covers may expose you to
dangerous voltage or other hazards. Failure to
follow this WARNING may result in death or
serious injury. Refer all servicing not specified in
this manual to aToshiba Authorized Service
Provider.
46) Ifyou have the TV serviced:
• Ask the service technician to use only replacement
parts specified by the manufacturer.
• Upon completion of service, ask the service
technician toperform routine safety checks to
determine that the TV is in safe operating condition.
Choosinga locationforyourLEDTV
ToDisplay your LEDTV onthe included Pedestal Stand:
Observe the following safety precautions:
1) Read and follow the pedestal assembly instructions
included with the pedestal.
CAUTION: Before beginning pedestal assembly,
carefully lay the front of the LCD Panel face down
on a flat, cushioned surface such as a quilt or
blanket. Leave the bottom of the unit protruding
over the edge of the surface and assemble the
pedestal as described in this instruction document.
Note: Extreme care should always be used when
attaching the pedestal stand to avoid damage to
the LCD panel.
2) Place the TV on a sturdy, level surface that can
support the weight of the TV.
3) Be sure to secure the TV to a wall, pillar, surface, or
other immovable structure see item 26) on page 5 for
additional details.
To Display your LED TV using a Wall Bracket:
If you decide to wall mount your LED TV, always use a
wall bracket Listed by an independent laboratory (such
as UL, CSA, ETL) that is appropriate for the size
and weight of the TV:
1) CAUTION: Two people are required for installation.
2) Unplug and remove any cables and!or other
component connectors from the rear of the TV.
3) Remove the screws of the VESA Mounting Pattern
shown inthe table below, ifapplicable.
CAUTION: Do not use the screws removed from
the back cover to attach the wall mount bracket to
the TV.
4) Always use the screws supplied or recommended by
the wall mount manufacturer.
5) Follow the instructions provided with your wall bracket.
Before proceeding, make sure the appropriate
bracket(s) are attached to the wall and the back of the
TV as described in the instructions provided with the
wall bracket.
6) After attaching the appropriate bracket(s) to the wall
and the back of the TV, remove the pedestal stand
from the "IV, as described in this instruction document.
7
7) VESAMounting Pattern
TVSize HolePattern(HxV) ScrewSize
32" 200mm x 200mm M6
40" 2OOmm x 2OOmm M6
50" 4OOmmx 2OOmm M8
Removing the Pedestal Stand
1) Carefully lay the front of the unitface down on a fiat,
cushioned surface such as a quilt or blanket. Leave
the stand protruding over the edge of the surface.
Note: Extreme care should always be used when
removing the pedestal stand to avoid damage to
the LCD panel.
2) Remove the stand screws shown in the diagram
below. This will allow removal of the pedestal stand.
3) Once you have removed the screws holding the
pedestal stand in place, remove the pedestal stand
from the TV.
32" TV. VESAMountingPattern
Two stand screws Hook for attaching
thestrap
(asshort as possible
(SampleIllustration)
40"TV.
VESAMounting Pattern
I • Hookfor attaching
Four stand screws the strap
(as short as possible)
(SampleIllustration)
50"TV.
VESAMounting Pattern
Four stand screws
the strap
(as short as possible)
(SampleIllustration)
CAUTION: Always place the TV on the floor or a
sturdy, level, stable surface that can support the
weight of the unit. To secure the TV, use a sturdy strap
from the hook(s) on the rear of the TV to a wall stud,
)illar, or other immovable structure. Make sure the
strap is tight, secure, and parallel to the floor.
8
FCCDeclaration of Conformity
ComplianceStatement (Part 15):
Toshiba 32L2400U, 40L2400U, 50L2400U
Television models comply with Part 15 of the FCC
Rules.
Operation is snbject to the l_llowing two conditions:
(1) This device may not cause harmftll interference, and
(2) This device must accept any interference received,
including interference that may cause nndesired operation.
The p,%ty responsible for compliance to these mrs is:
ToshibaAmerica Inl_mlation Systems, Inc.
9740 Irvine Blvd., Irvine, CA 92618.
Ph: 800-631-3811
Note: This equipment has been tested and found to
comply with the limits for a Class B digital device,
pursuant to Part 15 of the FCC Rules. These limits are
designed toprovide reasonable protection against
harmful interference in a residential installation. This
equipment generates, uses, and can radiate radio
frequency energy and, if not installed and used in
accordance with the instructions, may cause harmful
interference to radio communications. However, there
is no guarantee that interference will not occur in a
particular installation. If this equipment does cause
harmful interference to radio or television reception,
which can be determined by removing and applying
power to the equipment, the user is encouraged to try
to correct the interference by one of the foflowing
measures:
• Reorient or relocate the receiving antenna.
• Increase the separation between the eqnipment and
receiver.
• ( onnect the eqnipment into an outlet on a circuit different
from that to which the receiver is connected.
• Consult the dealer or an experienced radioiTV technician
Ibr help.
Caution: Changes or modifications to this equipment
not expressly approved by Toshiba could void the
user's authority to operate this equipment.
ENERGYSTAI_ UserInformation
ENERGY STAR User Infom_ation Statement: the factory
default settings of this tdevision meet ENERGY STAR*
requirements. (hanging Picture Settings may increase
energy consumption, possibly beyond the limits required for
ENERGY STAR qnalification.
To ensure yonr television is operating at optimal energy
efficiency, select [Home] mode during initial activation. To
remm to [Home] mode settings, select the [Installation] icon
from the menu, select [Store / Home Mode[, then select
[Home]. This places the TV in [Standard[ mode. [Standard[
mode is recommended for norlnal home use.
ENERGY STAR _qnalified TV. Products
that e_n the ENERGY STAR prevent
green house gas emissions by meeting
strict guidelines set by the U.S.
Environmental Protection Agency.
ENERGY STAR and the ENERGY STAR
mark are registered U.S. marks.
ImportantnotesaboutyourTV
The following symptoms are technical limitations of
LCD Display technology and are not an indication of
malfunction; therefore, Toshiba is not responsible for
)erceived issues resulting from these symptoms.
1) An afterimage (ghost) may appear on the screen ifa
fixed, non-moving image appears for a long period of
time. The afterimage is not permanent and will
disappear in a short period of time.
2) The LCD panel contained in this TV is manufactured
using an extremely high level of precision technology;
however, there may be an occasional pixel (dot of
light) that does not operate properly (does not light,
remains constantly lit, etc.). This is a structural
property of LCD technology, is not a sign of
malfunction, and is not covered under your warranty.
Such pixels are not visible when the picture is viewed
from a normal viewing distance.
Note: Interactive video games that involve shooting a
'gun" type ofjoystick at an on-screen target may not
work with this T_[
9
TrademarkInformation
ColorStream, ColorMaster, DynaLight, GameTimer,
Native Mode, Stable Sound, Surflock, TosLink, and
TheaterWide aretrademarks or registered trademarks
of Toshiba America Information Systems, Inc.
Blu-ray Disc TM, Blu-rayTM , and the Iogos are
trademarks ofthe Blu-ray DiscAssociation.
_,. _ •For DTS patents, see http://patents.dts.
r,_,s_,,0,,_ com. Manufactured under license from
DTS Licensing Limited. DTS, the Symbol,
& DTS and the Symbol together are
registered trademarks, and DTS
TruSurround is a trademark of DTS, Inc. ©
DTS, Inc. All Rights Reserved.
r_n DOtBY • Manufactured under license from Dolby_
DIGITAL Laboratories. Dolby ° and the double-D
symbol are trademarks of Dolby®
Laboratories.
H_mI" .The terms HDMI and HDMI High-Definition
Multimedia Interface, and the HDMI Logo
are trademarks or registered trademarks of
HDMI Licensing LLC in the United States
and other countries.
•MPEG Layer-3 audio coding technology
licensed from Fraunhofer IIS and Thomson.
•This production contains Bitstream Vera
Sans fonts under the following copyright:
Copyright © 2003 by Bitstream, Inc. All
Rights Reserved. Bitstream Vera is a
trademark of Bitstream, Inc.
•All other brand and product names are
trademarks or registered trademarks of
their respective companies.
Copyright
L' 2014 by Toshiba America Inibrmation Systems, Inc. All
rights reserved. Under the copyright laws. this guide cannot
be reprodnced in any form without the prior written
_ermission of Toshiba. No patent liability is assumed.
however, with respect to the use of the inlBnnation
contained herein.
Notice
The in_rmation contained in _is mannal, including but not
limited to any prodnct specifications, is sut_ject to change
without notice.
TOSHIBAAMERICA INFORMATION SYSTEMS,
INC., TOSHIBA OF CANADA LIMITED, AND
TOSHIBA DE MEXICO, S.A. DE. C.V..
(COLLECTIVELY TOSHIBA) PROVIDES NO
'_,:&R1L&NTY WITH REGARD TO THIS MANUAL OR
ANY OTHER INFOR2MATION CONTAINED HEREIN
AND HEREBY EXPRESSLY DISCLAIMS ANY
IMPLIED _:&R1L&NTIES OF MERCHANTABILITY
OR FITNESS FOR ANY PARTIC[ LAR P[ RPOSE
WITH REGARD TO ANY OF THE FOREGOING.
TOSHIBA ASS[ MES NO LIABILITY FOR ANY
DAMAGES INC[ RRED DIRECTLY OR
INDIRECTLY FROM ANY TECHNICAL OR
TYPOGRAPHICAL ERRORS OR OMISSIONS
CONTAINED HEREIN OR FOR DISCREPANCIES
BET_VEEN THE PRODUCT AND THE MAN[ AL. IN
NO EVENT SHALL TOSHIBA BE LIABLE FOR ANY
INCIDENTAL, CONSEQ[ ENTIAL, SPECIAL, OR
EXEMPLARY DAMAGES, WHETHER BASED ON
TORT, CONTRACT OR OTHER'WISE, ARISING
OIT OF OR IN CONNECTION WITH THIS
MAN[ AL OR ANY OTHER INFORMATION
CONTAINED HEREIN OR THE [SE THEREOF.
Contents
Chapterl:lntroduction.............................................................16
Features .................................................................. 17
Overview of installation, setup, and use................... 18
TVfront and side panel controls and connections ....19
TV back panel connections ...................................... 20
Chapter2:ConnectingYourTV.................................................22
Overview of cabletypes ........................................... 22
Coaxial (F-type) cable ....................................... 22
Standard A/V cables (red/white/yellow) ............. 23
Component video cables (red/green/blue) .........23
HDMI®cable (with HDMI Logo) ......................... 23
Optical audio cable ............................................ 24
About the connection illustrations ..................... 24
Connecting aVCR, antenna, cable TV,
or camcorder ..................................................... 24
Connecting a Blu-rayTM/ DVD player,satellite
receiver with ColorStream TMor VCR ................. 26
10
c°.t°.ts 11
Connecting an HDMI®or DVI device to the
HDMl®input ...................................................... 27
HDMI®CECconnection ........................................... 29
Connecting a digital audio system ........................... 31
Connecting a computer ........................................... 32
Connection to the TV's HDMl®terminal .............32
Chapter3:
Chapter4:
Chapter5:
UsingtheRemoteControl.......................................33
Installing batteries .................................................. 33
Remote control effective range ................................ 34
Learning about the remote control ........................... 36
MenuLayoutandNavigation..................................39
Main menu layout .................................................... 39
Navigating the menu system ................................... 41
SettingupyourTV...................................................42
Initial Setup ............................................................. 42
Installation setup selection ...................................... 43
Storing channels in memory (optional) ................... 44
Auto Tuning ............................................................. 44
Manual Tuning ..............................................
Setting channel skip .....................................
Setting the AV input mode ............................
Setting the time zone ....................................
Viewing the system status ............................
Resetting Factory Defaults ......................
.........46
.........46
.........47
.........47
.........48
.........48
Chapter6:SettingupyourTV...................................................49
Selecting the video input source .............................. 49
Labeling the video input sources ............................. 51
Tuning channels using the Channel Browser ............52
Favorites browser .................................................... 53
Elements of the Channel Browser ...................... 54
Adding and clearing channels and inputs
in the History List ........................................ 56
2 Contents
Tuning to the next programmed channel............56
Tuning to a specific channel
(programmed or unprogrammed) ............... 56
Switching between two channels using
Channel Return ........................................... 57
Switching between two channels using
SurfLockTM .................................................. 57
Selecting the picture size ......................................... 58
Full.................................................................... 59
TheaterWide 1................................................... 59
TheaterWide 2 ................................................... 59
TheaterWide 3 ................................................... 60
Native................................................................ 60
4:3..................................................................... 61
Normal .............................................................. 61
Dot by Dot ......................................................... 61
Scrolling the TheaterWideTM picture
(TheaterWide 2 and 3 only) ............................... 62
Using the Auto Aspect feature ............................. 62
Using the 4:3 Stretch ........................................... 63
Using the FREEZEfeature .................................... 63
Adjusting the picture .......................................... 64
Selecting the picture mode ............................ 64
Adjusting the picture quality .......................... 65
Using closed captions ......................................... 66
Baseclosed captions ..................................... 66
Digital CCsettings ......................................... 67
Adjusting the audio ............................................. 68
Muting the sound .......................................... 68
Using the Digital Audio Selection ................... 69
Selecting stereo/SAP broadcasts ................... 69
Adjusting the audio quality ............................ 70
DTSTruSurround TM ........................................... 71
Sound Mode ...................................................... 71
Stable SoundTM .................................................. 71
c°.t°.ts13
Using the Dolby® Digital Dynamic Range
Control feature ......................................... 71
Selecting the PIN code .......................................... 72
Enter a new PIN code....................................... 72
Forgotten PIN code ......................................... 72
Changing or deleting your PIN code ................ 72
Using parental controls (for USA region) ............... 72
Blocking TV programs and movies by rating
(V-Chip) ...................................................... 72
Downloading an additional rating system ..........73
Displaying ratings ............................................. 76
Unlocking programs temporarily ....................... 76
Using the input lock feature ..................................... 77
Locking channels .................................................... 77
Using the GameTimerTM ................................... 78
Using the panel lockfeature ........................... 79
Using the Media Player........................................ 80
Auto Start function ........................................ 81
To open the Media Player............................... 81
Viewing photo files ........................................ 82
Playing music files ........................................ 84
Viewing photo files and playing music files
at the same time ......................................... 85
Sorting photo or music files .............................. 85
Setting the sleep timer ............................................. 86
No Signal Power Down ............................................ 87
Using HDMI®CEC................................................... 87
HDMI®CECplayback device (Blu-rayTM/DVD
player, etc.) control ..............................
Other HDMI®CECfunctions .......................
Setting up HDMI®CEC................................
Using the HDMI®settings feature .....................
HDMI®1(or 2) RGB Range .........................
HDMI®Information Display ........................
Displaying TV status information ......................
Understanding the last mode memory feature ....
...87
...89
...90
...90
...90
...91
...91
...92
4 Contents
Chapter7:UsingtheTV'sAdvancedFeatures.........................93
Using the advanced picture settings ........................ 93
ColorMaster TM ................................................... 93
BaseColor Adjustment ...................................... 93
Color Temperature ............................................. 94
Static Gamma .................................................... 94
DynaLightTM ....................................................... 95
Dynamic Contrast .............................................. 95
Cinema Mode .................................................... 95
Noise Reduction ................................................ 95
Chapter8:Troubleshooting.......................................................97
General troubleshooting .......................................... 97
Picture problems ..................................................... 98
Sound problems ...................................................... 99
Remote control problems ...................................... 100
Channel tuning problems ...................................... 100
Closed caption problems ....................................... 101
Rating blocking (V-Chip) problems ....................... 101
No HDMI®CECoperation ...................................... 101
HDMI®problems ................................................... 102
Media Player problems .......................................... 102
If the problem persists after trying the solutions ....102
AppendixA:Specifications.....................................................103
Television system .................................................. 103
Channel coverage .................................................. 103
Power source ........................................................ 104
Power maximum current ................................. 104
Power consumption ........................................ 104
Audio power .................................................... 104
Speaker type ......................................................... 104
Video/audio terminals ........................................... 104
Video/audio input ............................................ 104
ColorStream TM (component video) HD input ....105
c°.t°.ts15
HDMl®input ..................................................... 105
Dimensions (with stand) ....................................... 105
Weight / mass (with stand) .............................. 105
Operating conditions ....................................... 105
Supplied accessories ............................................. 106
Acceptable signal formats for HDMI®.................... 106
HDMl®signal formats ...................................... 106
AppendixB:Index....................................................................107
Chapter1
Introduction
Safetyicons
This manual contains sat_ty instructions that must beobserved to avoid potential
hazards that could result in personal injuries, damage to your equipment, or loss
of data. These satEtycautions have been classified according to the seriousness of
the risk, and icons highlight these instructions as tbllows:
Indicatesanimminentlyhazardoussituationwhich,ifnotavoided,will result
-- indeathorseriousinjury.
Indicatesa potentiallyhazardoussituationwhich,if notavoided,couldresult
indeathorseriousinjury.
Indicatesa potentiallyhazardoussituationwhich,if notavoided,mayresult
inminorormoderateinjury.
Indicatesa potentiallyhazardoussituationwhich,if notavoided,mayresult
inpropertydamage.
NOTE Providesimportantinformation.
16
Introduction17
Features
Features
The following are just a few of the many exciting features of your
new Toshiba wide screen, integrated HD LED TV:
o,*. Integrateddigitaltuning(8VSB ATSCandQAM)--
Eliminates the need for a separate digital converter set-top box
(in most cases)
o,** 1366 x 768 output resolution (32L2400U)
1920 x 1080 output resolution (40/50L2400U)
o.**Two HDMI_'--Digital, High-Definition Multimedia Interfaces
with 1080p input support. See "Connecting an HDMI(R)or DVI
device to the HDMI(R)input" on page 27
.!. ColorStream TM HD--High-resolution component video input
and shared composite video input, see "Connecting aBlu-ray TM
/ DVD player, satellite receiver with ColorStream TM or VCR"
VCR" on page 26
o.**DigitalAudio Out--Optical audio connection with Dolby(R)
Digital optical output form. See "Connecting a digital audio
system" on page 31
•_* DTS TruSurroundT_L-Delivers an ilranersive virtual
surround sound experience over front facing speaker
configurations, complete with rich bass, high frequency detail
and clear dialog. For snore information, see "DTS
TruSurround TM''on page 71.
.!. ColorMasterT_I--Allows you to adjust the TV's standard
colors, see "ColorMaster TM''on page 93
.!. Cinema Mode--Shows film-like quality movies, see "Cinema
Mode" on page 95
.!. DynaLightT_r Backlight control monitors the brightness of
each video frame and automatically adjusts backlight intensity
based on the content to create higher dynamic contrast, for
deeper blacks and increased depth, see "DynaLight T_'_''on
page 95
.!. DNR--Digital picture Noise Reduction, see "Digital Noise
Reduction (DNR)" on page 96
.!. Edge Enhancer--Lets you adjust the levels for your desired
picture settings and achieve a sharper picture, see"Edge
Enhancer" on page 96
.!. HDMr _'CEC--Allows control of external devices from the
TV remote via HDMI ®connection, see "Using HDMI(R)CEC"
on page 87
.!. Media Player--Allows you to view photo files and play music
files, see "Using the Media Player" on page 80
8 Introduction
Ovelwi_" of instulluO_)n, setup, and use
o:. ENERGY STAR _'qualified
Overviewofinstallation,setup,anduse
Follow these steps to set up your TV and begin using its many
exciting features.
1 Carefully read the important safety, installation, care, and
service information. Keep this document for future reference.
2 To choose a location for the TV:
o:. Read "hnportant notes about your TV" on page 8
o!. Place the TV on the floor or a sturdy, level, stable surface
that can support the weight of the unit. Secure the TV to a
wall, pillar, or other ilmnovable structure, see 26)
on page 5.
o!. Place the TV in a location where light does not reflect on
the screen.
o,** Always leave a space of at least 4 (four) inches around the
TV. The slots and openings are provided to protect the TV
from overheating and to help maintain reliable operation
of the TV.
3 Do not plug in any power cords until after you have connected
all cables and devices to your TV.
4 Before connecting cables or devices to the TV, learn the
functions of the TV's connections and controls, see "Overview
of cabte types" on page 22
5 Connect your other electronic device(s) to the TV, see
"Connecting an HDMI® or DVI device to the HDMI® input"
on page 27
6 Install the batteries in the remote control, see "Installing
batteries" on page 33
7 See "Using the Remote Control" on page 33 for an overview of
the buttons on the remote control.
8 After connecting all cables and devices, plug in the power
cords for your TV and other devices. Then press the POWER
button on the TV control panel or remote control to turn on the
TV. If the TV stops responding to the buttons on the remote
control or TV control panel and you cannot turn the TV offor
on, unplug the power cords for a few seconds and then plug
them in and try again.
9 See "Navigating the menu system" on page 41 for a quick
overview of navigating the TV's menu system.
Introduction 19
TVf_3ntcmdsidepcmel eonnv/s cmdconnections
10 Program channels into the TV's channel memory, see "Auto
Tuning" on page 44
11 For details on using the TV's features, see Chapter 6 and
Chapter 7
12 For help, refer to "Troubleshooting" on page 97
13 For technical specifications_ see "Specifications" on page 103
14 For the End User License Agreement, see "License Agreement"
onpage 107
TVfrontandsidepanelcontrolsandconnections
Leftsidepanel TVfront
i
3-- U ii TVtop
4C 2
2 _
(Sample Illustration) 32L2400U- Front cmd side pcme/ controls atTd
connections
Leftsidepanel TVfront
ll ..... _ TVtop
2 1
(Sample Illustration) 40/50L2400U- Front atTd side patTel controls atTd
connection
1 Power On/Standby LED--Power indicator light, (glows red
when the TV power is Off).
2 Remote sensor (embedded)--Point the remote control toward
this remote sensor.
3 POWER--Turns the TV On/Off. If the TV stops responding to
the buttons on the remote control or TV control panel and you
0 Introduction
TVbackpcmelconnectio_s
cannot turn offthe TV, press and hold the POWER button on
the TV control panel for a few seconds to reset the TV.
4 •/•/+/-- -- Adjust the volume level, change the channel, or
change the input or source you are viewing, depending on the
mode, which is selected by the CH/INPUT button.
5 CH/INPUT--Switches the function of the • /•/+/-- buttons to
select the volume, channel, or input mode.
• In Volume mode, the buttons increase or decrease the volume.
• In Channel mode, the buttons change the channel up or down.
• In Source mode, the buttons toggle the input from one source
to the next.
6 USB port--Accesses JPEG or MP3 files, or updates TV
firmware.
IV backpanelconnections
For explanations of cable types and connections, see on page 22.
1 2 3
I I I
Power Cord
4
(Sample Illustration) 32L2 400U- Back pcmel connections
5 -- Power Cord
%
(Sample Illustration) 40/50L2 400U- Back pcmel connections
  • Page 1 1
  • Page 2 2
  • Page 3 3
  • Page 4 4
  • Page 5 5
  • Page 6 6
  • Page 7 7
  • Page 8 8
  • Page 9 9
  • Page 10 10
  • Page 11 11
  • Page 12 12
  • Page 13 13
  • Page 14 14
  • Page 15 15
  • Page 16 16
  • Page 17 17
  • Page 18 18
  • Page 19 19
  • Page 20 20
  • Page 21 21
  • Page 22 22
  • Page 23 23
  • Page 24 24
  • Page 25 25
  • Page 26 26
  • Page 27 27
  • Page 28 28
  • Page 29 29
  • Page 30 30
  • Page 31 31
  • Page 32 32
  • Page 33 33
  • Page 34 34
  • Page 35 35
  • Page 36 36
  • Page 37 37
  • Page 38 38
  • Page 39 39
  • Page 40 40
  • Page 41 41
  • Page 42 42
  • Page 43 43
  • Page 44 44
  • Page 45 45
  • Page 46 46
  • Page 47 47
  • Page 48 48
  • Page 49 49
  • Page 50 50
  • Page 51 51
  • Page 52 52
  • Page 53 53
  • Page 54 54
  • Page 55 55
  • Page 56 56
  • Page 57 57
  • Page 58 58
  • Page 59 59
  • Page 60 60
  • Page 61 61
  • Page 62 62
  • Page 63 63
  • Page 64 64
  • Page 65 65
  • Page 66 66
  • Page 67 67
  • Page 68 68
  • Page 69 69
  • Page 70 70
  • Page 71 71
  • Page 72 72
  • Page 73 73
  • Page 74 74
  • Page 75 75
  • Page 76 76
  • Page 77 77
  • Page 78 78
  • Page 79 79
  • Page 80 80
  • Page 81 81
  • Page 82 82
  • Page 83 83
  • Page 84 84
  • Page 85 85
  • Page 86 86
  • Page 87 87
  • Page 88 88
  • Page 89 89
  • Page 90 90
  • Page 91 91
  • Page 92 92
  • Page 93 93
  • Page 94 94
  • Page 95 95
  • Page 96 96
  • Page 97 97
  • Page 98 98
  • Page 99 99
  • Page 100 100
  • Page 101 101
  • Page 102 102
  • Page 103 103
  • Page 104 104
  • Page 105 105
  • Page 106 106
  • Page 107 107
  • Page 108 108
  • Page 109 109
  • Page 110 110
  • Page 111 111

Toshiba 32L2400U User manual

Category
LCD TVs
Type
User manual
This manual is also suitable for

Ask a question and I''ll find the answer in the document

Finding information in a document is now easier with AI