Page is loading ...

Before Building
We want the assembly and operation of this airboat to be a success so BEFORE removing any parts from the parts bags,
please read this manual thoroughly to familiarize yourself with the model. If for any reason you think this model is not for
you, return it to your local dealer immediately. PLEASE NOTE: Your hobby dealer cannot accept a return on any model
after assembly has begun.
Warranty
AquaCraft
™
will warrant this kit for 90 days after the date of purchase from defects in materials or workmanship.
AquaCraft will either repair or replace, at no charge, the incorrectly made part.
Make sure you save the receipt or invoice you were given when you bought your model! It is your proof of purchase
and we must see it before we can honor the warranty.
To return your Air Force for repairs covered under warranty you should send your boat to:
Hobby Services
1610 Interstate Drive
Champaign, Illinois 61822
Attn: Service Department
Phone: (217) 398-0007 9:00 am - 5:00 pm Central Time M-F
E-mail: hobbyser[email protected]
HCAZ3011 for HCAB5027/HCAB27**Entire Contents © Copyright 2002 v1.1
ASSEMBLY AND OPERATION MANUAL
™
™

INTRODUCTION ..............................................................2
SAFETY PRECAUTIONS......................................................2
HELPFUL HINTS ................................................................2
REPAIR SERVICE ................................................................3
SPECIFICATION & DESCRIPTION CHANGES ..................3
SCREW INFORMATION ....................................................3
BOAT TERMINOLOGY ......................................................3
REQUIRED FIELD EQUIPMENT ........................................3
TOOLS YOU WILL NEED ..................................................3
FINISHING THE READY-TO-RUN AIR FORCE ..................4
Final Assembly ..............................................................4
FINISHING THE PRE-BUILT AIR FORCE ............................6
Additional Required Items ..............................................6
ENGINE POD ASSEMBLY & INSTALLATION ....................6
INSTALL THE SERVOS ........................................................8
INSTALL THE RADIO GEAR ..............................................9
RUNNING THE ENGINE....................................................9
BREAKING IN THE ENGINE ............................................11
ENGINE MAINTENANCE ................................................11
RUNNING THE AIR FORCE ............................................12
ORDERING REPLACEMENT PARTS..................................13
ENGINE TROUBLESHOOTING........................................14
ENGINE MOUNTING TEMPLATE ....................................15
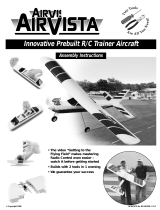
Thank you for purchasing the AquaCraft Air Force
™
by
Hobbico
®
! This manual contains the instructions you need to
safely build, operate, and maintain your nitro R/C airboat.
Read
over this manual thoroughly before operating the Air Force.
• Use care to avoid touching the propeller anytime the
engine is running. Pay equally close attention to items
such as loose clothing, shirt sleeves, ties, scarves, long
hair or loose objects such as screwdrivers or pencils that
may fall out of shirt or jacket pockets on to the spinning
prop. If your fingers, hands, etc. come in contact with the
spinning propeller, you may be severely injured. Make all
engine adjustments from behind the rotating propeller.
• Because of the speed and mass of this boat, it is capable
of inflicting property damage and severe personal injury
if a collision occurs. Never run this boat in the presence
of swimmers or where the possibility of collision with
people or property exists.
• This boat is controlled by radio signals, which are subject
to possible interference from other R/C transmitters,
paging systems or other electrical noise. Before turning
your radio on, make sure no one else in the area is
operating a radio on the same frequency (channel).
• A weakened or loose propeller may disintegrate or be
thrown off. Since propeller tip speeds with powerful
engines may exceed 600 feet per second, it must be
understood that such a failure can result in serious injury.
• Model engine fuel is poisonous. Do not allow it to come
into contact with the eyes or mouth. Always store fuel in a
clearly marked container and out of the reach of children.
• Model engine fuel is highly flammable. Keep it away
from open flame, excessive heat, sources of sparks, or
anything else that might ignite it. Do not smoke or allow
anyone else to smoke in close proximity to open fuel.
Make sure that fuel lines are in good condition so that
fuel will not leak onto a hot engine causing a fire.
• Never operate your engine in an enclosed space. Model
engines, like automobile engines, exhaust deadly carbon
monoxide. Run your engine only in an open area.
• Model engines generate considerable heat. Do not touch
any part of your engine until it has cooled. Touching the
muffler, cylinder head, or exhaust header may result in a
serious burn.
• Use safety glasses when starting or running engines. The
propeller may throw loose material such as sand or
gravel into your face.
• Use a “safety stick” or electric starter to start the engine.
Do not use your fingers to flip the propeller. Make certain
that the glow plug clip or connector is securely in place
so that it does not pop off or otherwise get into the
running propeller.
If the buyer is not prepared to accept the liability associated
with the use of this product, the buyer is advised to return
this kit immediately in new and unused condition to the
place of purchase.
• Avoid working over a deep pile carpet. If you drop a
small part or screw, it will be difficult to find.
• Place a mat or towel over your work surface. This will prevent
parts from rolling off and will protect the work surface.
• Avoid running the boat in cold weather. The hull and
other plastic parts can become brittle at low
temperatures. In addition, grease and oil become thick,
causing premature wear and poor performance.
• Test fit all parts before attaching them permanently.
HELPFUL HINTS
SAFETY PRECAUTIONS
INTRODUCTION
TABLE OF CONTENTS
2

Repair service is available anytime.
After the 90-day warranty, you can still have your Air Force
repaired for a small charge by the experts at AquaCraft’s
authorized repair facility, Hobby Services, at the address
listed on the front page of this manual.
To speed up the repair process, please follow the instructions
as listed below.
1. Under all circumstances return the ENTIRE system;
boat and radio.
2. Make sure the transmitter is turned off, all batteries are
removed and fuel is drained from the tank.
3. Send written instructions which include: a list of all
items returned, a THOROUGH explanation of the
problem, the service needed and your phone number
during the day. If you expect the repair to be covered
under warranty, be sure to include a proof-of-purchase
date (your store receipt or purchase invoice).
4. Also be sure to send your full return address.
All pictures, descriptions, and specifications found in this
instruction manual are subject to change without notice.
AquaCraft maintains no responsibility for inadvertent errors in
this manual.
Do not use too much force when tightening self-tapping
screws into plastic or fiberglass. Over tightening will cause
the threads in the plastic to strip. We recommend that you
stop turning a self-tapping screw once you feel some
resistance as the head of the screw comes in contact with the
plastic. Do not use powered screwdrivers when assembling
this kit. They tend to over tighten the screws. Do not use
thread-locking compound on self-tapping screws. The thread-
locking compound may damage the plastic. IMPORTANT:
Use thread lock on any fastener that is threaded into metal or
fastened with a nut. Vibration from the engine will cause the
screws to loosen if thread-locking compound is not used.
BOW: The front of the boat
STERN: The back of the boat
PORT: This is the left side of the boat when aboard and facing
the front (bow).
STARBOARD: This is the right side of the boat when aboard
and facing the front (bow).
HULL: The body of the boat.
DECK: The top of the boat
❏ HCAP2520 Hot Shot
™
2 Glow starter
❏ HCAP3335 Safety Stick Engine Starter
❏ HCAP3015 Hand crank fuel pump
❏Fuel (10-20% nitromethane with at least 18% lubricant)
Optional Items:
❏ HCAP3200 Torqmaster
™
90 Deluxe Electric Starter
❏ HCAP0800 Torqmaster Hobby Battery (12 volt, 7 Ah)
❏ HCAP0200 Charger for Torqmaster Battery
❏ HCAP3105 Top Fueler
™
6/12V Electric Fuel Pump
Other Useful Items to Have on Hand:
❏APCQ1108 11 x 8 Propellers
❏ OSMG2691 #8 Standard long glow plugs
❏ GPMQ4131 Fuel tubing
❏ HCAQ2000 #32 Rubber bands
❏ HCAP3000 After Run Engine Oil
❏ Phillips head screwdriver (HCAR1022)
❏Thin CA (GPMR6002)
❏ 4-way wrench (HCAP2550)
❏ Needle-nose pliers (HCAR0625)
❏Adjustable wrench or 5.5mm wrench
❏ 2mm drill bit (pre-built version only)
❏ 3mm drill bit (pre-built version only)
TOOLS YOU WILL NEED
REQUIRED FIELD EQUIPMENT
BOAT TERMINOLOGY
SCREW INFORMATION
SPECIFICATION & DESCRIPTION CHANGES
REPAIR SERVICE
3

Note: If you have the prebuilt version, proceed to page 6.
Engine and Propeller Installation
❏ 1. Looking down at the top (deck) of the hull, remove the
four large mounting screws with washers located toward the
rear of the hull (stern).
❏ 2. Place the engine pod assembly onto the hull lining up the
four holes and making sure that the engine points forward,
toward the front of the hull (bow). The engine will appear to point
slightly to the starboard side (right). This is done deliberately to
counter the torque of the engine. Check the alignment by looking
down on the deck and engine from overhead.
❏ 3. Install the four large mounting screws and washers.
Tighten them completely to make sure that the engine pod is
securely fastened to the hull.
❏ 4. Locate the spinner assembly and propeller. Remove the
propeller (prop) nut and washer from the crankshaft of the engine.
❏ 5. Separate the spinner assembly by removing the two
small self-tapping screws.
❏ 6. Place the spinner backplate onto the crankshaft so that
it rests against the drive washer.
❏ 7. Place the propeller onto the crankshaft so that the
blades rest against the alignment pegs of the backplate and
replace the prop washer.
❏ 8. Replace the prop nut. IMPORTANT: Tighten the prop
nut firmly.
❏ 9. Place the spinner cone over the prop so that the blades
of the prop fit into the notches of the cone. Replace the two
spinner assembly screws. The cone should sit flush against the
FINAL ASSEMBLY
4
FINISHING THE READY-TO-RUN AIR FORCE

backplate. If you see a gap, check to make sure that the prop
is installed correctly.
Installation of Batteries
❏ 1. Remove the five hatch screws and lift the canopy
assembly from the deck.
❏ 2. Remove the battery box. Do not cut the rubber bands.
❏ 3. Install four new “AA” batteries into the battery box and
re-install the battery box into the boat. There is hook and loop
material provided with the model to make your battery box
extra secure. Make sure to plug the battery box connector
into the switch connector.
❏ 4. Replace the canopy and secure it with the five hatch
screws.
Transmitter Assembly
❏ 1. Remove the transmitter antenna from the parts bag and
screw it into the top of the transmitter as shown. To ensure
that the antenna is attached, lightly pull on the base of the
antenna. If it slides out, it is not installed properly.
❏ 2. Slide off the battery door on the bottom of the
transmitter.
Install eight new “AA” batteries into the transmitter. Re-install
the battery door onto the bottom of the transmitter.
❏ 3. Turn the transmitter on using the switch on the front. The
red LED light next to the on/off switch should light up. If the
LED does not light up, turn the transmitter off and check to
make sure that the batteries are installed properly. If you see a
flashing LED, the batteries are low and need to be replaced.
Check the Radio System:
• Pull the on/off switch located on the boat to the
“ON” position.
ANTENNA
STEERING RATE
(D/R)
STEERING
REVERSE
SWITCH
ON/OFF
SWITCH
POWER LED
(RED)
THROTTLE
REVERSE
SWITCH
STEERING
STEERING
TRIM
THROTTLE
TRIM
Install (8) new "AA" batteries
5

❏ .40 – .46 size engine.
❏ 2-channel radio system w/ two servos
❏ 1. Remove your engine’s upper right backplate screw as
shown, to install the metal pushrod guide bracket.
❏ 2. Place your engine on the plywood engine mount so that
the drive washer extends 4mm [1/8"] beyond the front edge
of the engine mount plate. After removing the engine, mark
and drill the mounting holes using a 3mm drill bit.
❏ 3. Install the engine pod supports with the 4 x 20mm
screws and 4mm washers but leave them a little loose so that
the supports can be adjusted to determine the proper width
for your engine.
ENGINE POD ASSEMBLY & INSTALLATION
ADDITIONAL REQUIRED ITEMS
6
• Standing behind the boat with both the vessel and
transmitter powered up, rotate the wheel to the left. The
back of the rudder should move towards the left. Move the
wheel to the right. The back of the rudder should move
towards the right. If this is not the case, simply move the
steering servo reverse switch to the other position.
• Use the knob marked steering rate D/R to adjust the
amount of rudder throw. Turning the knob clockwise
increases the amount of steering while turning the knob
counterclockwise decreases the amount of steering. Too
much steering can cause the air Force to flip over.
• Squeeze the trigger on the transmitter; this should open
the carburetor. For full stop, pushing the trigger forward
should close the carburetor completely.
• Your Airforce Airboat is now ready for action. Go to page 9
for information on running and breaking in your engine.
FINISHING THE PRE-BUILT AIR FORCE

❏ 4. Test fit the engine and engine mount to determine the
proper width of the supports. Then tighten the 4 x 20mm screws.
❏ 5. Cut out the engine mounting template (on page 15) and
place it on the deck in front of the engine pod supports. This
will help to determine the proper thrust angle. There will be
approximately 3° of right thrust to counter the torque of the
engine. Place the engine and engine mount atop the pod
supports and line up the crankshaft with the “right thrust” line
on the template.
❏ 6. Use a drill bit to mark the supports. Using a 3mm drill
bit, drill the holes for the engine pod.
❏ 7. Insert the four 3 x 27mm screws (with washers) and
secure the assembly with 3mm locknuts.
❏ 8. Position the fuel tank directly behind the engine. Hold it in
place with rubber bands. Leave enough space for the fuel tubing.
❏ 9. Attach the required fuel line to the carburetor. The
muffler (pressure) line and fill line will be routed through the
cowl later.
❏ 10. Route the throttle pushrod cable up through the hole
located at the rear of the engine mount and through the metal
pushrod guide bracket.
7

❏ 11. Screw the clevis onto the throttle pushrod and attach
it to the inside hole of the throttle lever.
❏ 12. Finish the throttle cable installation by placing a couple
of drops of thin CA where the cable goes through the engine
mounting plate.
❏ 13. The engine cowl has been pre-cut but you may have
to make modifications based upon which engine you are
installing. Next, place the cowl over the engine and secure it
to the plywood using the four 2.5 x 8mm panhead self-
tapping screws.
❏ 14. Attach the muffler.
Refer to page 4 for spinner and prop installation.
❏ 1. Cut two X-shaped servo arms as shown. This will cut
down the chances of any radio wiring getting tangled in the
radio compartment.
❏ 2. Install the throttle and rudder servos with rubber
grommets and mounting screws.
❏ 3. Center the servos as indicated in the radio system
instructions.
❏ 4. Attach the servo arms and screws to the servos and
attach the throttle and steering linkages as shown.
INSTALL THE SERVOS
8

❏ 1. If your radio system’s on/off switch has a hole through
the side, attach the exterior switch hardware as shown. The
battery box and receiver are held in place with #32 rubber
bands. Refer to your radio system’s instruction manual for
proper radio operation.
❏ 2. The receiver antenna should be routed through the
small hole located at the rear of the radio compartment. The
easiest way to accomplish this task is to snake a piece of thin
wire through the hole first and then attach the antenna wire
to the thin wire. Now gently pull it through. Route the
antenna wire through the antenna tube. Insert the antenna
tube into the grommet, securing it into place.
❏ 3. See step 3, on page 5 and 6, of the “Transmitter
Assembly” section for proper carb and rudder linkage
settings.
Setup the rudder so there is only 7mm [9/32"] of throw left
and 7mm [9/32”] of throw right.
❏ 4. Place the canopy/ hatch over the radio compartment
and
secure it using five 2.5 x 8mm panhead self-tapping screws.
Before running the engine, read the instruction manual that
came with your engine.
Note: The needle valve settings listed in this manual are for
the AquaCraft Pro 46 engine included with the RTR Air Force.
If you purchased the ARR version, see your engine instruction
manual for the proper needle valve settings.
There are Several Simple Steps to Starting the Engine:
❏ 1. Install a glow plug if one is not in your engine. The glow
plug threads into the top of the cylinder head.
❏ 2. Remove the fuel tank pressure line from the muffler.
RUNNING THE ENGINE
INSTALL THE RADIO GEAR
9

❏ 3. Remove the fuel line stopper from the fill line and insert
the filler nozzle (not included).
❏ 4. Fill the tank almost to the top (viewable from the back)
of the tank. Leave a little air at the top of the tank. Excess fuel
will flow out of the tank pressure line.
❏ 5. Replace the fuel line stopper and tank pressure line.
❏ 6. Open the high-speed needle valve three full turns out
(counterclockwise) from fully closed. The high-speed needle
is sticking out the left side of the engine (looking at it from
behind the prop). If you have previously run the boat, keep
the same needle valve setting that you used on your last run.
❏ 7.
Prime the engine by rotating the propeller counterclockwise
with the carburetor intake choked.
CAUTION! Use a glove to
protect your hand while rotating the propeller
. Once you see fuel
reach the carburetor (in the fuel line), rotate the engine 2-3 more
times. It’s ready to start.
IMPORTANT NOTE! This engine uses an ABC construction
(Aluminum piston with a Chrome plated Brass cylinder liner)
which provides outstanding performance and long life. When
new, your engine will feel tight and difficult to rotate. It may
even squeak when approaching top dead center. This is
normal and is the result of the precision tolerances of the
tapered cylinder. After fuel starts flowing through the engine,
this tight condition will “break in” and the engine will turn
over easier. If you a using a safety stick to start the engine for
the first time, we recommend that you place 5 to 7 drops of
After Run Oil (HCAR3000) through the glow plug hole and
rotate the engine 12 or more times. This will make the engine
easier to flip start.
❏ 8. Secure the glow starter onto the engine’s glow plug.
❏ 9. Check that the throttle is 1/8 open from the fully closed
position. Bring the electric starter into contact with the
spinner and depress the starter switch for one or two seconds.
Repeat, if necessary. When the engine fires, withdraw the
starter immediately. If using a safety stick, quickly flip the
propeller counterclockwise.
10

❏ 10. Remove the glow starter after 10-15 seconds.
IMPORTANT NOTE: Never place your finger over the
carburetor intake when applying the starter. Such an action will
cause an excess quantity of fuel to be forced into the cylinder
and result in a hydraulic lock that may damage the engine.
If the engine fails to start, refer to the “Engine
Troubleshooting” section on page 14.
In order to perform adjustments as needed, the break-in
procedure should be performed on dry land with your Air
Force securely held in place.
To insure long life and good performance from your
AquaCraft Pro .46 engine, you MUST break-in the engine.
The break-in period is critical for long life of the internal parts
of the engine. This should be done over the first 5 or 6 tanks
of fuel. If you have the HCAB27** RTR Airforce, then watch
the included video.
Fuels
Use nitro fuels that are specially formulated for model
airplane engines (this a boat, but it uses an airplane engine).
Typically this would be 10-20% nitromethane.
Some Things to Remember During Break-In
1. Use the same fuel that you will use for normal running.
2. Resist the urge to accelerate and decelerate the engine quickly.
3. Break-in puts stress on the glow plug and you can burn it
out during break-in. Make sure you have an extra plug or two
on hand.
How To Stop Your Engine
Just as squeezing the throttle trigger on your transmitter
increases power, pushing the trigger the opposite way
decreases power. Pushing the throttle trigger forward should
close the carburetor completely, cutting off air supply and
stopping the engine.
The First Tank
Your first tank of fuel should be running the boat at a very rich
high-speed needle valve setting. This allows the fuel to carry
as much oil as possible into the engine to lubricate the
internal parts during the break-in.
❏ 1. Make sure the needle valve is 3 turns out from fully
closed (counterclockwise). This should be factory set already,
but check it to make sure. When closing the high-speed
needle, close the needle until you feel some resistance. DO
NOT overtighten or you will damage the engine.
❏ 2. Start the engine.
❏ 3. Once the engine is started, open the high-speed needle
valve around 1/8 turn at a time, finding the setting where the
engine just barely runs. This may take a few times adjusting
the needle. The engine will perform sluggishly and stall from
time to time – this is normal during the break-in process.
❏ 4. Run the engine at a medium speed, periodically
accelerating and decelerating. Do not give the engine full
throttle at this time.
❏ 5. Continue running the engine until the tank is almost out
of fuel. Do not allow the engine to run out of fuel. This leans
out the engine and can cause overheating.
Tanks 2-6
Turn in the needle valve (clockwise) around 1/8 turn from the
previous setting following each tank. You should notice that
the engine performs better during each run. After the sixth
tank, you should be near to the peak performance of the
engine.
Ways To Ensure A Long Life For Your Engine.
1. Keep your engine clean. Dirt will act as insulation on an
engine. It will not be able to shed heat as easily.
2. Do not over-lean your engine.
3. Do not run your engine without a propeller.
4. Do not over heat the engine. This goes along with keeping
it clean and not over-leaning the engine.
5. Do not use a fuel with low oil content. Make sure that you
use a fuel from a reputable manufacturer that is labeled as
model airplane fuel.
6. Avoid using old fuels in the engine. Always run all of the
fuel out of the engine. After running for the day, use after-run
oil and work it into the engine by turning the prop 3-4 times.
7. Do not use a fuel with a nitromethane (often called nitro)
content over 20%.
8. Do not use silicone sealer on the engine joints. Silicone
sealer contains acetic acid, which is corrosive if it gets inside
your engine.
9. Store your engine someplace where it will not be subjected
to extreme temperature changes.
If you are having problems with your engine consult the
“Engine Troubleshooting” section on page 14 of this manual.
The following are some potential problems.
ENGINE MAINTENANCE
BREAKING IN THE ENGINE
11

Glow Plug
The glow plug is an item that will wear out and need
replacement from time to time. It is a good idea to remove the
glow plug before your first run, heat it and see how well it
glows. You should see a bright orange glow from the filament.
If a coil or two will not glow or the plug will not glow at all,
replace the plug. If the engine quits when you remove the
glow starter, the plug might need to be changed, although this
may be because you are running too rich and need to screw
in your high-speed needle some. Look at the glow plug when
you are running the engine. If you see some bubbles coming
from around the plug, replace the glow plug (copper) gasket,
or both the plug and the gasket. The only real way to test a
glow plug is to replace it. Make sure you have a spare plug or
two on hand every time that you run the Air Force.
Fuel
Fuel can go bad. The main ingredient in model fuel is methanol,
which is basically a form of alcohol. Alcohols can absorb water
out of the air, so keep your fuel jug capped at all times. Store
your fuel out of the sunlight and in a cool place. Bad fuel is one
of the most difficult problems to diagnose in engines. If you have
tried everything you can think of to remedy an engine that is not
running correctly, try using some fresh fuel.
Fuel line is susceptible to pinhole leaks. You cannot see the
hole in the fuel line, but if you see bubbles in the line going
to the carburetor, replace the fuel line. Another symptom of a
leak in the fuel line is a surging engine. The properly tuned
engine will surge when the air bubbles enter the carburetor.
It is basically leaning out the mixture.
Overheating
One of the worst things you can do to your engine is overheat
it. The oils that lubricate the engine are carried in the fuel. If
your engine is set too lean, there will not be enough oil in the
engine to lubricate the internal parts. This will cause
premature wear in the engine and cause damage.
• Before running your Air Force, it is a good idea to check
over all screws to make sure they are securely fastened.
• Place the boat in water that is at least 8" deep and free of
obstacles (weeds, sticks, ducks, muskrats, etc.).
• CAUTION: Airboats are top-heavy by nature. It is common
practice to slow down a little for sharp turns. If you don’t,
there will be an increased chance of flipping over.
• Slowly advance the throttle to full speed and note if the
boat has a tendency to turn right or left. Adjust the
steering trim knob on your transmitter until the boat runs
in a straight line when the steering wheel is at neutral.
• CAUTION: Running in windy conditions will affect the
performance of your Air Force and increase the chances
of capsizing.
• Total run time of the Air Force is approximately 6 minutes
(assuming you begin with a full tank of fuel). When you
notice an increase in power, it means the fuel tank is
nearly empty and it’s time to head for shore. As soon as
the boat reaches shore, stop the engine, turn off the
receiver, and finally the transmitter (in that order).
• CAUTION: The engine will be hot! Allow it to cool for a
few minutes before restarting.
• Your Air Force will often take on small amounts of water,
especially when running in rough water and when
making tight turns. Keep a roll of paper towels handy and
dry out the hull interior after every run. If you notice
excessive amounts of water in the hull, check for leaks,
especially around the hull/deck joint. You may reseal the
joint using medium cyanoacrylate (CA) Glue.
• Always store your Air Force with the canopy /hatch cover
removed to allow the interior to dry out completely. If
you neglect to do this, it may result in corrosion of the
electronic components.
• IMPORTANT: If, for whatever reason, your boat takes on
a large amount of water, swamps or sinks, causing the
radio equipment to get wet, you must do the following
immediately: Remove the battery pack and radio
equipment from the boat. Open the receiver and servo
cases. Allow the components to air dry completely before
reassembling. Reinstall the components and check for
proper operation before running the boat in water.
The Waiting Game
If your Air Force airboat should happen to stall or capsize,
water currents will slowly carry it to shore. The bad news is
that the boat could be carried to the opposite shore. When
surveying areas to run your Air Force, keep in mind things like
wind direction, size of the lake, strength of river currents, etc.
Helpful Tip
Use a fishing rod with at least 12lb. line and a tennis ball tied
to the end to retrieve a stalled or capsized model boat.
GOOD LUCK AND GREAT BOATING!
RUNNING THE AIR FORCE
12

To order replacement parts for the AquaCraft Air Force, use the
order numbers in the Replacement Parts List that follows.
Replacement parts are available only as listed and can be
purchased from hobby shops or mail order/ Internet order firms.
Hardware items (screws, nuts, bolts) are also available from these
outlets. If you need assistance locating a dealer to purchase parts,
visit www.hobbico.com and click on “Where to Buy.” If this kit
is missing parts, contact Hobbico Product Support.
Replacement Parts List
Order # Description
HCAB6500 Engine mounts w/ screws (left & right engine pod “legs”)
HCAB8700 Rudder assembly w/ screws (rudder, rudder mount,
rudder arm)
HCAB7900 Spinner assembly (spinner assembly
complete)
HCAB6450 White engine cowl/ fiberglass (white cowl w/4 screws)
HCAB6451 Yellow engine cowl/ fiberglass (yellow cowl w/4 screws)
HCAB6452 Blue engine cowl/ fiberglass (blue cowl w/4 screws)
HCAB6453 Green engine cowl/ fiberglass (green cowl w/4 screws)
HCAB6454 Orange engine cowl/ fiberglass (orange cowl w/4 screws)
HCAB6455 Red engine cowl/ fiberglass (red cowl w/ four screws)
HCAB6456 Gray engine cowl/ fiberglass (gray cowl w/ four screws)
HCAB6300 Decal sheet (three main sheets plus cockpit decals)
HCAB6550 Engine platform w/hardware (pre-assembled engine
mount)
HCAB9010 Throttle and rudder cable w/hardware (cables cut to
length)
HCAB6900 Fuel tank (complete fuel tank)
HCAB6210 Assembled white canopy/ hatch (comes w/hardware)
HCAB6211 Assembled yellow canopy/ hatch (comes w/hardware)
HCAB6212 Assembled blue canopy/ hatch (comes w/hardware)
HCAB6213 Assembled green canopy/ hatch (comes w/hardware)
HCAB6214 Assembled orange canopy/ hatch (comes w/hardware)
HCAB6215 Assembled red canopy/ hatch (comes with hardware)
HCAB6216 Assembled gray canopy/ hatch (comes with hardware)
HCAB6200 Canopy/ hatch unpainted (unassembled canopy w/
hardware)
Hobbico Safety Stick
™
Starter
Start your engine the safe, easy, economical way – with
Hobbico’s “chicken stick”-style Safety Stick. Its comfortably
contoured, hardwood handle gives you the perfect grip for
flip starting your engine on the flight line. The end is rubber-
coated to prevent breaking or damaging your propellers.
There’s no better way to turn a couple of dollars into years of
dependable engine starts! HCAP3335
Hobbico Super Hot-Shot
™
2 Glo-Starter
The Super Hot-Shot 2 combines a locking glow plug clip for
standard or 4-stroke plugs with a high-capacity Sanyo
®
rechargeable NiCd. It delivers 4000mA – enough for an entire
day of modeling. Features include a Twist-and-Lock
Connector and heavy-duty wall outlet adapter with LED
indicator for recharging. HCAP2520
Hobbico Hand-Crank Fuel Pump
Uniquely geared for efficient
operation – and ergonomically
shaped for comfort – the Hand
Crank Fuel Pump delivers over
1/4 ounce of glow fuel with every
turn of the handle. It fills or drains
with equal ease. The pump
comes with fuel tubing and two
screws for easy field box
attachment. HCAP3015
Hobbico TorqMaster
™
90
Deluxe 12V Starter
The TorqMaster 90 Deluxe
12V starts engines up to .90
cu. in. and includes an
aluminum starter cone with
grooved silicone insert;
soldered copper contacts;
thick carbon brushes; easy
press switch; 5' DC input
cord; and factory-soldered
battery clips. Spinners and
hubs over 3" in diameter require both Jumbo Starter Cone and
Jumbo Rubber Insert, available separately. HCAP3200
Hobbico After Run Engine Oil
After each time you run your engine,
just take a few seconds to put After-Run
Engine Oil into its carburetor – that’s a
quick, easy way to prevent varnish or
gum build-up, and to protect bearings
and internal parts from rust and
corrosion. After-Run Engine Oil works
wonders to keep 2- and 4-stroke engines
performing in peak condition. Available
in a handy, 2-ounce bottle. HCAP3000
OTHER ITEMS AVAILABLE FROM HOBBICO
ORDERING REPLACEMENT PARTS
13

14
ENGINE TROUBLESHOOTING
The engine starts
Does the engine
turn over easily?
Does it run
continuously?
Is fuel getting to
the engine?
Check for clogging in
the carburetor or fuel
line. Check for fuel
spraying out of the
fuel line. If so,
replace the fuel line.
Is fuel in the
fuel line?
Is the glow plug
red hot?
Check the high speed needle
setting and prime the engine.
Is foreign matter
clogging the fuel
tank or fuel line?
Is the battery for
the glow plug
clip charged?
It should be
ready to go.
Is the high speed
needle setting 2
to 3 turns out
from closed (if
the engine is
broken-in?)
Try starting the
engine again.
NO
NO
NO
NO
YES
YES
YES
YES
YES
Does the engine
quit when the
glow plug clip is
removed?
YES
YES
Clear the engine
of fuel.
NO
Reset the high
speed needle.
YES
NO
Replace the
glow plug.
Check that the
pressure line is
connected to the
muffler. The fuel
may be bad.
The engine does not start
NO
Does the engine
turn over easily
with the glow
plug removed?
The engine may
be flooded. Clear
the engine of
fuel.
YES
Check that
nothing is
caught in the
engine.
NO
Check for fuel
spraying out of
the fuel line
through a
small hole. If
so, replace the
fuel line.
YES
Remove the
obstruction from
the fuel tank or
fuel line.
NO NO
Charge or
replace the
batteries.
YES
Replace the
glow plug.
Try starting the
engine again.

15
ENGINE MOUNTING TEMPLATE
/